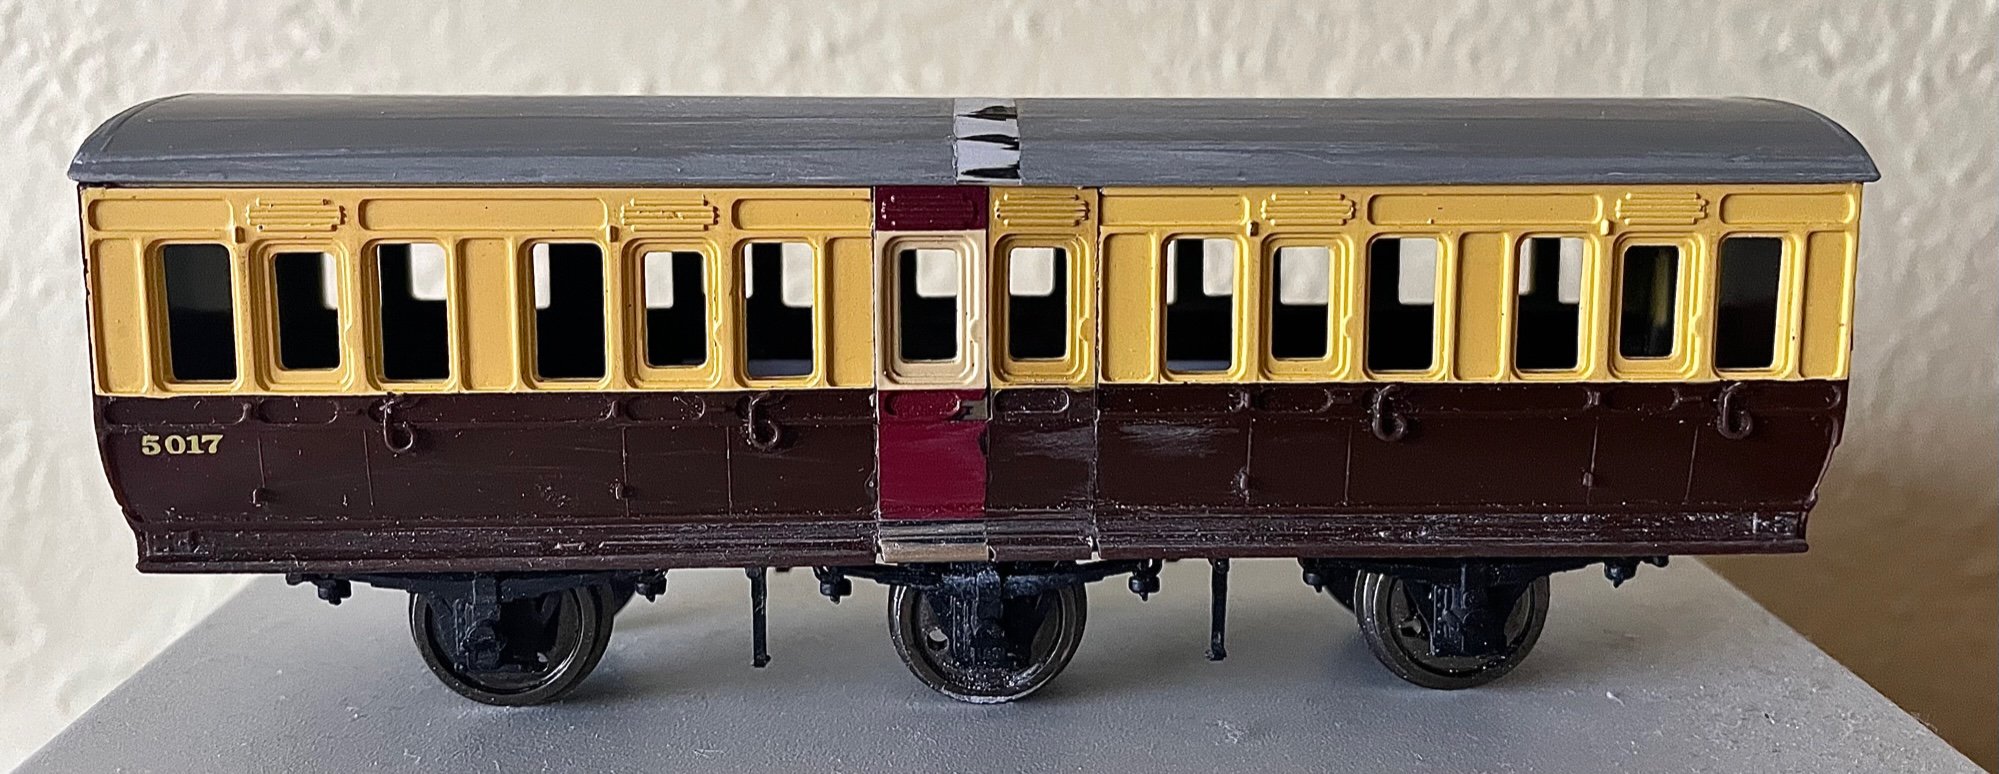
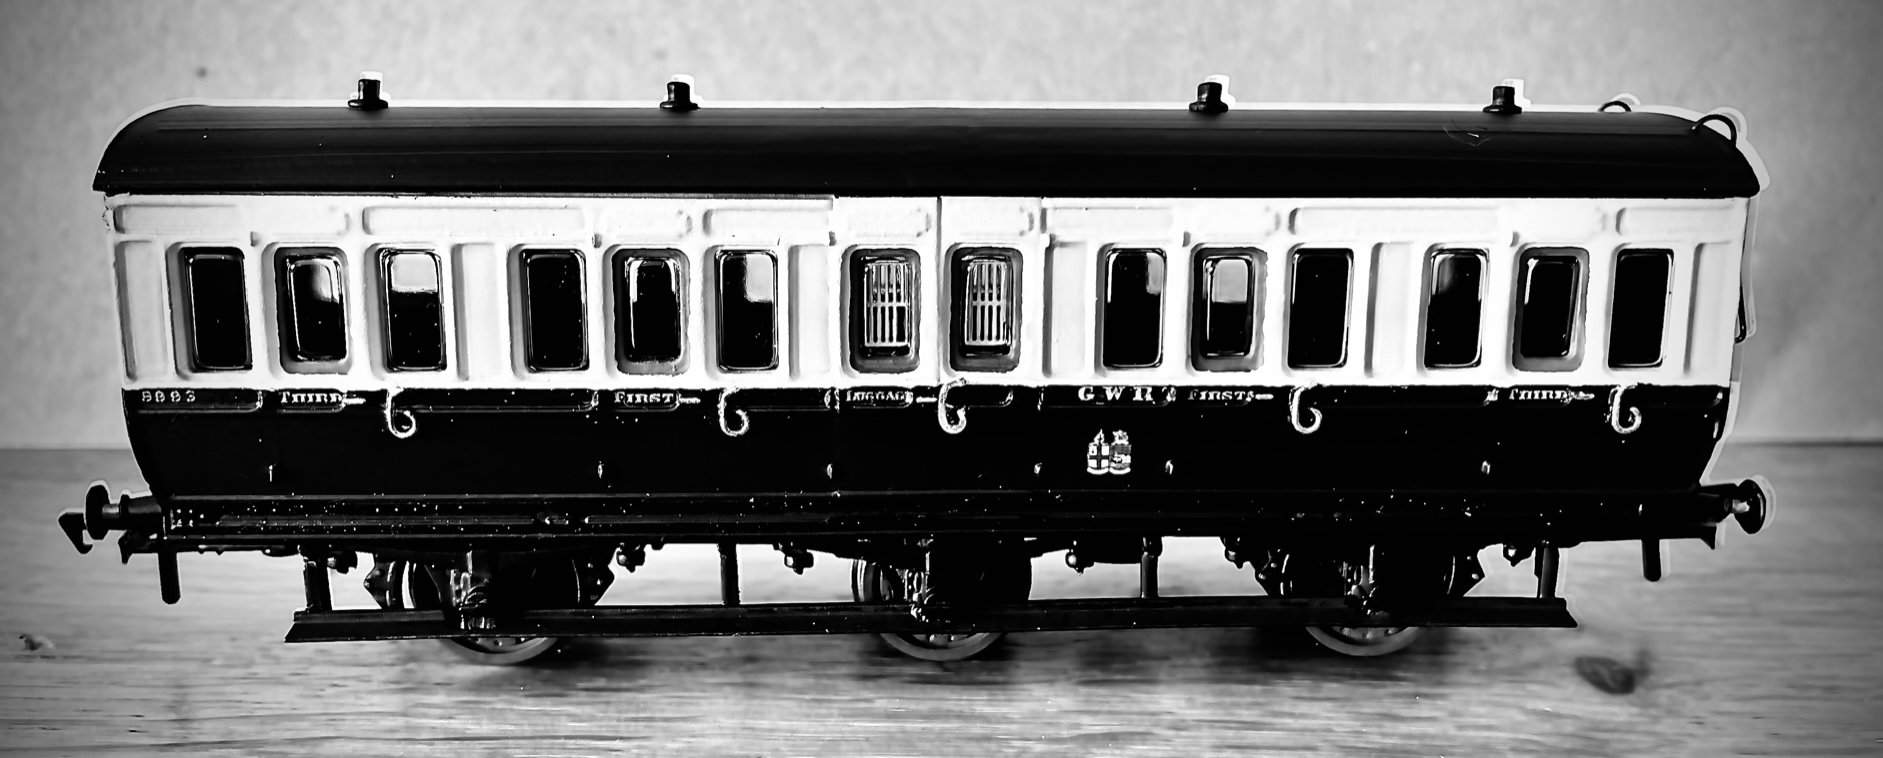
This latest build is just about as close as you can get to a Dia. U20 6-wheel Composite / Passenger Luggage coach by dismembering a Triang Clerestory and a couple of scrap Ratio 4-wheelers. It’s not 100% accurate either, as limitations and compromises are forced on it by the nature of the donor parts. The windows are too large and, in hindsight, the step-boards are too short. From three feet however, it looks like the real thing and is sufficiently unusual to be an attractive addition to the fleet of short coaches.
The prototype, one of ten, was build as a Broad Gauge coach in 1885 and converted to standard gauge in 1892. In 1931, whilst at Barry, it was condemned but reprieved to become a Camp Coach, a role it took on in the Summer of 1934. Eventually relegated to Departmental use [in black], it was finally broken up in 1954.
So, the build. The starting point is shown in the photo below.

The roof and all other parts of the coach were removed and the body then carefully sawn up as shown, with the three middle compartments taken out. Two pairs of doors were then taken from the scrap parts of another clerestory, carefully glued together and then the door panels glued into each side, joining the body together. Plastic strip had already been glued inside the lower centre sides of the body to provide strength and prevent the doors from bowing in [see above] and a false floor made up from plastic card to cover the hole in the centre [opposite the new doors]. The unit was then set aside to cure thoroughly. The photo below shows the centre doors fitted in place.

Whilst the body was curing, I turned to the chassis. I had originally planned to use an etched Brassmasters’ Cleminson chassis as it would provide excellent 6-wheel articulation and enable use through tight curves. This wasn’t possible however as whilst it would fit, it would leave insufficient room for cosmetic axle boxes to sit inside the width of the coach: consequently, a homemade chassis was required. The picture below shows this.

The black chassis parts have been scavenged from two Ratio 4-wheelers and preparing them was tedious!. Each side has been reduced in height [the upper step-boards cut away] and considerably in thickness and then mounted on some thin plastic strip to gain the correct running height. The outer wheels [Hornby coach disks] run in brass bearings and the middle wheel set floats in the plastic card cradle once its axles had been filed right back to the wheel face. The centre W-irons were cut away - carefully - from another Ratio GWR coach and super-glued in place. This procedure, too, needed time to cure. The centre wheel set would be retained by gluing two short pieces of wire across the top of the cradle. A test run showed sufficient side-play and radial movement in the centre wheel set to allow the coach to cope with very tight curves.
Preparing the new roof was the next operation. For this, two Ratio roofs were required, the first being cut in half exactly at the centre line and the second having a slice of sufficient length taken out of its centre line to allow all parts to be assembled to meet the length of the new coach. Disguising the joint was extremely difficult and it can be seen faintly on the finished coach, it is not that noticeable however. If one gets the measurements right, the rain strips match up. See below.

The next photo shows the basic body with its wheels fitted and the roof sitting in place. It was obvious now that the build was viable and worth completing. You’ll see, too, that the solebars, having come from scrap coaches, were damaged and a lot of repair work was required to improve them. The only part of the whole build which required filler was at the bottom of the centre doors where the steps had been damaged by the saw. These small ‘v’ shaped impressions were later over-filled with superglue gel and, when it had cured, sanded back to the correct profile.

The major surgery had now been completed and detailing was about to commence. The next series of photos shows the body in primer, with the step boards and their hangers repaired and fitted, buffers added and the roof sprayed matt black [with its lamp pots in place].

In red primer, both sides are shown. The small holes in the roof at one end are for the hand rails to be eventually fitted. The roof is still a dry fit. The next task involved masking-up and painting, before the interior detailing could commence. The photo below shows the cream and chocolate applied [before tidying-up the finish].

And the next shot shows the coach now fully painted and lettered, with windows fitted [SE Finecast clerestory glazing] and seats and partitions in place. Vacuum pipes have also been applied to both ends and, whilst not visible, the emergency brake-gear rodding glued in place on the end which will not have the handrails. The rectangular holes in the coach ends [for fitting the original roof], have also been filled.

The underside had been sprayed up also. It is surprising how often modellers fail to complete this task, or simply give it scant attention. The photo shows the two 5 gr weights stuck in to aid smooth running and also some basic detailing. The side play in the centre wheel set can be easily seen here.

The finished product. Before gluing the roof in place, grilles were fitted to the windows of the luggage compartment. Etched brass grab rails and door handles were then fitted to the centre doors and the buffer shanks and vacuum pipes painted. Handrails were bent up and fitted to one end. The wheels were painted also and, whilst it is difficult to see, laser-cut Mansell inserts applied to each wheel face.


