GWR D15 Third Class Brake
Yet another Triang Clerestory coach creation……
A box of Triang Clerestories had been nagging me for surgery for quite some time and I'd been looking around for an interesting early GWR coach to bash from them. I didn't want another Clerestory and was looking for a short, low-roofed bogie coach, similar to those which once ran on the Burry Port and Gwendraeth Valley Railway and which, as a schoolboy, I sometimes saw stabled outside Cardiff General.
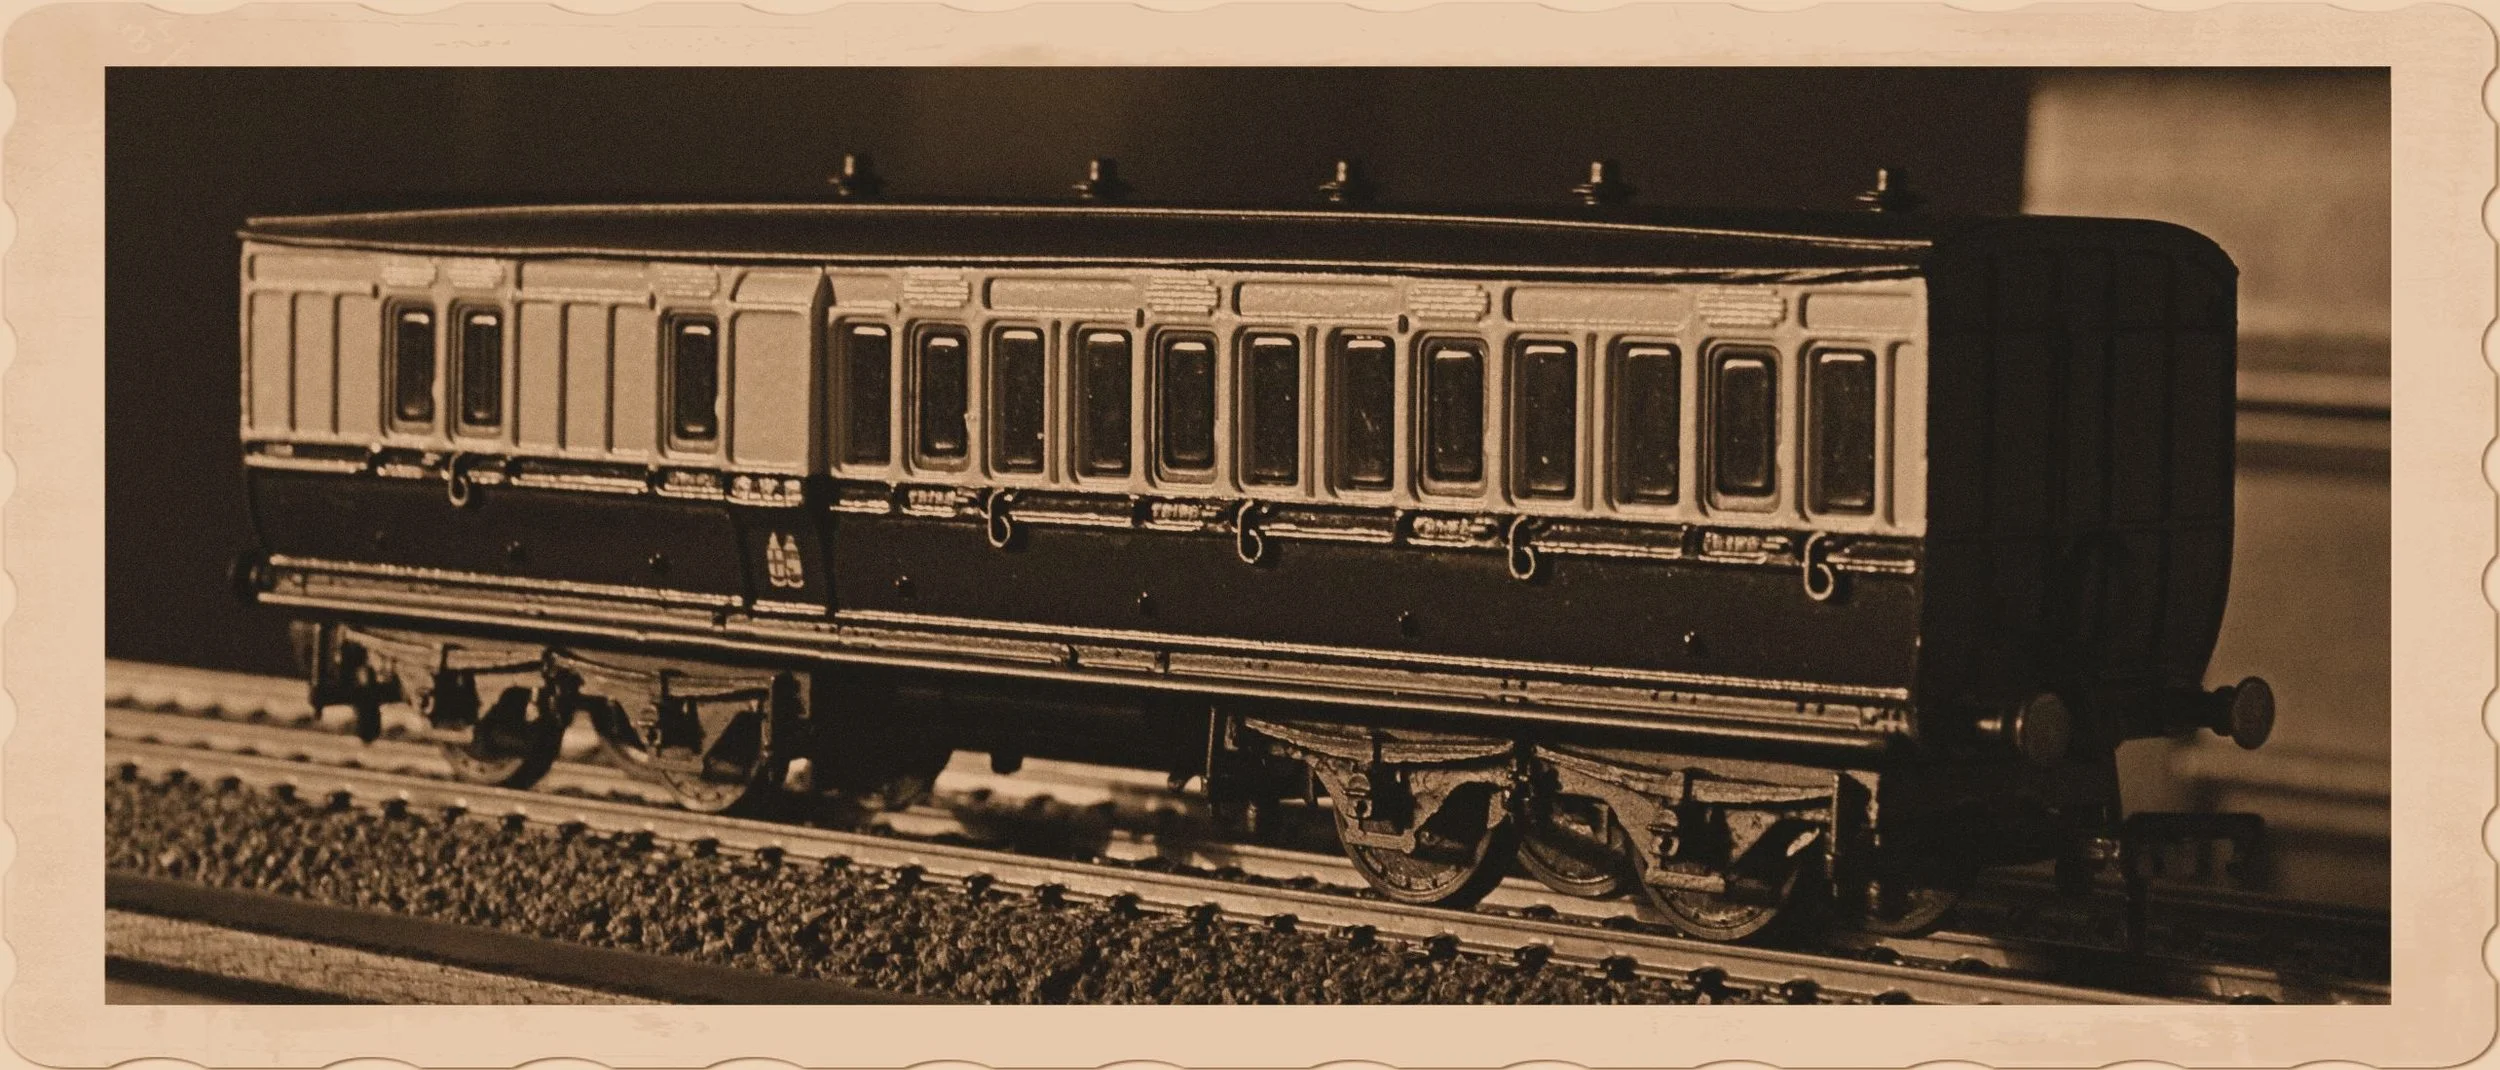
Googling around, I found an interesting RMWeb blog from early 2016 [written by Rosies Boss, an Australian modeller], showing a conversion of a standard Triang Clerestory Brake Third into quite a reasonable approximation of a GWR Brake Third to Dia. D15, a type of coach which was transferred to ex-Cambrian lines after the Grouping. So, whilst I can't take credit for an original bash, it suited my needs nevertheless and I rather like it, too. It's a real shorty, only 38' 6" long. Here's the donor model, you'll recognise it immediately:
In spite of the fact that the donor coach had been very nicely hand-painted at some time, it was destined for a complete make-over and no little knife-work, too.
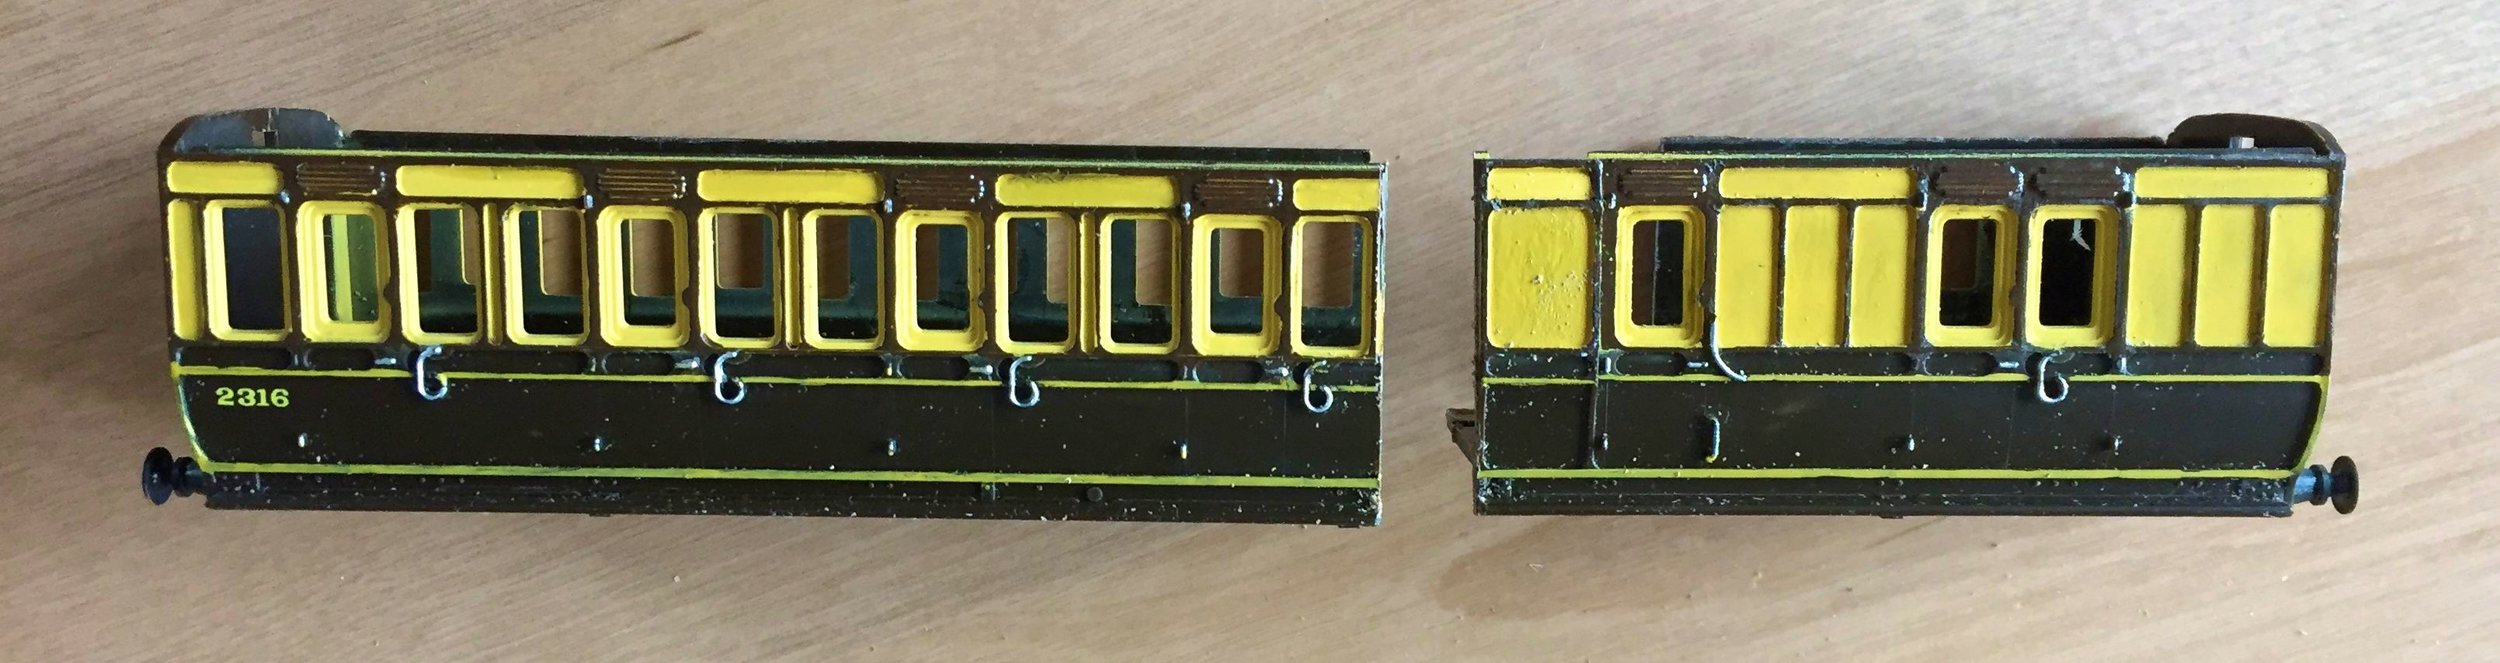
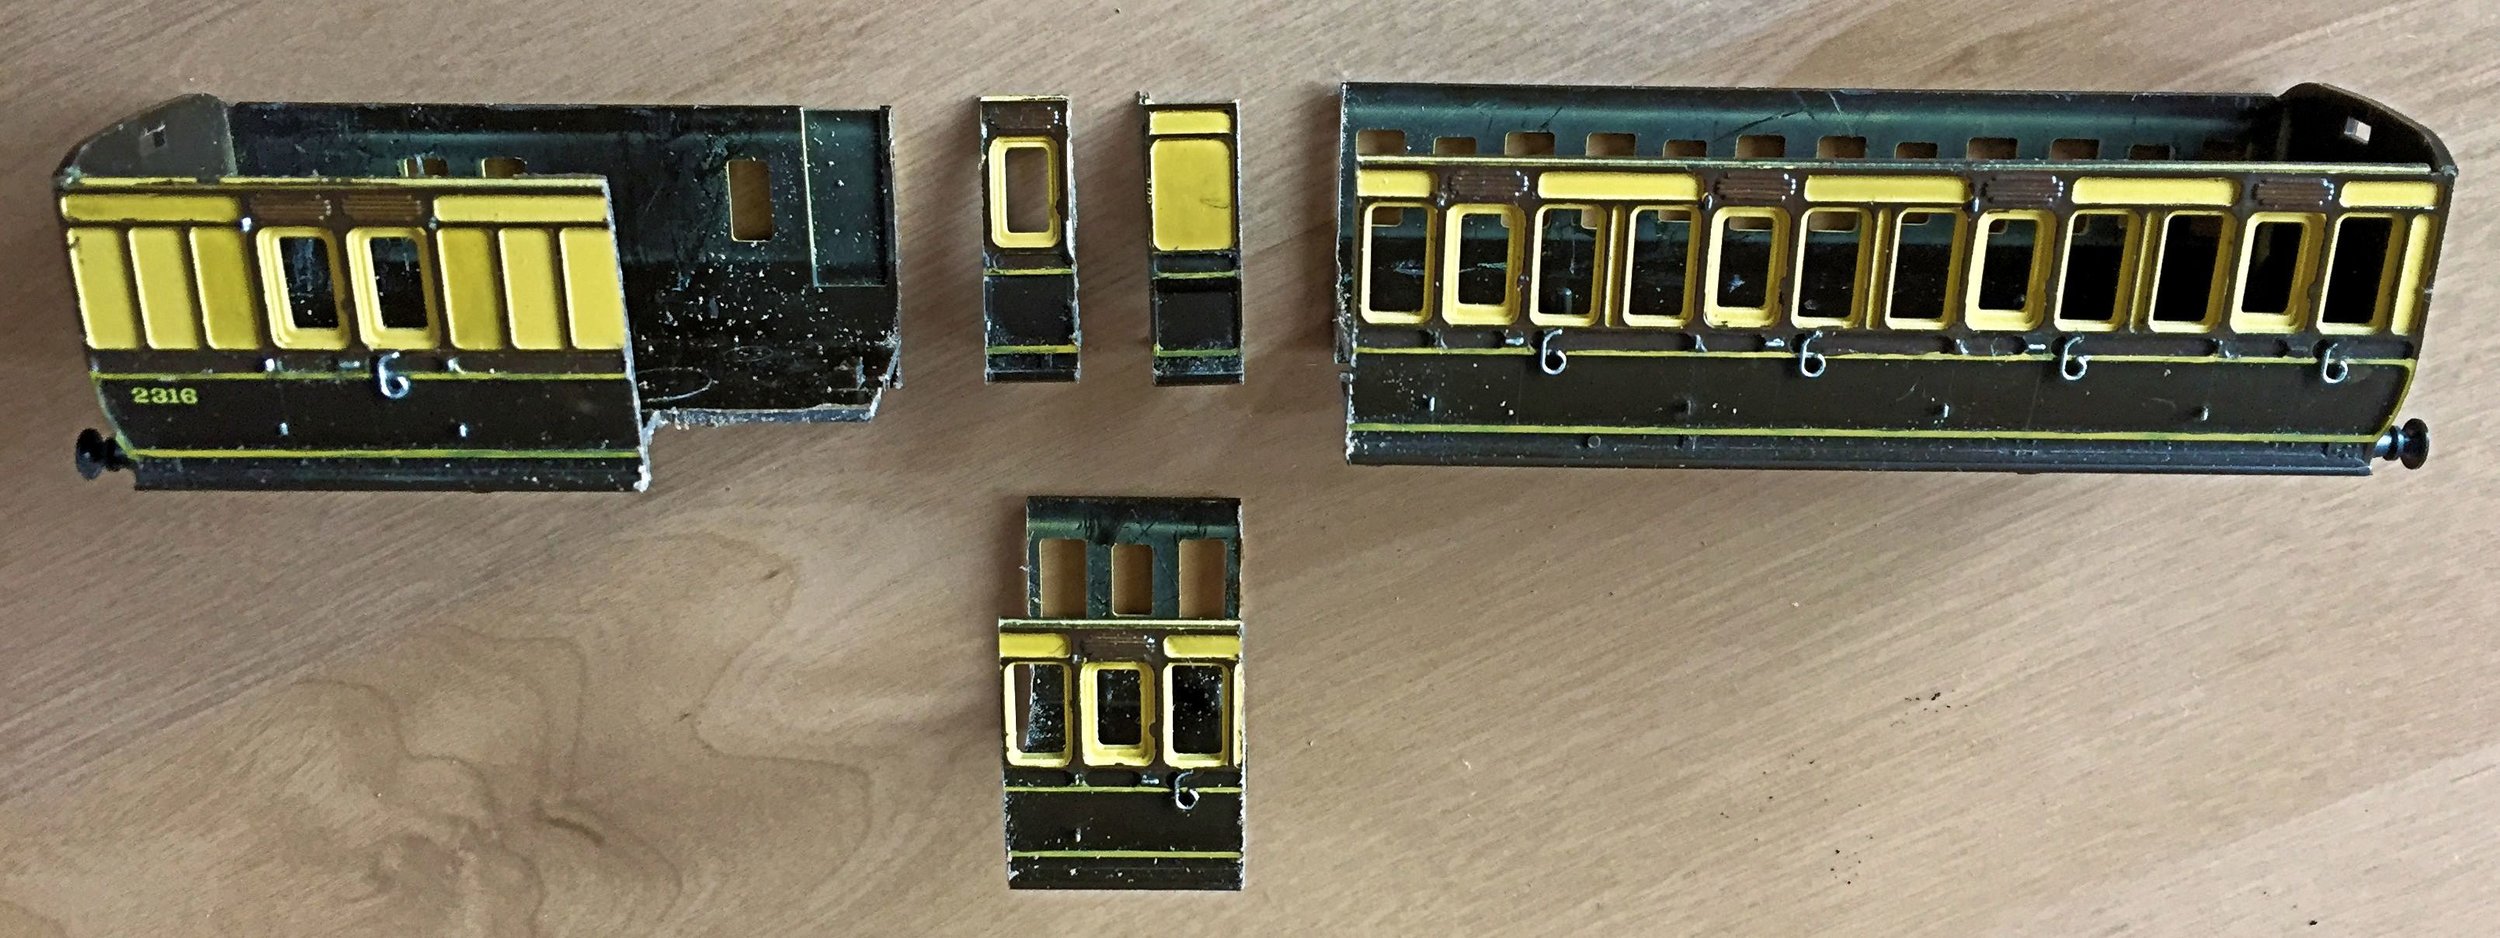
I began by removing the bogies, the roof and the awful buffers, and then sawing out one complete compartment across the body. Then, the first of many difficult tasks: from one side, a look-out [the GWR never called them ‘duckets’] and its adjoining door had to be removed in one piece, cut in half and the door and look-out then - eventually - reattached in opposite order, resulting in both sides being quite symmetrical. Cutting these parts by eye with a razor saw inevitably resulted in a less-than-square initial result. Careful sanding and filling would rectify any problems however and to assist with adjustments for the final fit, I cut out less of the removed compartment than its entire length to allow for sanding back rather than applying filler to the retained body. Some will still be needed however, I'm certain.
These are the two sides after the first major surgery [including the removed compartment]:
The new coach will need replacement bogies of course, 6'4" short Dean-types will be fitted and possibly sourced through Shapeways. Underfloor details will require fabrication also although I'm pretty certain that I've parts in the bits box which will do.
The replacement low roof will almost certainly need to be constructed from card. I'm not completely happy about this but there may be no alternative. I am wondering about adapting a roof from a K's Siphon however, although this would require sacrificing an uncommon kit in the first place. It may be a solution though. I go to sleep thinking about these things, sad, isn't it......
When starting a new project I generally have solutions and directions in mind and this one was no different, although the issue of the roof had yet to be resolved. However, sometime having past since the last posting above and,on re-inspecting a poorly and partially completed D&S Models etched brass Dean Passenger Luggage Van that I had bought at our recent show [for an incredible fiver], it was apparent that I could use much of it in this build. The bogies were the correct 6' 4" pattern, etched brass and white-metal and compensated too, and the roof could be refashioned to fit the coach although some holes would need to be filled. The only issue with the bogies is their P4 construction: that can be very easily resolved though. I'll need to make up some bolsters to fit them although that, too, should not present insurmountable difficulties. So, a far cheaper build than anticipated and I've saved £15 on the bogies.
The body parts have now been reunited. Reinforced from the inside by two long pieces of 'L' shaped plastic card, the various sections went together quite well considering and not too much filler will be required. It's beginning to look the part I think.

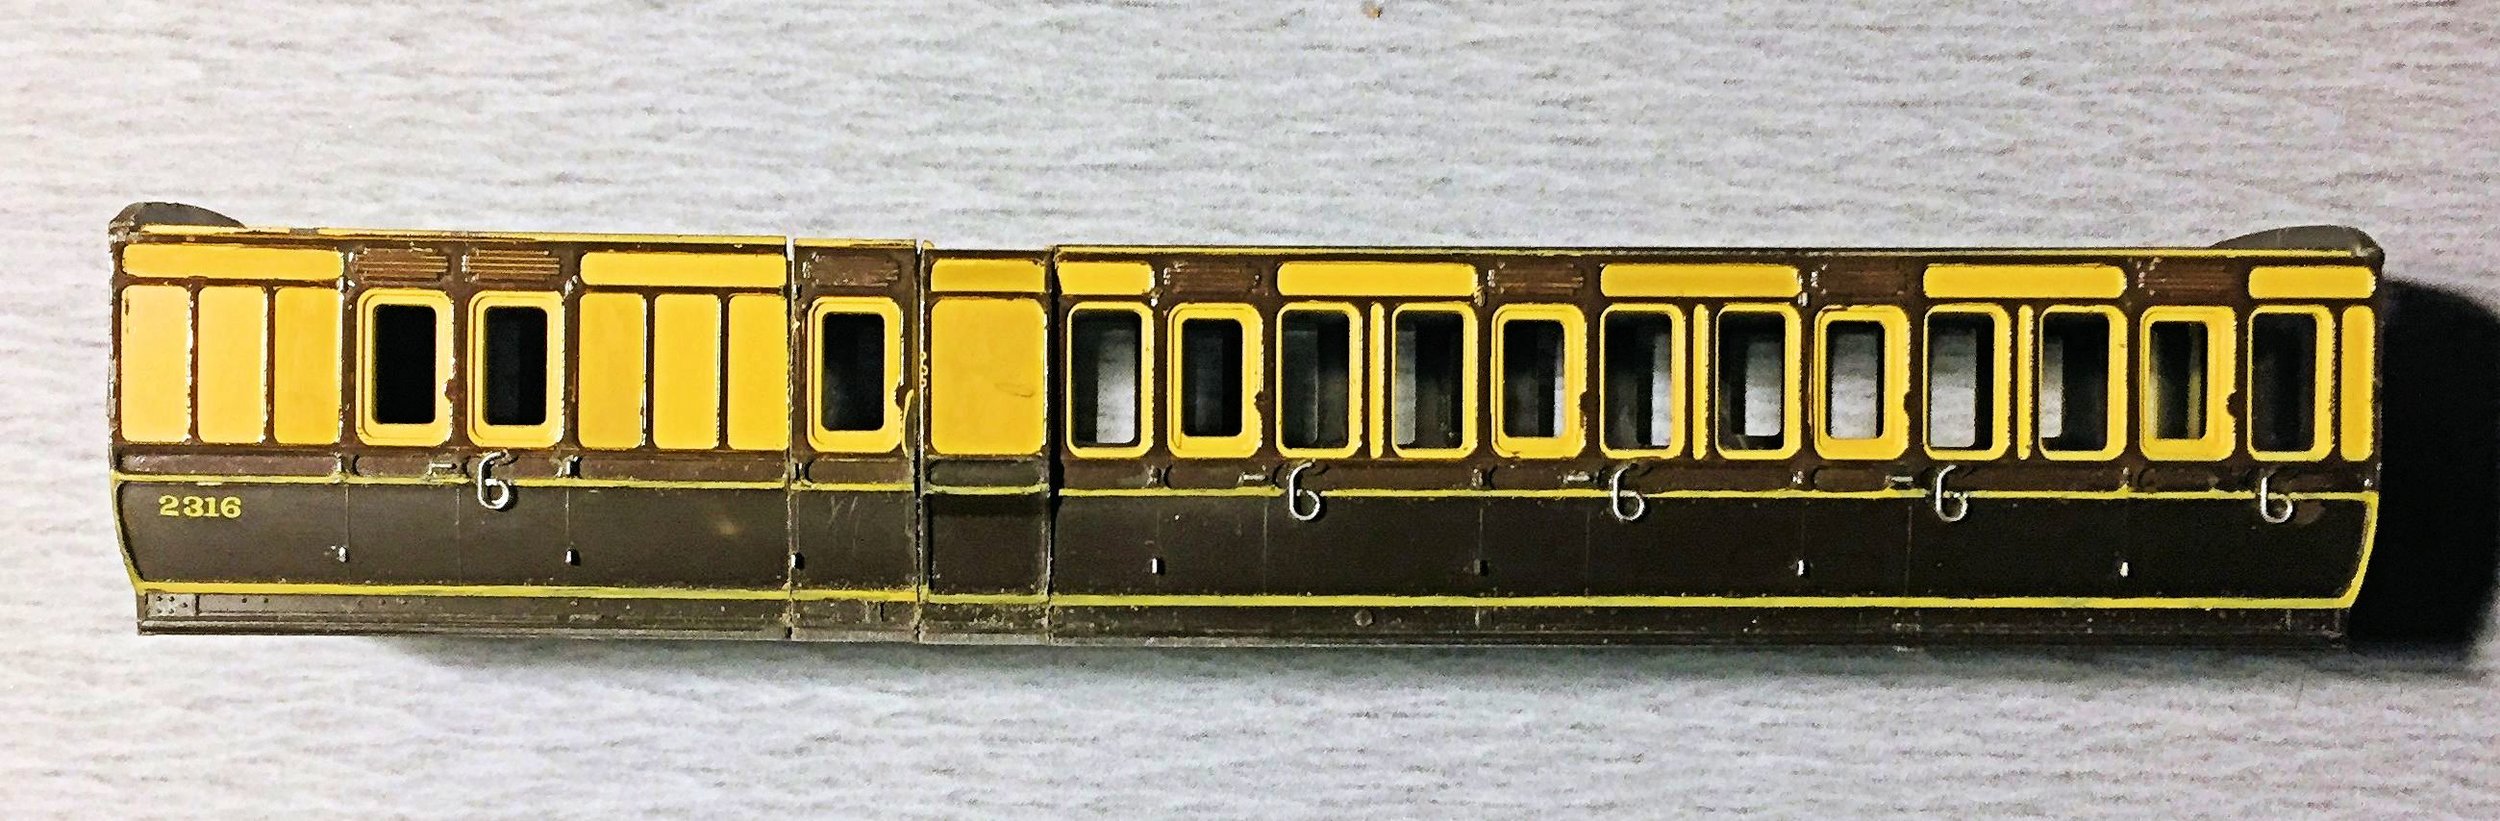
You can see the symmetrical layout of each side clearly in the above images. To be absolutely faithful to the prototype, there should only be two panels on either side of the Guard's double doors, rather than three as modelled. Neatly removing them would be just too difficult however and I've stuck with what I have. Whilst it doesn’t show yet, the new body is much shorter than the original. The eventual livery will be that attractive '30s pre-Shirtbutton finish.

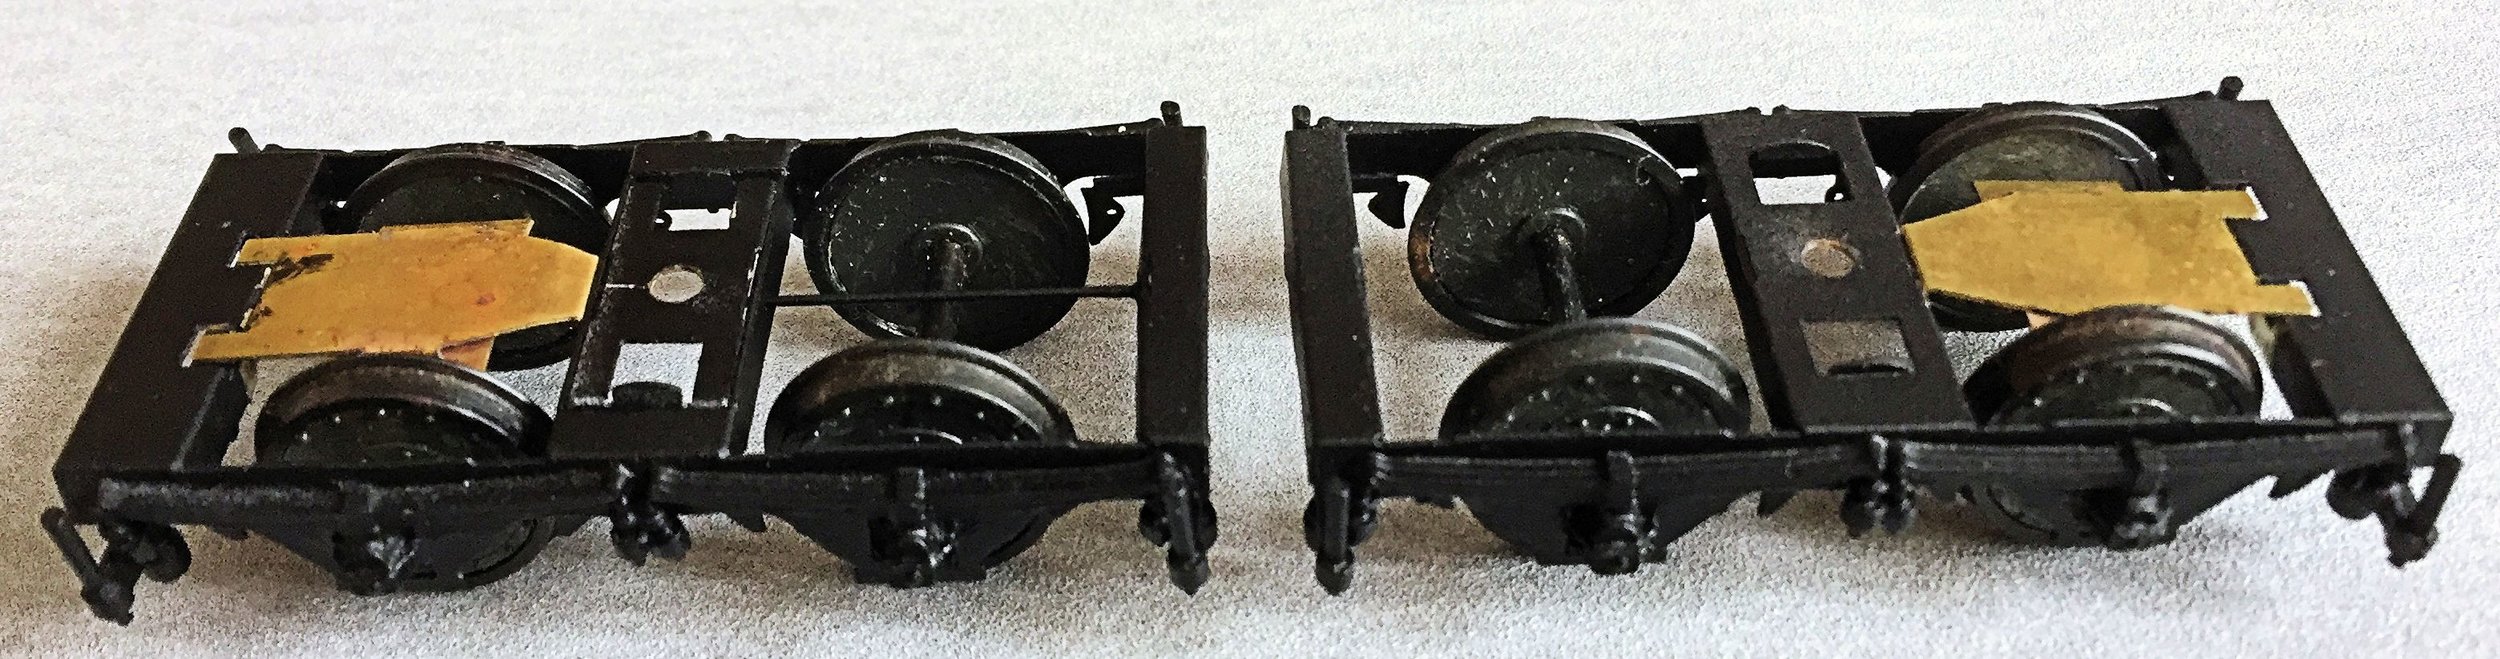
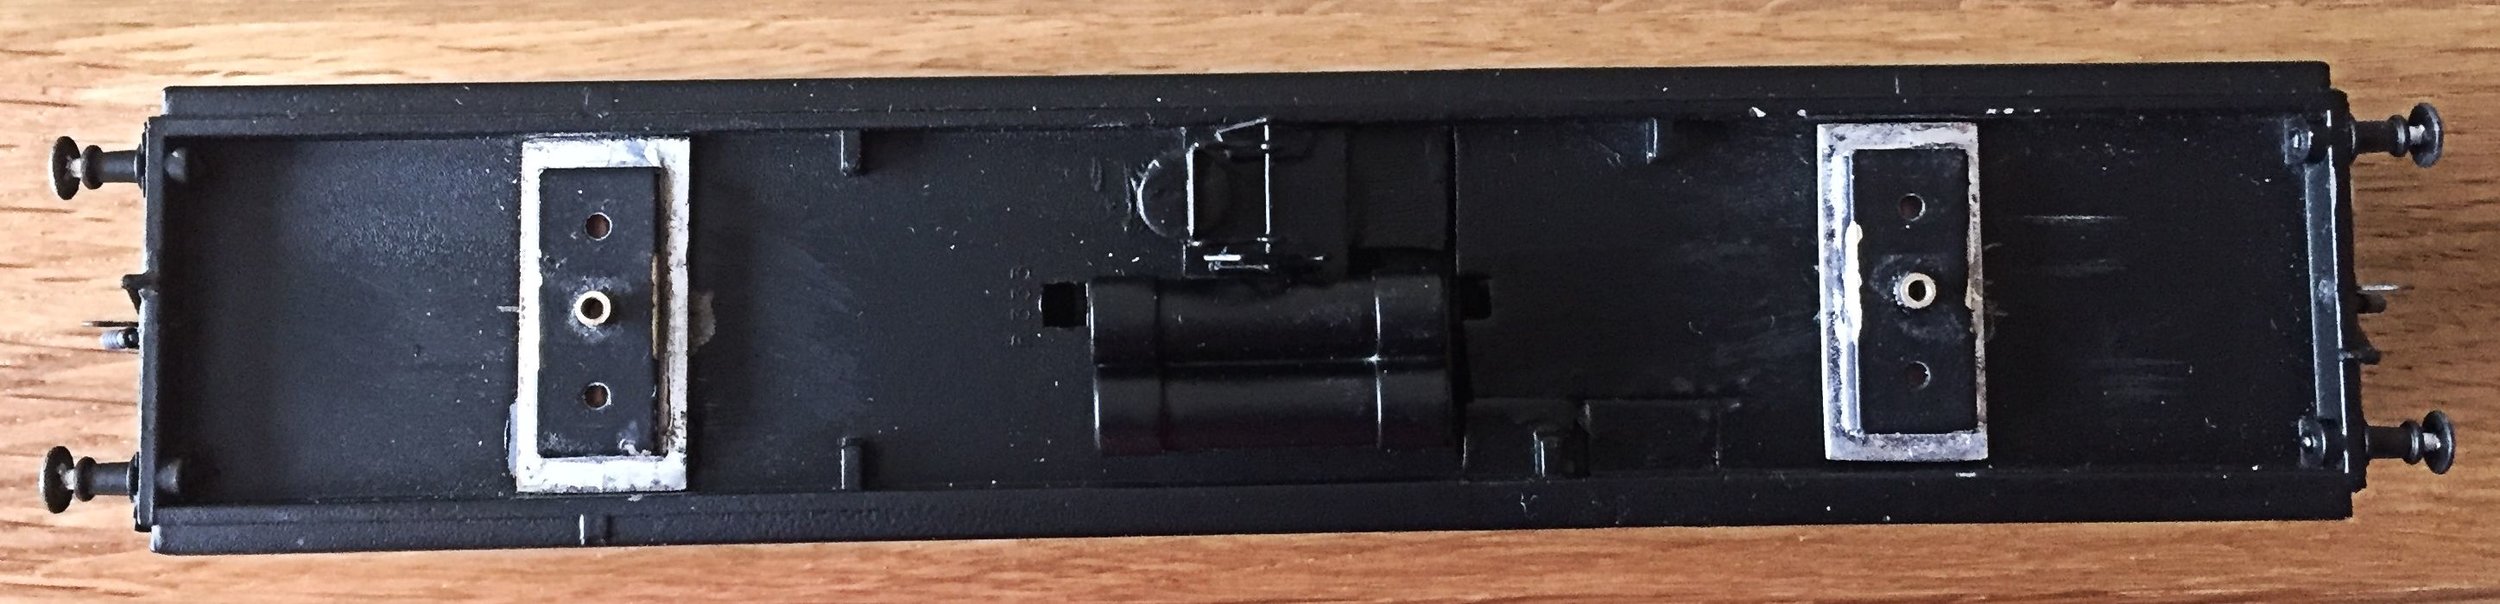
Turning to the bogies for a minute, I unscrewed them from their donor chassis to give them a closer look. Both fell apart almost immediately and I couldn't really work out what was holding them together, intact, when they were attached to the chassis in the first place. All of the pieces were present however and reassembling shouldn't have been a problem. This, opposite, is the pile of bits I had to play with.
It looks far worse than it was actually. The bogies were brass but had never been primed prior to painting - badly - with some thick matt black paste. I decided to brush them carefully and then prime with Halfords' gray before spraying with Halfords' matt black. Some parts required super-gluing back in place and the wheel sets needed re-gauging [P4 to OO]. The suspension units [one per bogie] required de-soldering before this could be done, but no real traumas occurred during their re-assembly either.
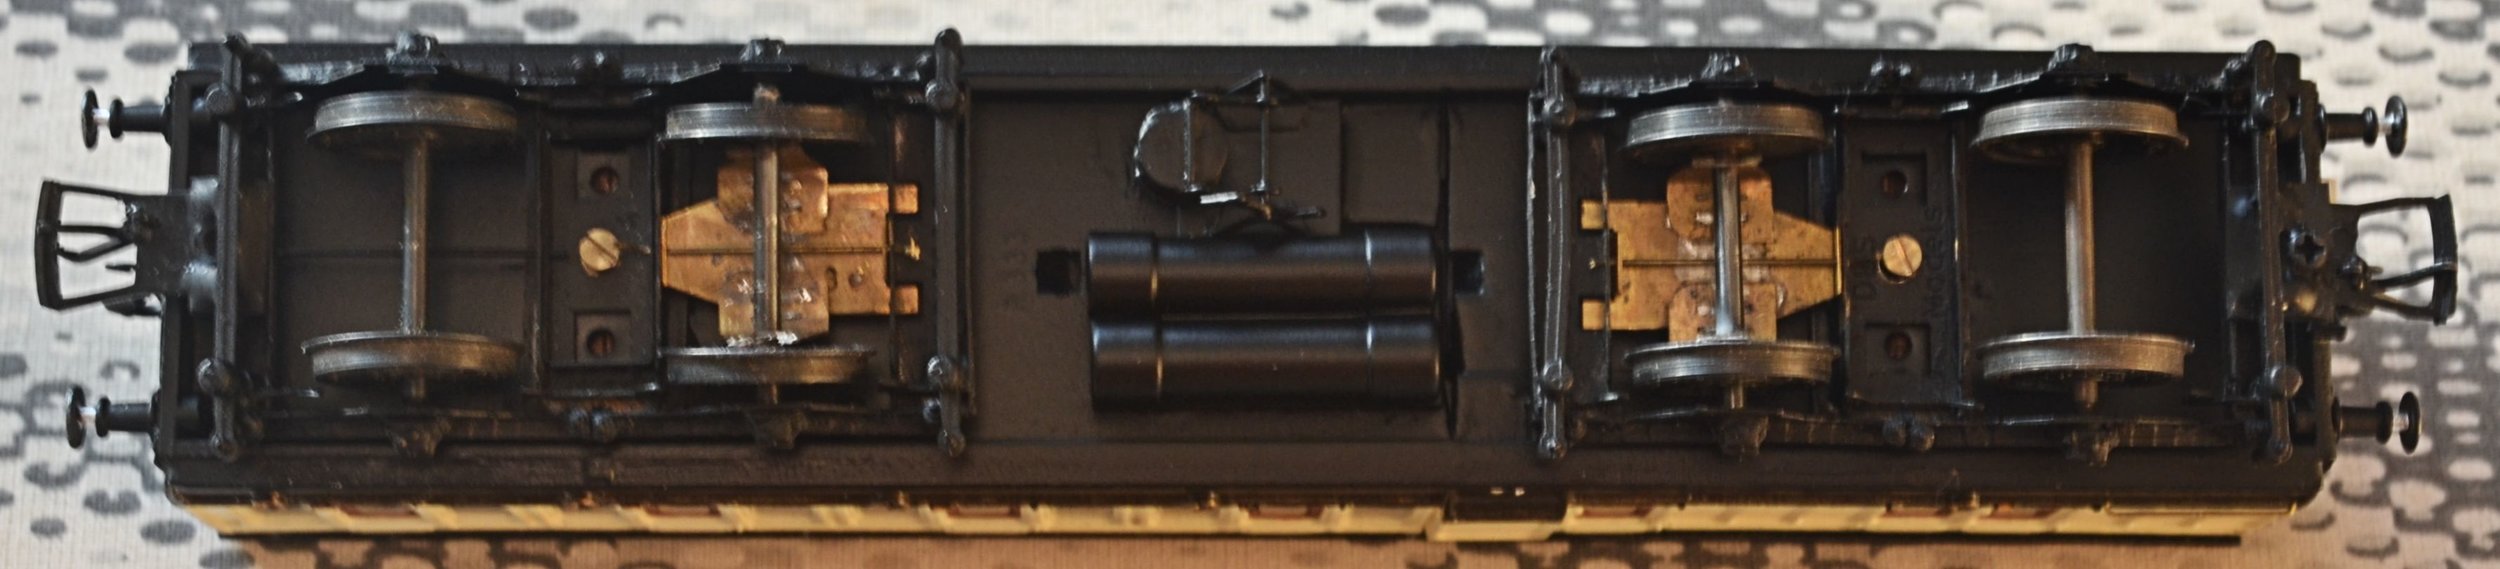
After a little work I now have this pair in ‘OO’, and they seem to be fairly free-running, too. I think I'll probably be able to modify their original bolsters, so attaching them to the underside of the new coach should be fairly straightforward. Whether it is or isn't however, I'm going to use them come-what-may! I'm now trying to work out how to remove the original and rather nice white-metal buffers from the donor chassis without destroying them.

With the body reassembled, various slight gaps addressed and the whole then primed, it was time to look at the underframe. The brass bolsters have been attached to the original fixing bosses under the floor and, with the bogies attached, a test run followed. All good so far.
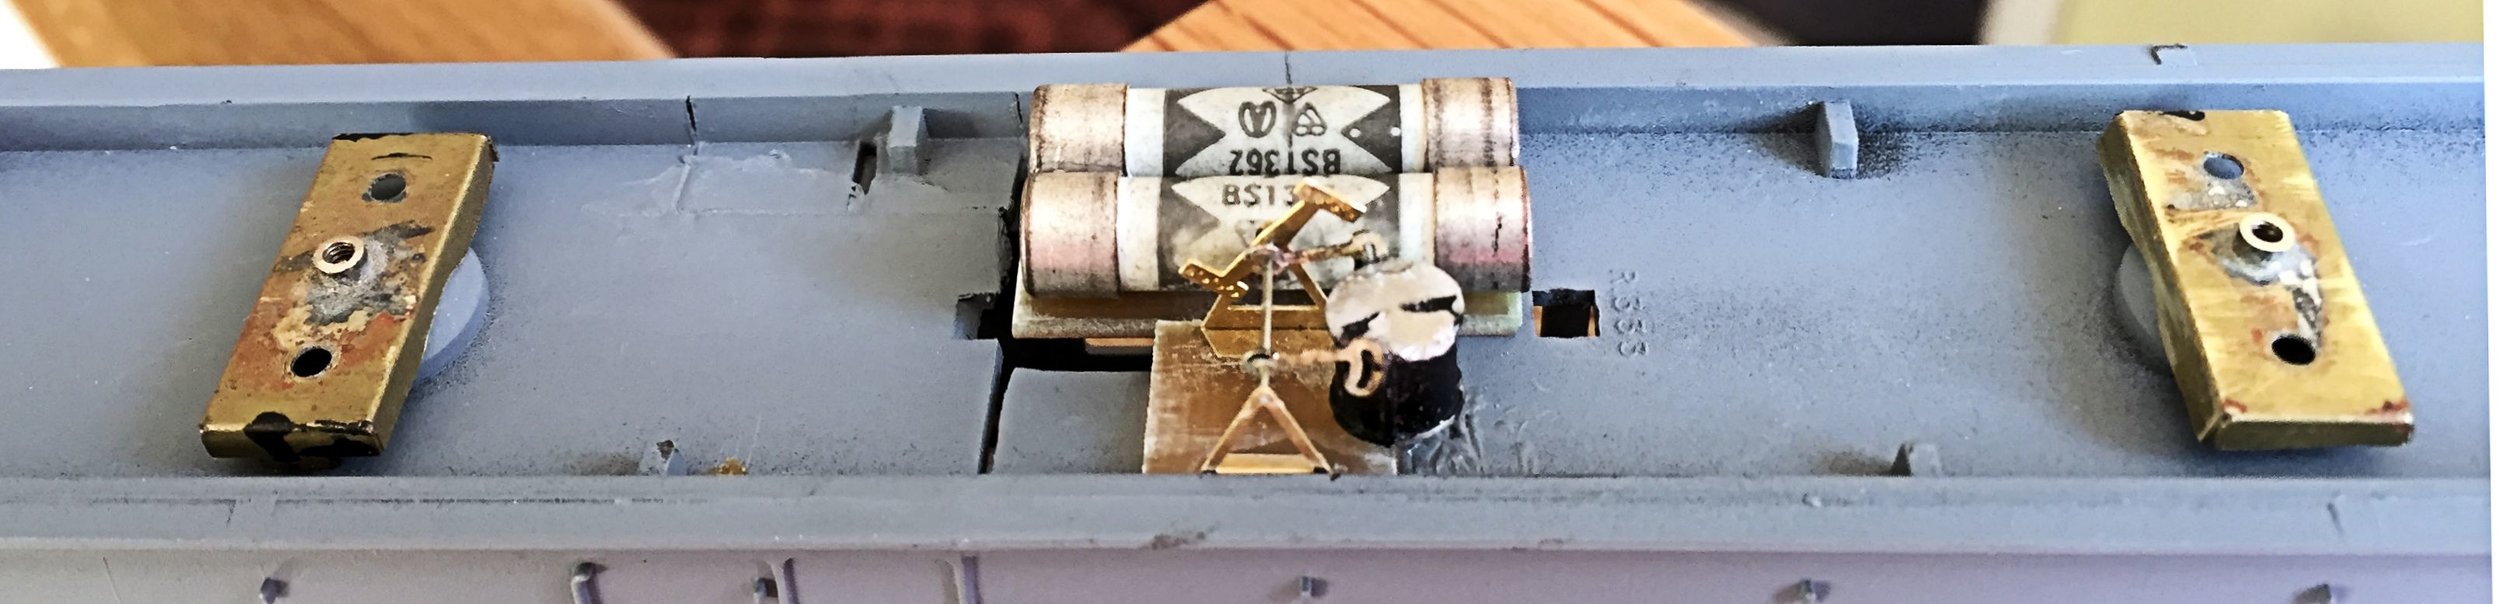
The bogies have been removed to allow the fitting of the gas reservoirs and the V-hanger / brake gear assembly. The reservoirs were old 7 amp fuses: almost exactly the correct size and once painted quite acceptable. They were mounted on some PCB first to allow them to hang lower when fitted. The V-hangers were etched brass fold-ups and the reservoir and various ancillary bits were reused, cleaned up, from other old broken kits, bought at toy-fairs for this very purpose. I was not able to use the white-metal buffers as originally planned as they could not be removed without breaking. The brass buffers fitted in their place may be old K's items, I'm really not sure. Pull-rods will be attached to the brake gear in due course.
I'm quite pleased that once primed, the side with the three cuts looks quite sound, too: the filler did its job.


Not the best photo next, but progress anyway. The main livery has been laid down on both sides and some lettering / numbering has commenced. Droplights have yet to be painted and the handles / grab-rails picked out in brass. A fair bit more to do after that as well. But we're getting there. I've yet to work out how to attach the couplings to the bogie frames.
I've been otherwise occupied and so little has happened to this build for the last week or so. I have started to flush-glaze however and each side has liveried and varnished. I may, in the fullness of time, apply a coat of 'Klear' to the chocolate paintwork, to make it a little more rich: varnish does flatten colour sometimes. The glazing may also receive a coat of 'Klear' to improve its transparency.
Now, the work that has gone into this build has left me wondering whether it has all been worth it. The build was not intrinsically difficult but it was detailed and fiddley. I couldn't work out why I was left dissatisfied for a while, until it occurred to me that I had built yet another Brake. Because of the panelling, the look-outs and the difference in outline, they are both attractive and interesting: you only need so many however and my Brakes far exceed in number my other coaches. So, in parallel with this build, I have started a Ratio 4-wheel Third. The finished rake will comprise the D15, the Ratio coach and that lovely old K's 6-wheeler I built a while ago. All three were common to the Cambrian in GWR days and, running with a Dean Goods, or a Dukedog, the 3 coaches will make up a prototypical train.
In the meantime, here's a photo to show how much shorter the D15 is, compared against an improved but otherwise standard-length Triang Clerestory Brake. It also shows, clearly, the transposition of the look-out and the Guard's door.

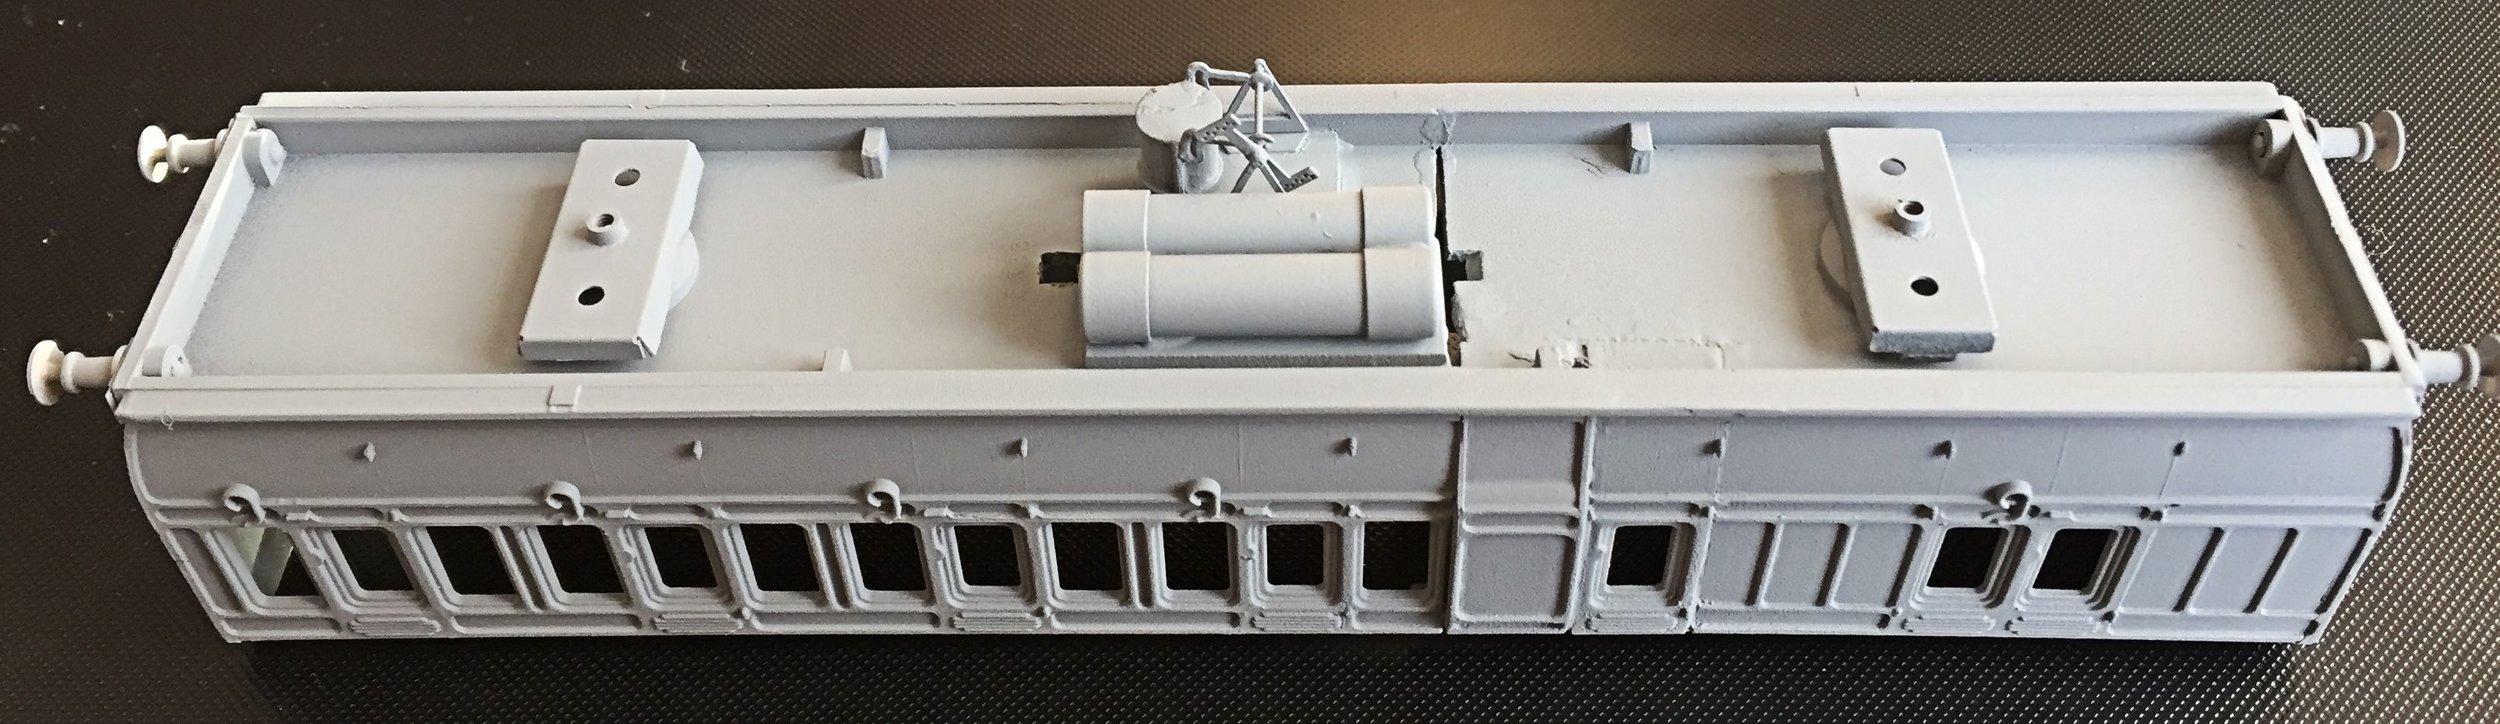
Photographs will follow shortly but the body is now finished: partitions and seats have been fitted and window rails fitted in the guard’s compartment. The underframe and ends have been sprayed black, the buffer shanks painted silver and vacuum pipes and coupling hooks painted and fitted. The roof was finally glued down to make the body a solid box. Oh, some brass rails have also been attached at the brake end sides.
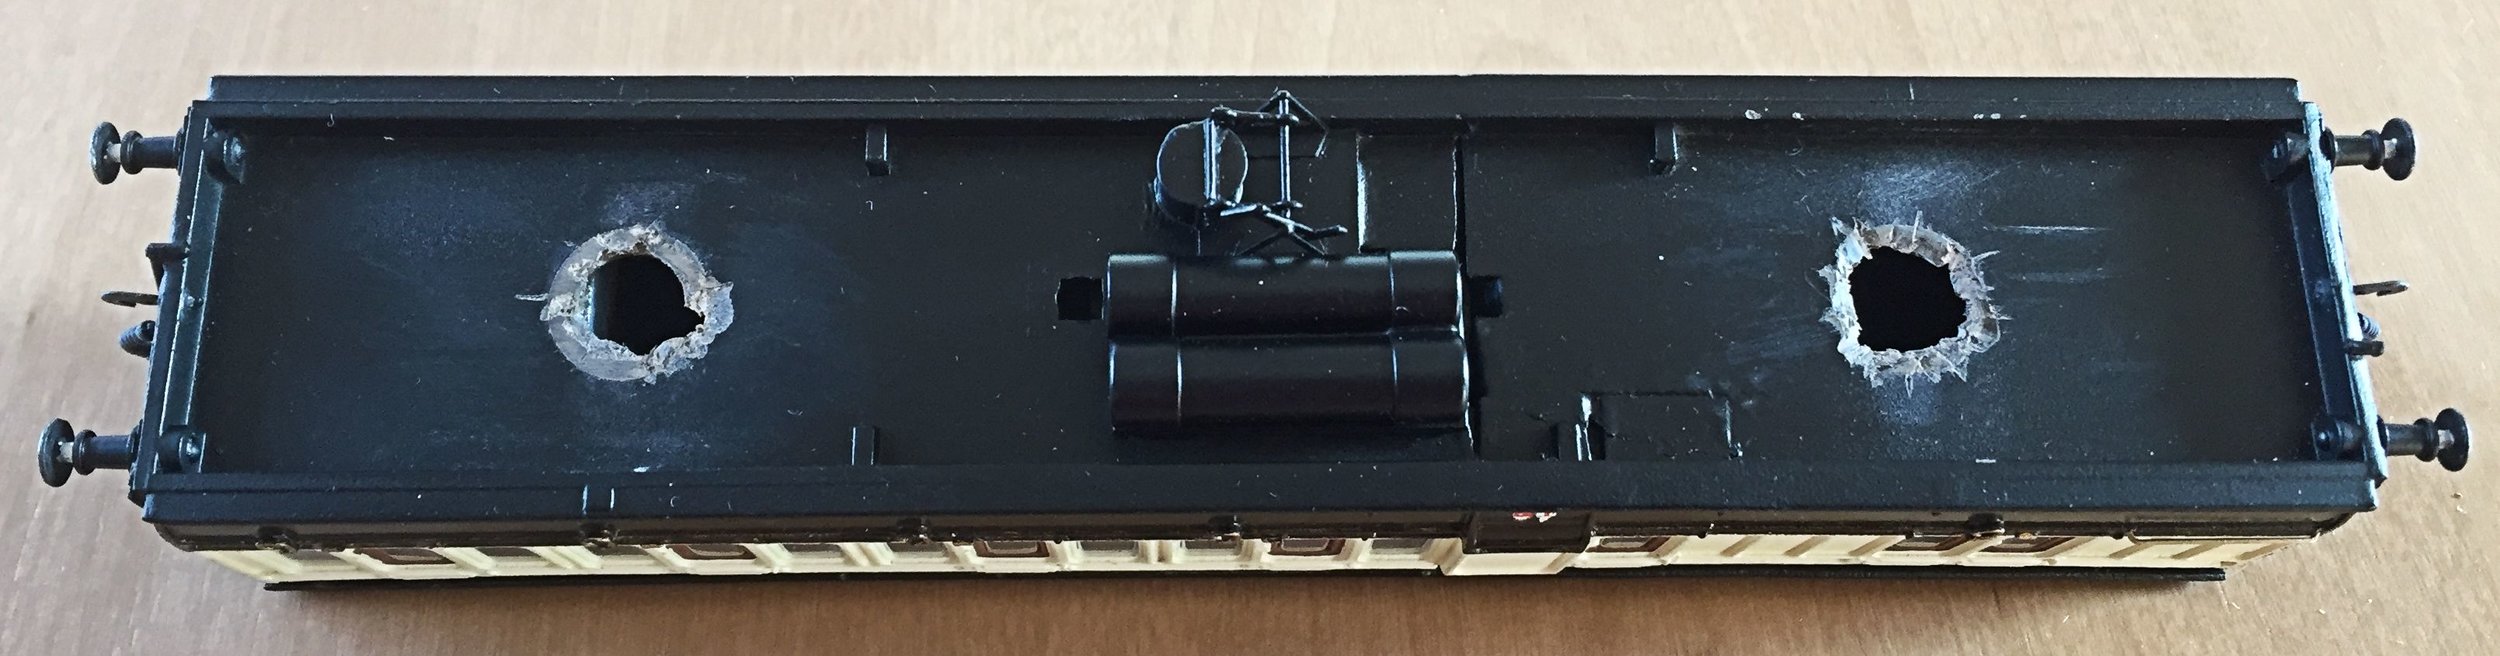
However, a trial run on track, with the bogies attached, showed that the coach sat 1-2mm too high: not much, you might think, but sufficiently so for the buffers to stand higher than those on adjoining coaches. This created a considerable problem as, for remedial action to follow and the coach body lowered, the very firmly attached bolsters had somehow to be removed from the underside of the coach and the moulded bosses on which they sat cut away without any plastic falling inside the body or the stresses involved separating any parts of the coach sides. With some trepidation, and a lot of care, this was achieved, the underside filed completely flat and the bolsters first soldered onto strips of PCP before the units being glued into the floor. Problem pretty much solved !
First, the various stages of the adjustment….

With the running height now adjusted, the build was complete. Some light weathering of the bogies and underframe will follow in due course but, otherwise, the coach is ready for service and awaits its 4-wheel All Third partner [currently in the paint shop].

….and finally a [poor] interior shot which just picks out the seats and partitions.