A Hornby Dublo restoration project
Backdating with considerable compromise the 'City of London' to the 'Duchess of Atholl'
and, from time-to-time, views of other restored diecast gems
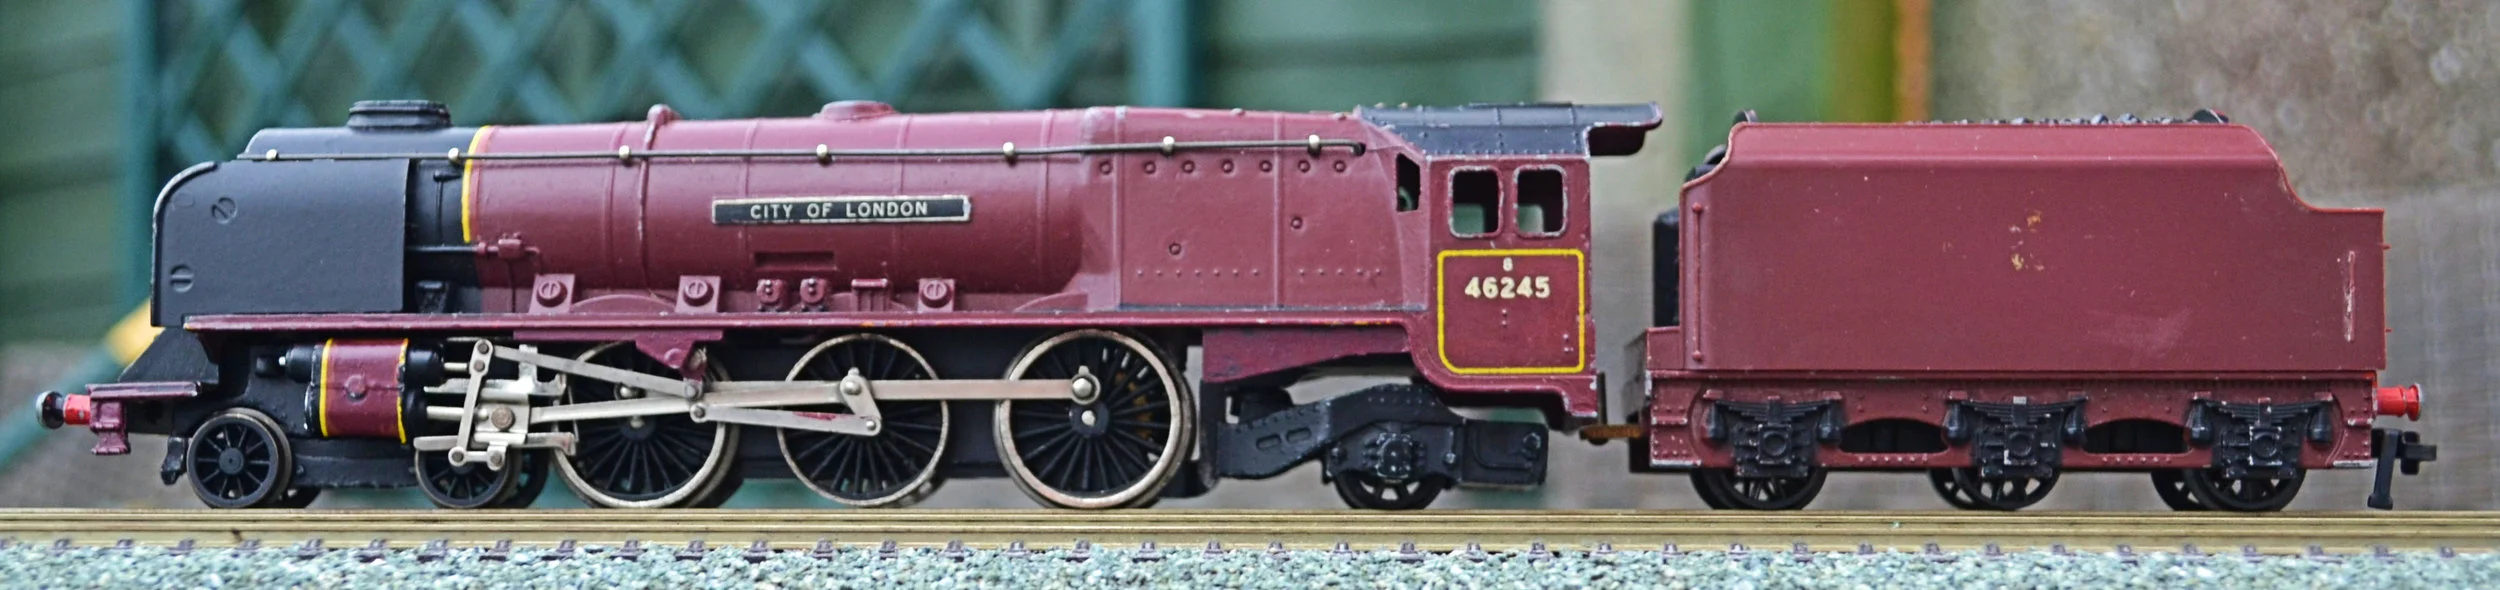
This Hornby Dublo 'City of London' loco dates to 1959/1960 and was bought for £15 in a non-working and very play-worn state. The motor had apparently siezed and the tender wheels [and others] were chipped and cracked. The front buffers and the running-plate below the smoke box also showed signs of a heavy fall. It was a speculative purchase: if the motor could be made to run then a full restoration would follow, if not it would be consigned to the bits box.
Dismantling the loco, a start was made on the motor. An hour or two with toothpicks, cotton buds and IPA sorted out what had been a filthy mechanism with fluff encrusted pick-ups and dirty wheels. The top bearing nut had also been over-tightened, preventing the armature from rotating [luckily it had not been bent]. A little oil to the bearings then had the mechanism running beautifully and very controllably. It does run a little quicker in reverse than forward though: not an uncommon problem, but why ?
The Duchess undressed after cleaning.
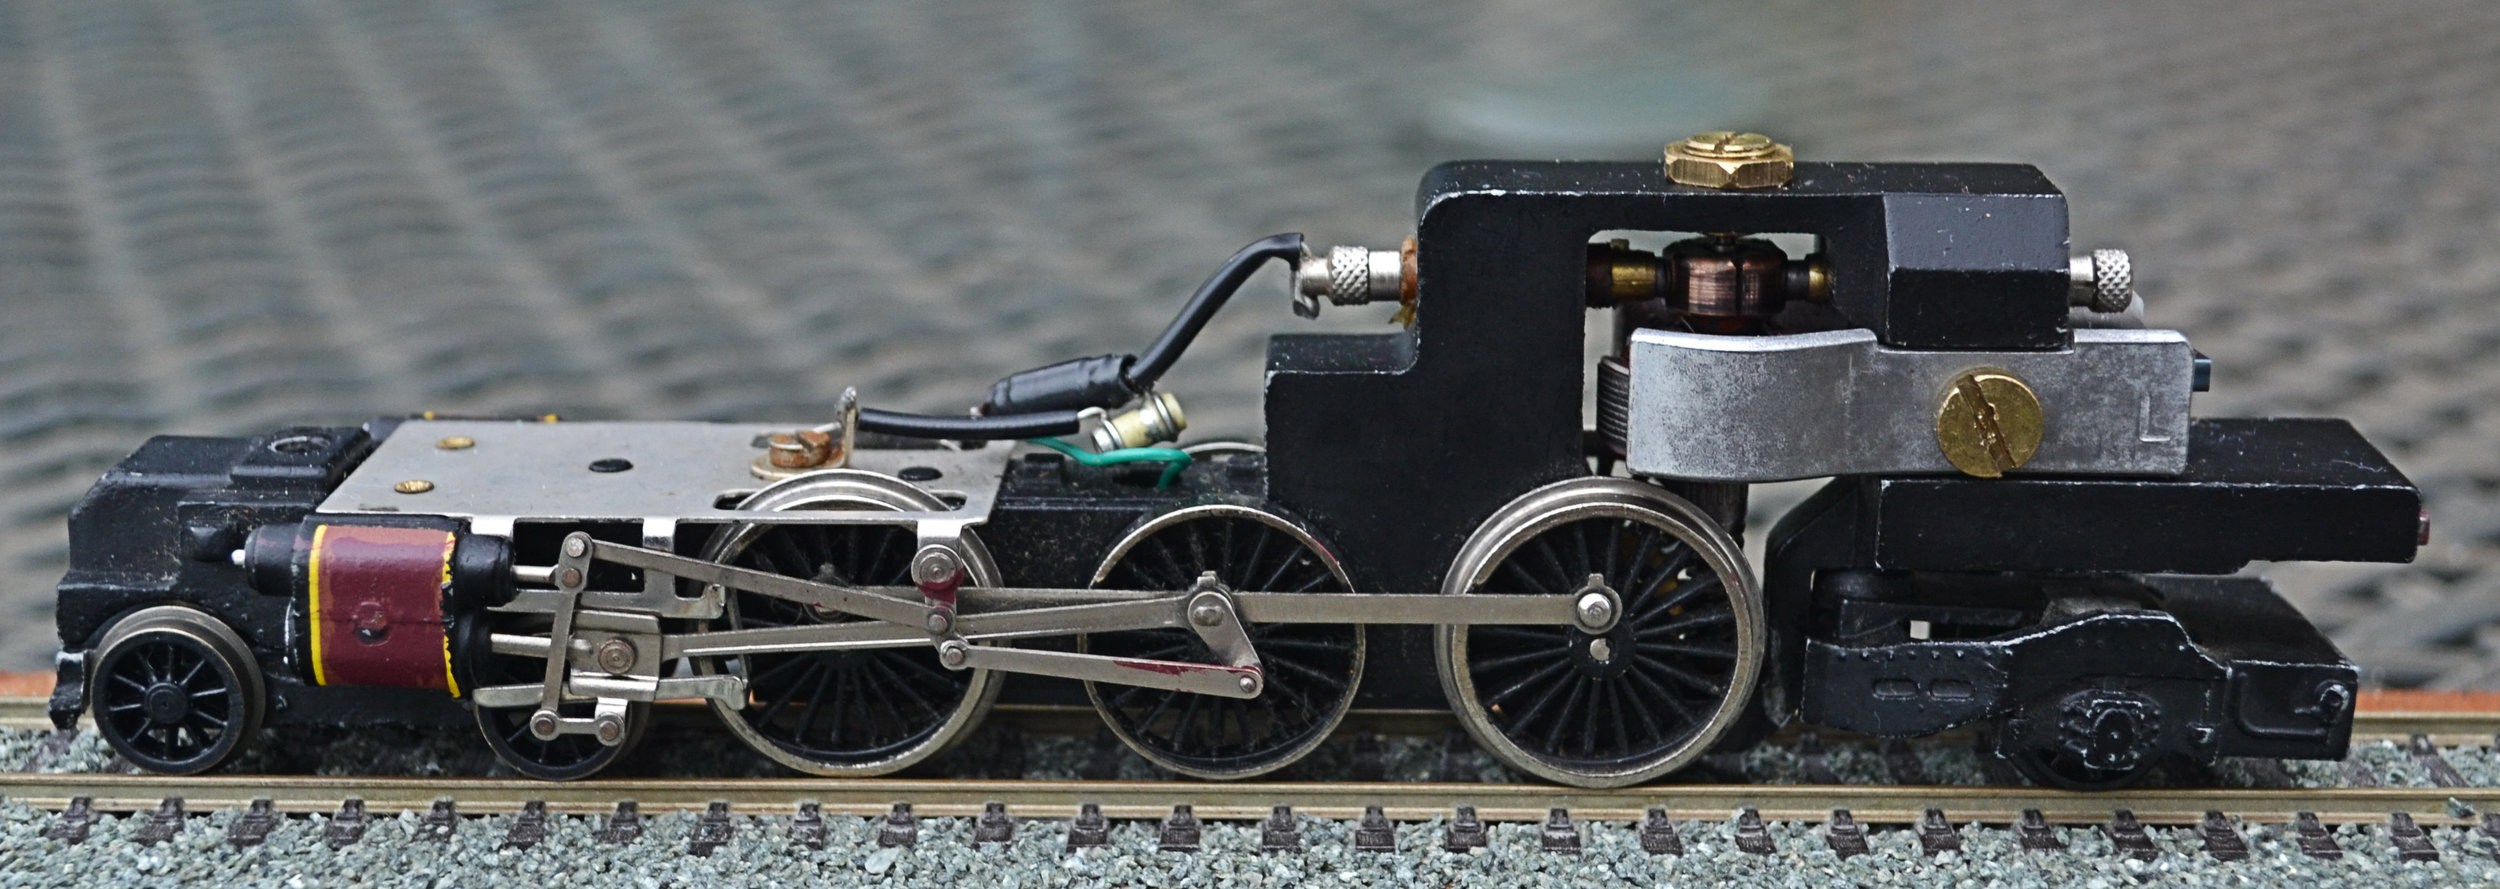
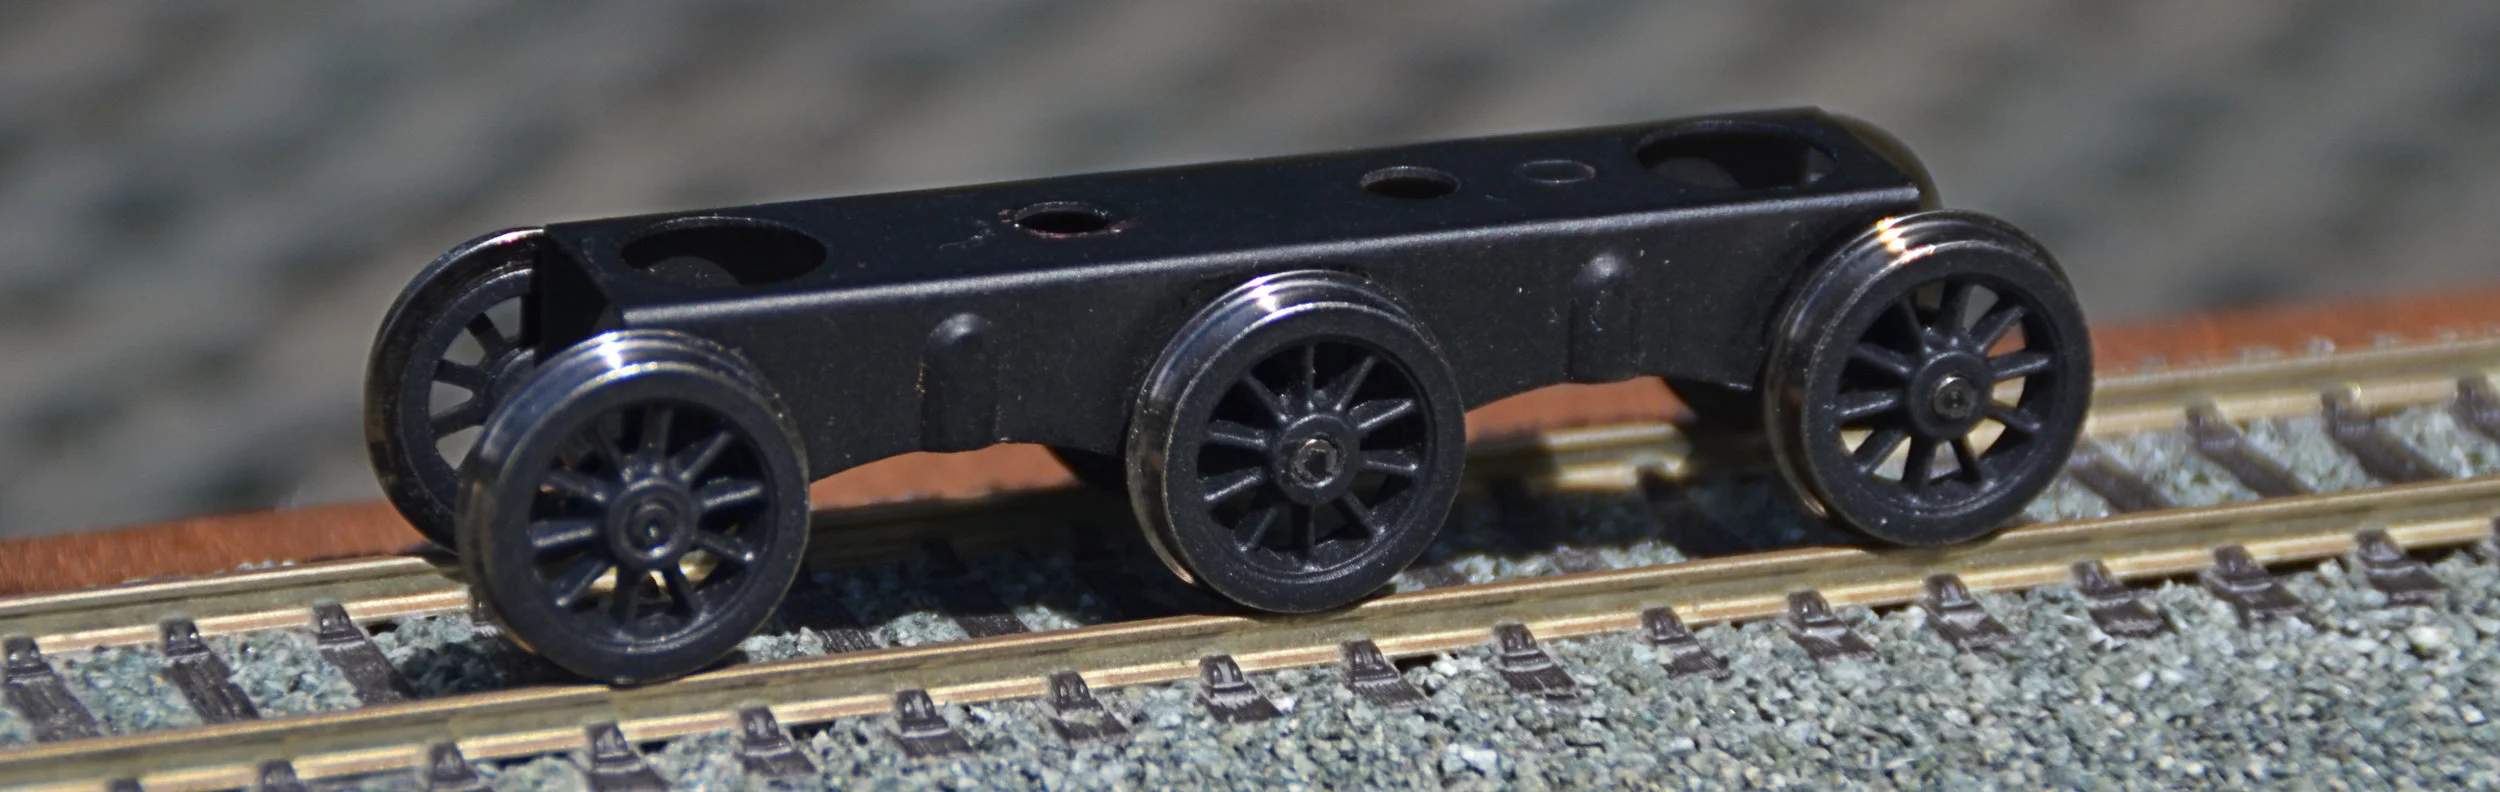
What I love about these mechanisms is that they are real engineering, you need proper screwdrivers and spanners to work on them and, of course, everything can be owner serviced. You'll see from the above photo that by this time I had also replaced the front bogie wheels with metal ones; the original plastic wheels were chipped and, well, generally horrible. The wheels under the tender and the cab will be similarly replaced.

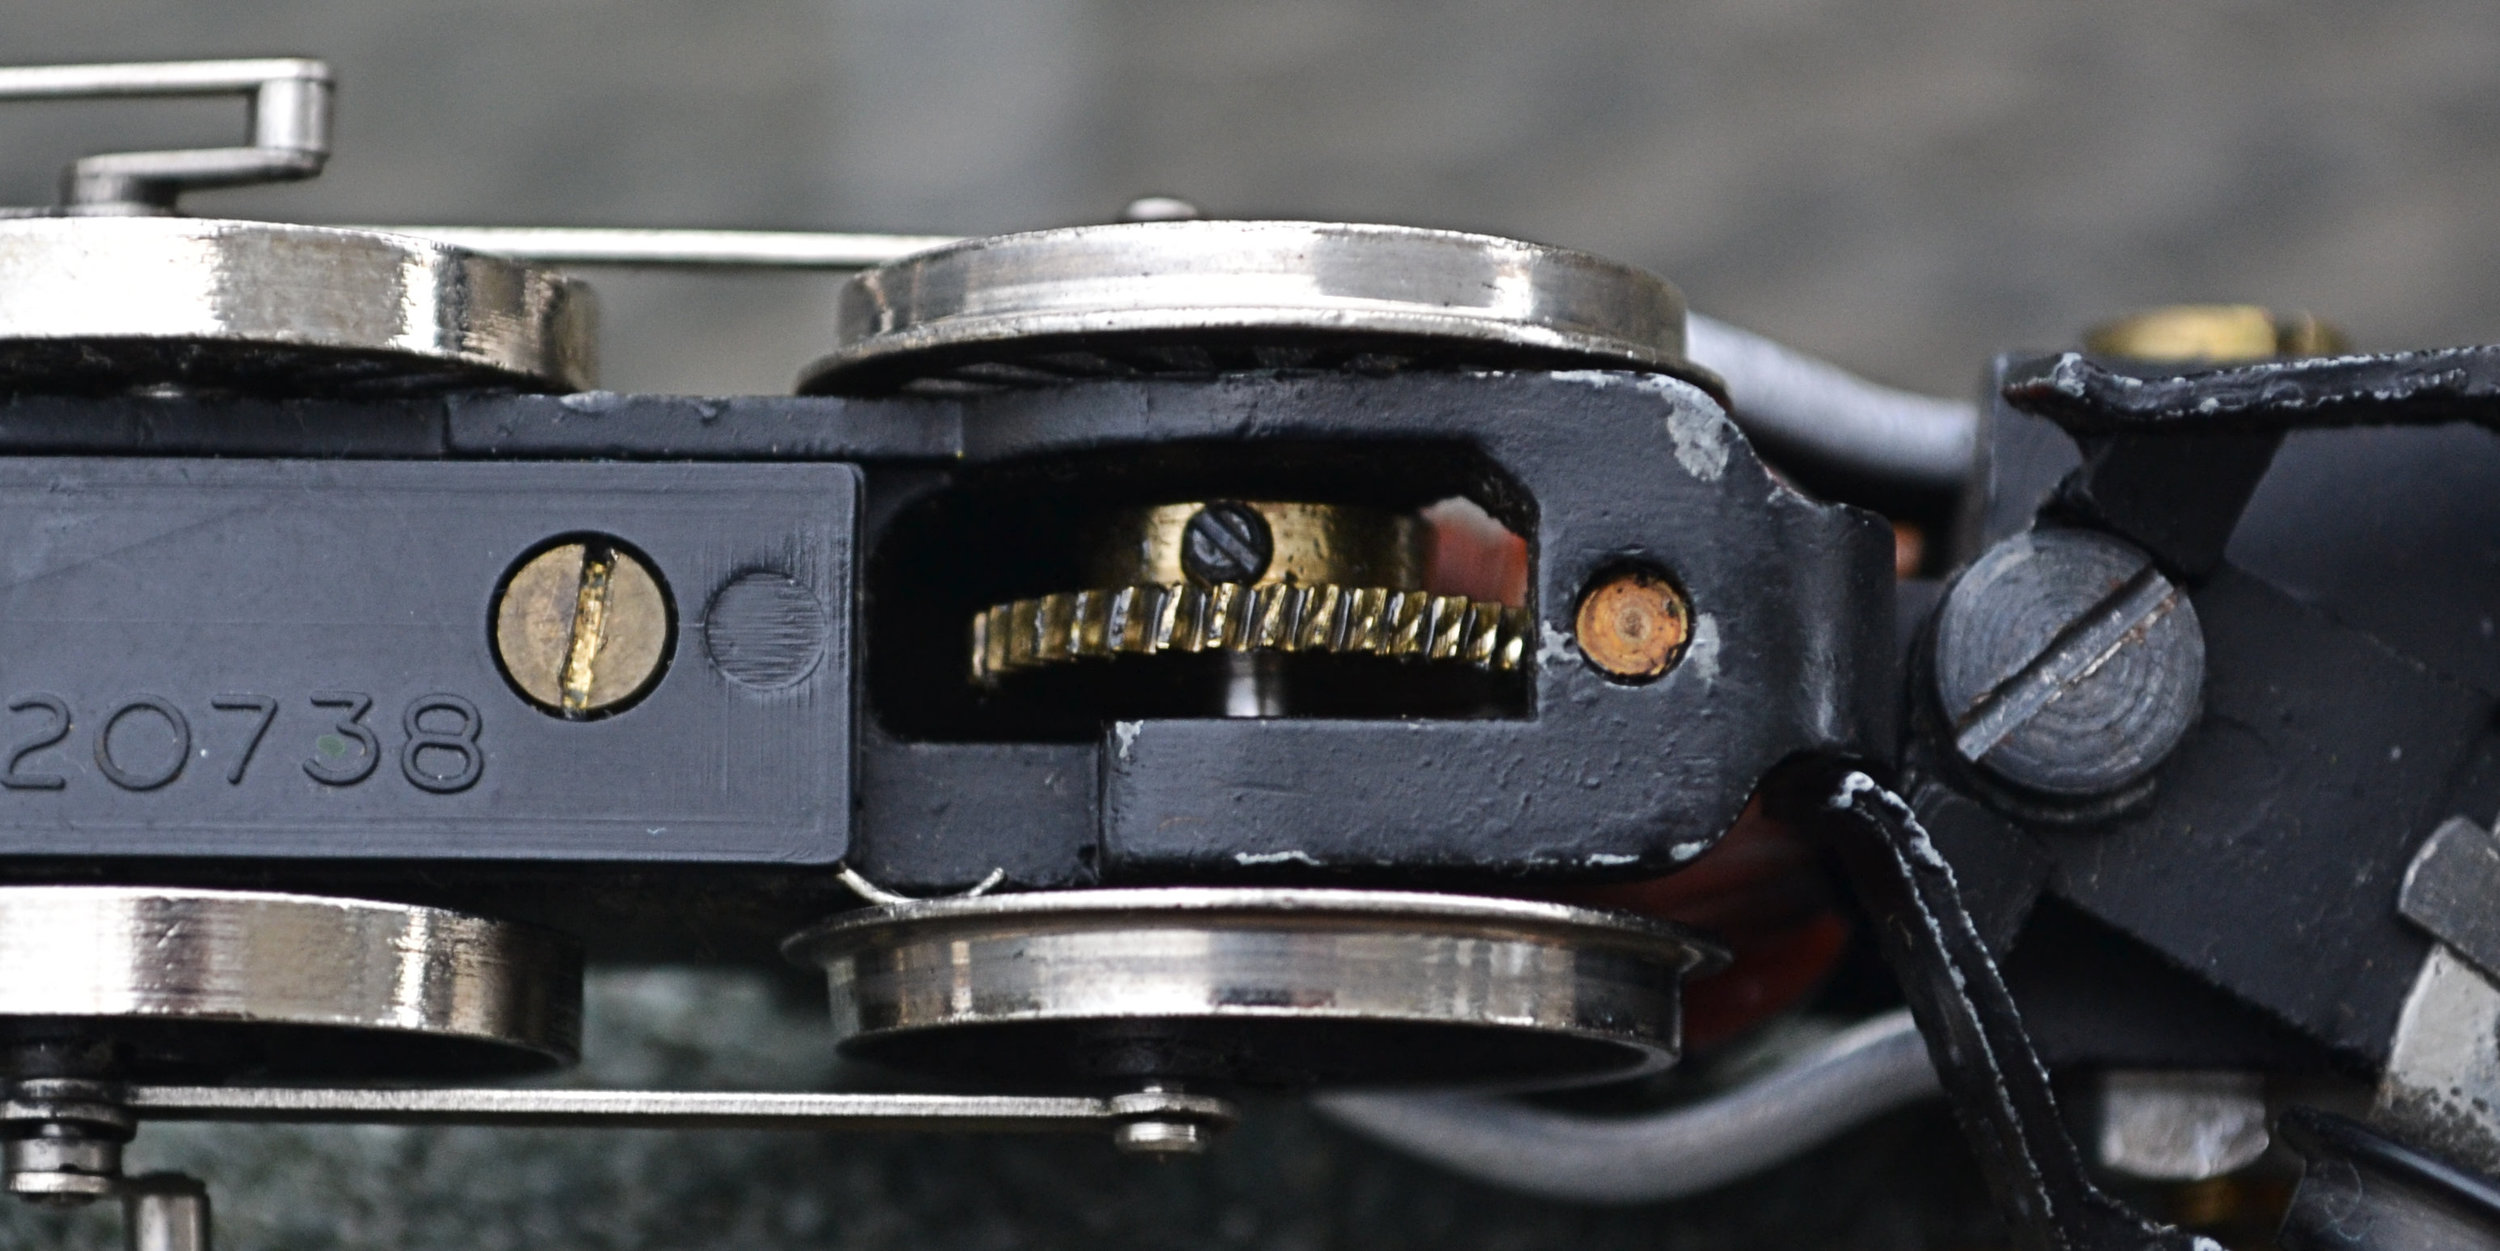
The above two photos show the vertical armature and worm, and the adjustable driving gear. I had also replaced the keeper plate by now as the original fell apart when unscrewed. Just about everything can be adjusted.
With the chassis now running smoothly, I turned my attention to the loco body and stripping the paint back to the metal. I normally use 'Mr Muscle Oven Cleaner' for this job and did here, but I had my doubts as, once before, it would not touch the surface of an old Wrenn Castle [I had to resort to bead blasting to strip that one]. It didn't work well, and a caustic soda bath was to follow.

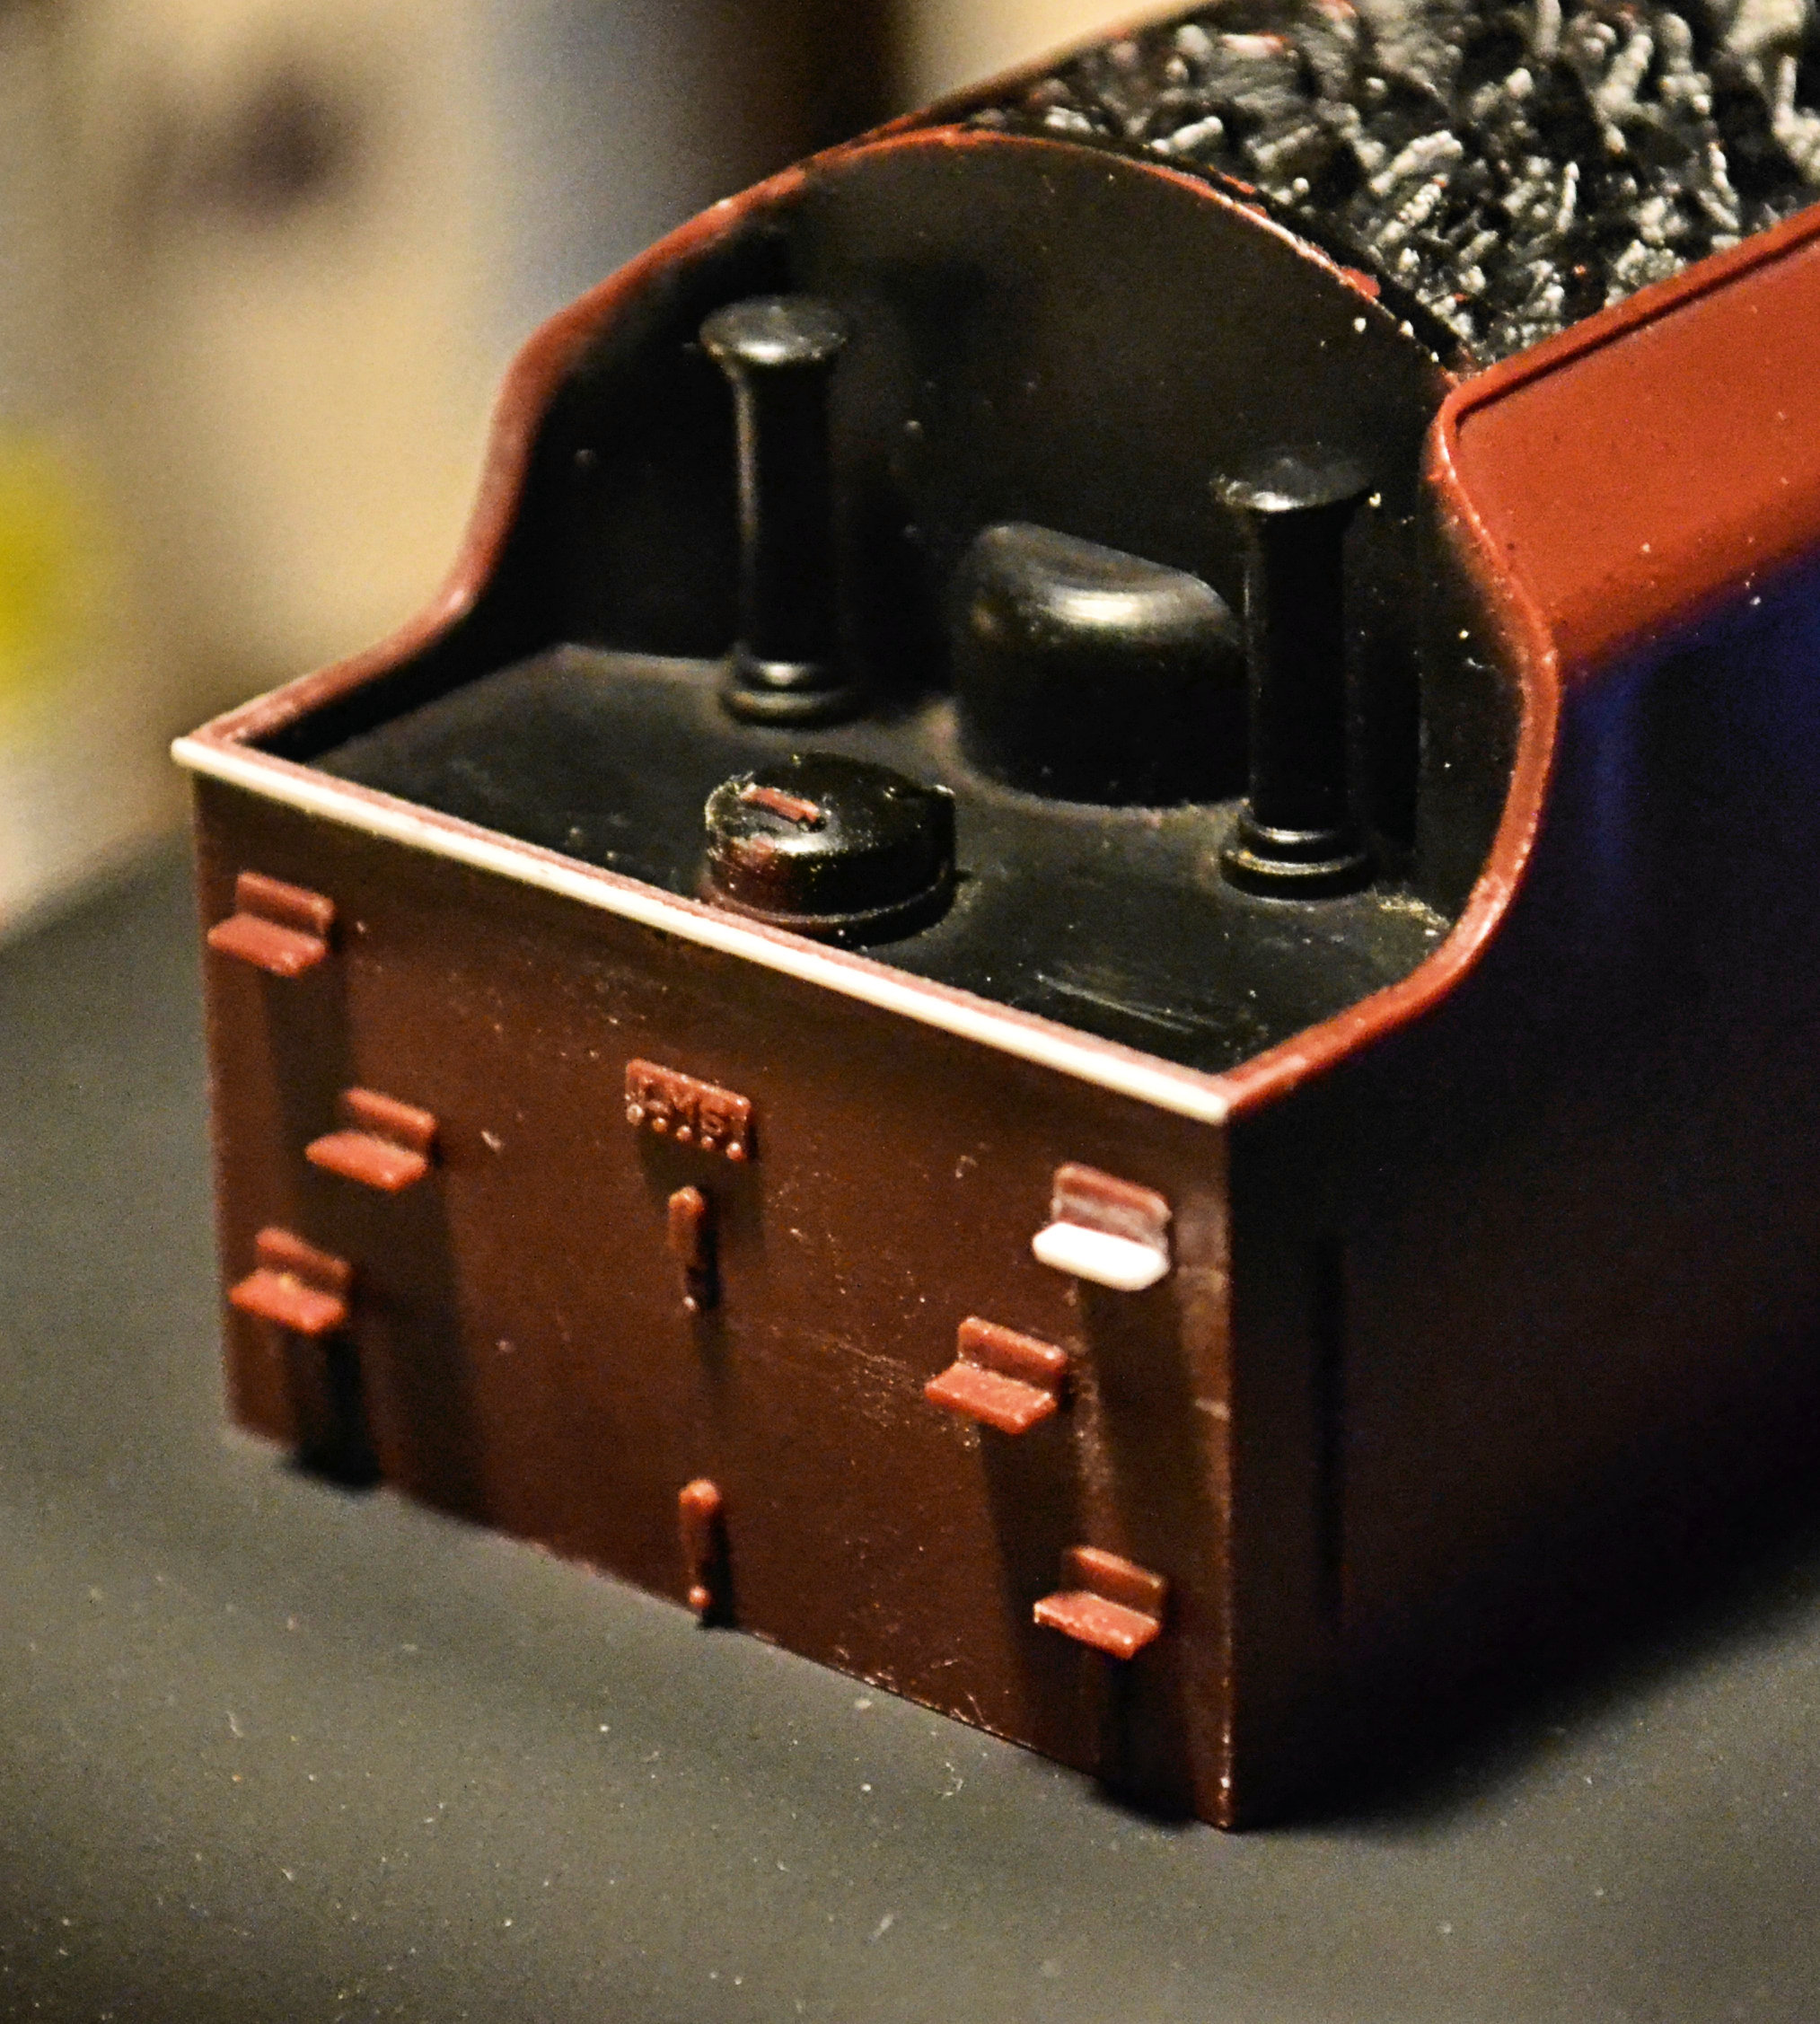
In the meantime I was able to consider alterations to the casting although I intend keeping the model as original as possible. The original buffers had to be removed as they were both bent and incapable of straightening without snapping: a consequence of the model having been dropped on its nose at some time [of which more, later]. On closer inspection, I also noticed that they were separate castings, fitted in during manufacture. At that time, one of the buffers was fitted at an angle, resulting in the square casing being twisted: that, too, was aesthetically unacceptable. But removing the castings without damaging the buffer beam and rivet mouldings was going to be a problem...
In fact, it wasn't. I was lucky, and by twisting the buffer castings with some pliers, they sheared away, leaving their fixing shanks in the sockets in the buffer beam. These were easy to tap out, clearing the holes without damage. This is what I was left with [you can also note how ineffective oven cleaner is removing paint from these locos].
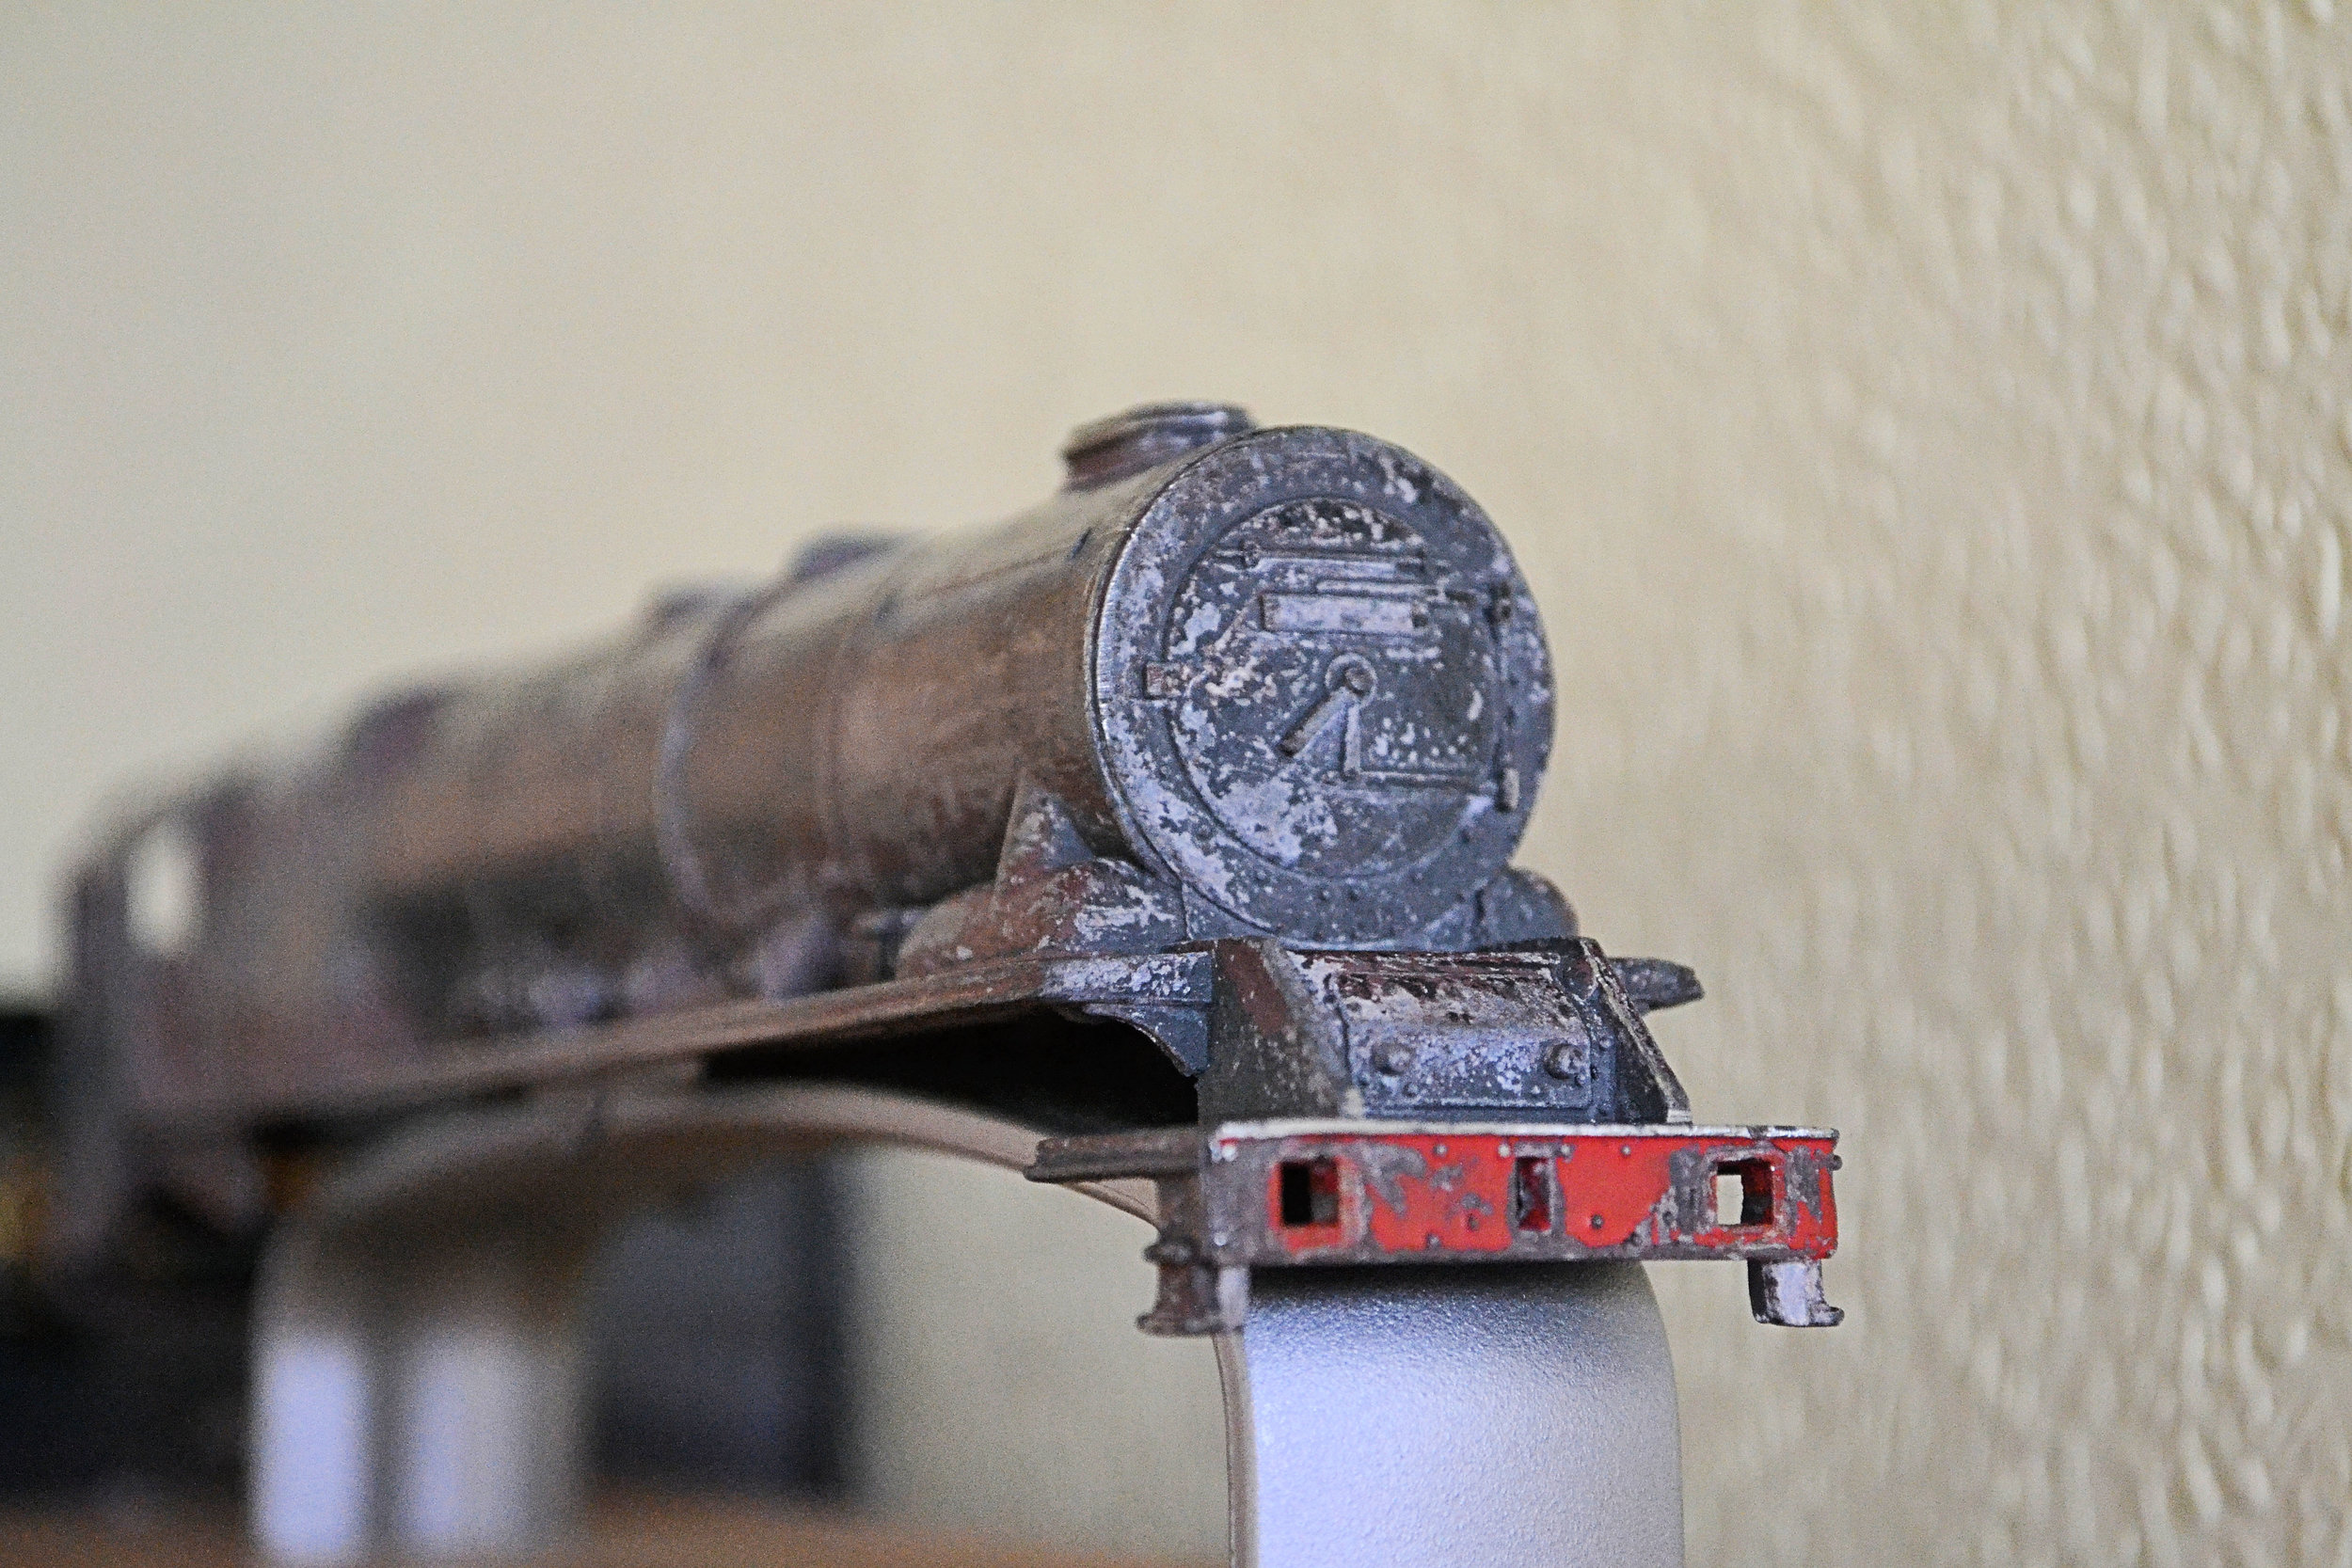
During that earlier fall, the front of the body casting was bent also, resulting in the buffer beam dropping below the horizontal. This was unsightly and had to be rectified, but without snapping it off or cracking it in any way. A sharp tap on the carpet - and an equally sharp intake of breath - straightened things up nicely.
Re-wheeling the front bogie and the truck under the cab was surprisingly difficult as the plastic wheels were forced onto splined axles which did not want to give up their running gear. I used a wheel press for this task and it required a surprising amount of pressure. Without it, I think that there would have been a real risk of bending the axles.
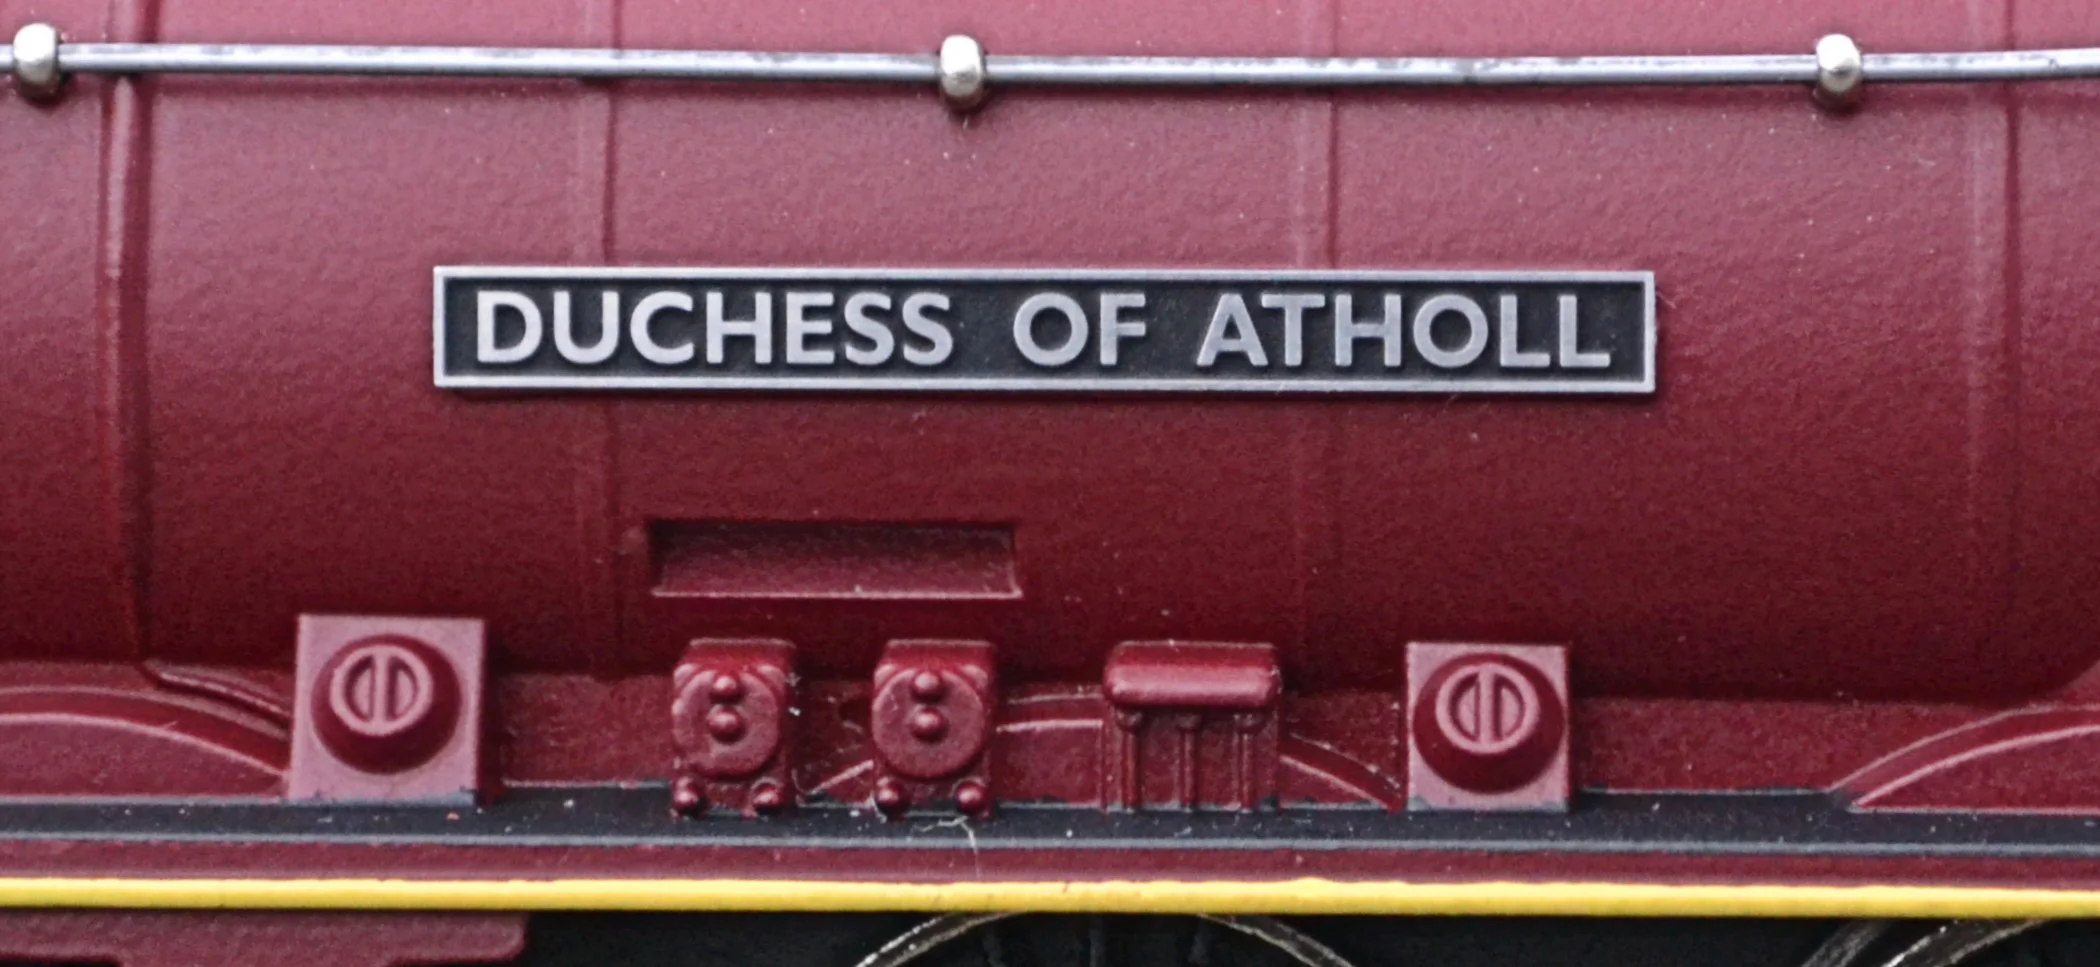
By now, in the Royal Mail, along with replacement buffers [from Markits], was a set of etched stainless steel nameplates [from Modelmaster]. At 33mm, these are over-length, being designed specifically for renaming these old Dublo locos. Not cheap but necessary. I had not bought any paint by this time either, but intended to use Halfords' Rover Damask Red over a red oxide primer. Lining and lettering would be by Pressfix and a bow-pen. I reckoned I could bring the lot home for less that £30.
Returning to the loco body, after a ten minute soak in a moderately gloopy mix of caustic soda [50gms:1 litre cold water], a wash in warm soapy water and a buff with a scourer I had this. Compare with the above two photos:

I had never used caustic soda before and for metal, from then on, it would be my poison of choice. It's amazing how hot the solution gets too, just telling you how toxic it is. A worrying amount of fizzing took place also, but no damage occurred to any part of the casting. All the body required after is a little dressing with files to removing original casting flash. And then priming...
The tender was next broken down into its constituent parts. Inspection of the plastic tender body showed one or two areas of light damage to the rear: the top edge beading had chipped and two steps were broken. These were easy fixes and were done after the tender body had been thoroughly cleaned and degreased. The easiest way of dealing with the beading was to remove the lot entirely and reinstate it with similar sized plastic strip.
I spent 30 minutes reinstating the two steps and the beading. The tender body was then ready for priming and, weather permitting, both it and the loco body would be covered in red oxide primer shortly.

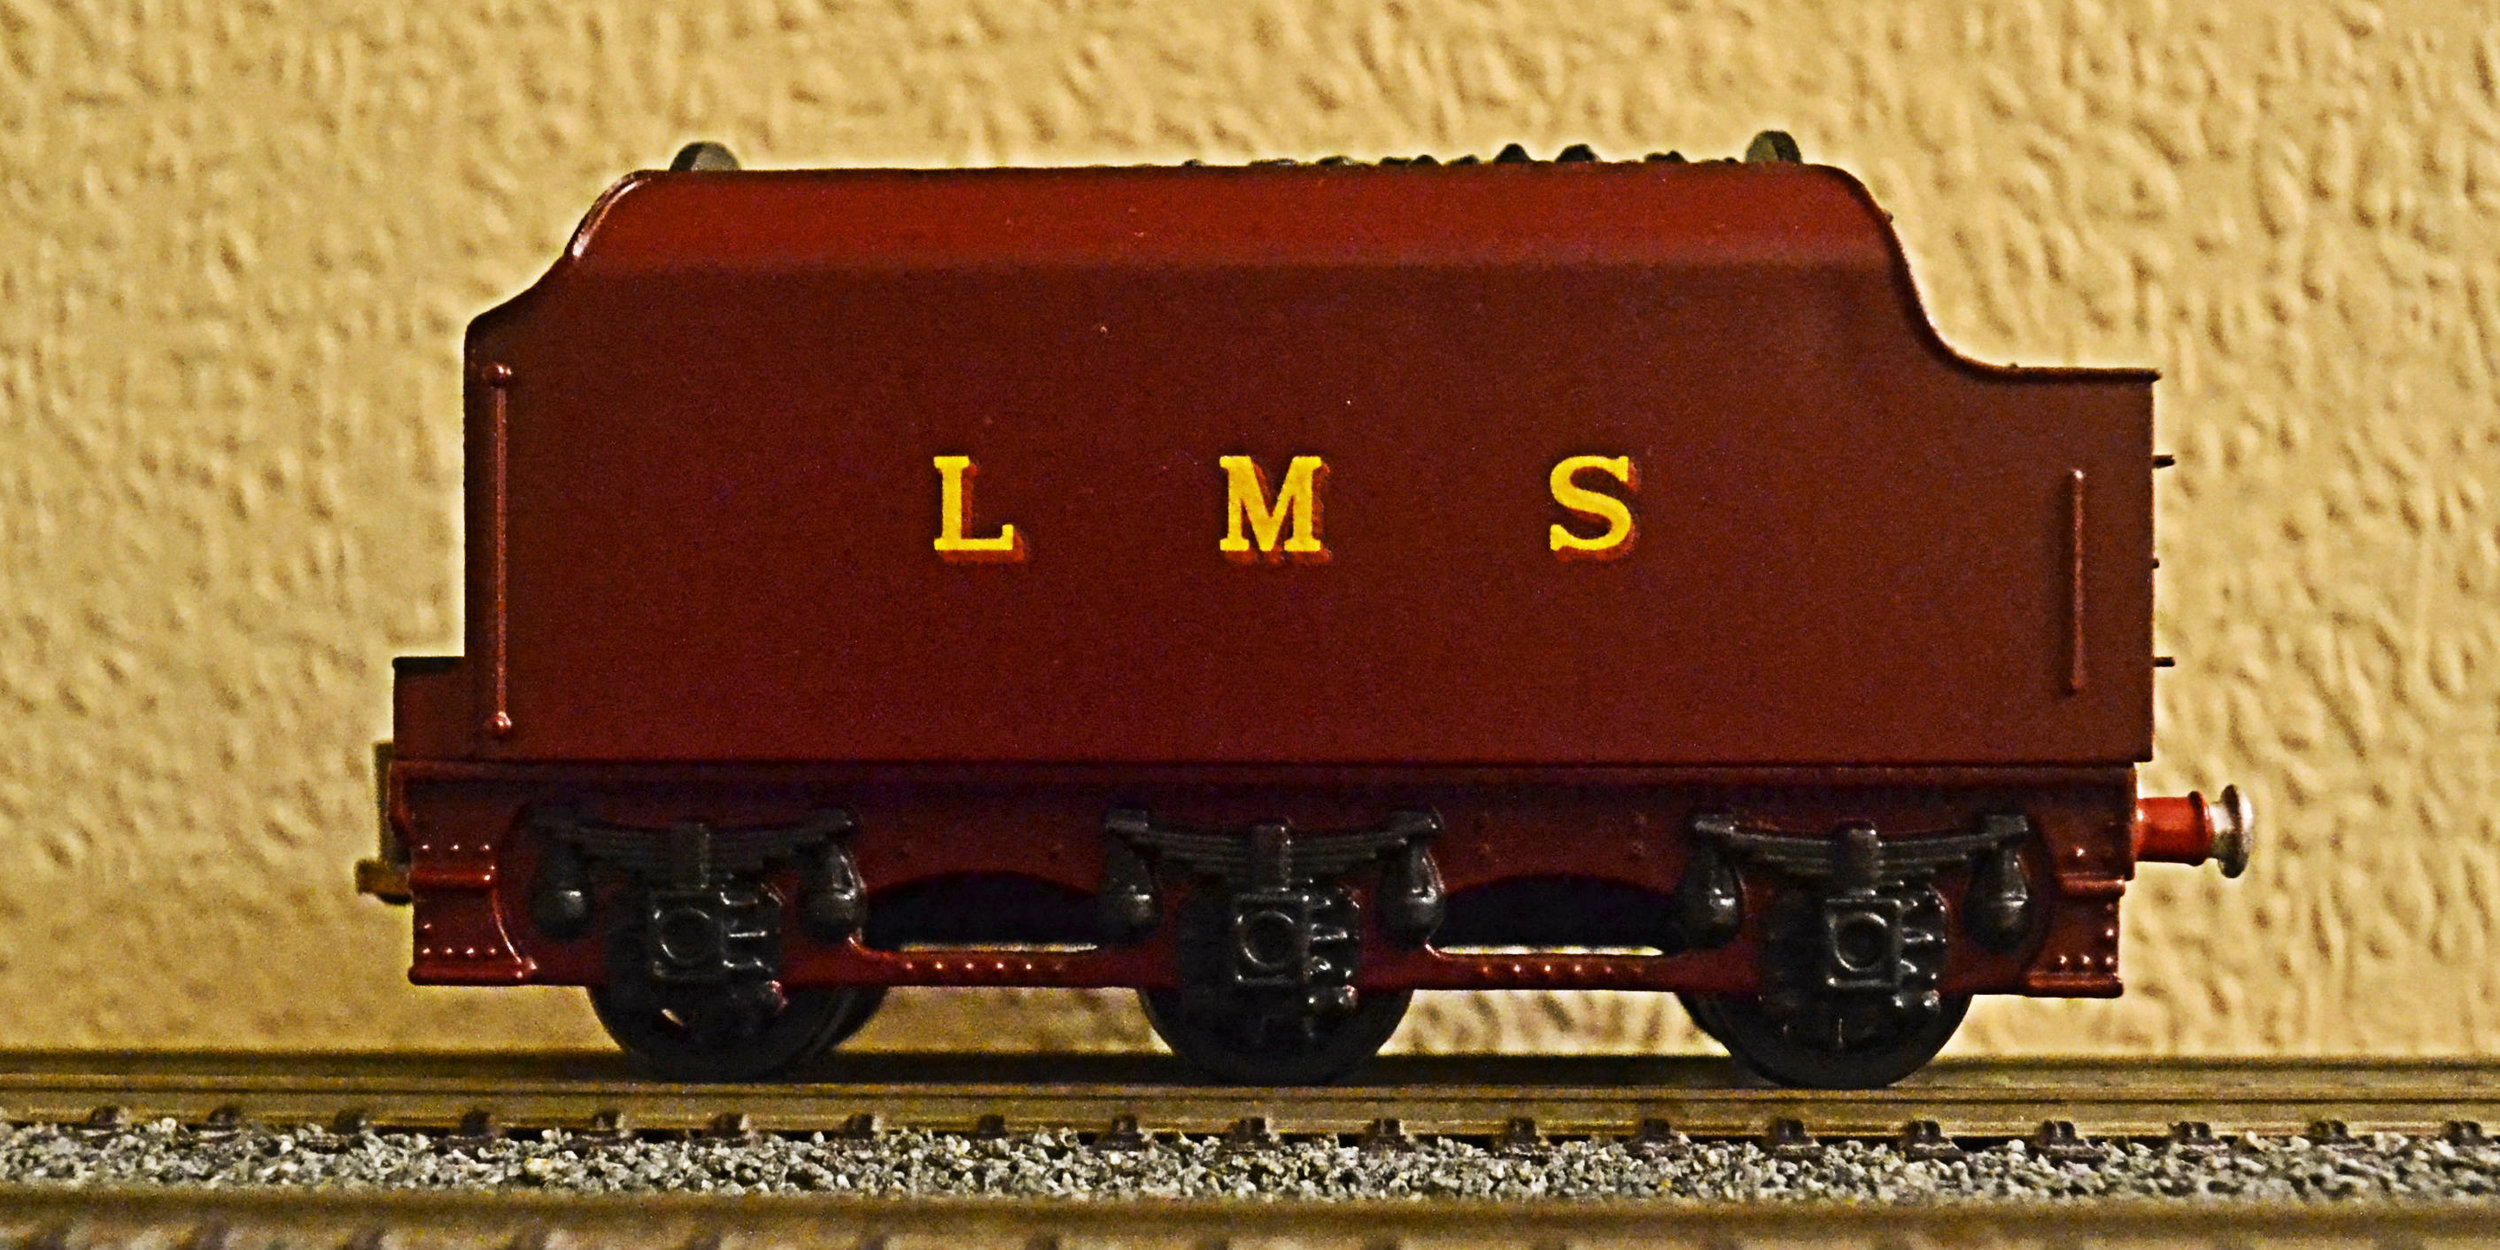
Having primed the tender body I sprayed it with two coats of Damask Red and set it aside to dry. It was then masked up so that the top and front could be sprayed black. The body was left left for a couple of days to harden off. The metal tender chassis was sprayed also and it too was left to harden. Re-wheeling the tender was difficult for the same reasons described above: the plastic wheels were an extremely tight fit and had to be cut off. The replacement wheels are Hornby T9 tender wheels: a tiny bit over-sized but quite acceptable. The following set of photographs shows these various operations having been carried out, the tender partially reassembled and the axle boxes painted.


To complete the tender unit, only lettering, painting the buffer beam and buffers, varnishing and attaching a coupling was required. With that done, it was set aside for work to commence on the loco body.
'Before' and 'after' photos:

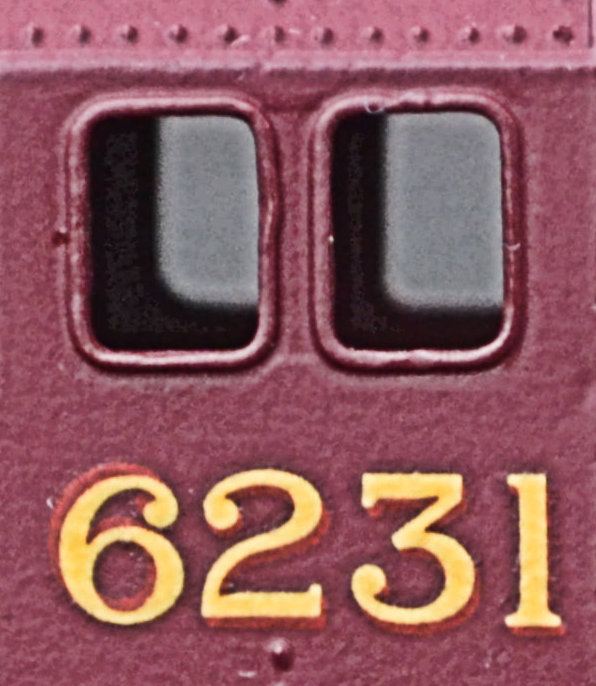
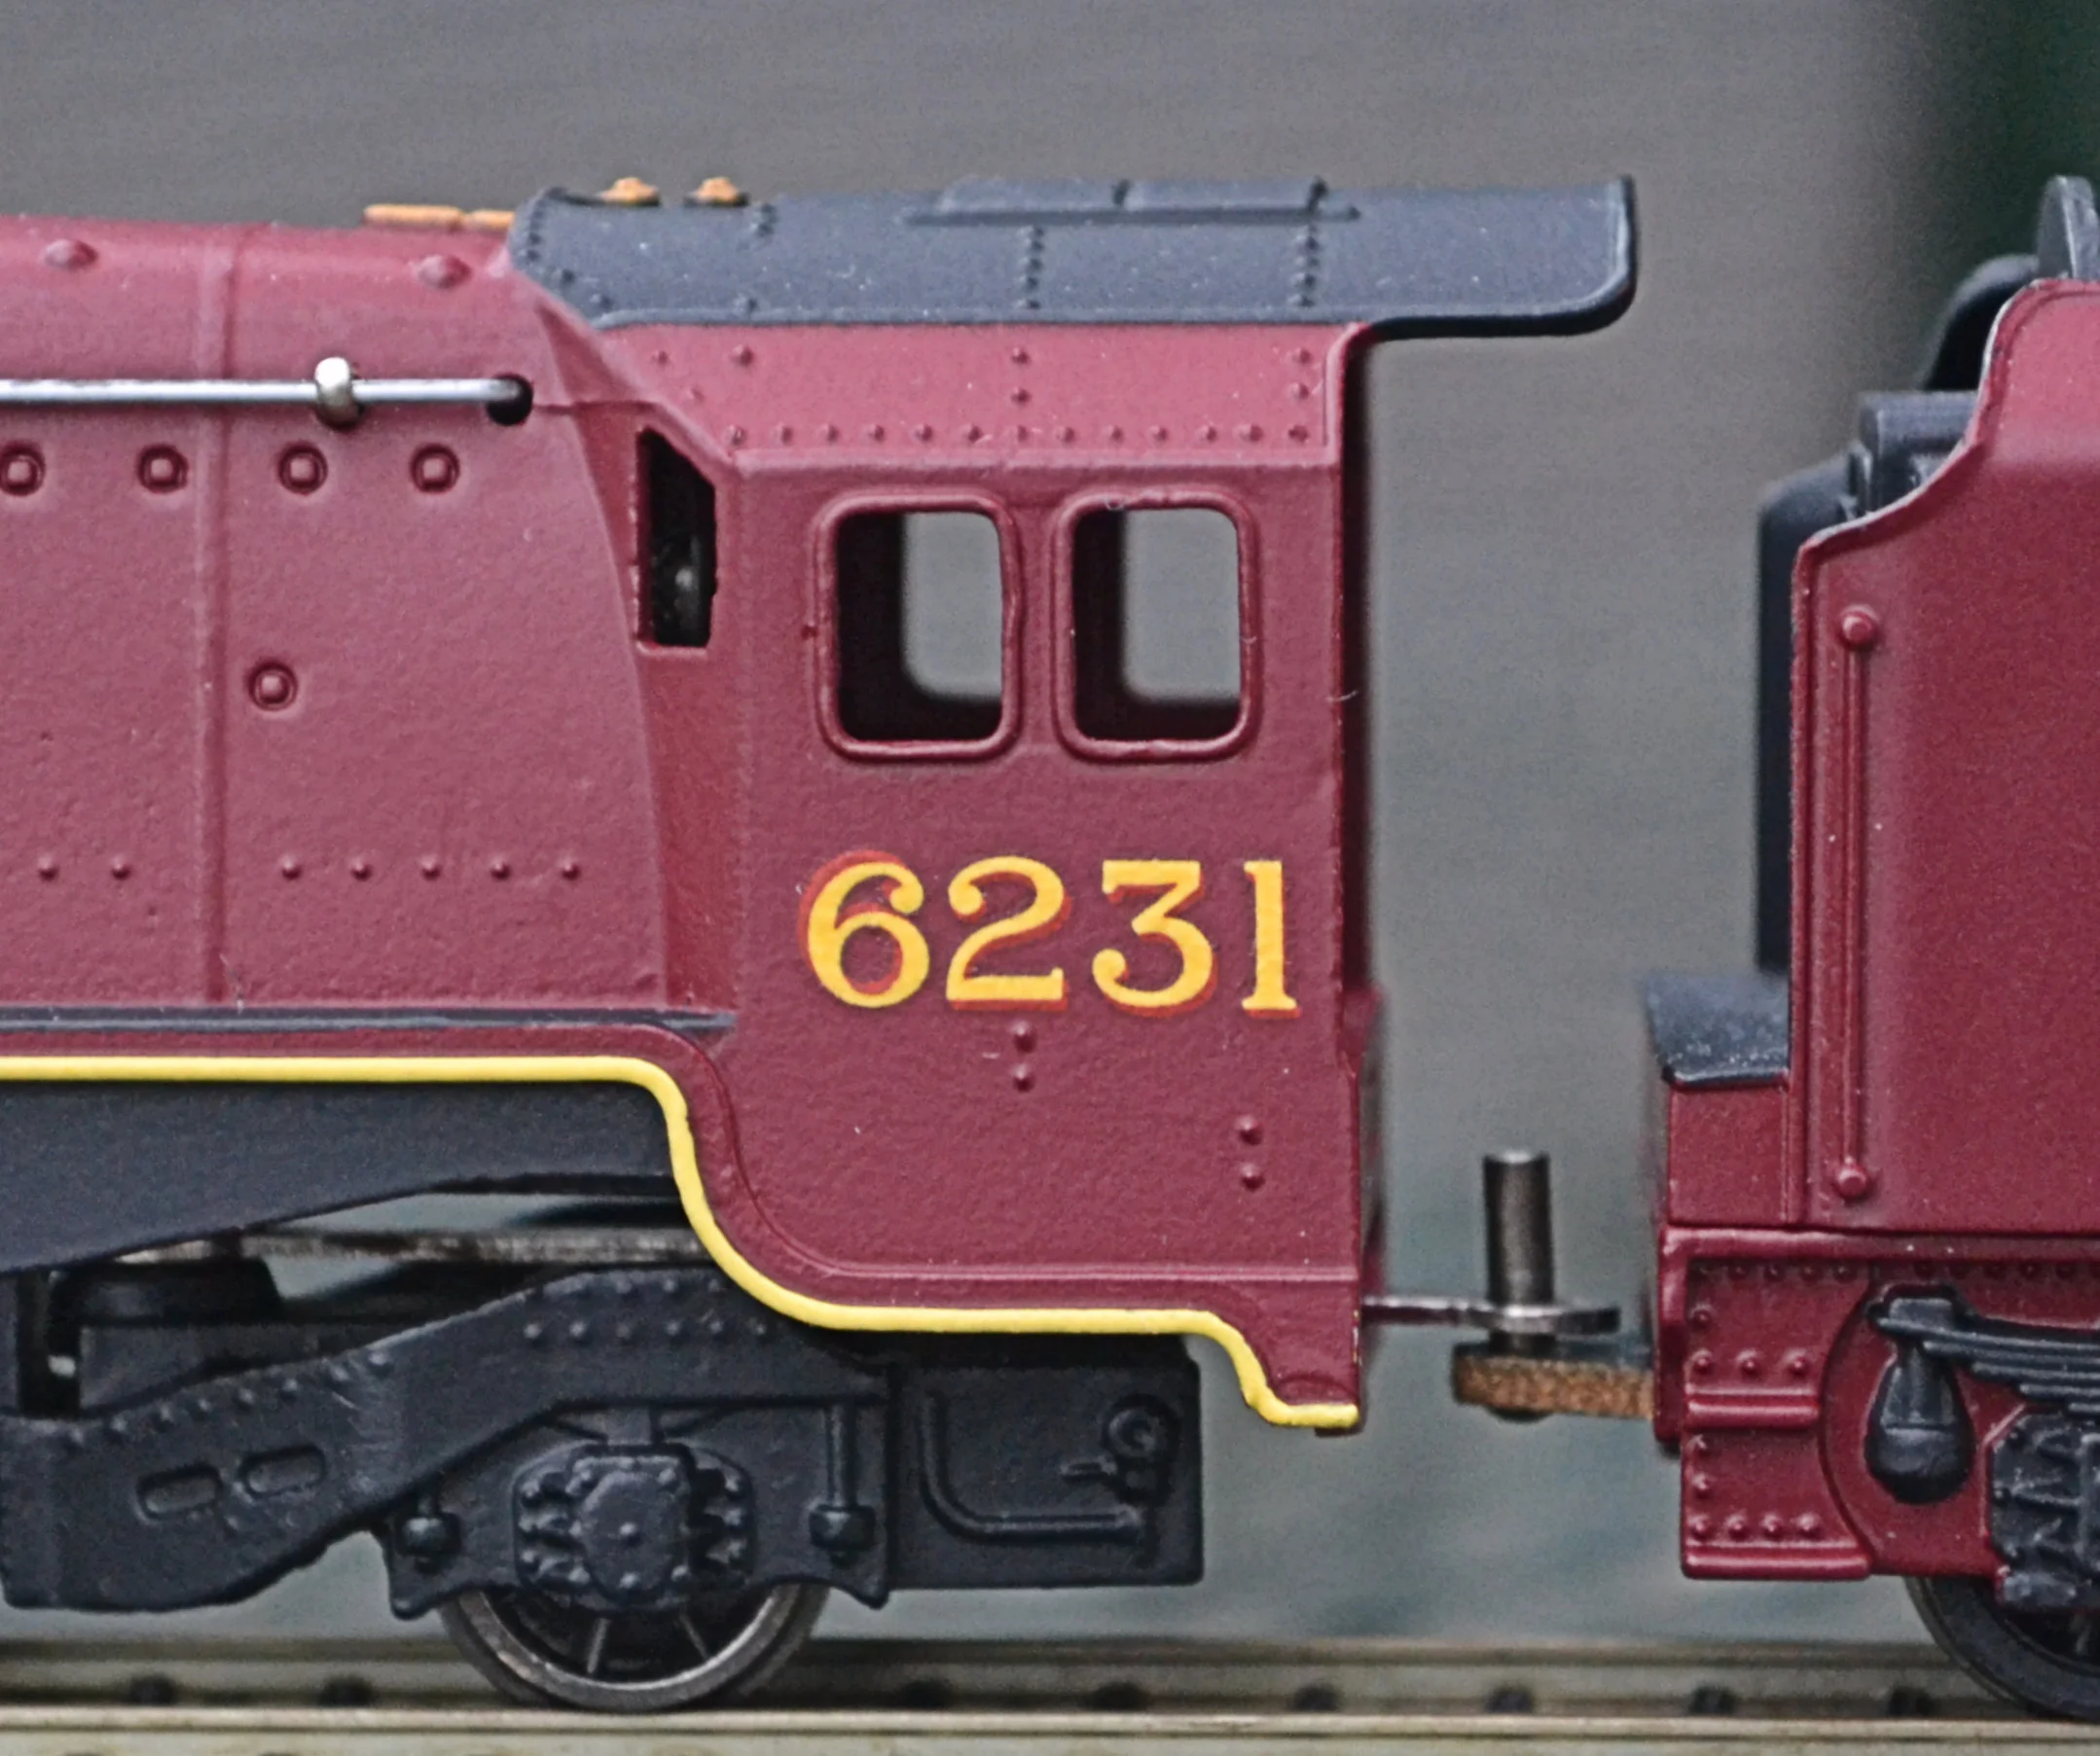
The loco body was primed and then given two coats of Damask Red. Once dry, it was masked off to allow the smoke box, the roof and the running plate to be sprayed black. The buffer beam was painted red and the replacement buffers [correct pattern and sprung] superglued in place. The original cosmetic coupling hook was reattached and the cabsides numbered appropriately.
The chassis was also masked up to allow the cylinder casings to be sprayed [after some moulding lines had been filed off]. The valve gear and slide bars were bent back into shape and correctly re-positioned. The bogie and training truck frames had already been sprayed black.
The loco was then lined out: the cylinder cover and boiler lining was applied by using Pressfix transfers: the horizontal lining running the length of the body was applied with a bow pen. When all of the lining had dried, the body was given two coats of Testor's matt varnish [as were the cylinder covers].
With the varnish cured, only the name and number plates, and the original hand rails, required attaching to complete the body which could, at last, be reunited with its chassis and tender. Job done.
Before, after and detail photos;


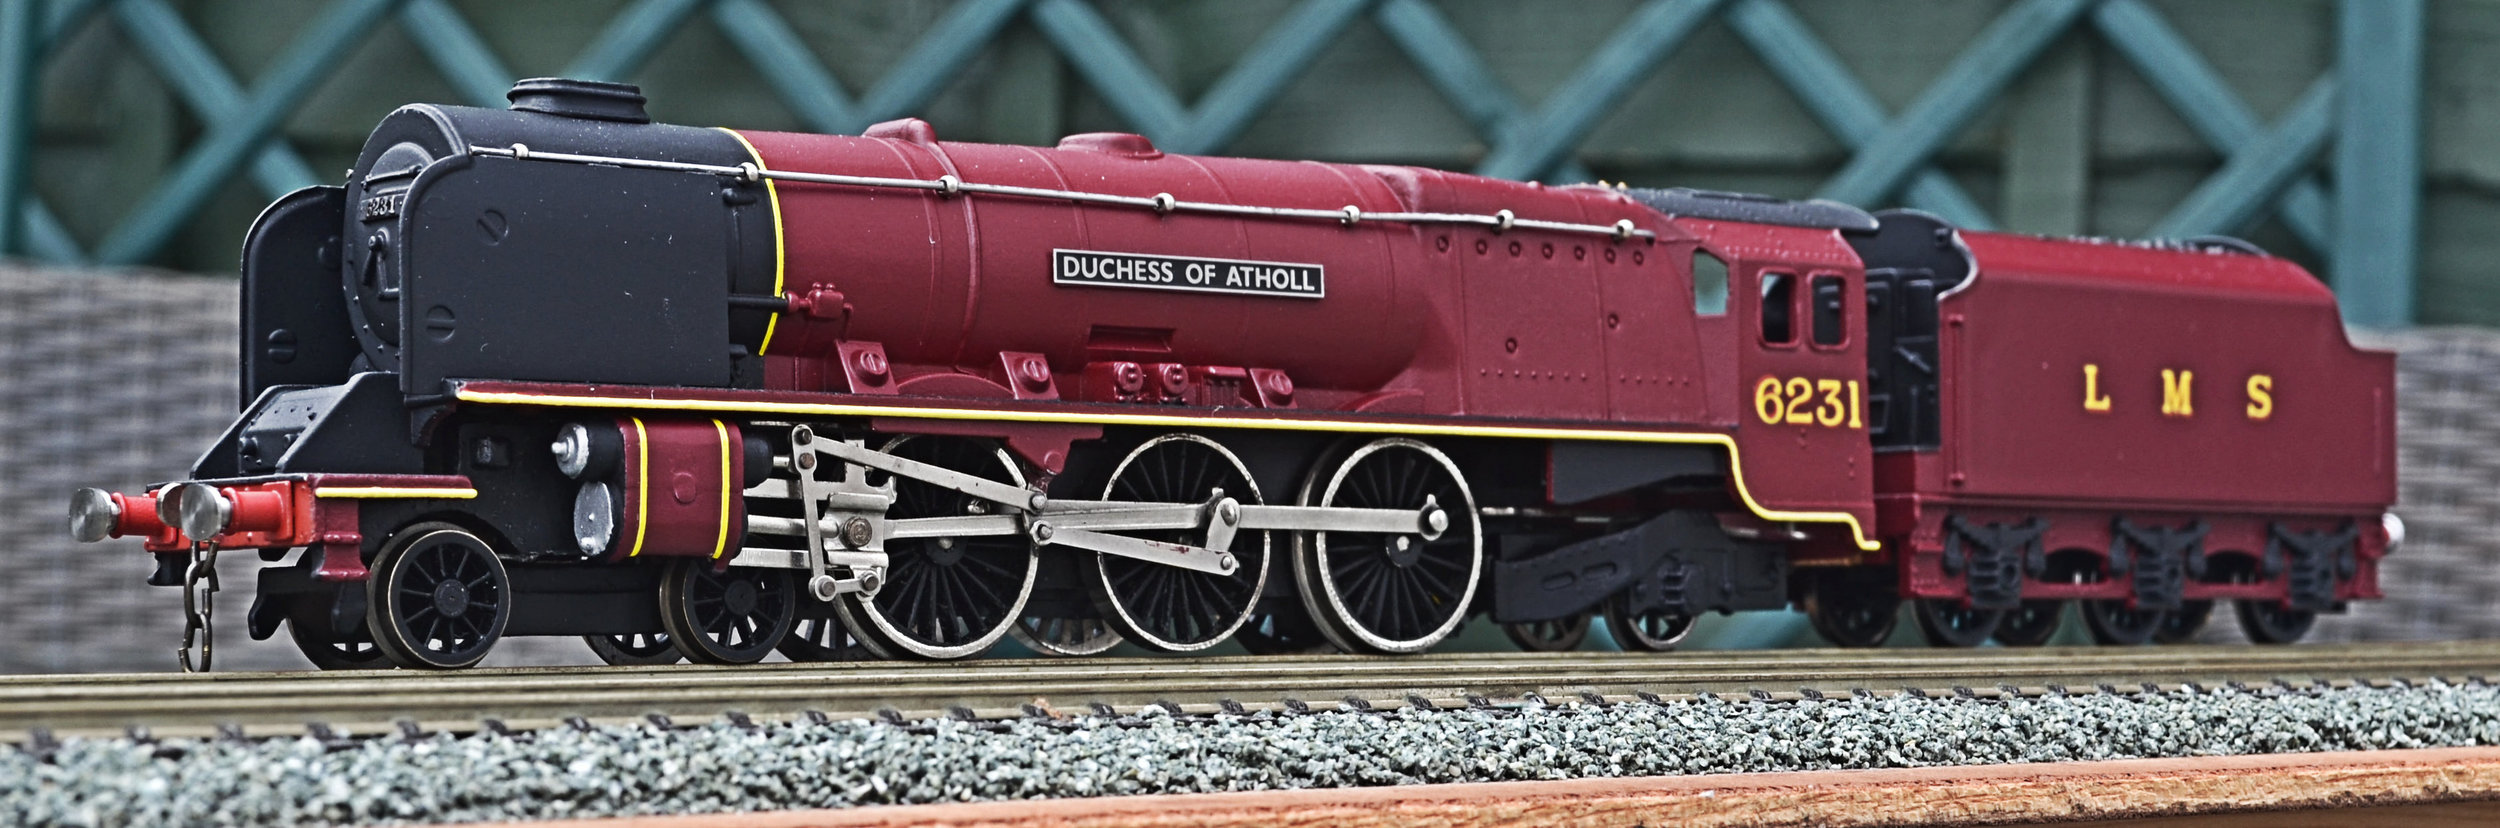

All things considered, a pleasing result and it did indeed come in under £30. 'Atholl' did not carry smoke deflectors in this livery however, only acquiring them after she had been painted in all-over black during the 1940s. Further, the stepped plates under the smoke-box are inaccurate, 'Atholl' having a more-graceful GWR-type curve there. Neither of these compromises worry me however, and even if this 'Atholl' would displease many purists, it gives a battered and non-operational Dublo City a new lease of life: hopefully she'll live on to run for another 60 years!
Footnotes:
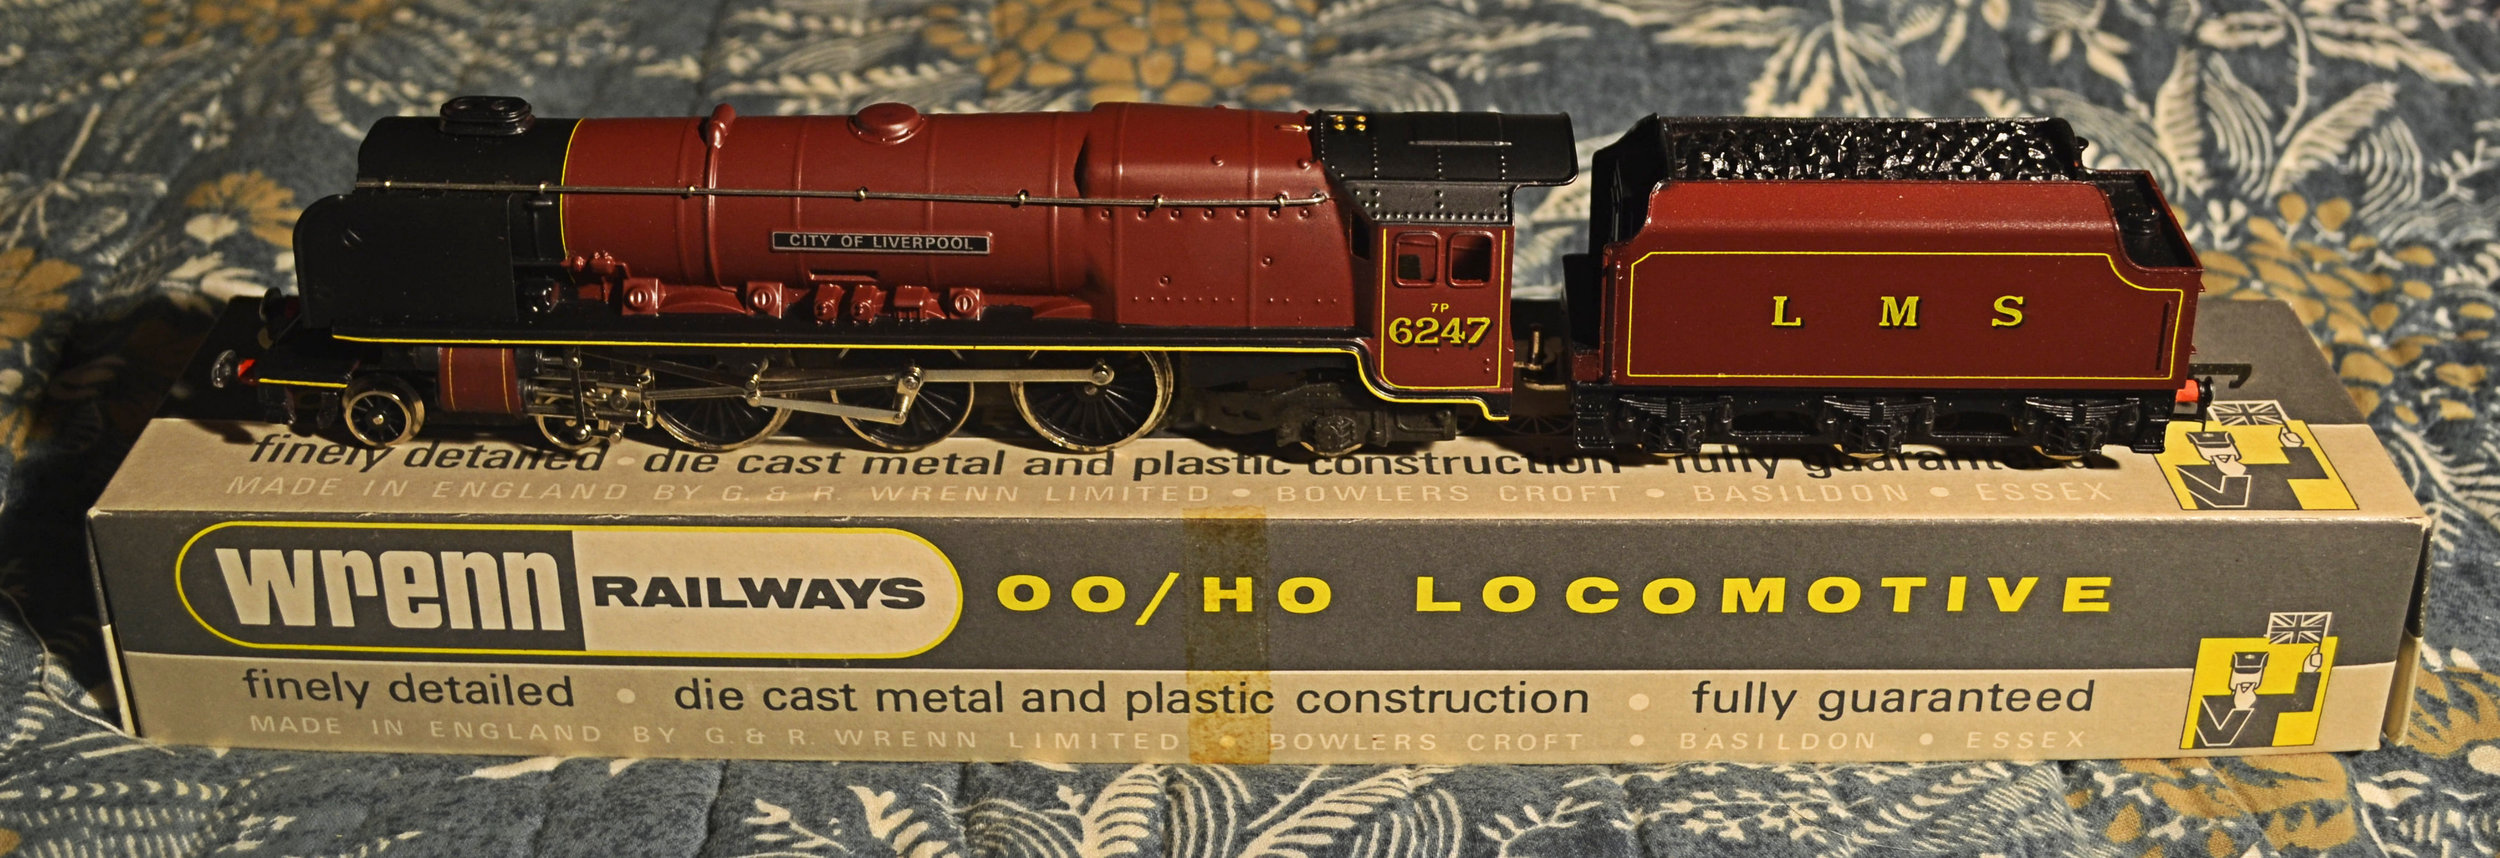
Purely for comparison is this later incarnation of an original Hornby Dublo City, the Wrenn 'City of Liverpool', now working again after a siezed centre driver and a jammed motor laid her up. It is pretty much original although, unfortunately, the buffer beams have been badly repainted at some time [they will be tidied up in due course]
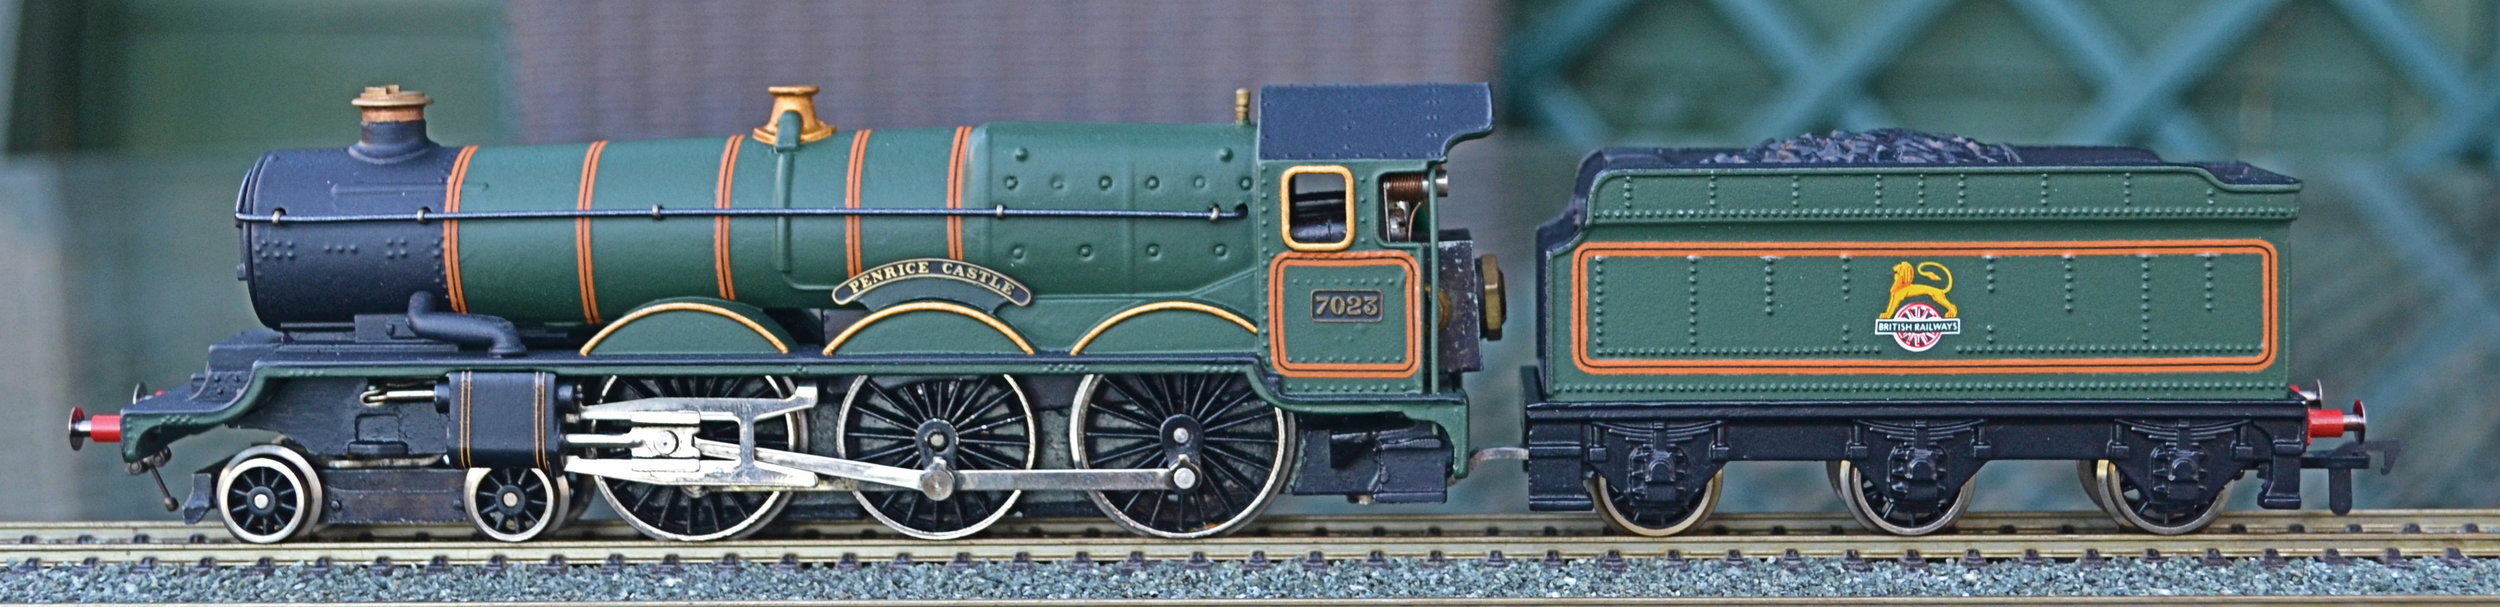
Next, a restored and renamed Wrenn 'Devizes Castle'. Now appearing as 'Penrice Castle', modellers will know that like most Wrenn stock, the model is an ex-Hornby Dublo issue , taken over by GR Wrenn and continuing in production for some years after HD had ceased to exist. The transfers used for the lining are [reputedly, anyway] 'new' old Wrenn stock, hopelessly overscale but essential for authenticity.
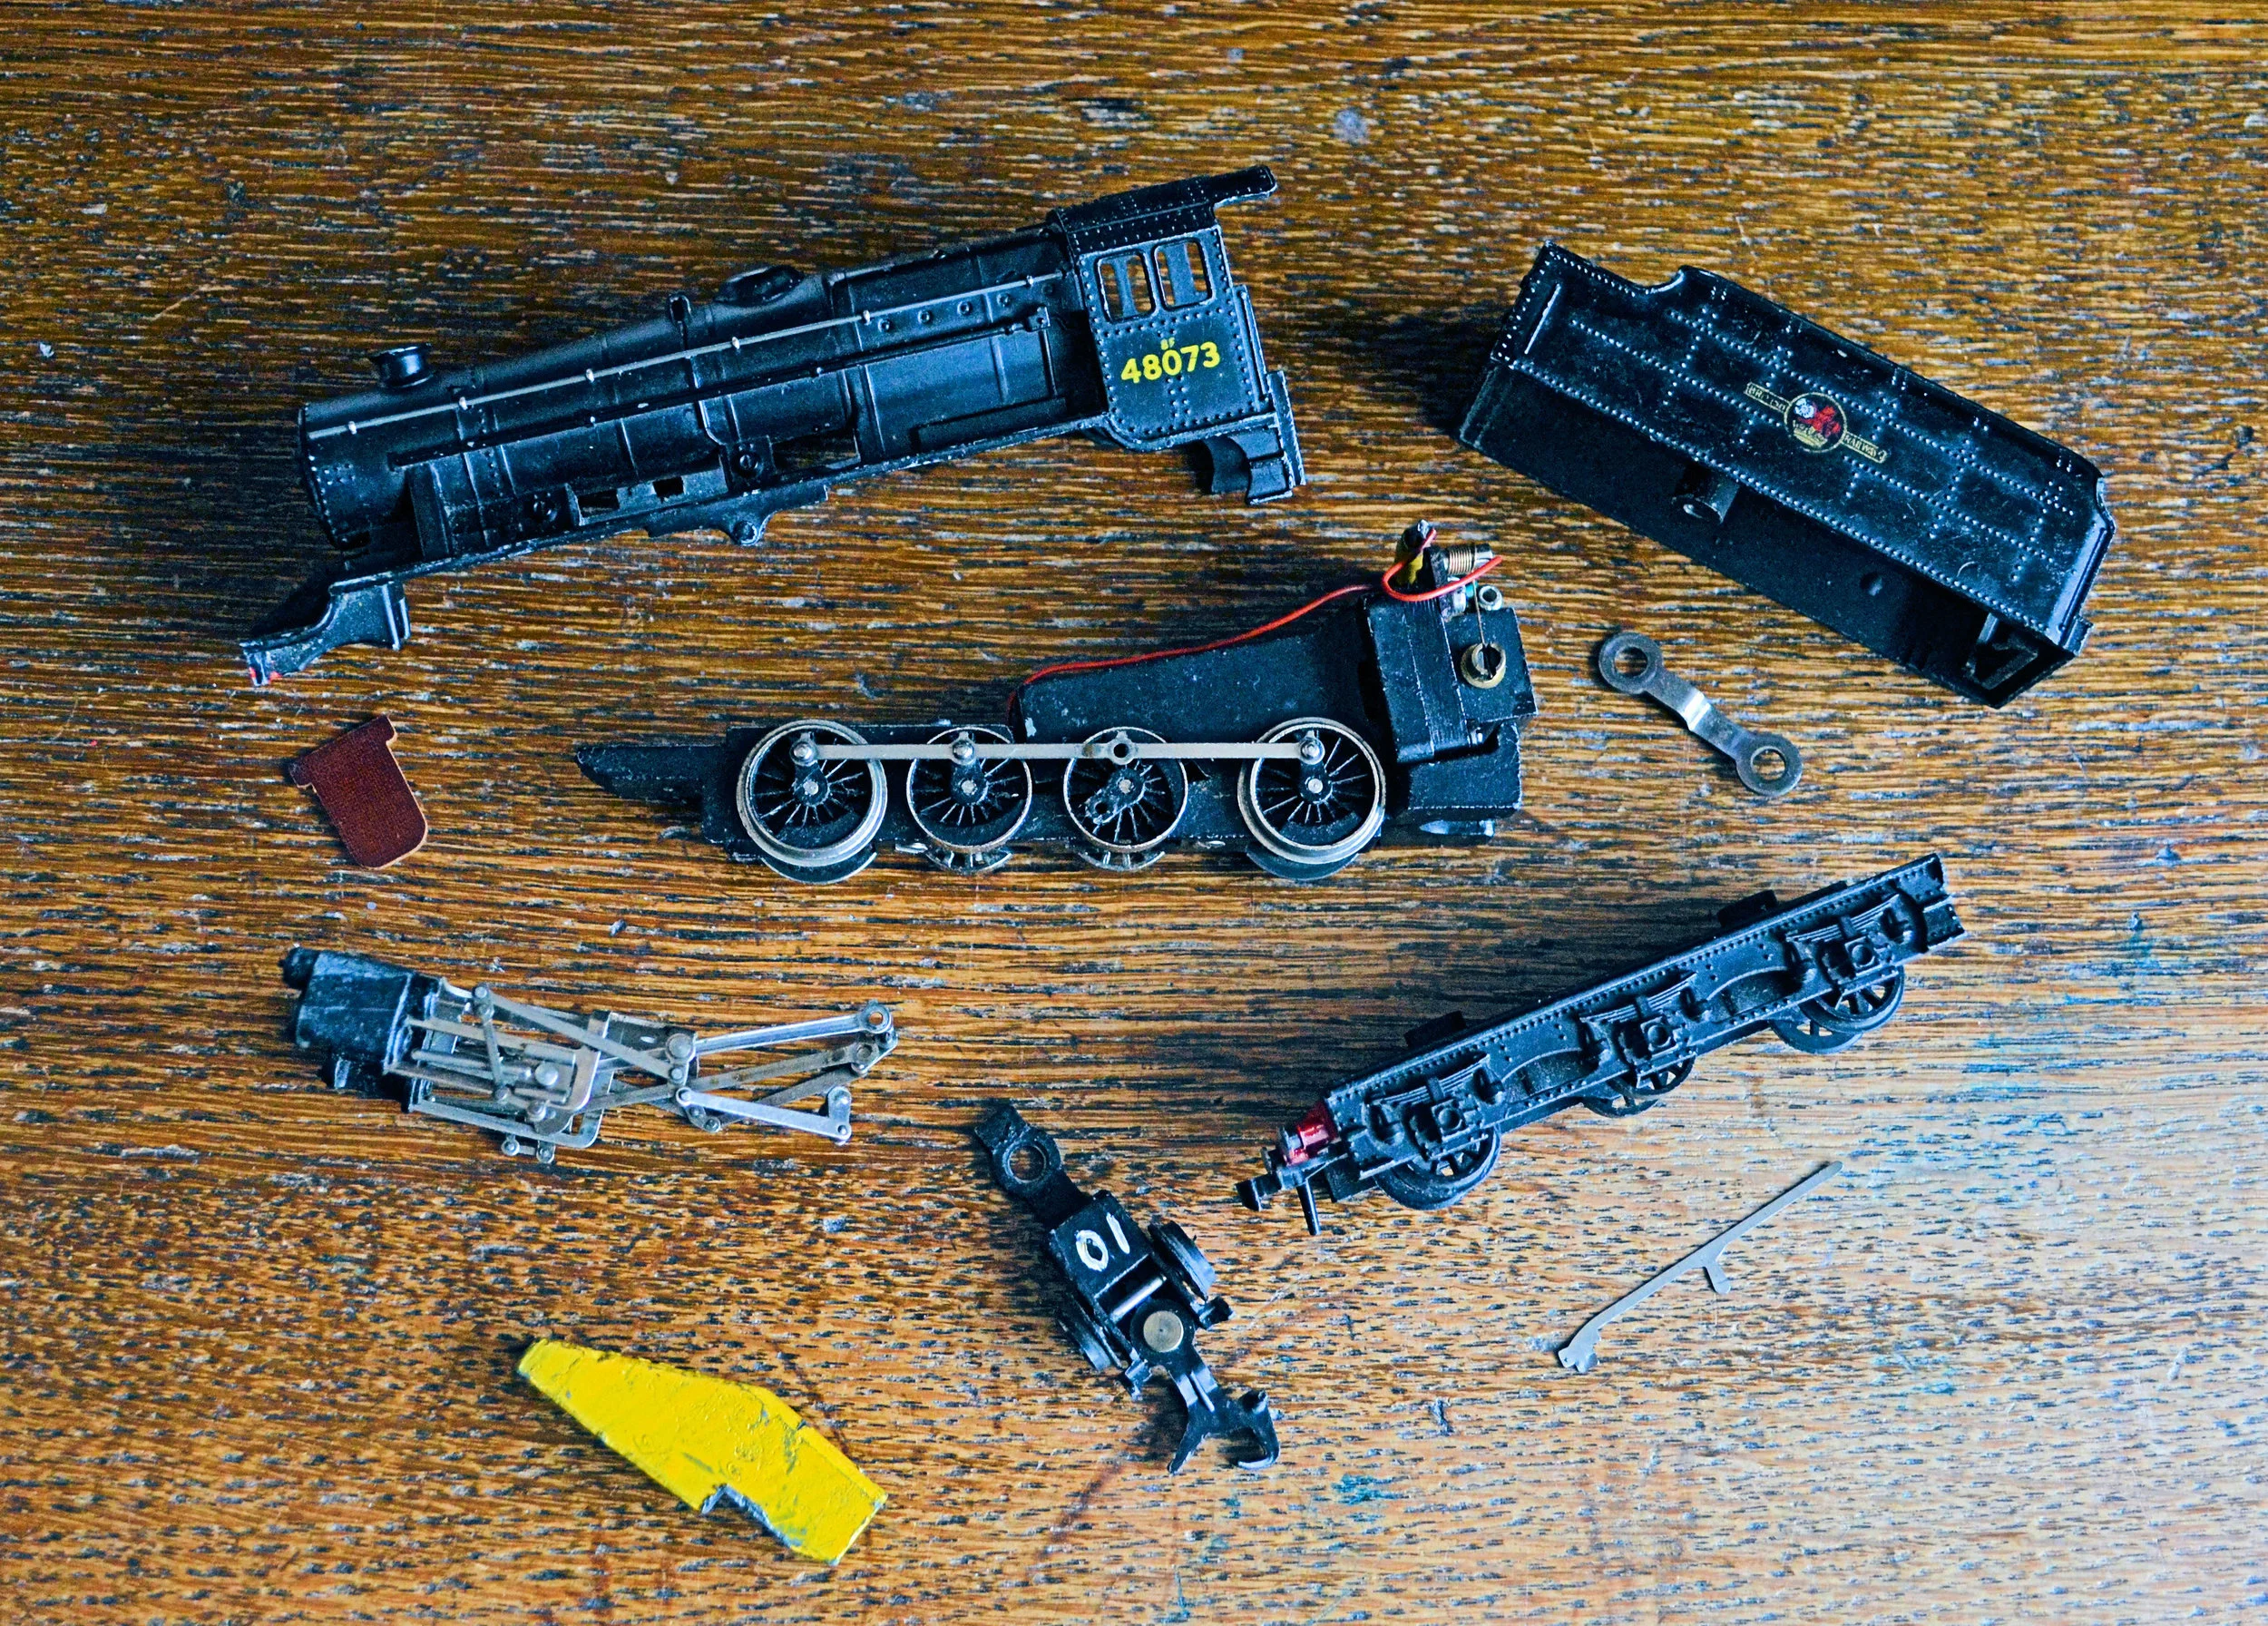
The latest restoration is an early Hornby Dublo 2-rail 2-8-0 8F loco. Bought as a tatty BR 48073 example, it has been completely dismantled and restored and runs as LMS 8414, one of the war-time Swindon-built examples. The only replacement parts fitted are the bogie and tender wheels [metal instead of plastic] and sprung buffers to replace the original battered examples. The first photo shows the original model partially dismantled, the rest are as restored.

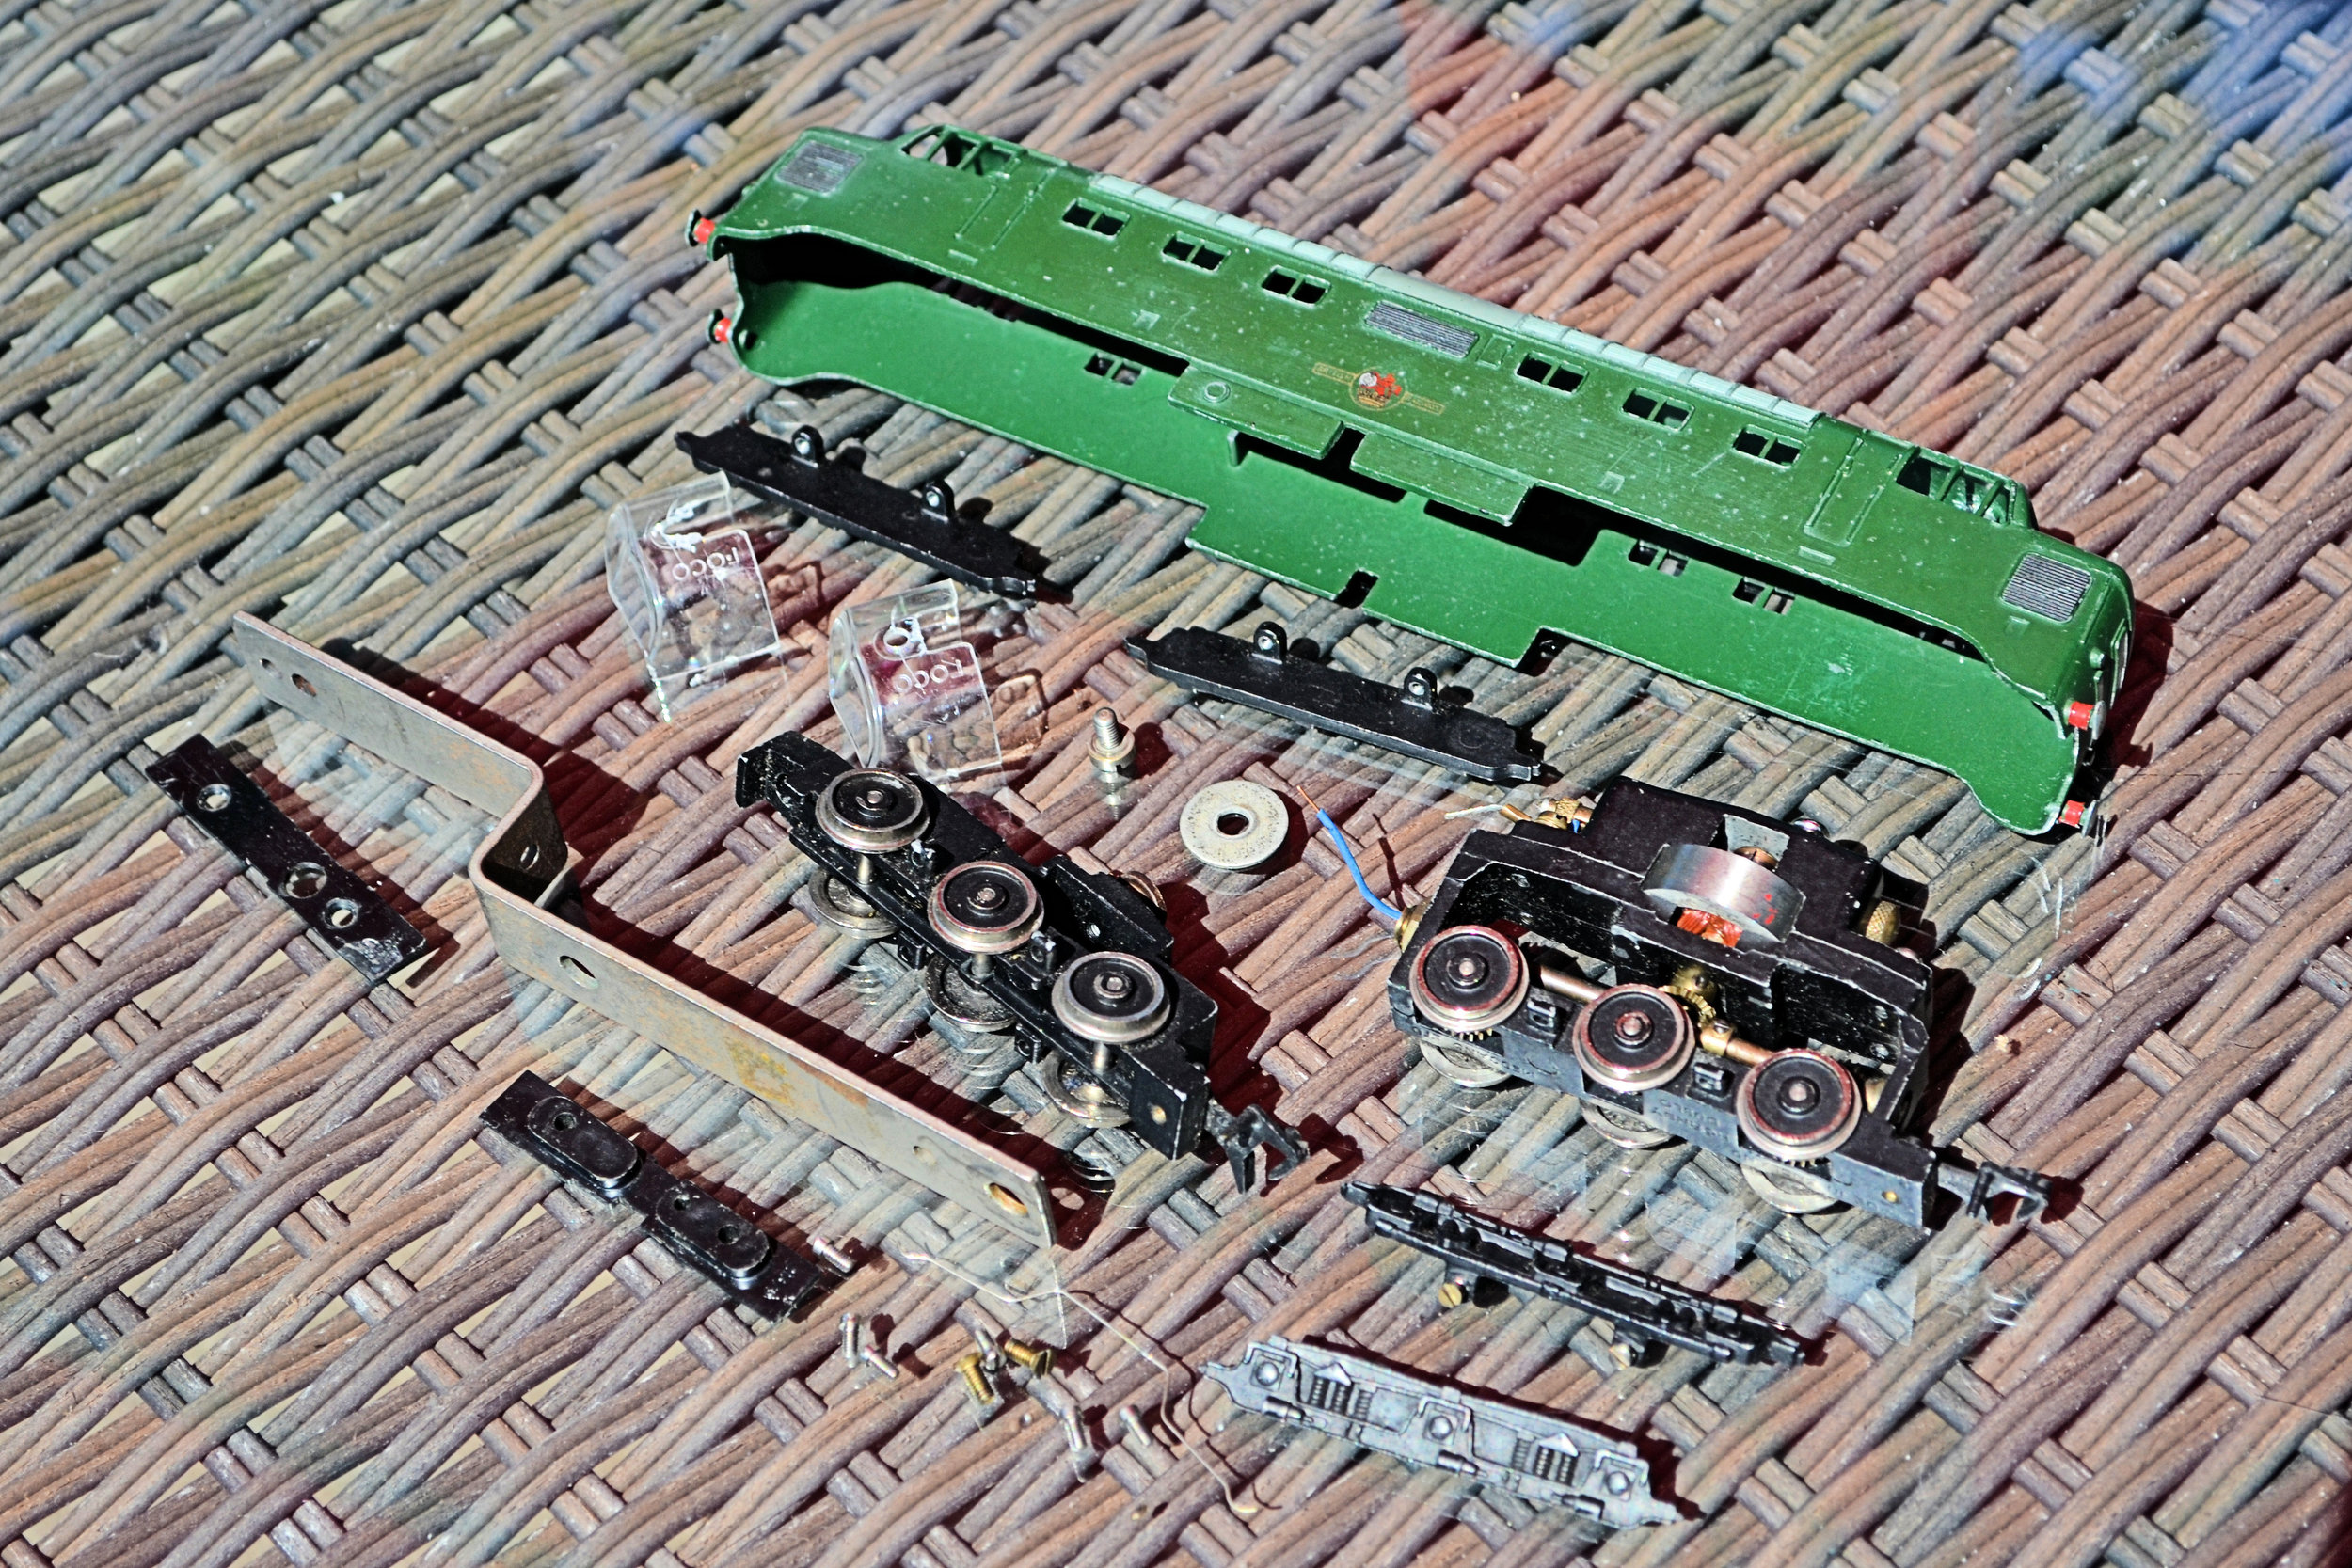
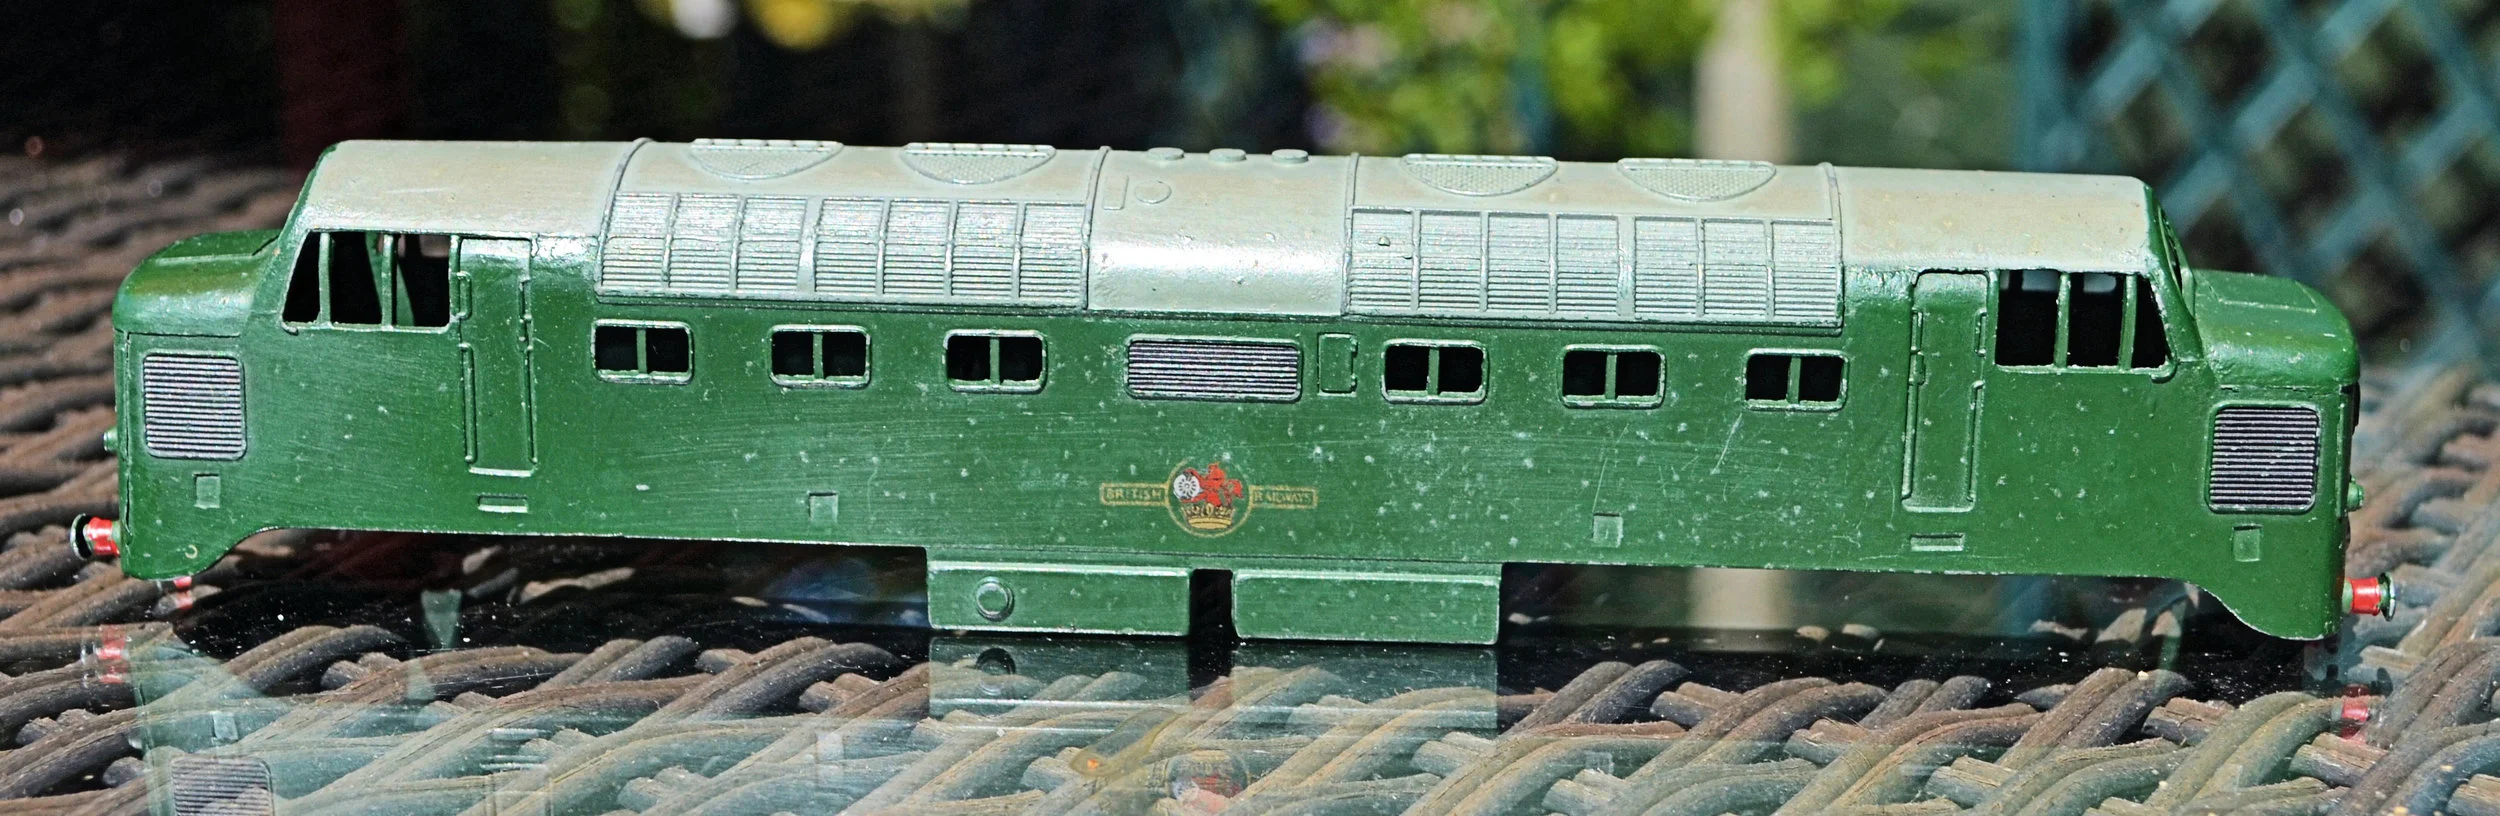
And next, a Hornby Dublo co-co diesel, obviously a 'Deltic', but a scale 10ft. too short and lacking the slight tumblehome that the original had along the bottom of the sides. This 2-rail example dates from the early '60s and was acquired as a non-runner. Closer examination showed a small screw jammed in the motor housing, preventing the armature from turning. With that remove, the motor ran well. The model was also missing one of its cast bogie side-frames [a replacement was sourced via eBay]. The first photo below shows the dismantled model [the wiring has been removed].
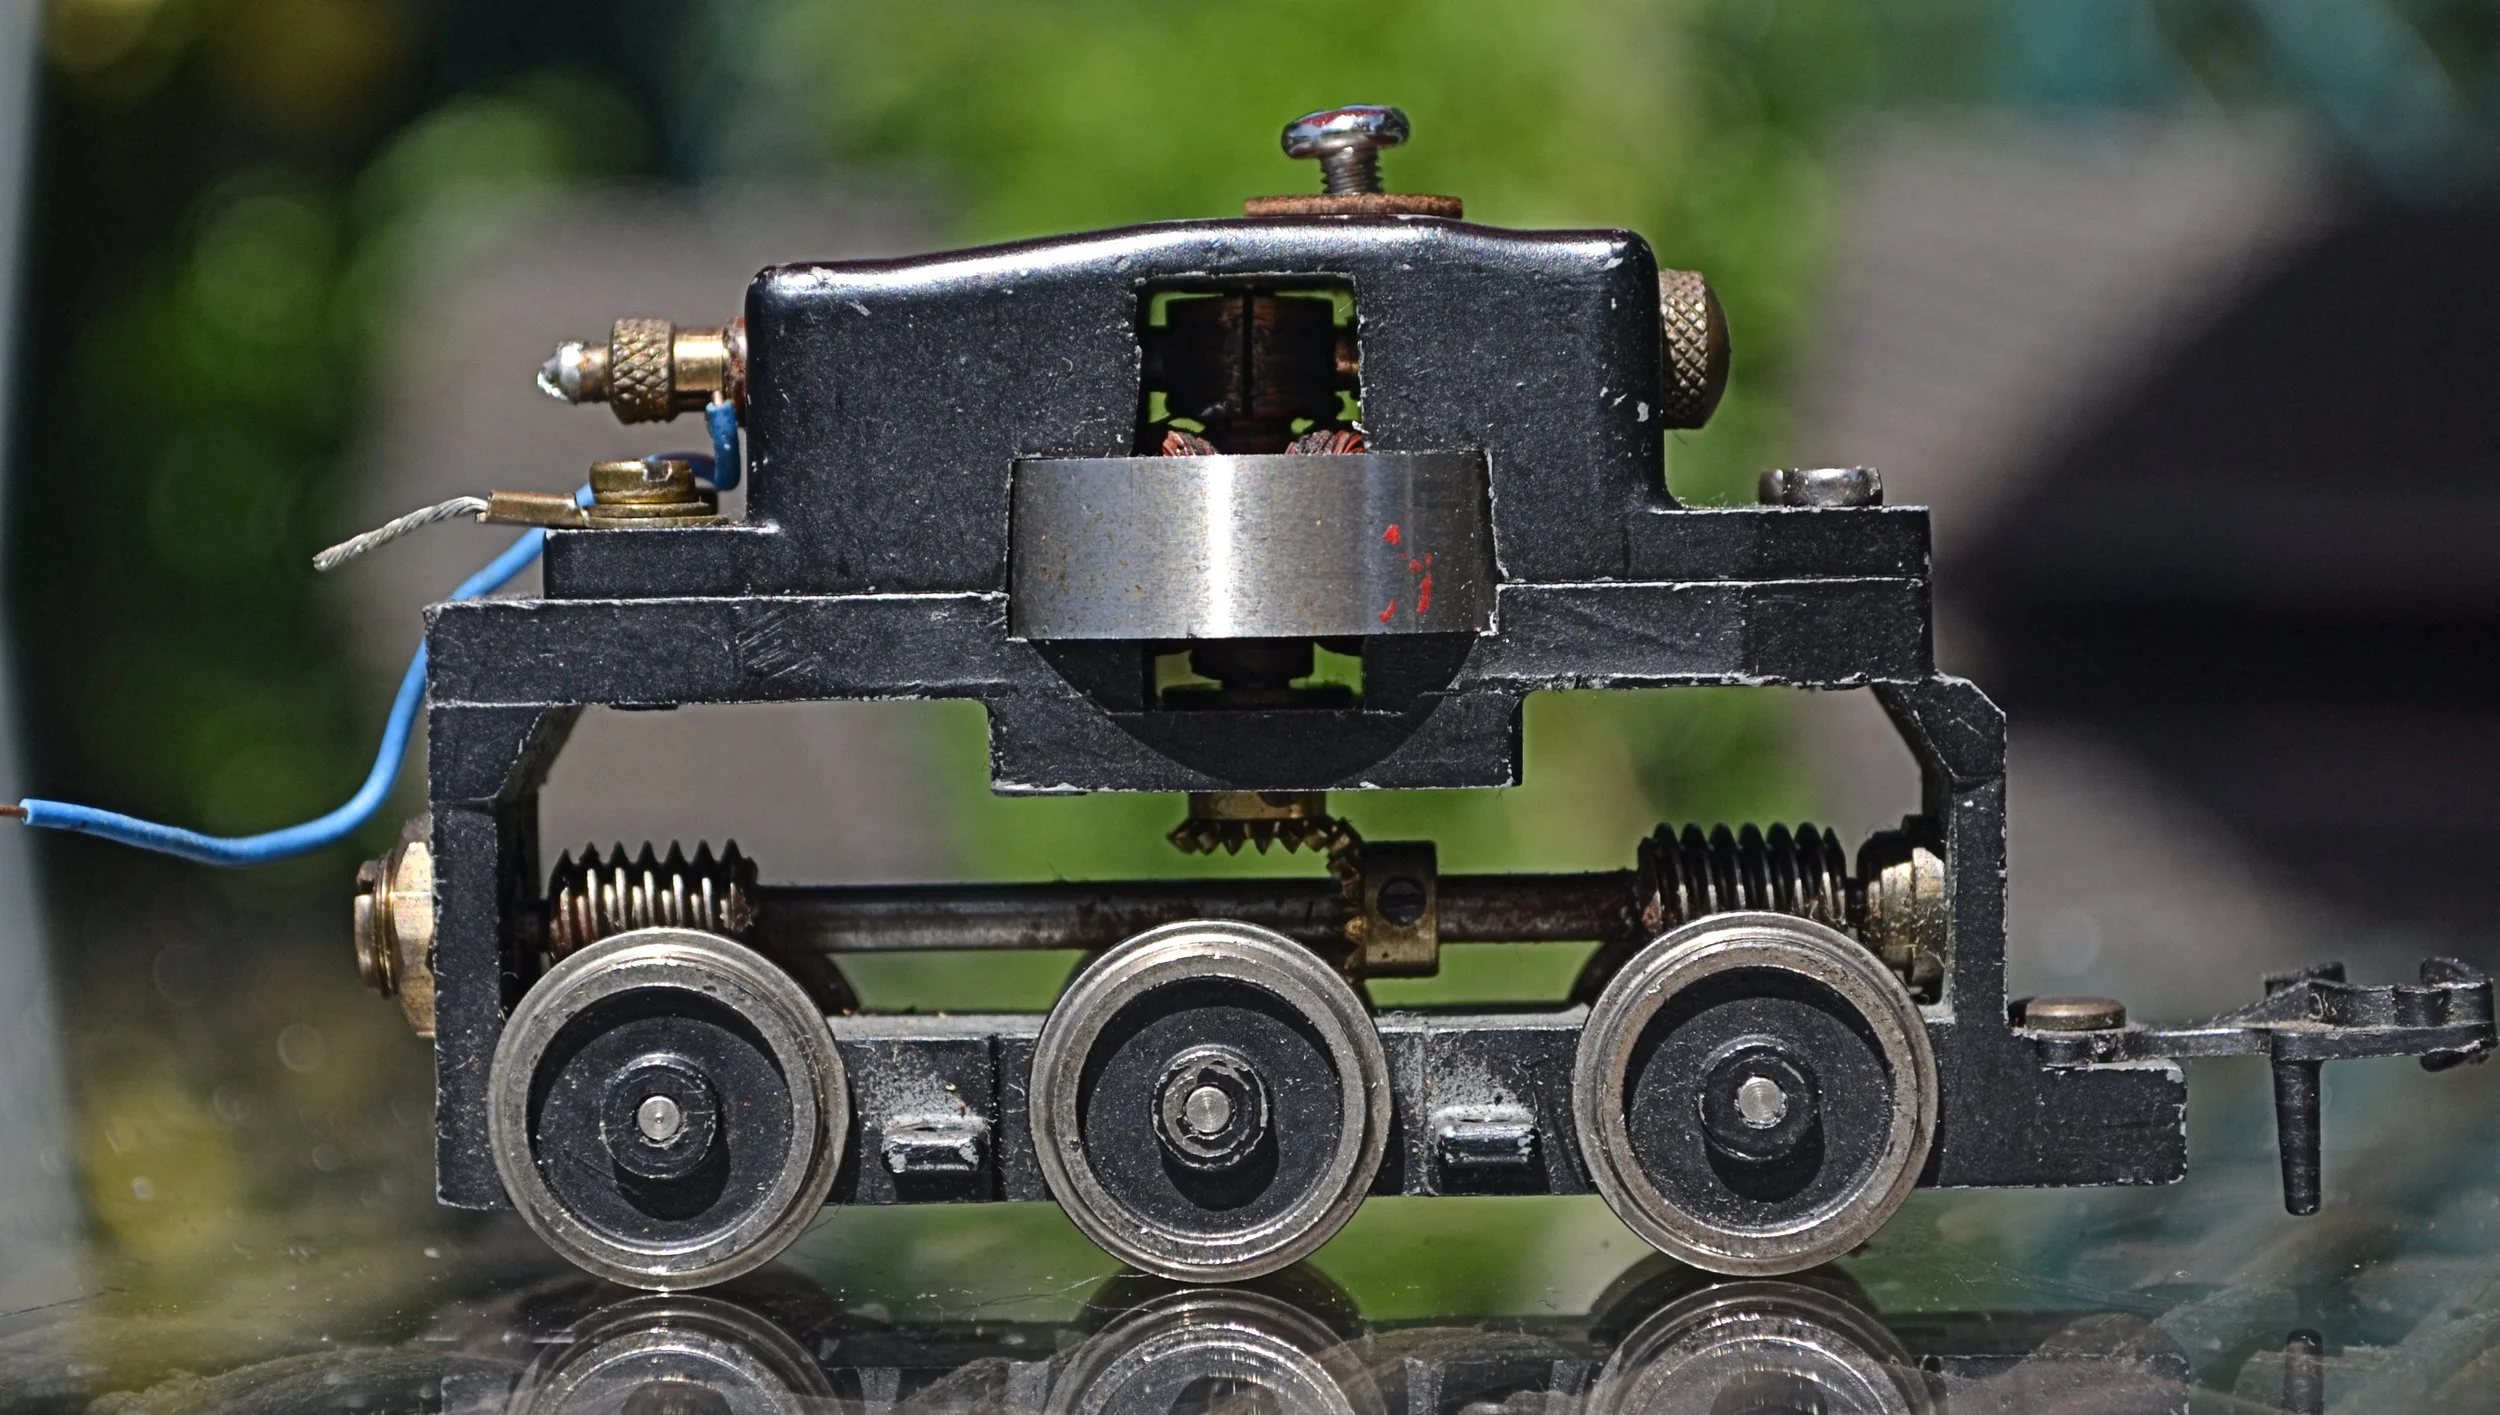
The body was too play-worn to keep in its original state and a decision was taken to give it a full repaint. A Hornby Dublo coupling will be left at one end and a Bachmann coupling fitted at the other. The second photo shows the hefty motor bogie with its vertical armature, driving the outer axles via a lay shaft which is turned by mitre gears. There is a little slack in the drive and this will be taken up by either carefully tightening the adjustable bearing or adjusting the mitre gear attached to the lay shaft [both gears have adjustment screws].
The next four photos show the body in its various stages of restoration: as acquired, stripped and cleaned, primed, and painted but awaiting detailing and varnish.

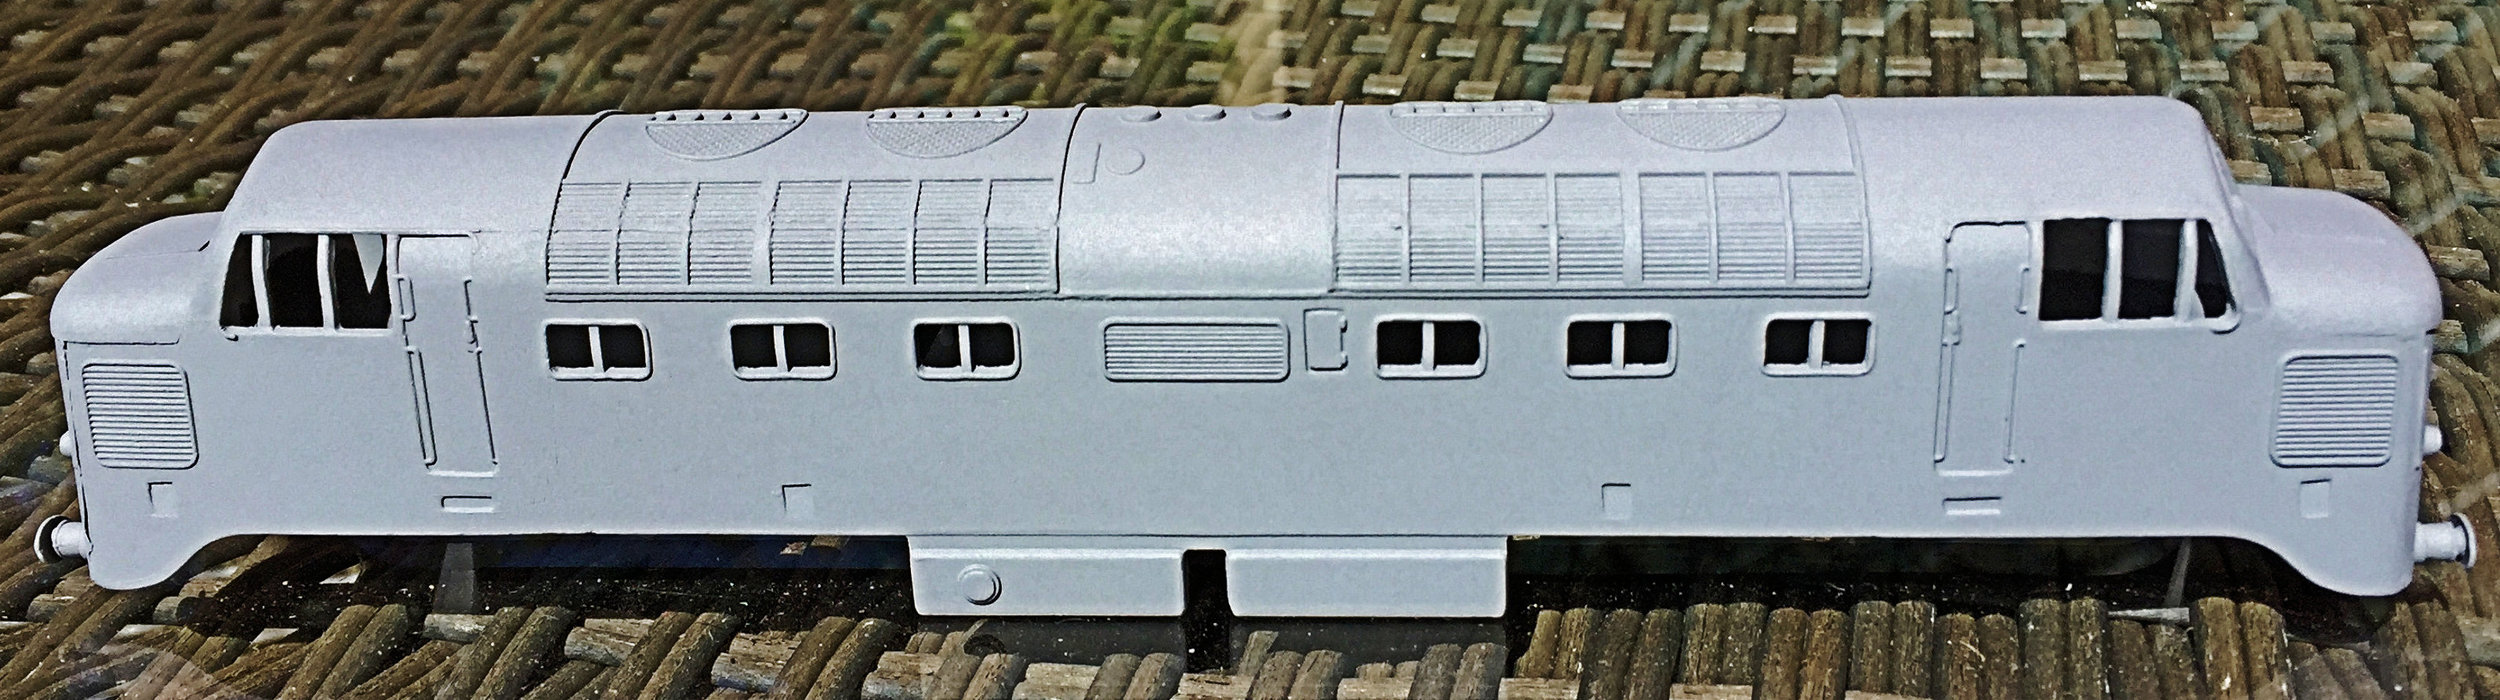
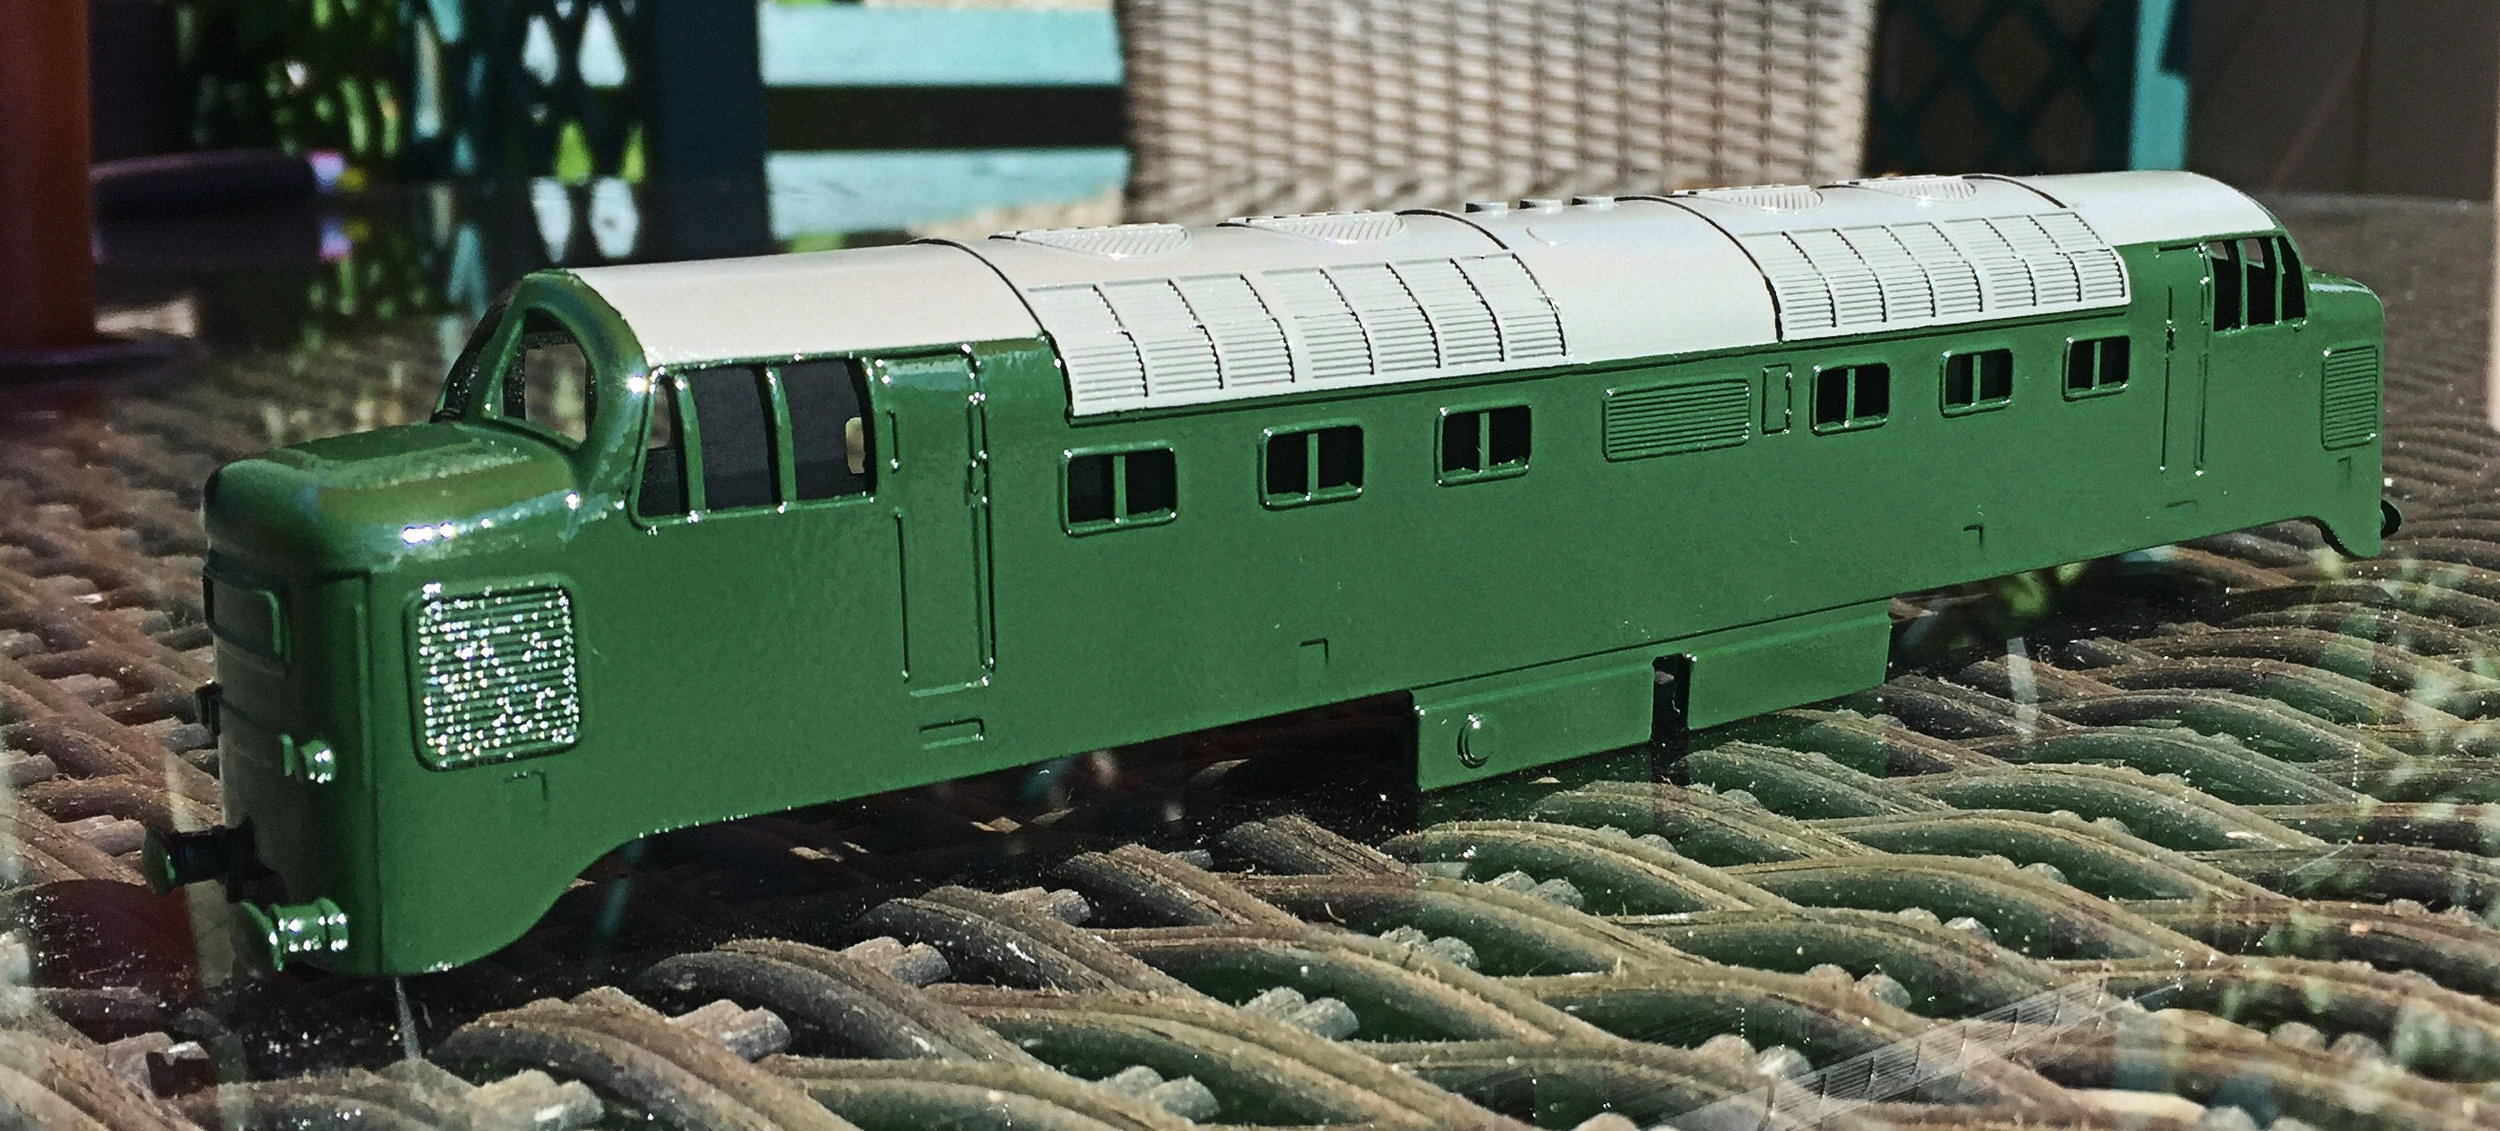
The paint used on the body was British Leyland Coniston Green [an acrylic] and Halfords' Industrial Gray [an enamel]; both in aerosol.