- A Cambrian Bogie Composite -
Yet more Triang Clerestory coach surgery
Although the Cambrian was the largest of the Welsh railway companies to become a constituent part of the newly re-formed Great Western Railway at the Grouping, much of the passenger stock that it brought to the party was obsolete and worn-out and quickly consigned to the cutter’s torch for wholesale demolition. Of the 350 coaches it possessed for example, around 200 were 6-wheelers, with only around 50 remaining within 3 years. However, the Cambrian possessed bogie passenger stock too, and much of this lasted far longer in service [some as late as early British Rail days].
The original coach for this build was constructed in 1898 and soldiered on, running across the ex-Cambrian lines in mid and north Wales, until March 1948. Based on a Triang Clerestory donor body, no part of the original remains unchanged and a lot of the detail has been scratch-built. Once again, the inspiration for this project came from an RMWeb blog from early 2016 [written by Rosie’s Boss, an Australian modeller], although this build varies considerably from the original. Photographs of the prototype coach are scarce and only one has been found [CC Green - ‘Cambrian Railways Album - 2 (p29), Ian Allan, 1981]. That does confirm the strong similarity between the prototype and the Triang donor coach, but the underframe area is not at all clear in the photo and so, in model form, has to be a matter of some conjecture.
So, with a little imagination and some inevitable compromise, here is No 6282, a 1st / 3rd non-corridor Cambrian Composite…..
The immediately recognisable starting point:

I began the build at the top, starting with the roof. This coach required a low, non-clerestory roof, a strong visual feature of the original. Not being able to find a commercial roof of the correct profile [and having wasted an entire evening trying to cajole, pointlessly, a vacuum-formed roof into some sort of shape], I decided to try to convert an original Triang clerestory roof into the right thing. At the outset, I had no idea as to whether this would work: it was an experiment. The outcome was good however, and the series of photos below show the conversion in stages:
Top left - Starting point Top right - Squares of 2mm plastic card used to brace the roof before surgery
Middle left - Clerestory portion removed with razor saw and packed out with 2mm plastic card.
Middle right - .010 plastic sheet laid to slightly overlap the cut out and endlessly scraped, sanded back and primed to remove the join.
Bottom left - Roof primed and gas lamp tops fitted, Some remedial work remains to be done.
Bottom right - Finished roof, with ventilators added also. This now awaits black paint.


The gas lamp tops are scavenged and cut-down Ratio LNWR ones and the ventilators are slightly cut-down from the same source [an old roof saved in the bits box]. This has been a satisfying job, not something which I'd care to repeat too often, but one which provides an achievable solution to the problem of finding a neatly fitting roof which will hold its own shape. It has just the right profile for the Cambrian Composite.

The next task involved making up the running gear. The donor body had no bogies attached, but even if it had, they would have been incorrect as the Triang model was fitted with BR Mk1coach bogies. After the GWR D15 coach build [see elsewhere on this site], I became sold on compensated bogies and bought this brass fret against which white metal cosmetic frames will be attached once complete. Before cutting the components out, I started by opening out all of the larger holes to 1/32".
The compensation unit is made by MJT and is designed to accept their 9ft. American-style side frames, a typical GWR fitting. Once attached, they should result in an extremely stable and free-running coach.
The following photos show the ease with which these units can be constructed:

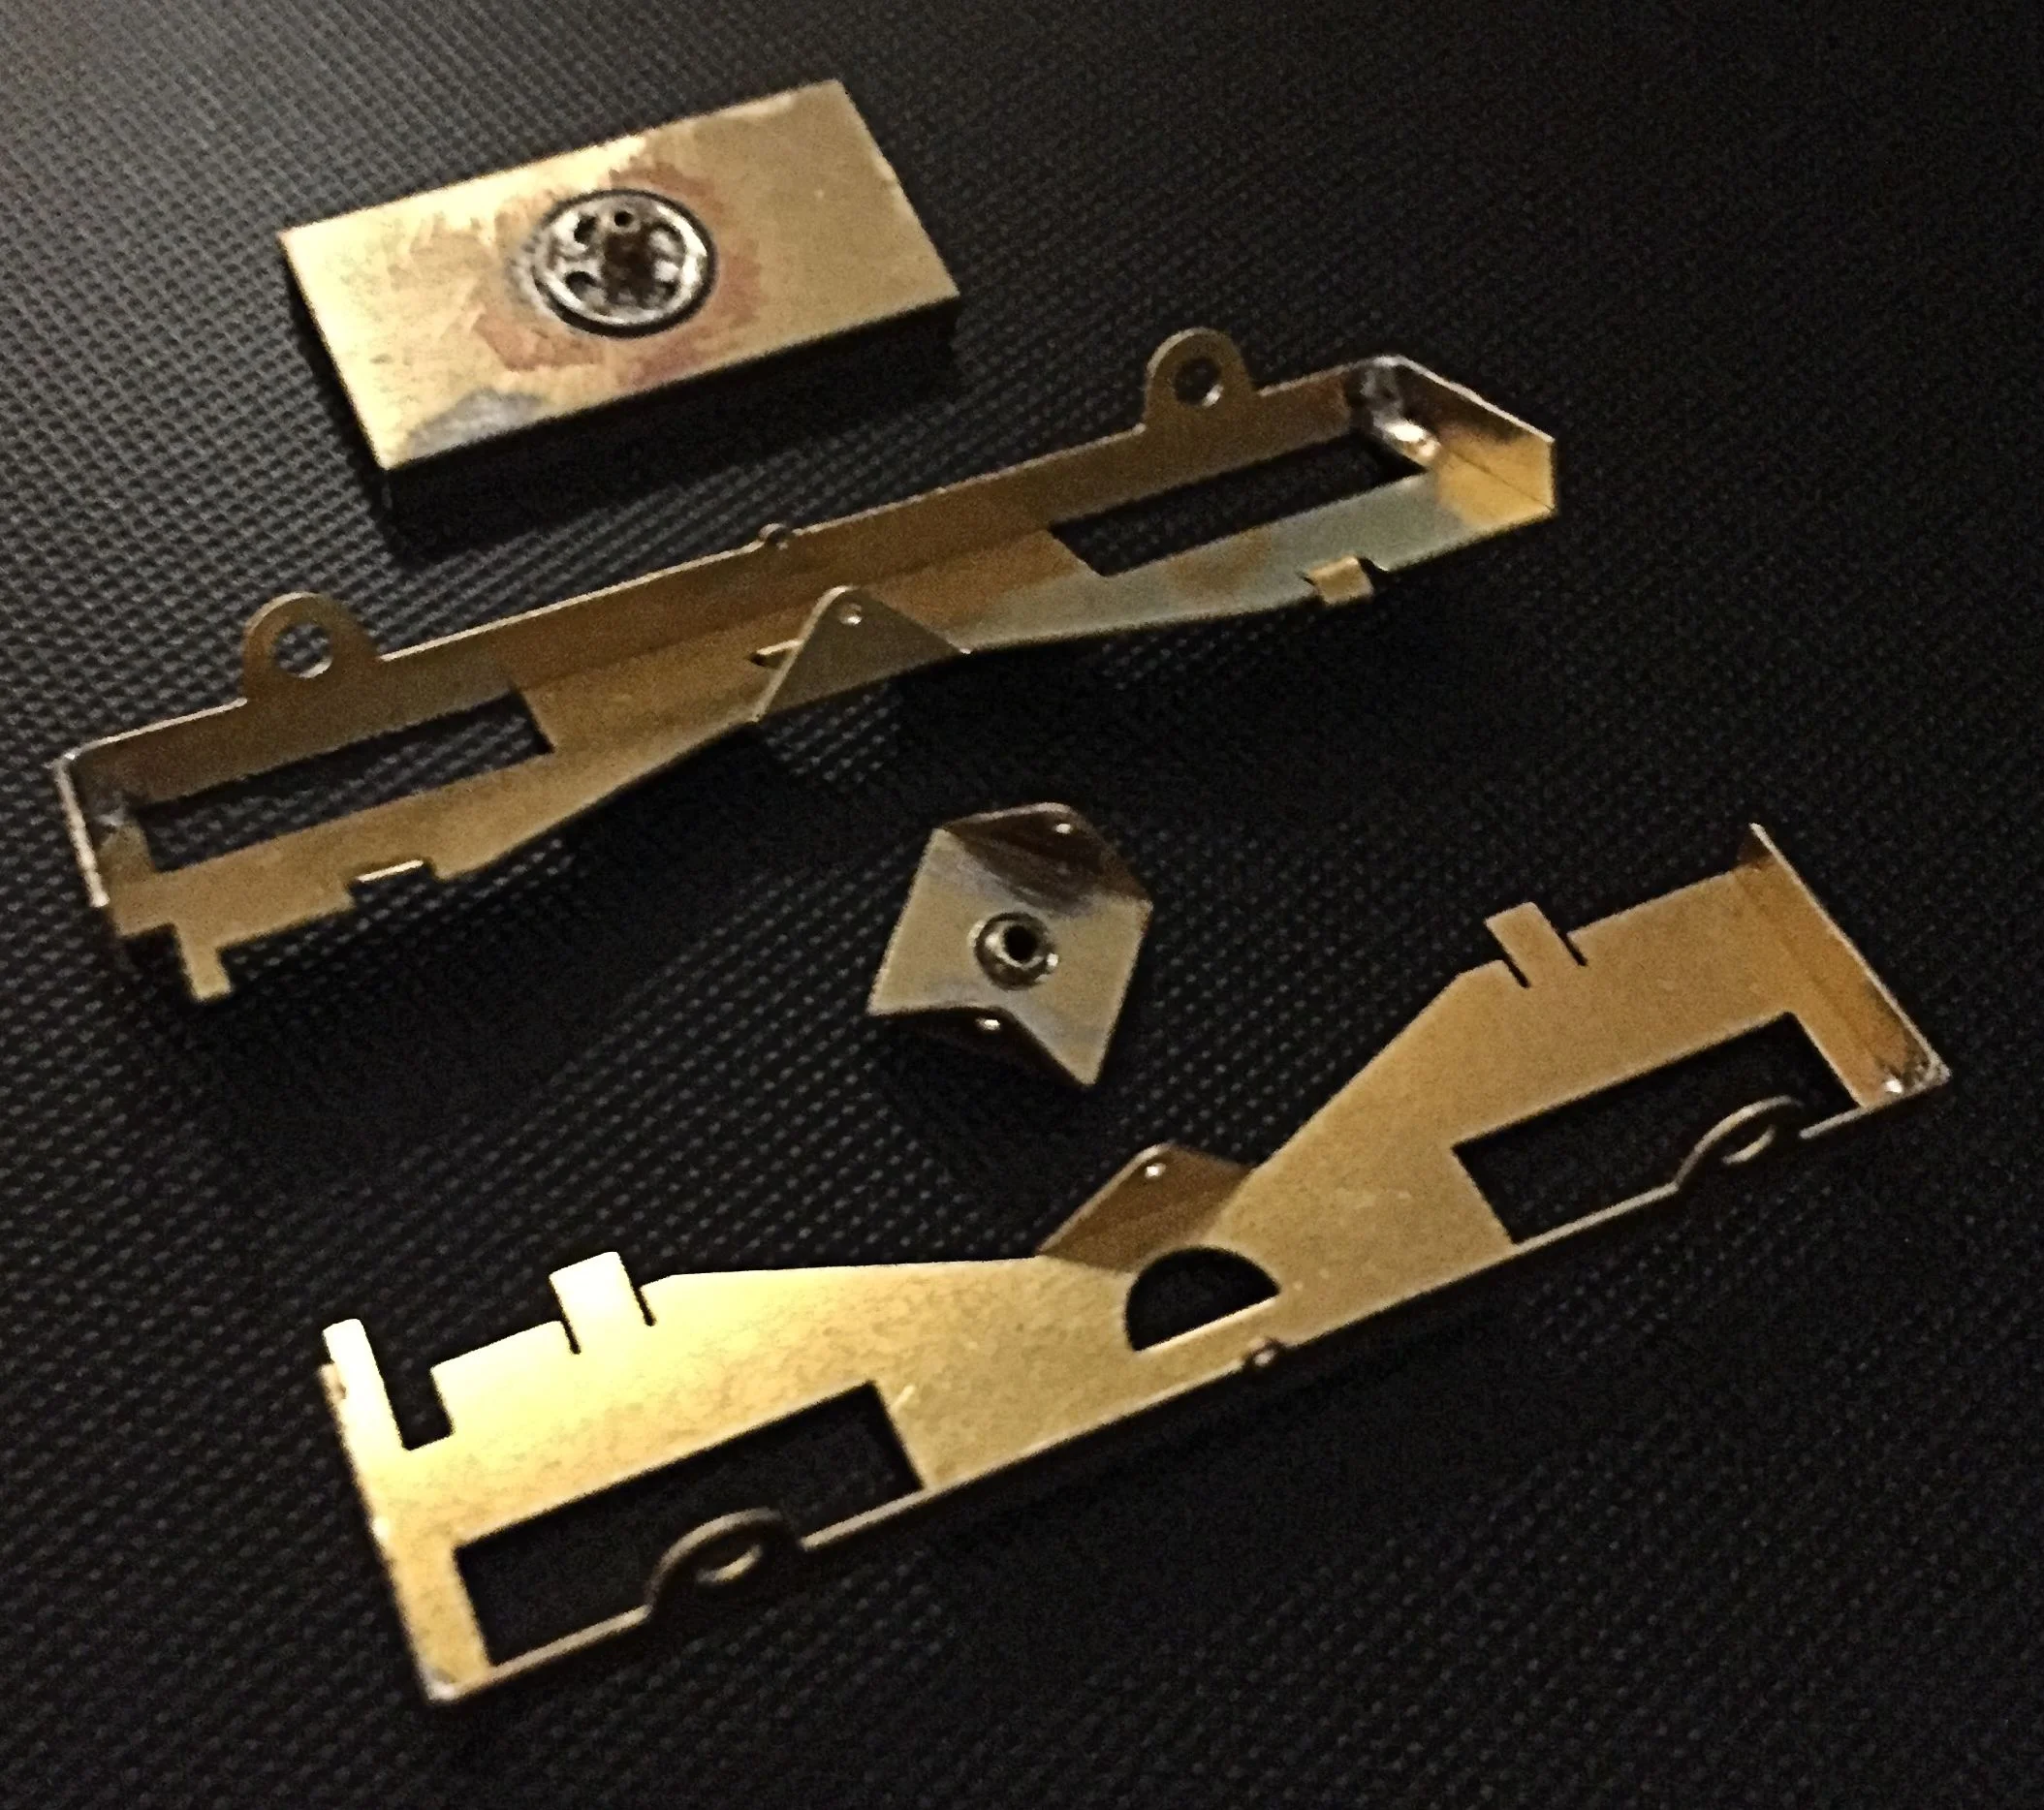
On the left above - Components cut out and simply folded up
On the right above - The parts soldered and press studs added to the bolsters. A minimum of soldering is required to assemble these units.

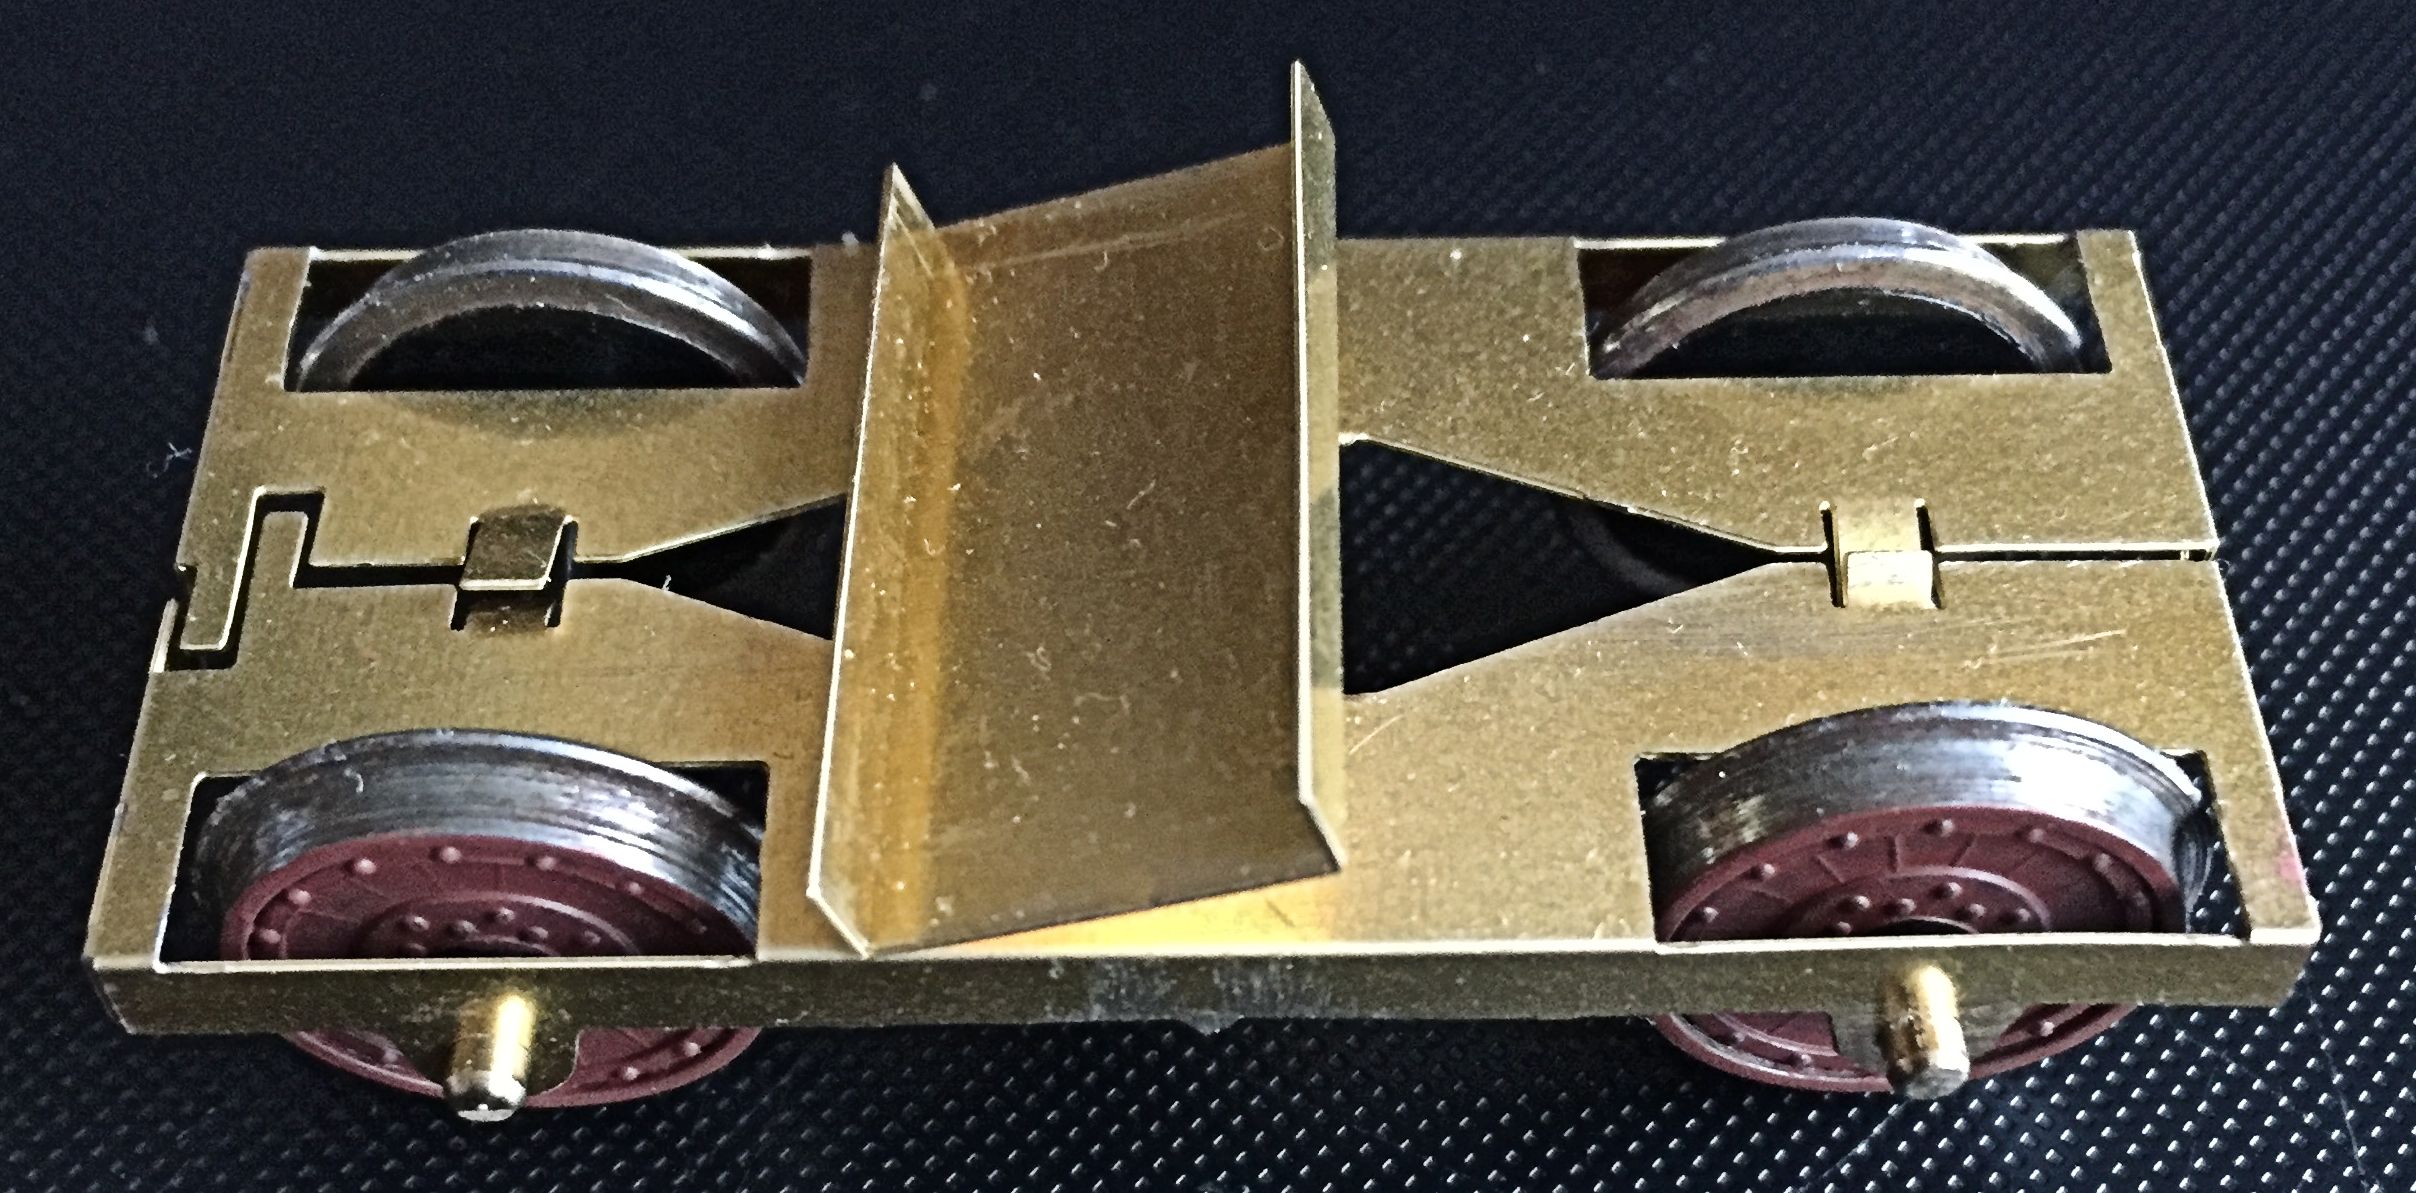
Above, the completed unit. Mansell wheels are fitted and they run in brass bearings. The two sides of the bogie are only joined to each other by the central torsion rod, so allowing the independent movement of each half. The elegant simplicity of this unit is only marred by a need to devise a method of attaching couplings. I'll simply solder a small 'L-shaped' piece of brass strip to one end and attach a coupling to that. It'll be placed centrally but only soldered to one side so as not to obstruct movement. White metal cosmetic side panels will be glued onto the units in due course.

The next task involved construction of truss rods for the coach body. The photo I was working from did not show this area at all and I decided to opt for something simple but robust. Before scratch-building some, I looked again at the crude truss rod/gas tanks moulding from the original Triang coach as the pattern was one I was looking for.
There was a problem however: the gas tank mouldings extended down to the base of the unit, creating a solid plastic web in one half of each side. A very fine razor saw was used to slice the rods away from the moulding and a scalpel used to clean up what remained. The photo opposite shows a ‘before and after’.

It was at last time to turn to the coach body. On rolling stock, I dislike bare underframes even though the detail is seldom seen. The model seems unfinished however if nothing is under there and I decided to install a pair of gas tanks, some brake gear and bits of piping. The gas tanks are my usual solution: 3 amp fuses. The brake gear was made up of various parts from the bits box and some rodding will be fitted later during the build.

Plastic card packing pieces have been glued at each end of the underframe to accept the bogie upper bolsters in due course. Finally, some more piping has been added under the foot boards, leading to the vacuum pipes at each end of the coach. The bolsters have been glued onto their packing pieces and the underframe sprayed up in primer.

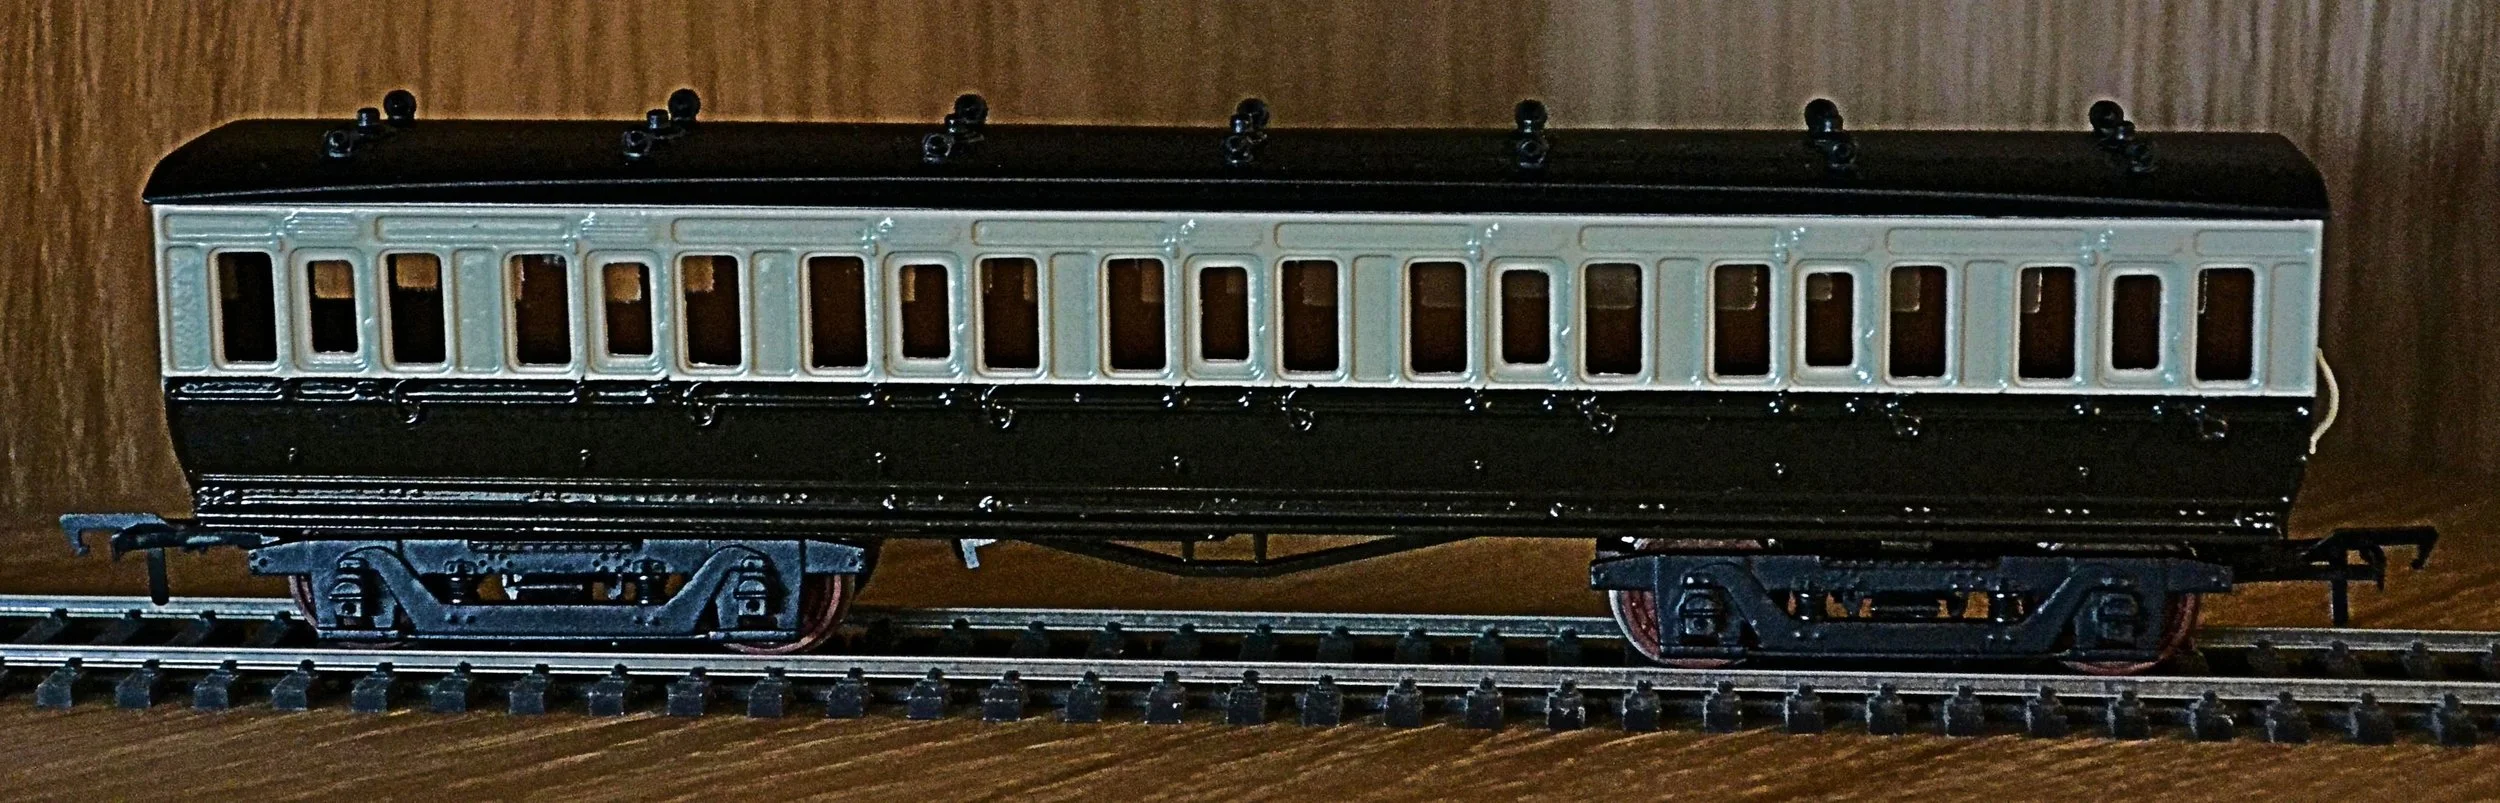
Finally, on its wheels. I quite like the worn-out, superannuated Col. Stephens' look here! There’s still quite a long way to go though….

The bogie side-frames and other details have been added and the two units have now been painted matt black. They will be lightly weathered in due course. The main livery has also been applied to the body, but is very glossy at this stage. Once the sides have been lettered, etc., and the drop lights and brass work detailed, the whole will receive a coat of matt varnish to flatten the paint, followed by brush-painted Klear to lift the colour. A test run at this stage showed the coach to be extremely free-running, finding slight depressions in the Club’s test tracks that until then had been unnoticed!
Incidentally, it looks as though the coach sits a little higher on its bogies at the right hand end. This is an illusion created by the piping running beneath the stepboards on the left hand side, reducing the gap there. In fact, the coach sits perfectly level. I will pick out the piping in a very dirty steel-black in due course to make it clearer. Not easily visible in the photo below. vacuum pipes and dummy couplings have also been attached.

With the lettering, etc., applied and the brass-work picked out, the body was given a coat of Testor’s ‘Dullcote’ to seal it before a coat of Johnson’s ‘Klear’ was applied to lift the colour. Once all was dry, the glazing was applied. For this I used SEFinecast pack no. SE74, applying the panes individually and securing them with superglue [it does not mist this type of plastic and so is safe to use]. This type of flushglaze is improved hugely by applying a further coat of ‘Klear’ to the panes once they are fixed in place, their transparency is greater and they acquire, visually, a more glass-like finish. The less than flattering photo opposite shows the glazing in place internally: of course, this mess cannot be seen from outside…….
Seats were then fitted [having been painted]. I used Ratio seating this time and although is costs £4-5 a coach, the high backs obviate the need for additional partitions to be fabricated. The seating also has a nice profile. Sadly though, rather like the underframe detail, they will be difficult to see in use.

This, now, is as far as I have got:

All that is left to do is paint the underframe and ends black, fit the buffers and fix the roof in place, add the end handrails and weather the underframe lightly. The coach will then be complete.
And with those final tasks undertaken, here is the finished product:
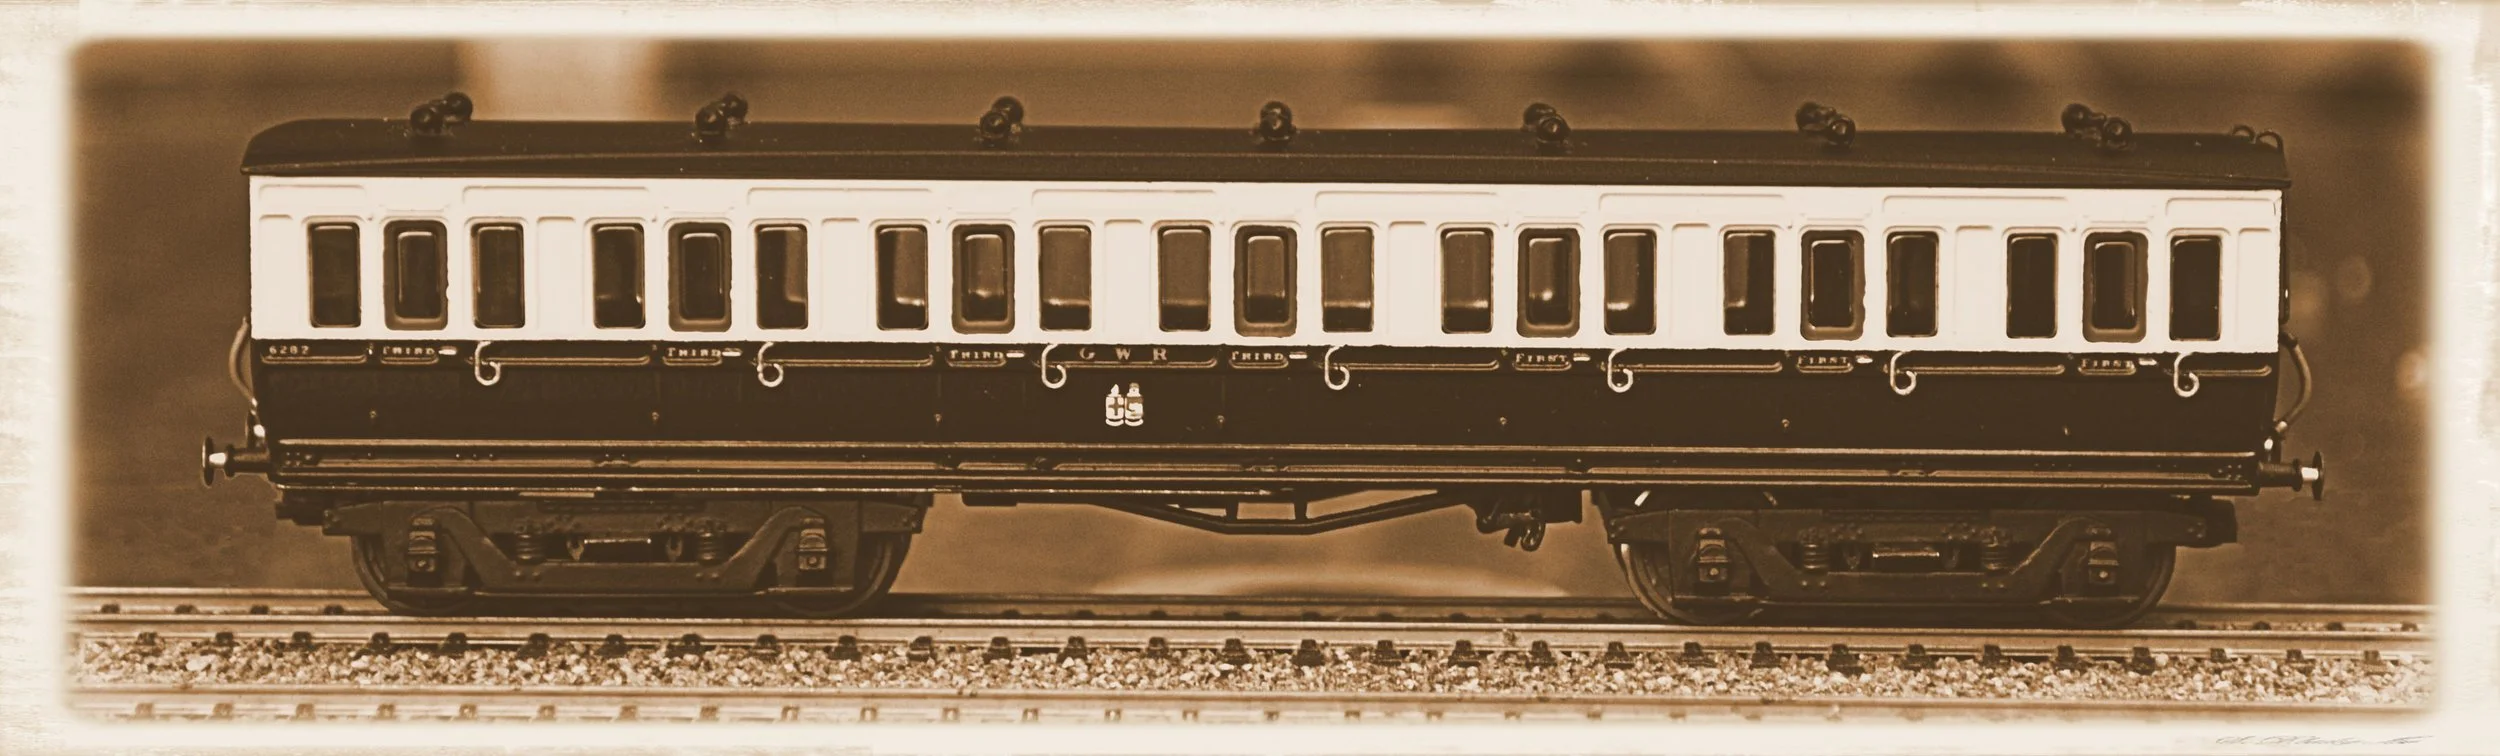

And, with its running mate, the D15 Brake Third: