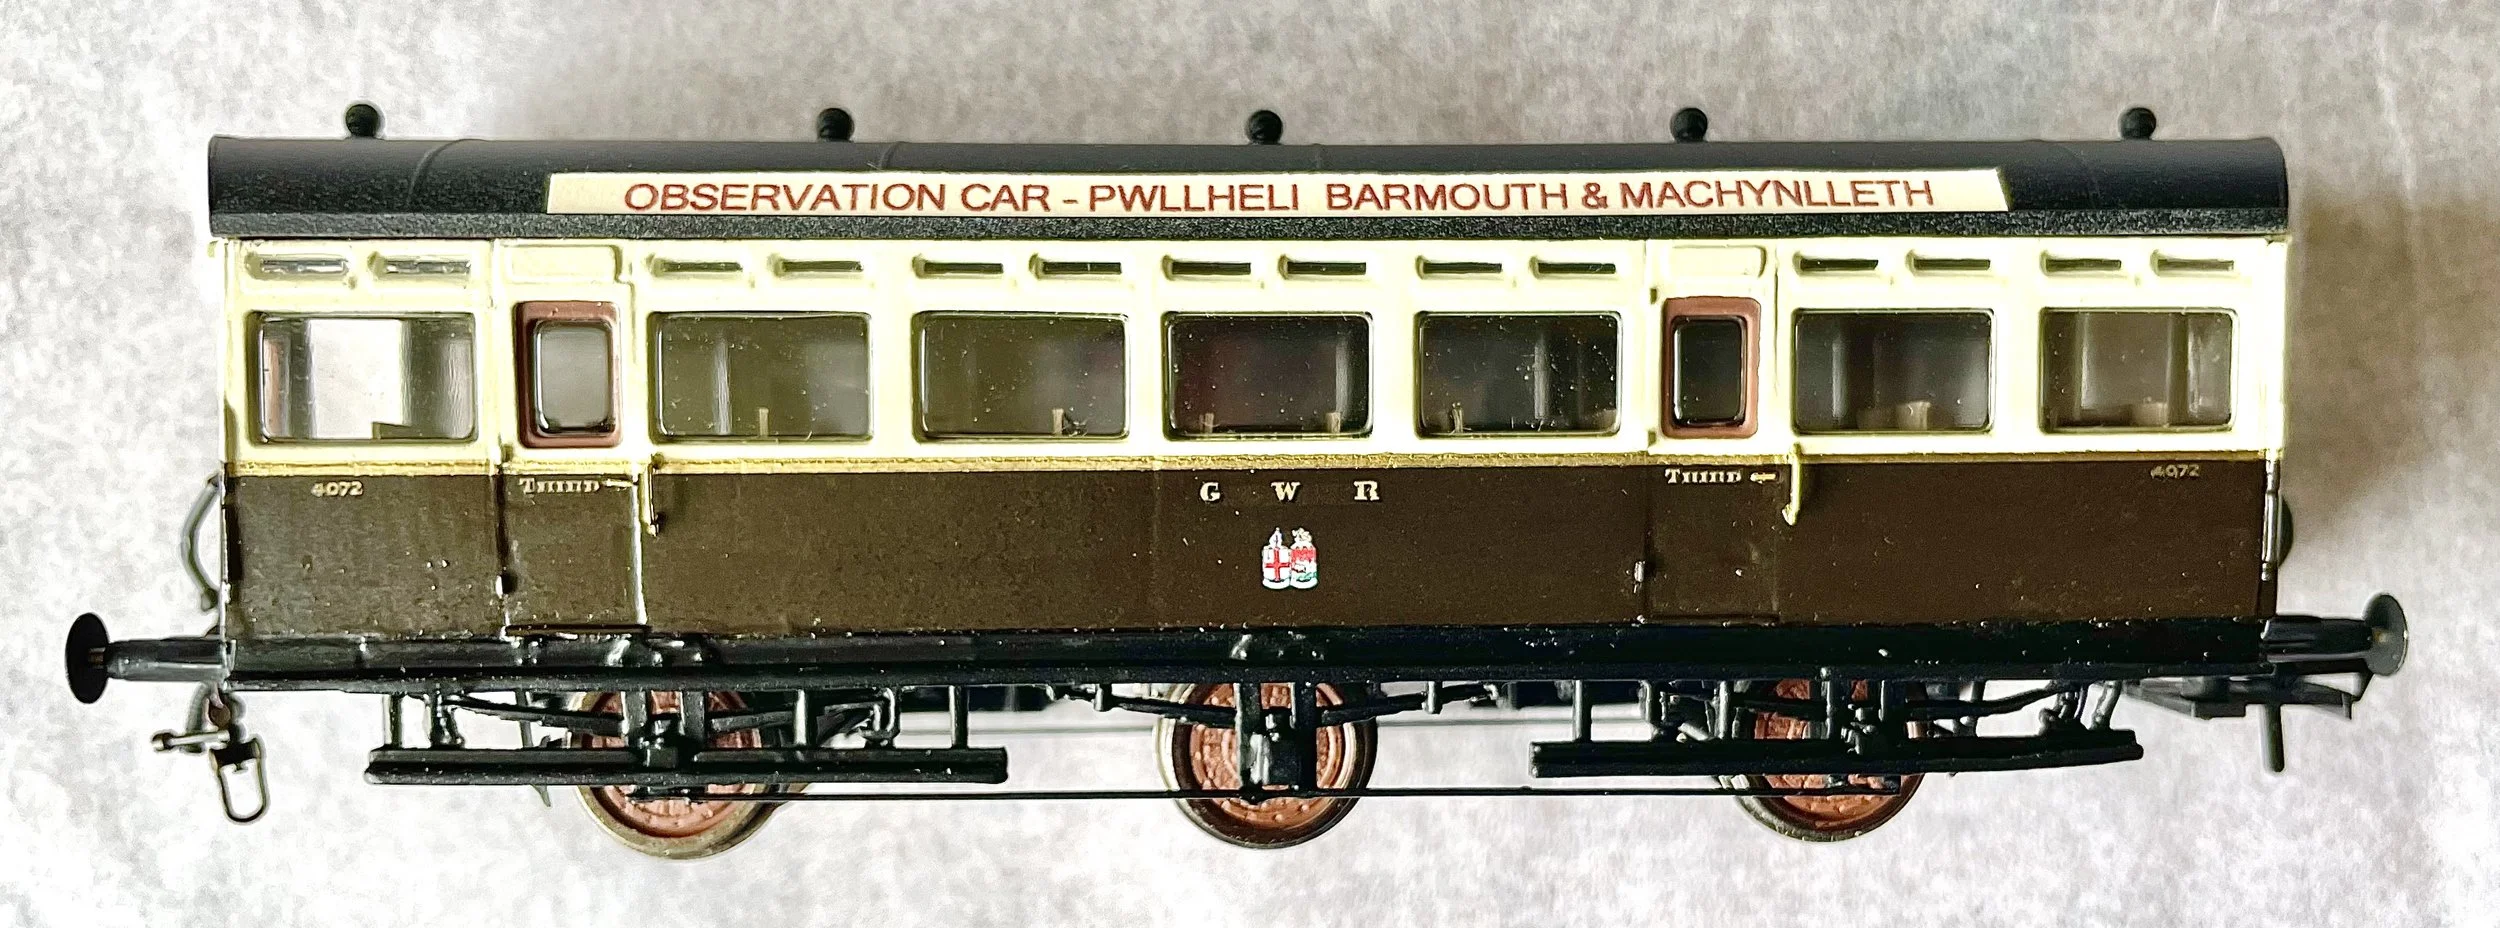
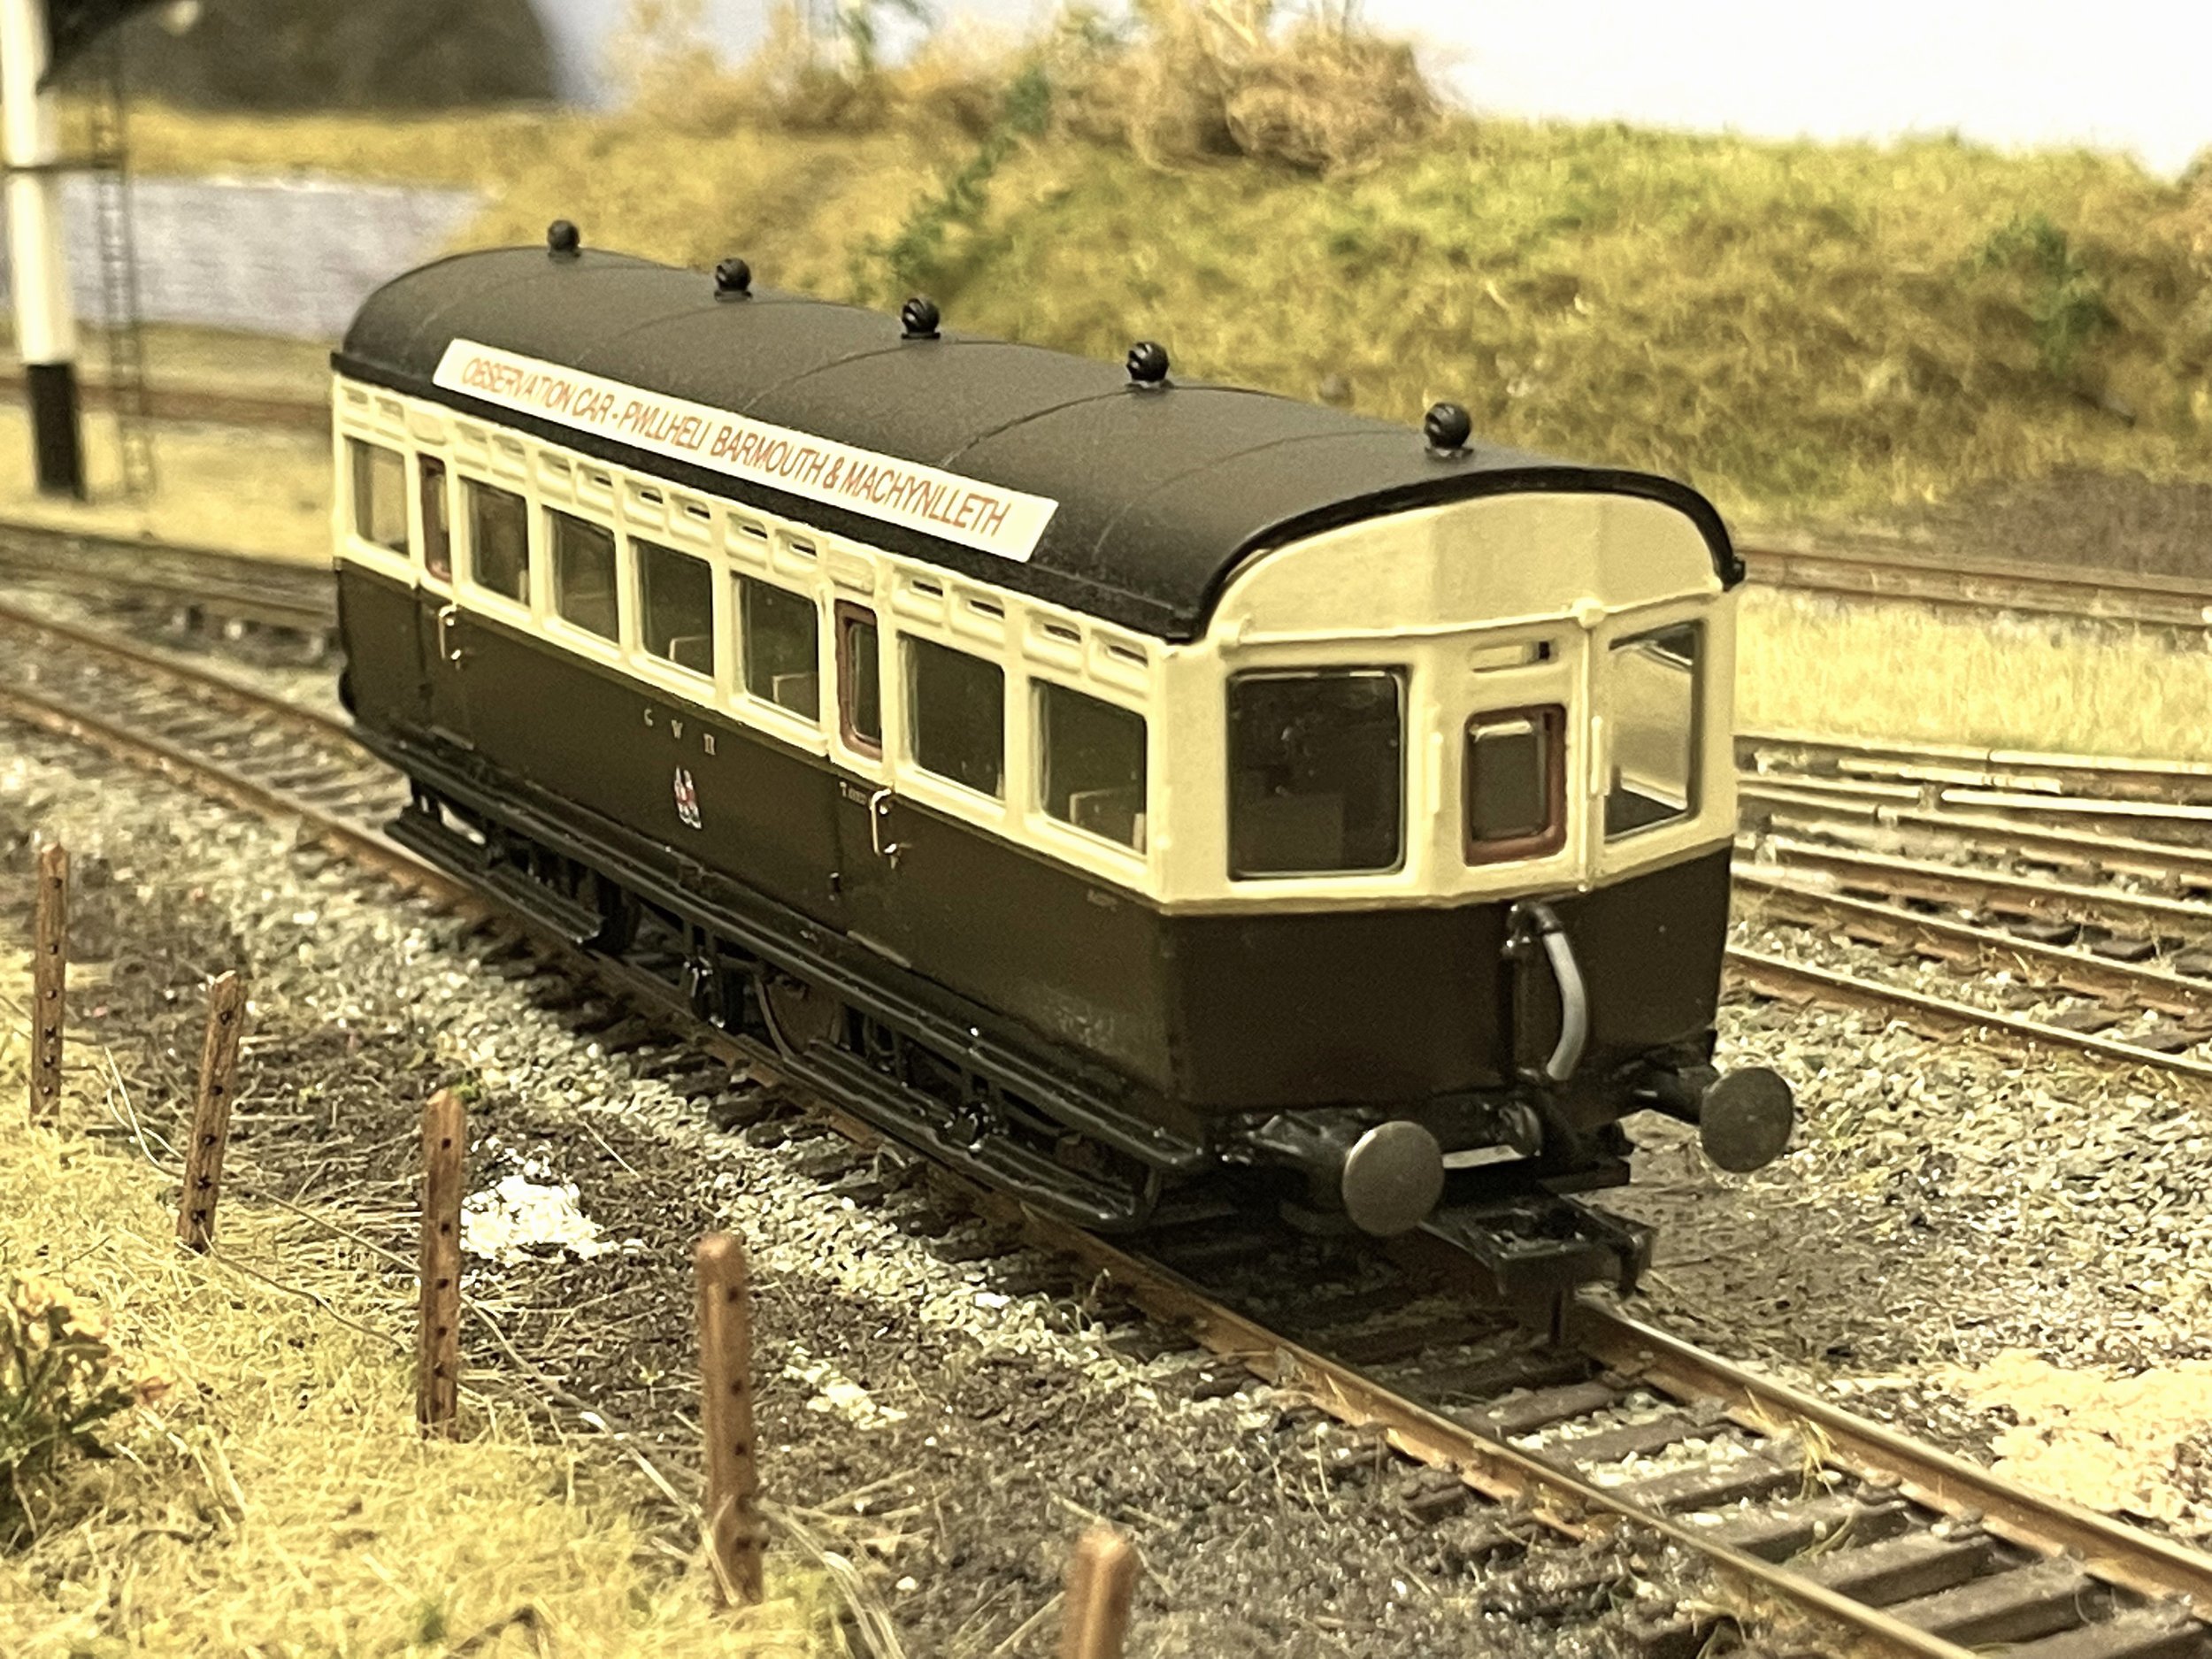
A pair of these quite unusual coaches were built by the Cambrian Railways, the first in 1917 and the second in 1920. Constructed at the Oswestry works, they were converted from existing Victorian 6-wheel Thirds and intended to carry 48 Third-class passengers in each, on reversible tram-type seats. Designed for use on the picturesque coastal route between Machynlleth and Pwllheli, they must have been popular for tourists in spite of their hard seats and a long journey!

After the Grouping, the GWR took over these cars and reliveried them after making some slight body modifications [mostly to the panelling] and installing electric lighting. The coaches were eventually withdrawn in May 1936 with the body of one, extraordinarily, remaining in use as a road-side cafe near Aldermaston for many years. The other lived on for a while as a holiday home apparently.
Further background details [measurements, etc.] on these coaches may be found in ‘The Locomotive’ magazine, February 15th. 1916 and ‘The Model Railway Constructor’ magazine, November 1964 and April 1965.
Construction of this coach in ‘OO’ will rely on a pair of Airfix and Hornby GWR Auto coaches as the basis. Their resemblance to the Observation Car is clear, although, obviously they are very much longer [the Observation Car should be just shy of 41ft. over buffers] and are not panelled either. Using them as a donors however allows for an outcome which is at least recognisable even if dimensionally a little incorrect. And short of scratch-building, there is no other way of constructing one of these interesting vehicles.
This will be the most ambitious cut-and-shut project I've undertaken to date and it may not be successful, either. On initially seeing the photo above, I immediately recognised that some old Airfix / Hornby Auto Trailers would be a good place to start and I acquired two for under £20 from the usual on-line place [it needs a pair for the correct number of windows and doors]. The initial plan was really more a proof of concept: if I could create bodies that were sufficiently square enough to form a credible model, then I'd proceed to the underframe - the initial plan for that was scratch-building, using an etched brass Cleminson chassis. I think that it is worth trying at least and something should be possible. If it all comes together, it will run with the two ex-Cambrian coaches seen elsewhere in my workbench.
Dismantling the first coach body gives you this one-piece unit [the roof and chassis have been set aside for the time-being: parts from both will be required later]:

This is then carefully sawn up to produce this:


The sections of double windows are then cut out of one the original sides, as opposite, and the pair are glued together.
The doors are then cut out also, significantly altered to ensure that their windows line up in the right place and then glued to either side of the four-window unit. Looks terrible at this stage, but it always does. As you can see, a fair bit of sanding and filling is always required about now. All of the parts are assembled against a steel edge to ensure squareness.

The remaining three windows are cut out and attached in the same way, a pair at one end and a singleton at the other. The next photo shows both sides assembled, but not completed. Happily, they are both the same length!

This is all pretty optimistic now. The sides are the same length although a very thin strip of plastic strip was required at the red end of one of the sides to even things up. The red pieces also required thin strips of plastic along their bottoms to as the older Airfix mouldings were just a fraction of a mm. lower than their Hornby counterpart. Everything is at least square enough to continue. For information, one side comprises 12 pieces, the other,15. Etched door and commode handles will be fitted eventually and I'll have to scratch-up some ventilators for the four doors, too.
The next jobs will involve preparing the ends and making the roof. I am not going to attempt the panelling however. If I had a cutter I could probably have made an overlay, but I don't. I thought about a number of ways of applying this but decided against in the end. And, as I have already said, the dimensions will not be wholly accurate to the prototype but, in OO, no-one will know (or care?!).
In the meantime, I have made up the roof, utilising parts from both donor models. It will be marked up for ventilators in due course, the existing ones having been removed and put aside to be reused. Their holes were filled with Milliput.

Well, under a coat of primer it's not really the best bit of cut-and-shuttery that I've done. I even hesitated posting the photo! Two of the doors are a little too recessed for my liking but given the number of parts in each door, and the fact that they are very much thinner than their adjacent sides, it was almost impossible to avoid. The harsh sunlight exaggerates a bit through the shadows, too. I'm not too worried about this though as once the sides have had their two coats of brown and an overlay of satin varnish, the imperfections will be far less noticeable. Still......
Door ventilators were made up from plastic card, suitably scribed.


Time now to consider the ends of the car. The first photo [opposite] shows one cut away from the body and with nothing more than the gong removed. You can see though that the centre window is far too big and the wrong shape in any case [see the small photo further above for comparison]. The donor model body side provided the answer however and one of the single smaller windows with a toplight was cut out and inserted in the centre window void [now increased in height slightly] of the original end to provide a near-accurate solution. Both ends were treated in this way. See the pair below.
Finally, further below, one end with all of the superfluous detail removed and then painted in primer. Once again, the shadows and harsh light make it look much worse than it actually is. But with so much detail needing to be planed off, some imperfections were bound to result. The final livery will address most of them. A pair of transverse handrails will be reinstated after painting and brake pipes etc will need fitting.

With the sides and ends in primer, it was time to begin constructing the body. The first stage involved providing a plastic card floor for the coach. This was essential at this stage as, without it, the body would have insufficient strength to remain assembled given the butt joints of the ends to the sides. With the floor in place, the outer chassis frames were constructed by adapting Keyser white-metal LNWR Full Brake ones. These were glued to the bottom edges of the sides with reinforcing fillets supporting them from behind. The photos below show the adaptation to the white-metal solebar / chassis casting and the method of attachment.


With a strong centre section achieved, the ends were then glued in place. The photo below also shows the roof - with ventilators attached - test fitted and some added pipework attached to the front. The solebars have been extended slightly at each end with plastic strip as the original casting was a little short.


The body was set aside now for the running gear to be assembled. The coach will run on an etched brass Cleminson 6-wheel kit made by Brassmasters. The unit comes in the form of a fret which needs to be soldered up and then wheels are attached. Assembly was extremely easy with only a little packing required under the outer wheel sets to ensure smooth running and the correct riding height. The chassis is extremely flexible and will negotiate extremely tight radii. The photos that follow show this through various stages of construction.
The chassis was mounted on plastic card and would eventually be painted black.

It was now possible to mask-up the body and paint it. The roof was sprayed black and card destination boards were made up - as per the prototype - for attachment to the roof sides. The inside of the body was painted brown and seats were made up from plastic card strip and cardboard. The windows were all flush glazed, SEFinecast Autocoach glazing was used for the lower windows and ends and ‘Glue’nGlaze’ was used for the toplights. The roof was finally attached and a general tidy-up of the paintwork followed. Decals were applied - from Railtek - and the correct running number used (4072). Brass door handles and grab rails were inserted into pre-drilled holes. Finally, a coupling was applied to one end, buffers inserted, various bits of plumbing, pipework and truss rods were fabricated and attached and the chassis glued in place with epoxy resin. The wheels, incidentally, have had laser-cut Mansell inserts attached to them to improve their image.


This has been by far the most difficult cut-and-shut I have attempted to date and it was somewhat ambitious. I’d not attempt another but the outcome is at least recognisable although far from perfect. It has provided an interesting addition to my rake of GWR ex-Cambrian coached however and is sufficiently unusual to draw attention to itself.
Finally, a very late find on-line. Is this a vintage Exley model?


