- RESTORING A K's BODYLINE KIT OF 9701, A GWR CONDENSING PANNIER TANK -
by Tony Richards
IMAGE: BEN BROOKSBANK, VIA WIKIPAEDIA, WITH THANKS
A Brief History of the Class
The above photograph shows 9701, the subject of this article, in BR days [August 1957] at Paddington Station. It had just four years of active life left. The GWR built eleven of these unusual engines during 1933/34, for exclusive use on the underground lines of the Metropolitan and Hammersmith & City railways, between Paddington and Smithfield Goods. The class was allocated to Old Oak Common and by the mid-60s all had been withdrawn: sadly, not one of this interesting class survived into preservation.
The Model
This is an unusual prototype and one rarely modelled in any gauge. If you want to run one, you'll have to build one. Until very recently, the 1960s K's 'Bodyline' whitemetal kit was the only option and whilst with great care it could be assembled acceptably, most of the models I've seen for sale have been absolute shockers. There is now a OO 3-D printed body available for a Bachmann 57XX chassis and also two bodies available for N gauge [one white metal, the other 3-D printed]. Other than referencing these, they are beyond the scope of this article but can be found through a quick 'Google' trawl. For completeness, I'd also add that a Korean brass r-t-r makes occasional appearances on eBay for £200+.
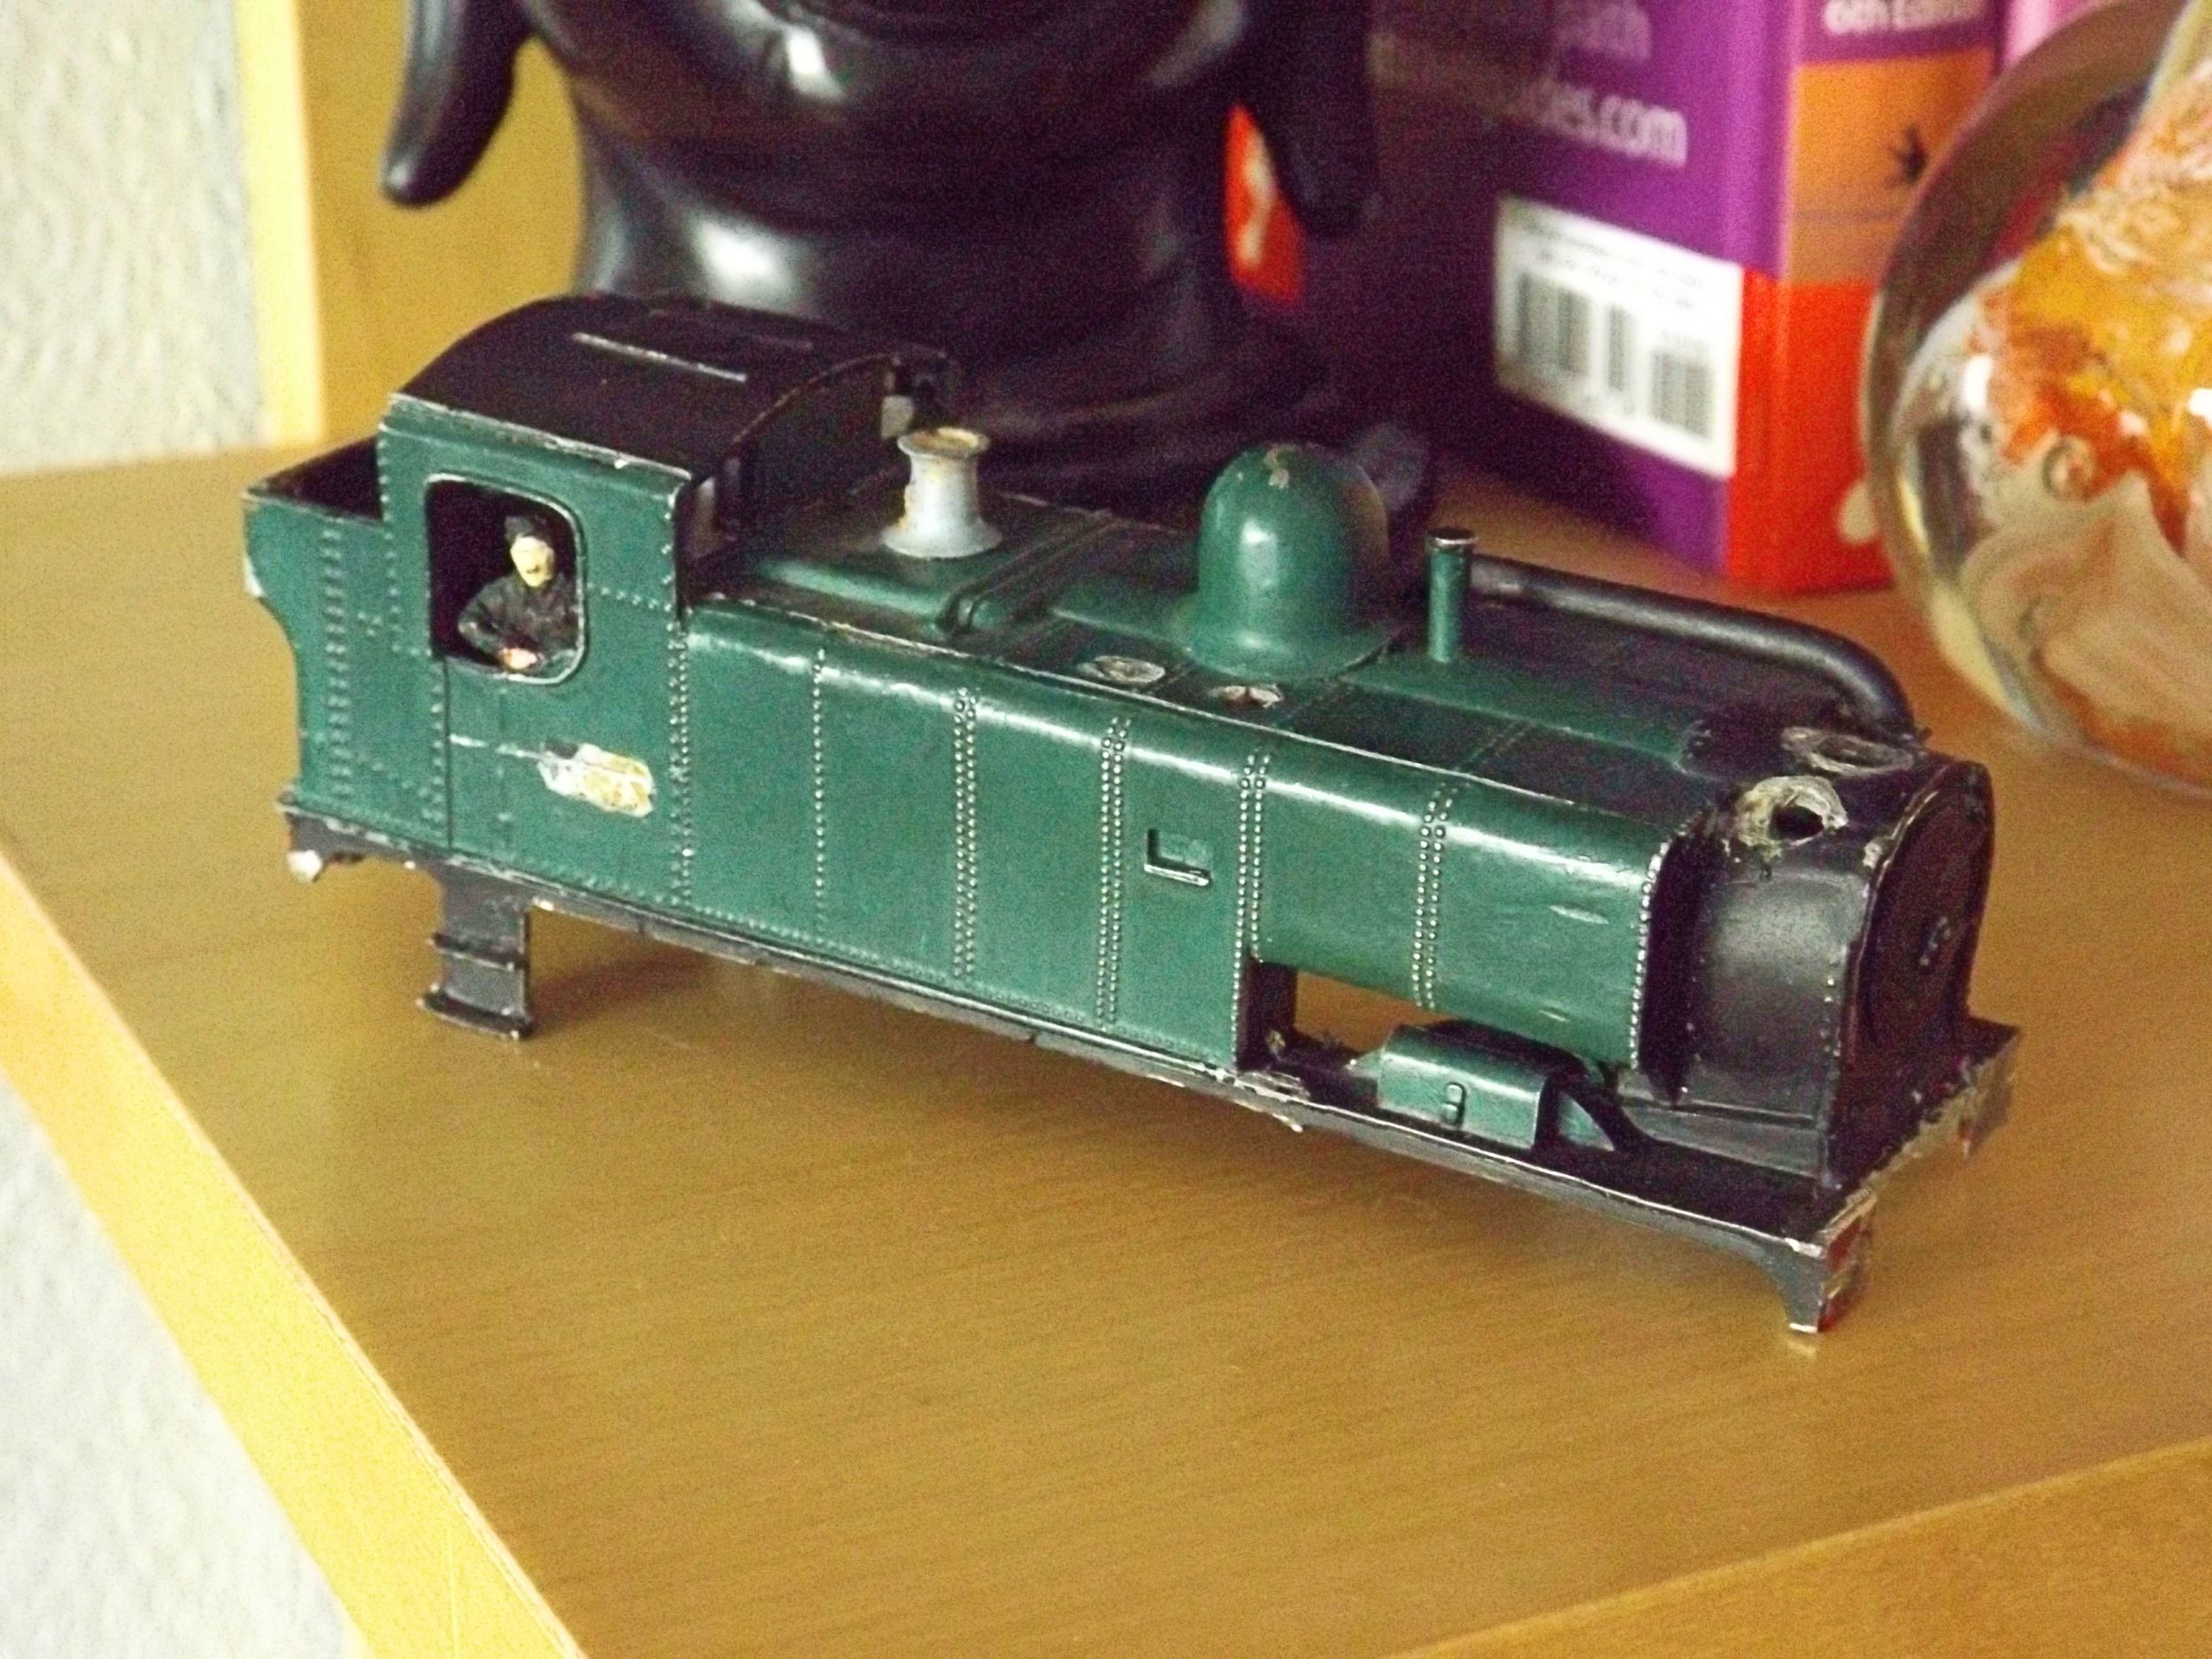
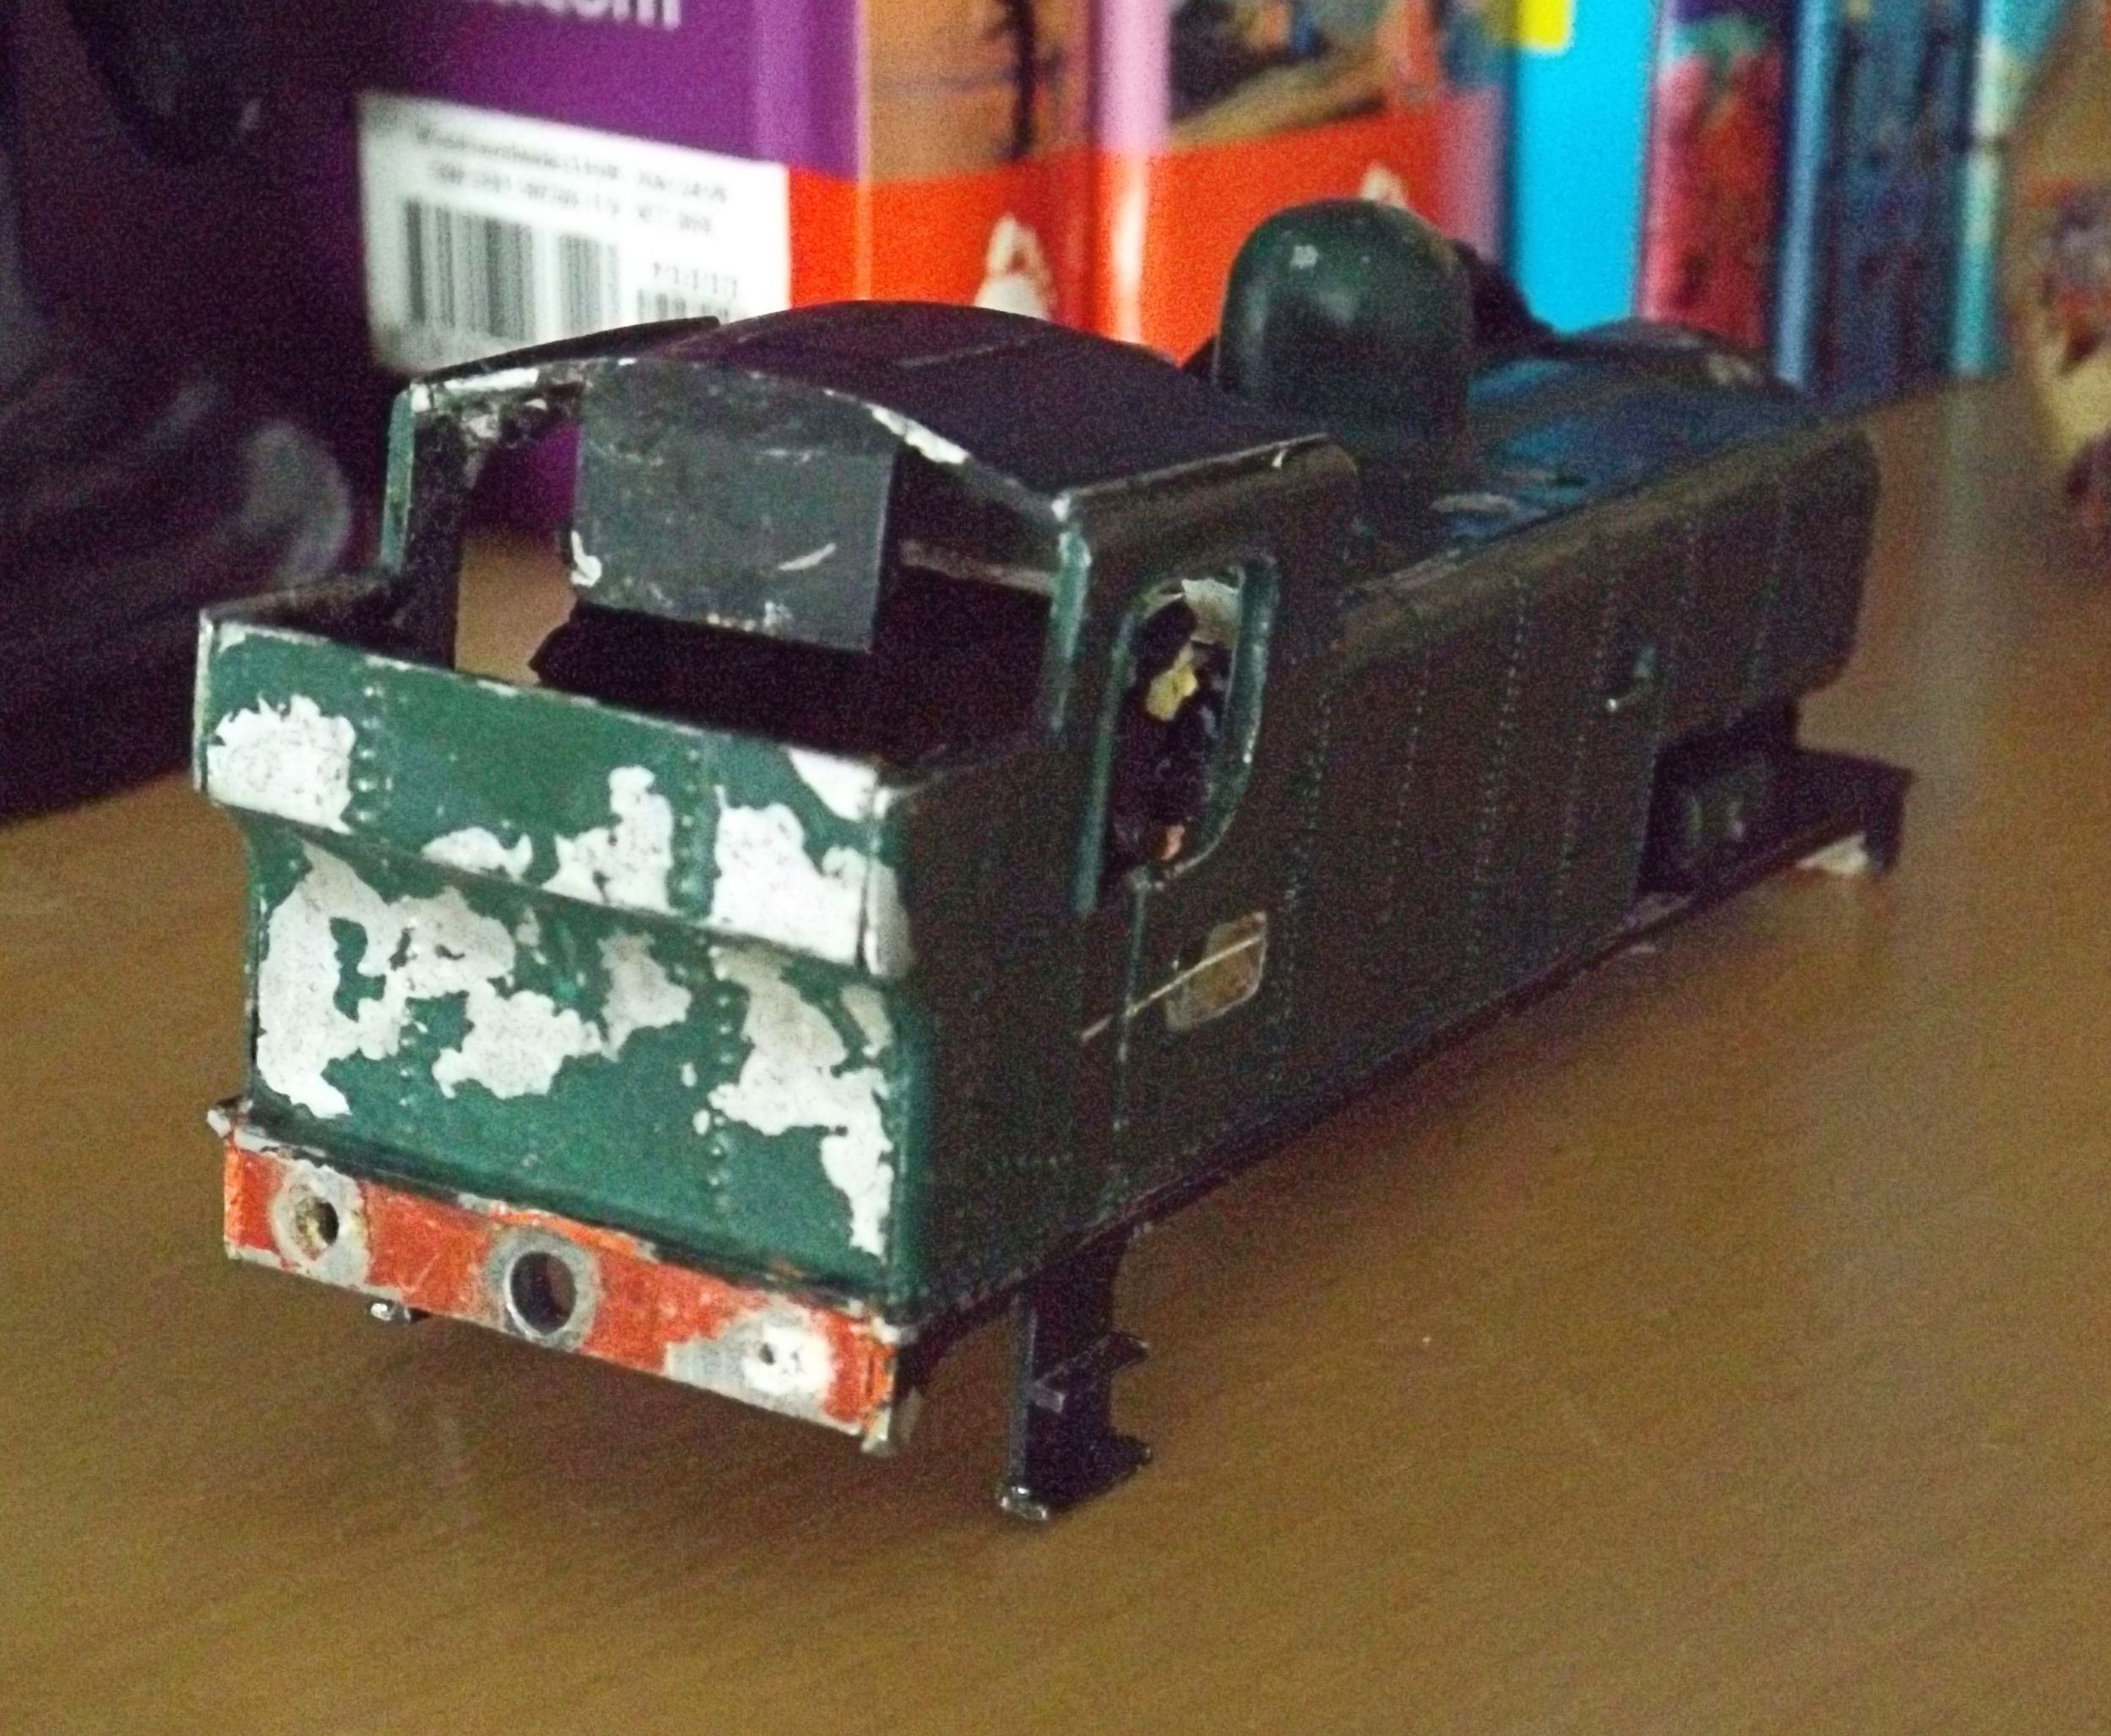
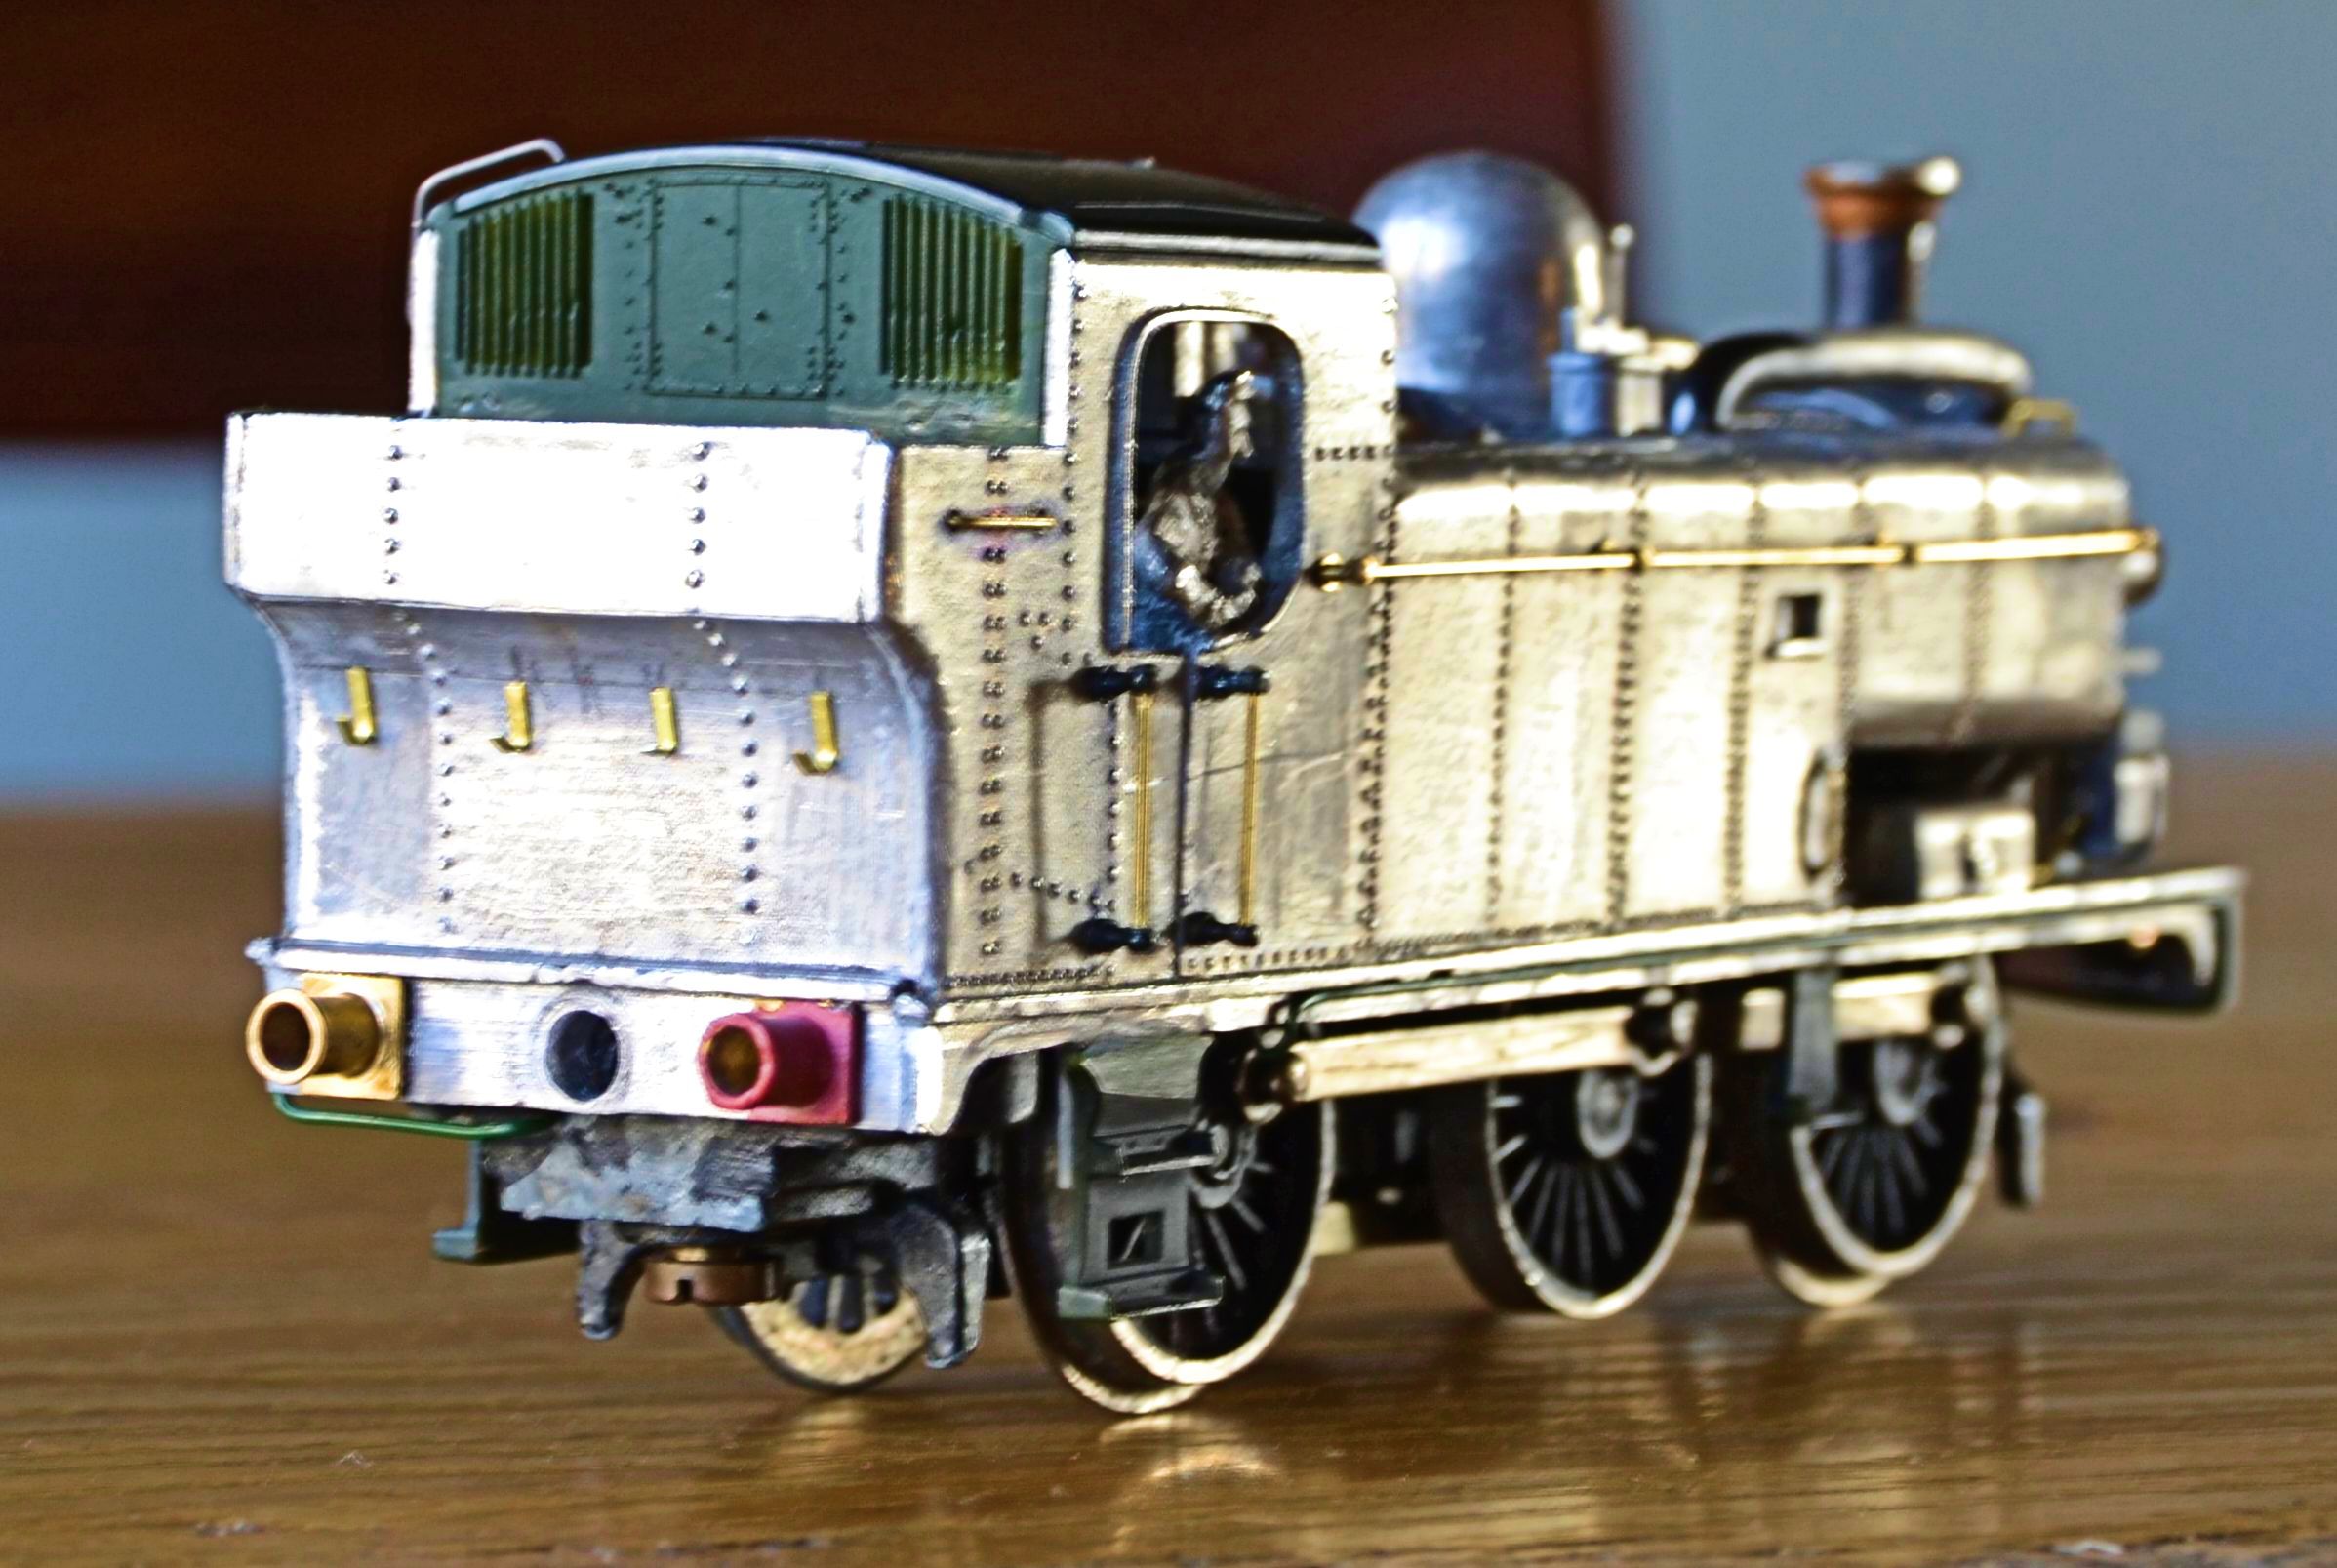
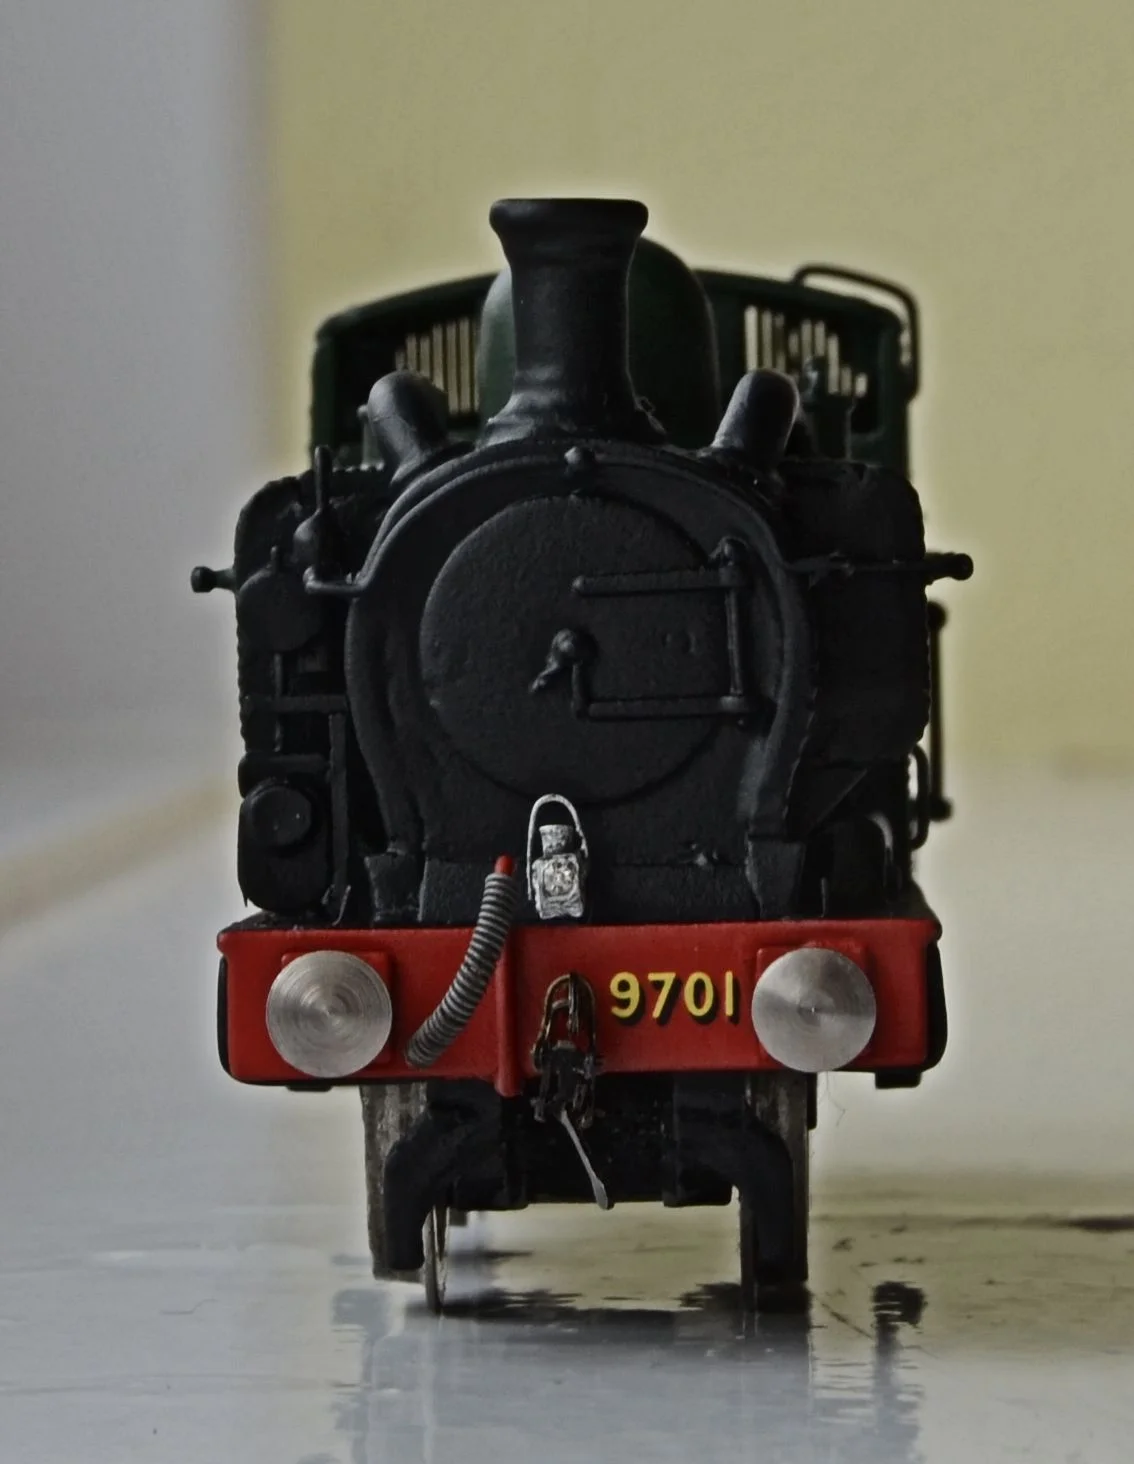
I recently acquired a partially-made K's 'Bodyline' kit of the above loco. The chassis ran very poorly , the body sides were of unequal length, both the chimney and condensing pipes were fitted out-of-line, the front buffer beam was out of square and mostly filler, the model exhibited broken buffers, messy solder on the outside of the tank body, poorly fitted number plates, broken or missing steps and a number of other significant missing parts including handrails and, critically, the Weir pump.
So, why did I bother ?
Well, the model cost just £15 and I reckoned that I had sufficient parts in the bits box to bring it back [or, at least, tolerate its existence !]. The only purchase required was some Humbrol filler. The intention was to restore this model to an original condition without buying in any parts, rather than rebuilding it to today's super-detailed standards.
However, the success, in fact the continuation, of the project was predicated entirely upon my being able remove the existing paint work. It was extremely thickly applied and I needed to get the castings back to white metal to have any chance of an acceptable resolution.
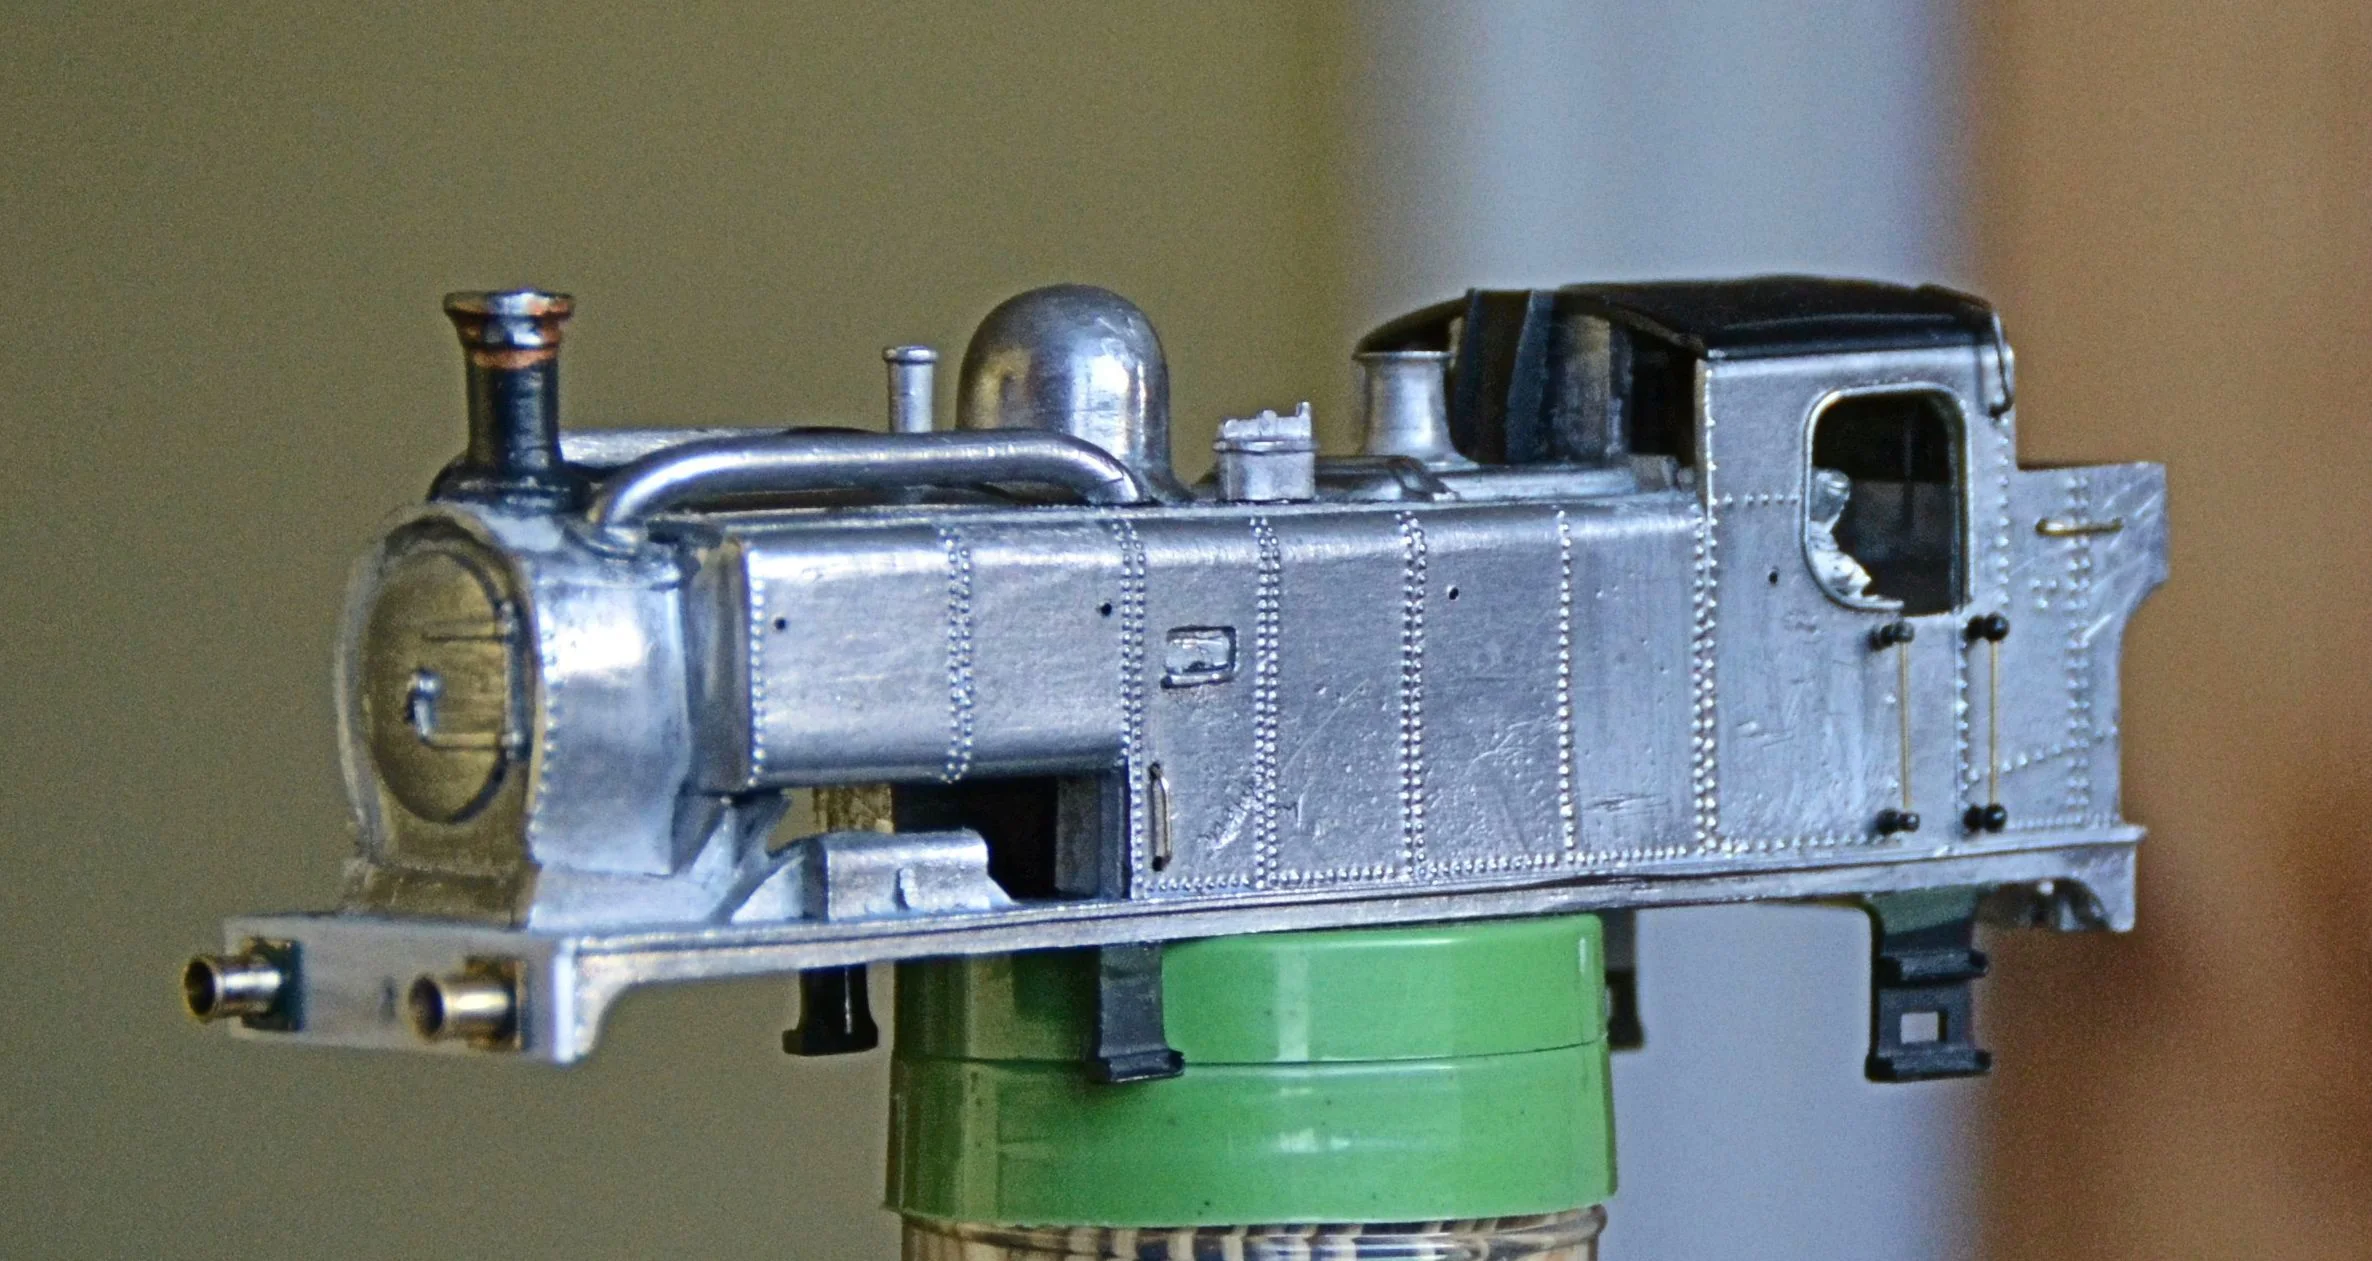
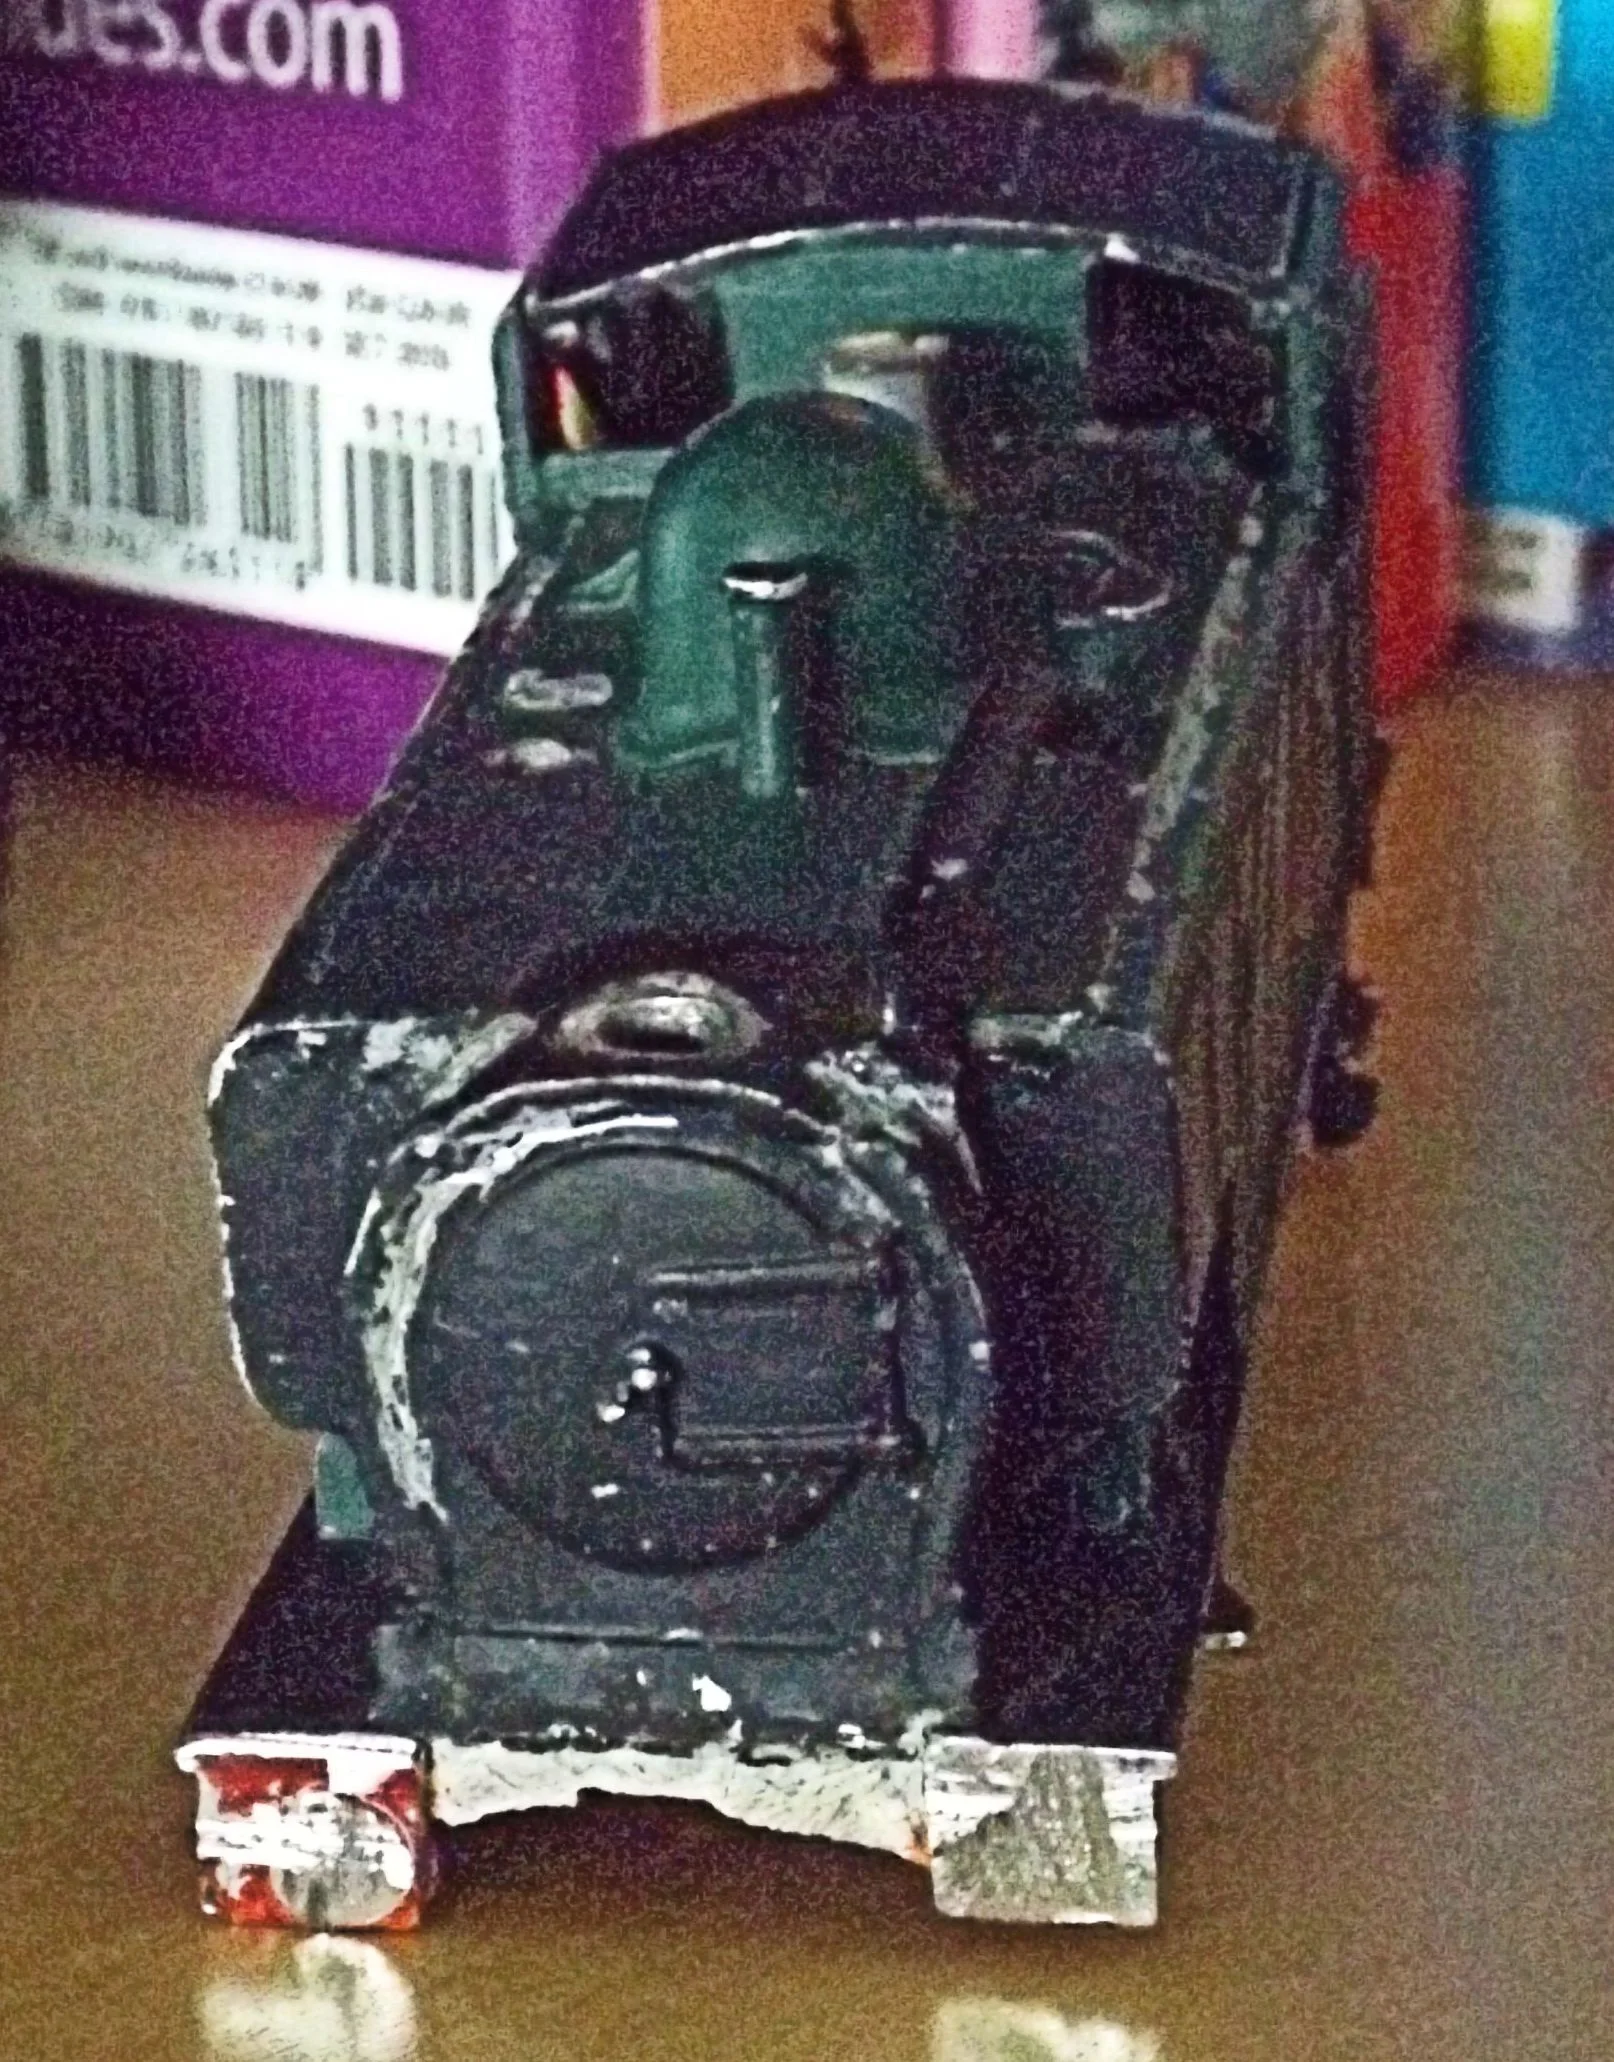
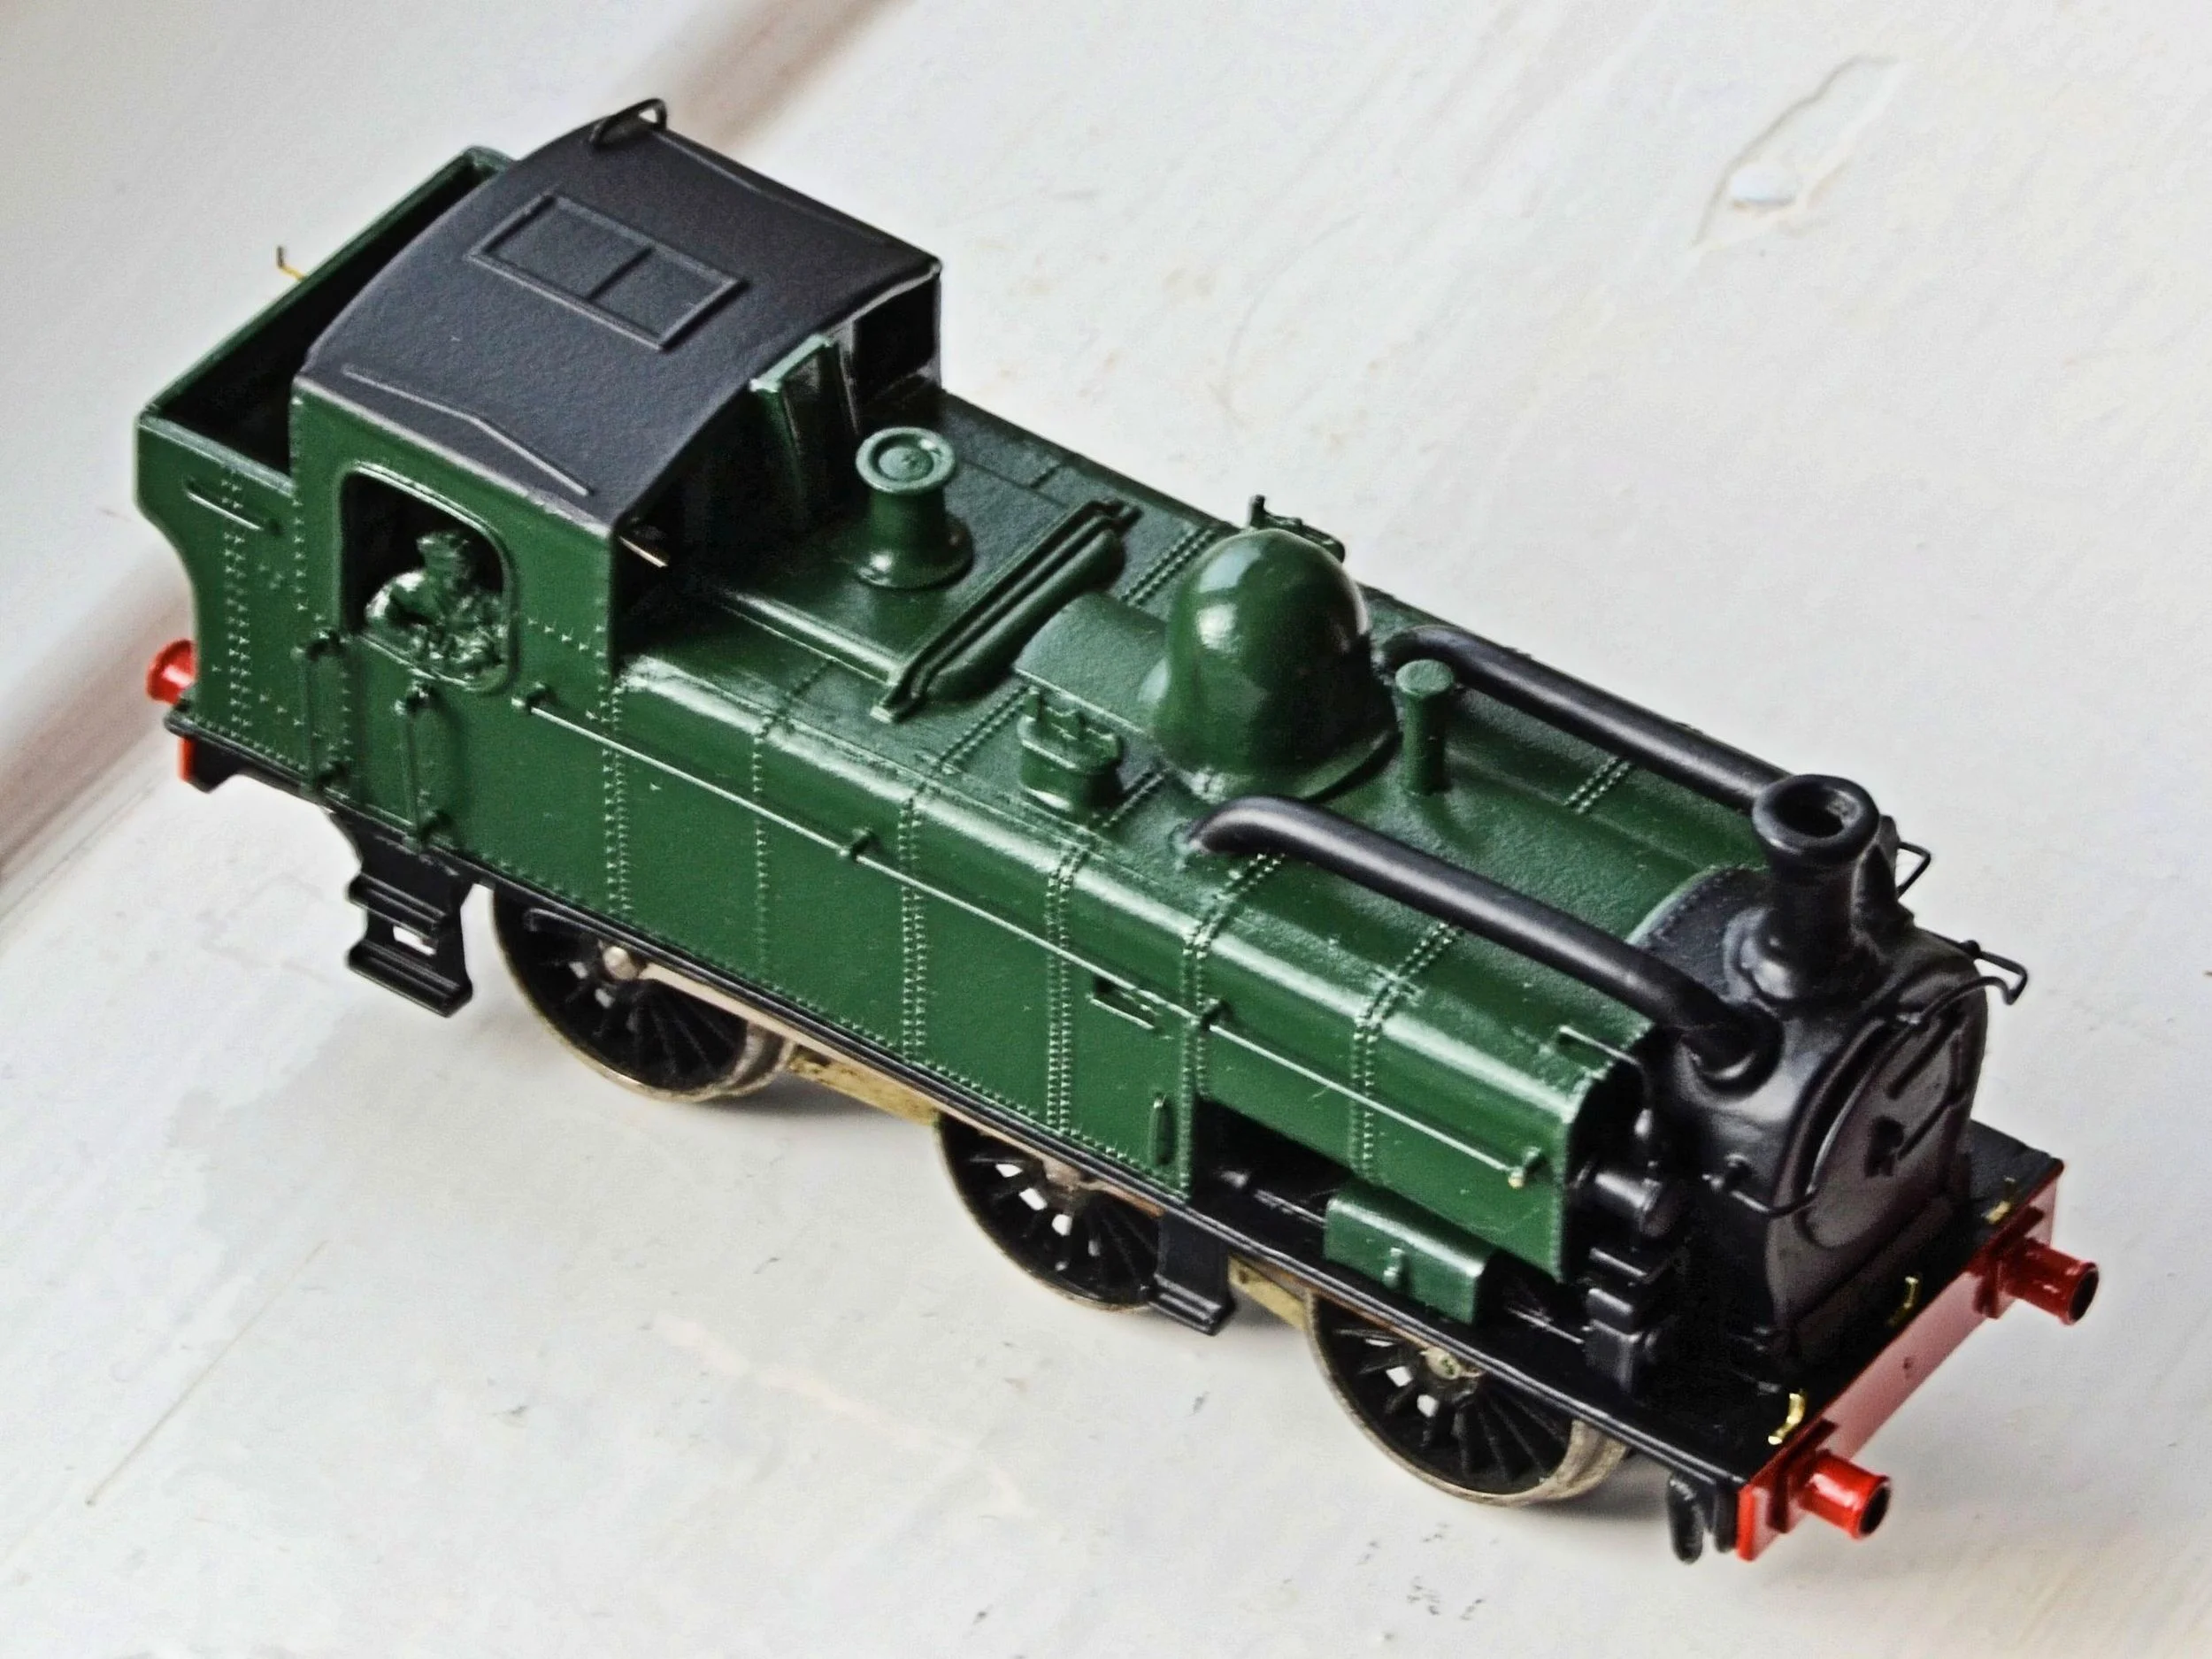
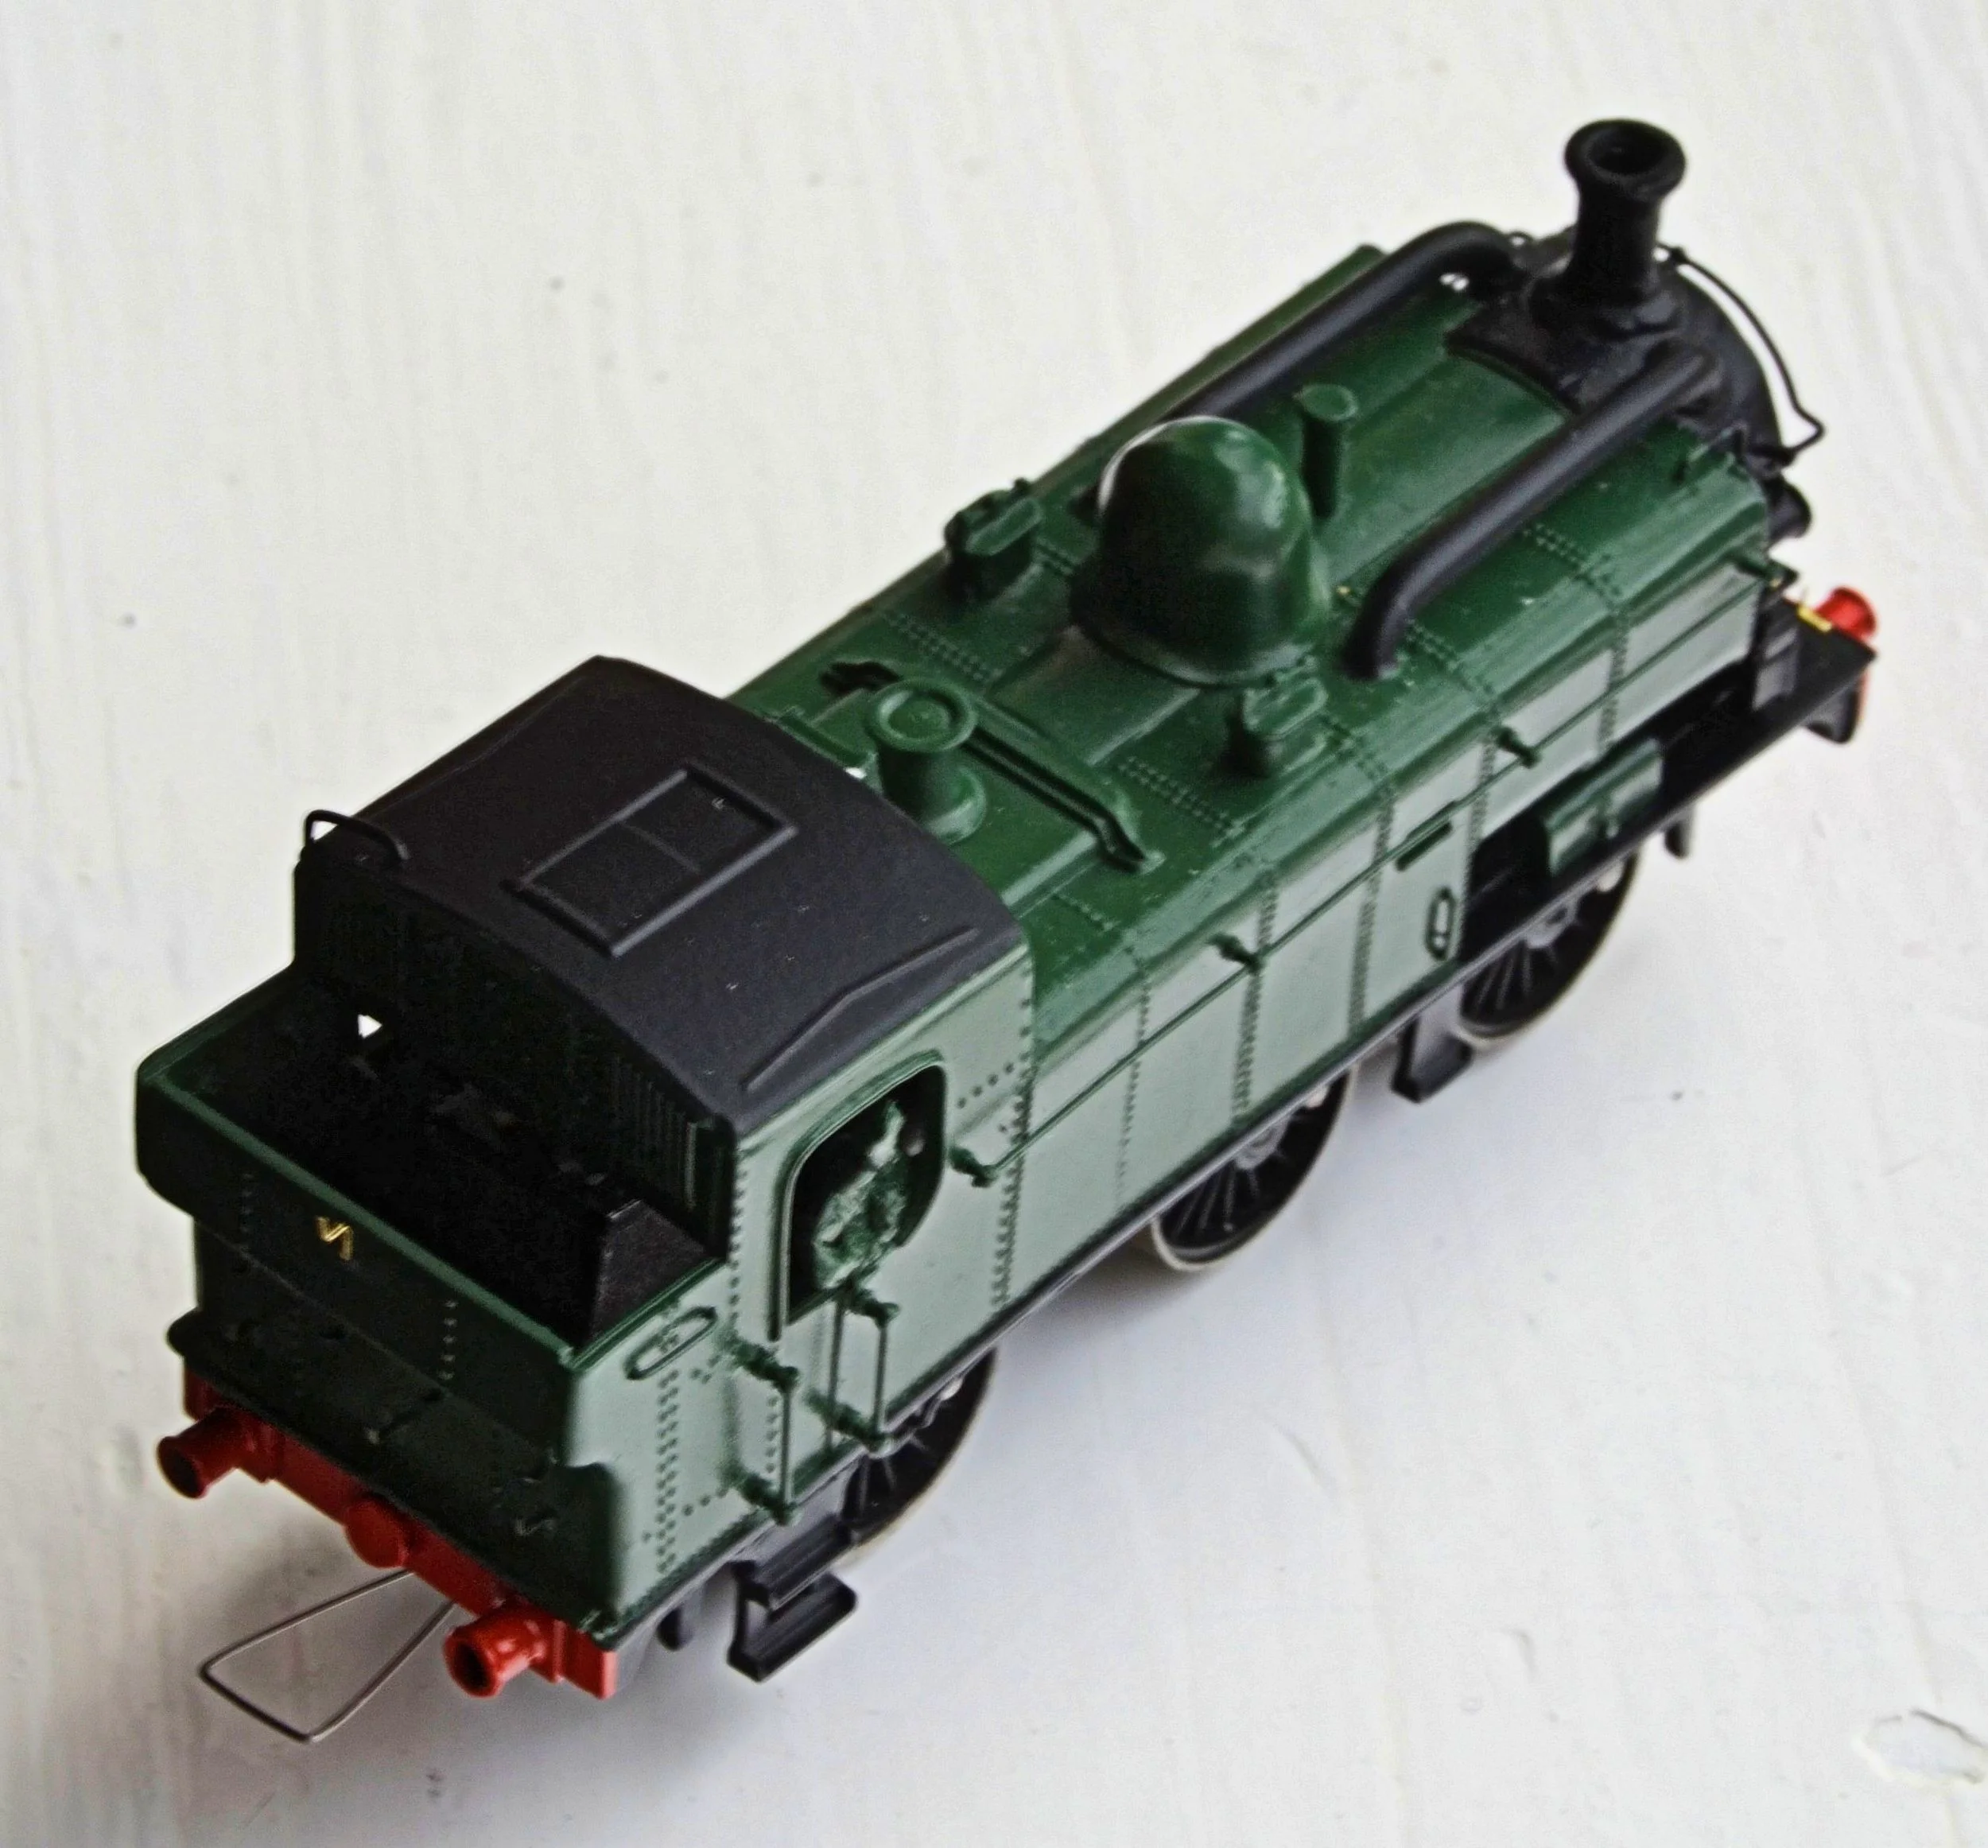
The photos below show some of the problems seen at the outset, believe me, they make it look far better than it was.......
Click on all photos throughout article for larger images.


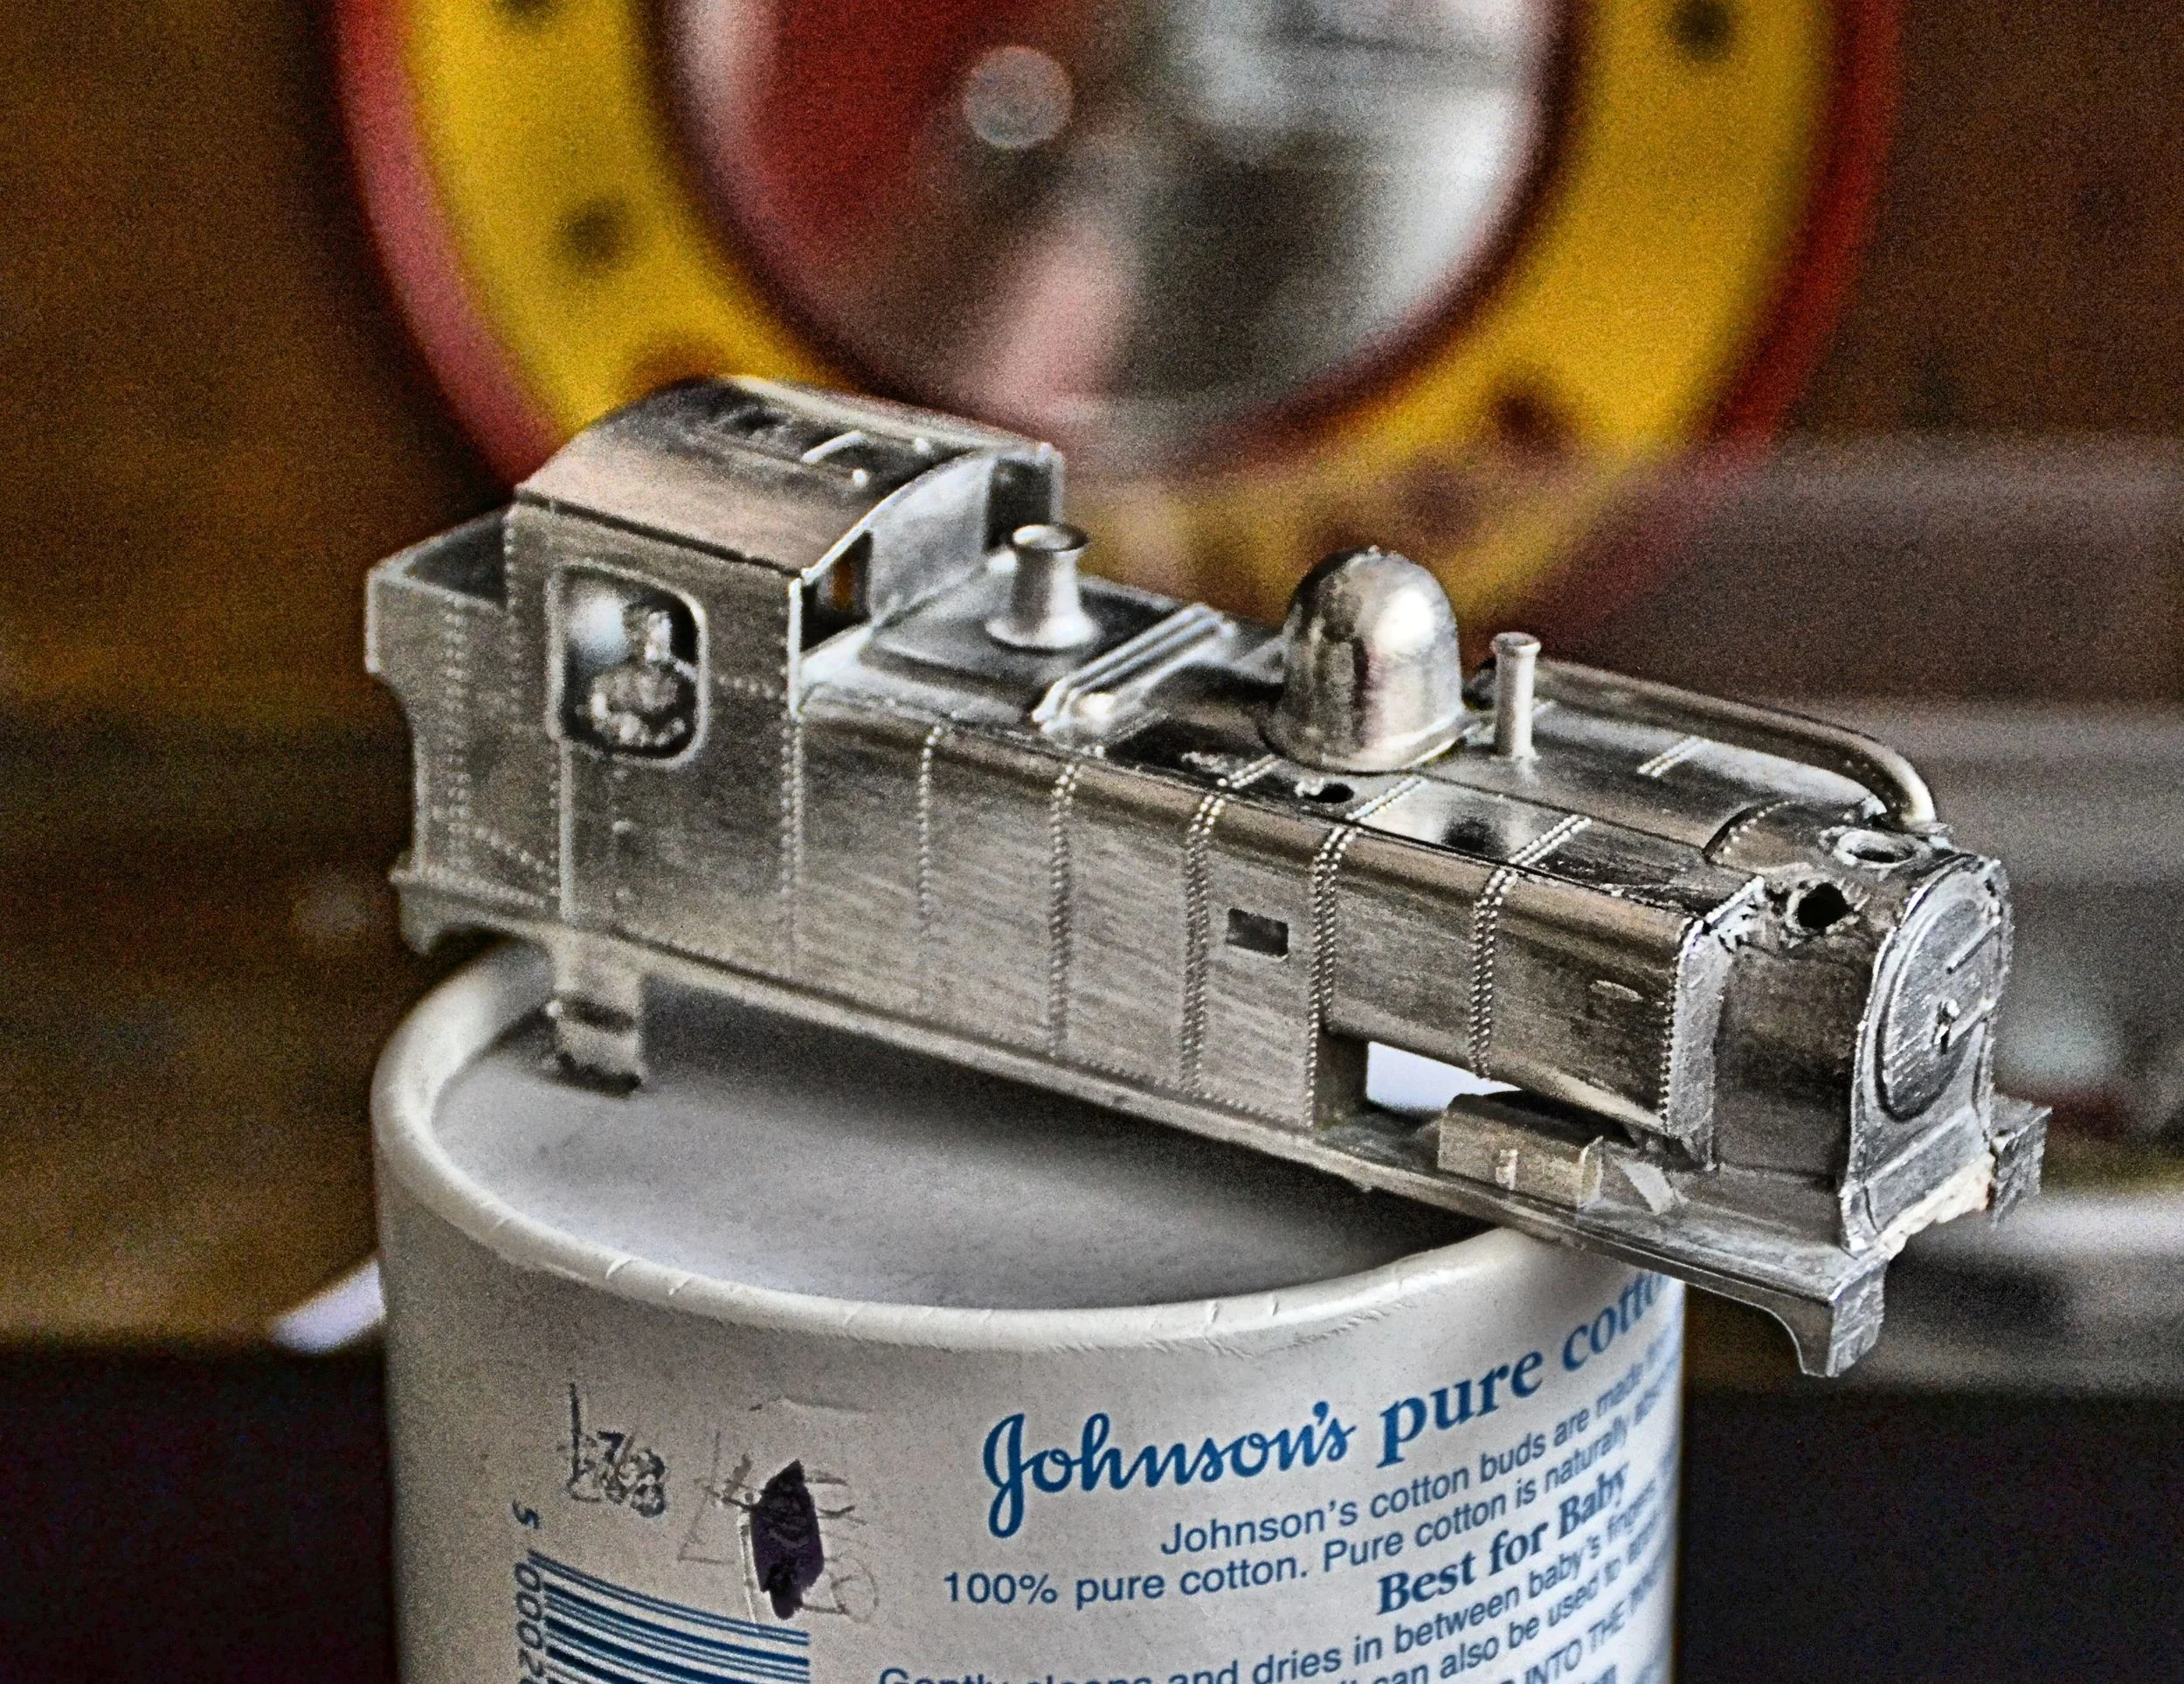
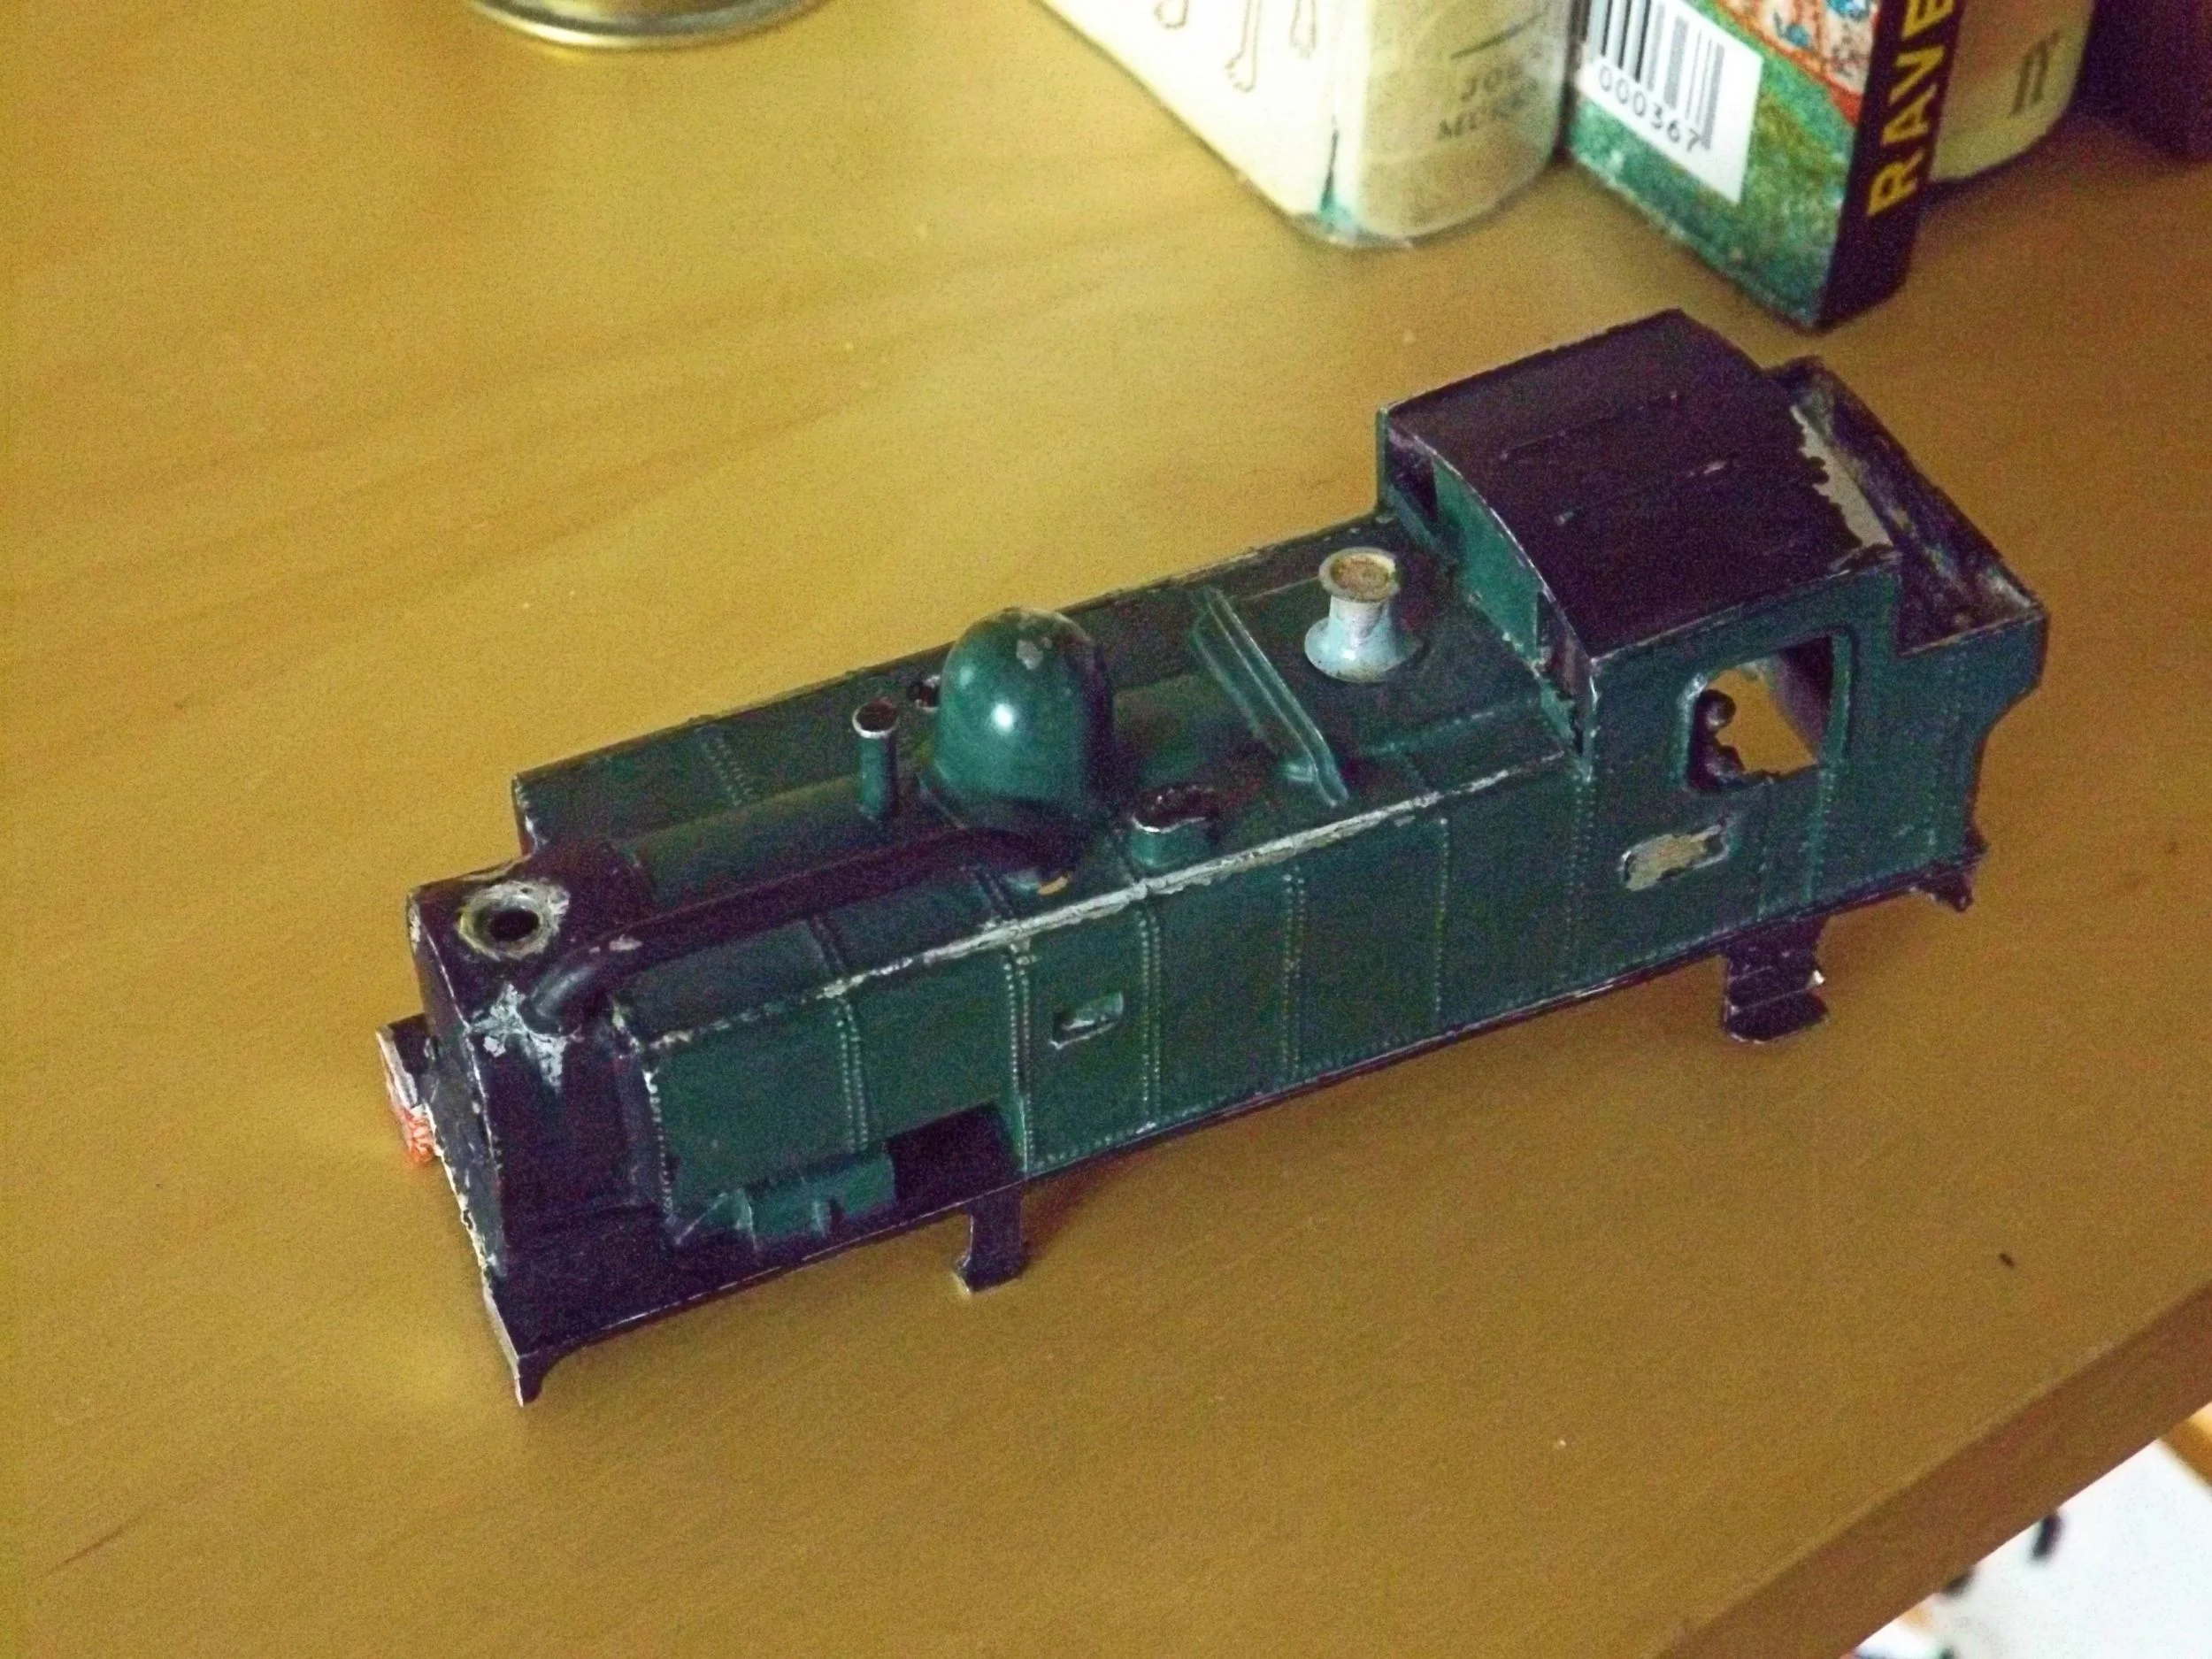
A Good Wash and Scrub-Up........
A 24 hour soak in 'Mr Muscle' oven cleaner effortlessly removed all of the paint. Nitromors wouldn't touch it at all, which speaks volumes for the extremely caustic properties of the oven cleaner [it contains Sodium Hydroxide]. The cleaned casting looked reasonable but showed a lot of distortion, a consequence of decades of careless handling and poor initial pre-build preparation [a lot of it was not square]. Gentle manipulation and filler would remedy most of that in due course. As can be seen from the photos below, a good wash in hot soapy water and a burnish with wire wool worked wonders.
At this stage, I sawed diagonally across the top of the front buffer beam to remove about a mil and a half to square up this part of the loco. I then cleaned up the beam with files so that I could later construct a new one out of plastic card. Once that had been applied, I would be able to deal with the filler liberally applied by the previous builder and close the gap between the buffer beam and the smoke box rather more effectively. I would also need to drill out some handrail knob holes, clean up some solder and original build damage to the body, fill in some seams, construct some steps and think about building a Weir Pump to sit alongside the smoke box. Not much to occupy me then............

Under the knife...........
By now I had decided to remove all of the steps as they were either too damaged or mis-shapen to continue with. Replacements were sourced from a redundant Airfix 14XX body and were cut down and reshaped to fit later. Various handrail knob / grab rail holes were drilled and a lot of filler applied to close some gaping seams. More would be needed after the first coat of primer had been applied however.
Unfortunately, closer inspection of the cab roof, front and back showed that it too was beyond repair, a further consequence of poor building and a crack in the casting. I decided to remove it and explore options for replacement.
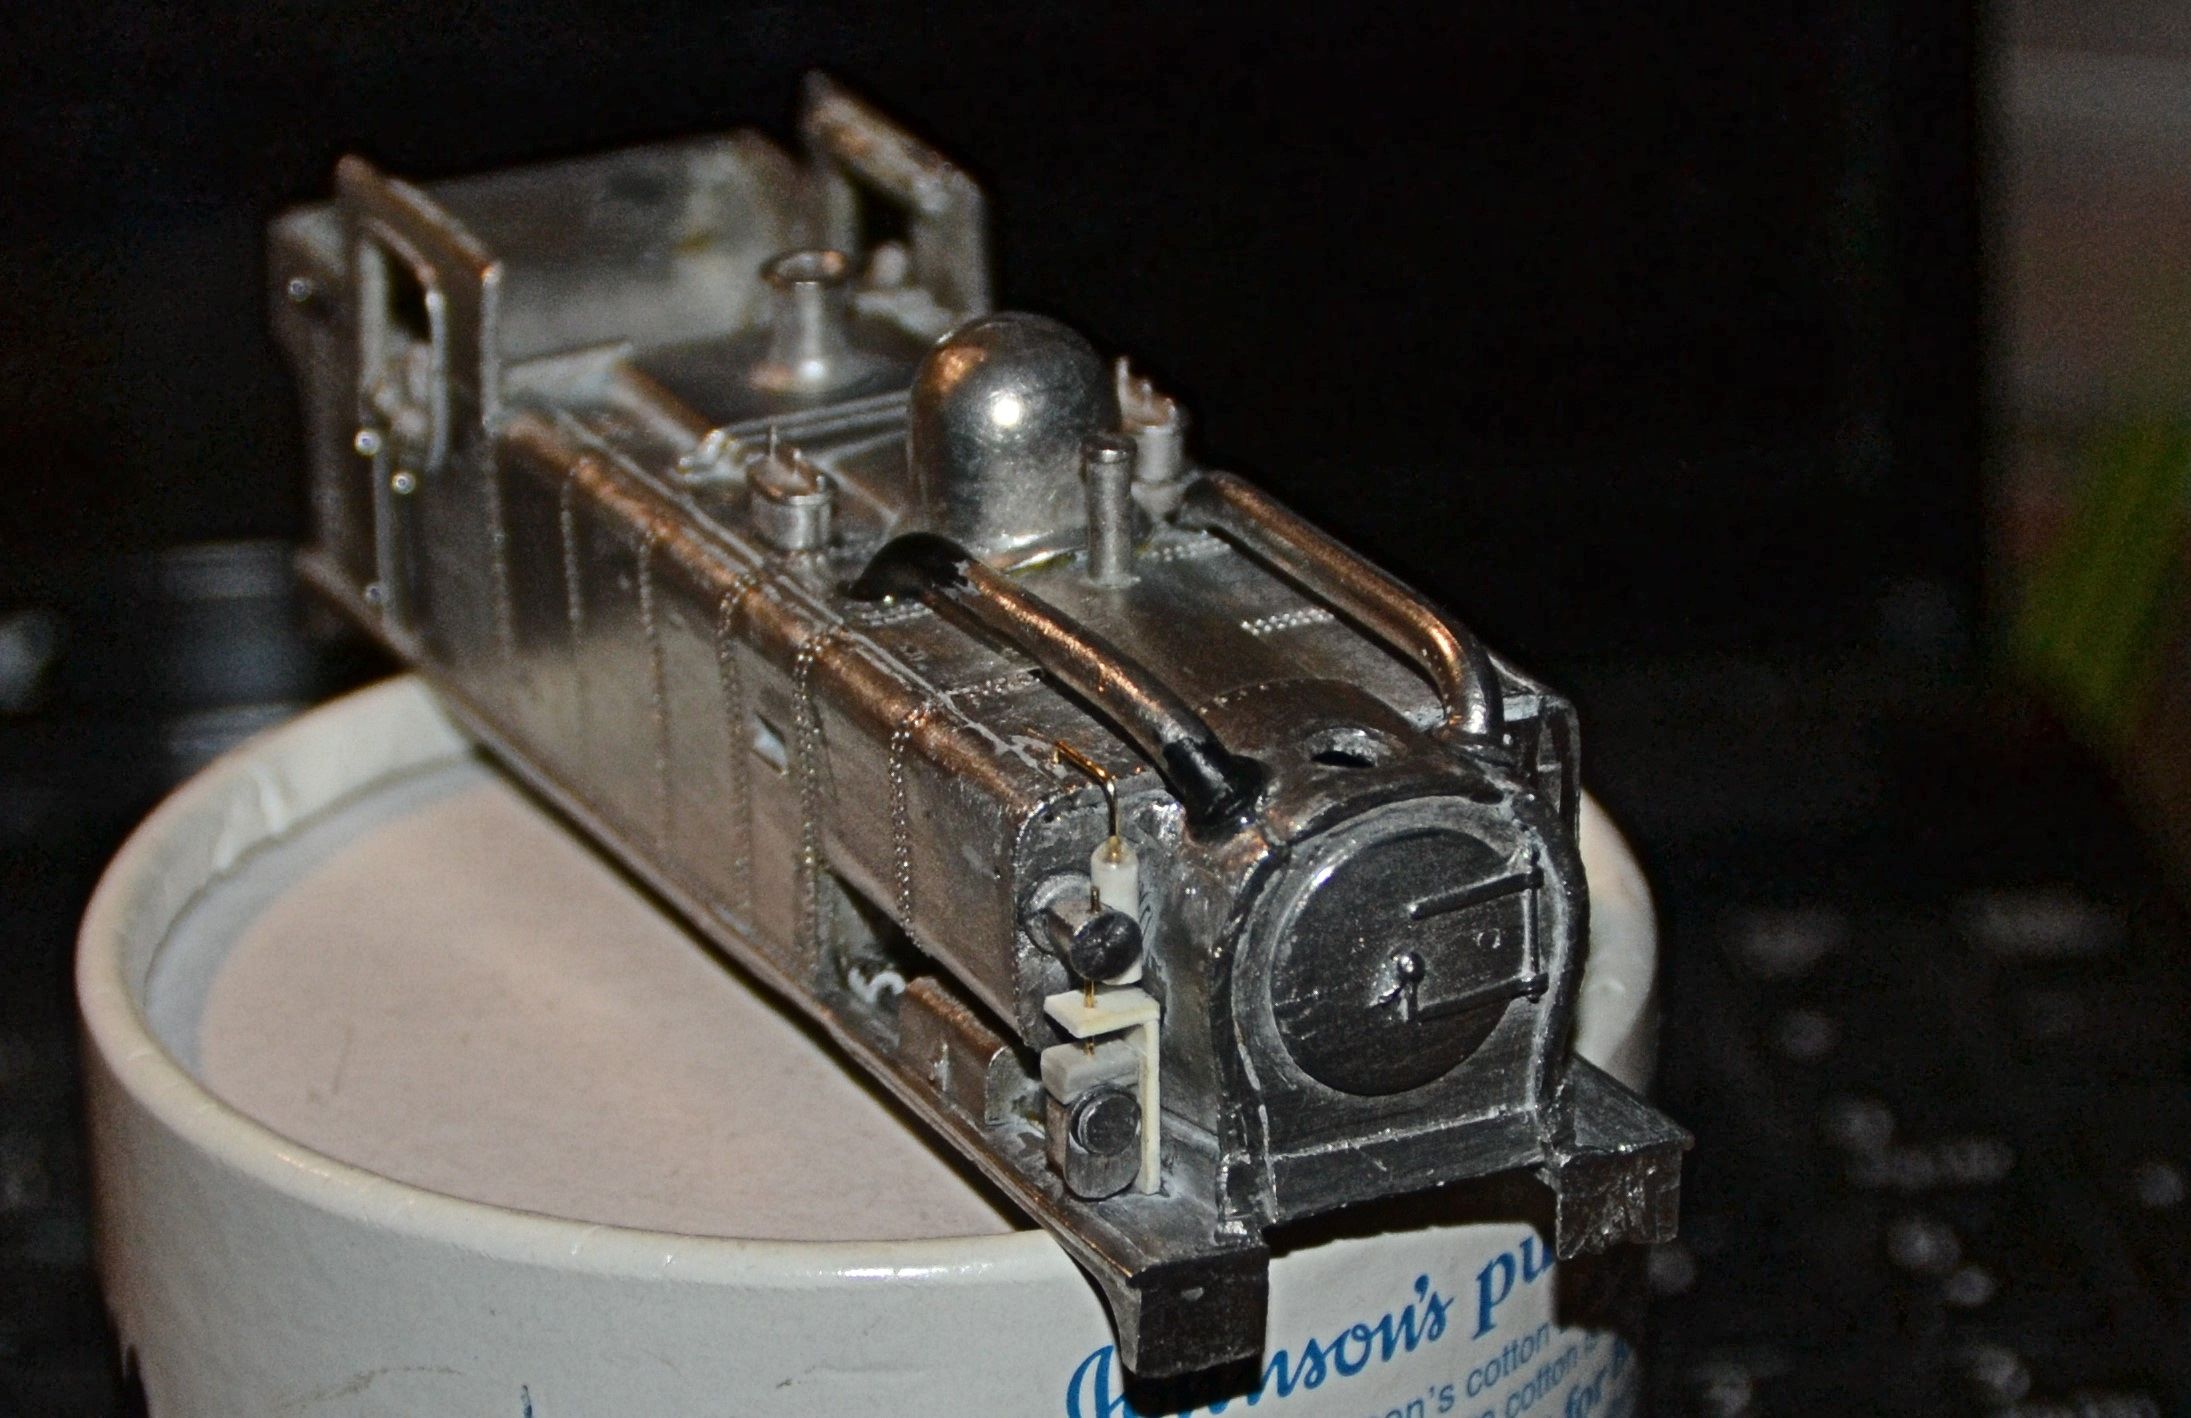
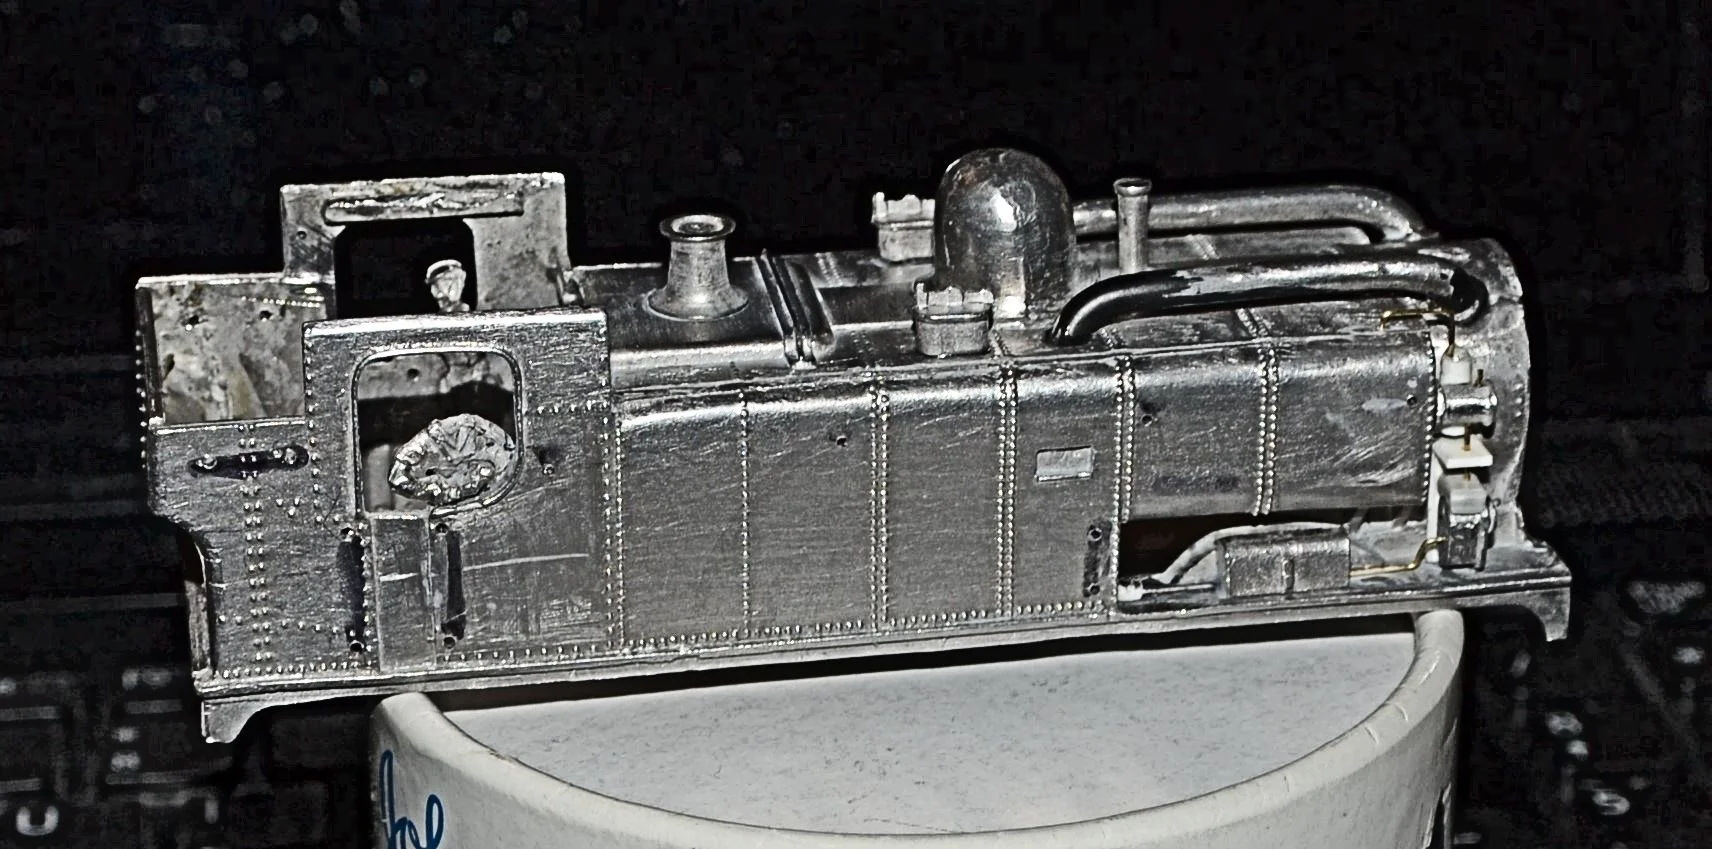
The exhaust steam pipes atop the tanks received a lot of attention. Neither was the same length nor the same shape, even allowing for the fact that they were handed. The left hand pipe required a lot of filing and reshaping to obtain an approximate match to its partner. Both were then refitted and I was reasonably happy with the result. I decided to try to reduce the the bore of left hand pipe just a little further however, but would wait to see what it looks like after it had first been primed. Replacement white metal water filler caps were fitted also. I used two-part epoxy for these tasks as it provided a useful filler - the holes for all were far too big. I formed the long runs of pipework that would be attached later to the lower sides, below the running plate. Curiously, the driver lost his head at some time during this operation !
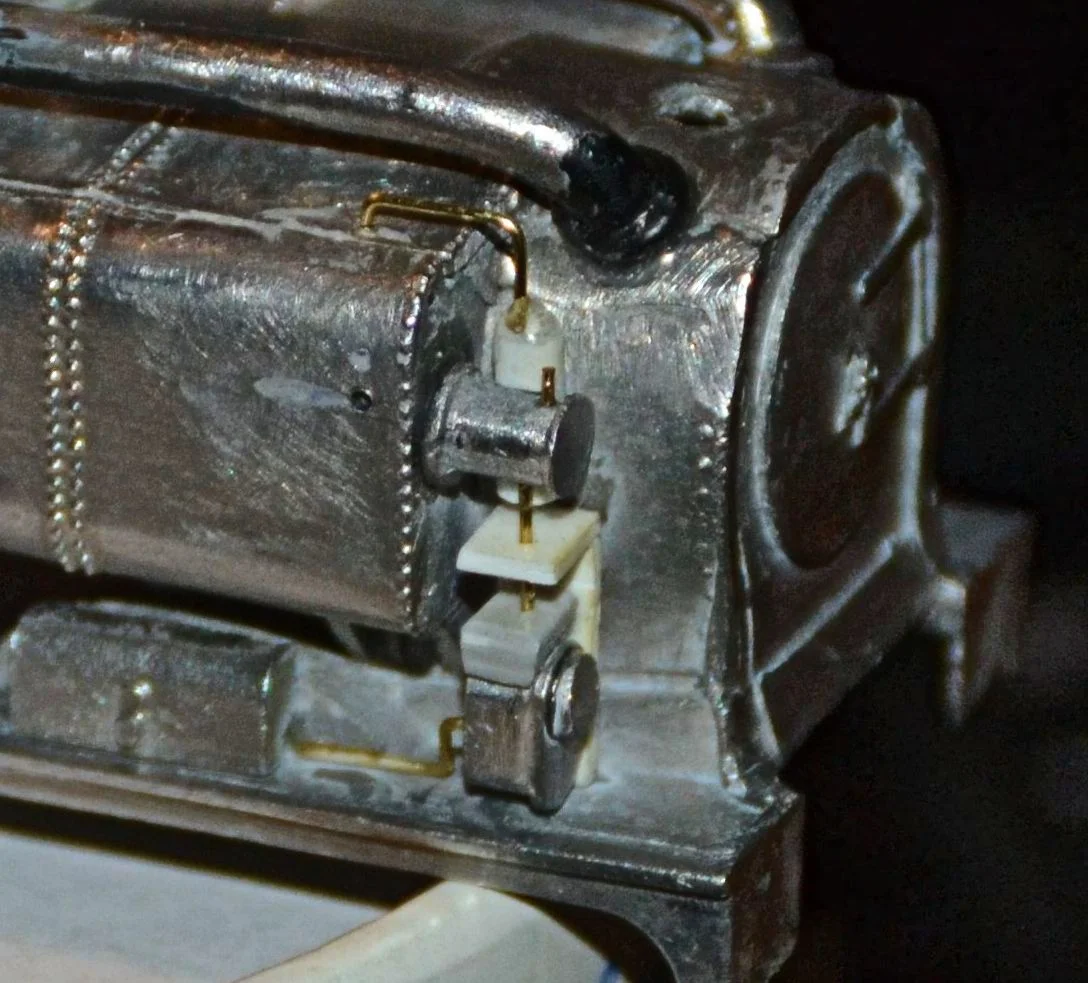
The most complicated part of this rebuild involved the fabrication of the Weir Pump, an absolutely essential detail on this class. Finding clear photographs of an original was extremely difficult: I sourced a few but they were either too small or too dark to understand precisely what was involved. [I did not find the photograph at the head of this article until I started writing this article - had I seen it earlier, it would have been of great help in terms of detail and scale]. I also had few similar mouldings in my parts box. Consequently, some plastic tube, brass strip, plastic card and wire was lashed together to produce an impression of the original. I felt that once painted it would look OK. The photos don't really do it justice however, but anyway, who's left who can remember the original ? I was satisfied with the result - as I said earlier, the finished model would be a generic representation rather than an accurate reflection of the prototype.
Still in surgery..........
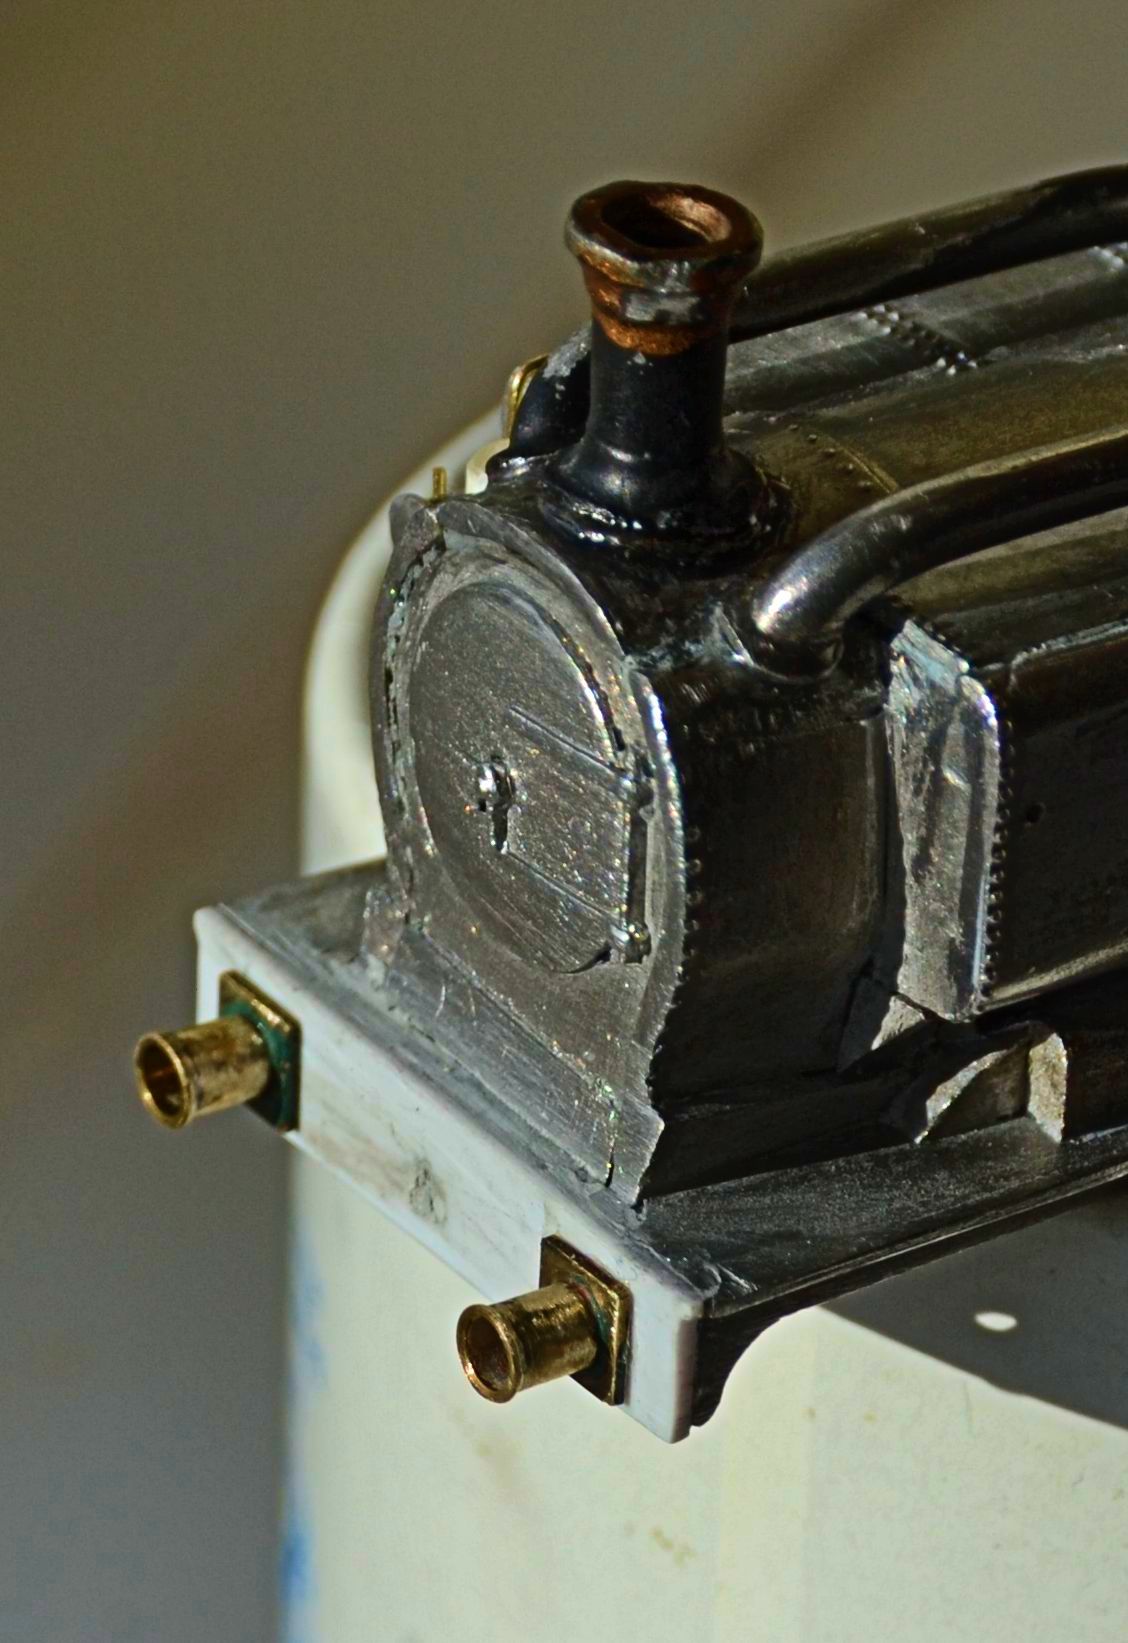
A little more work followed on the front end. I constructed a new buffer beam and reinstated the footplate directly in front of the smoke box door. These areas were 90% filler before, and really messy. I used plastic card and am really satisfied with the result. Once the adhesive had fully cured, a very thin skim of filler was laid over the footplate area and sanded back. It's pretty flush now. The front buffer beam is far deeper than the rear, a consequence of the way in which the sides were moulded. Nothing much I could do about that if radical surgery was to be avoided. When painted however, it would not be too noticeable. Brass buffer housings have also been fitted.
I also reattached the chimney. This was a difficult operation for two reasons: the chimney casting was absolutely terrible and, fitted as intended, would not sit flat because of dimples in the top of the smokebox, another shocking casting [see photos below]. When acquired, the chimney sat at about 80 degrees and slightly off to the right. I have managed to get it more or less perpendicular by using epoxy resin however - it provided a good seat as well as sealing the casting to the body. Epoxy also takes a little time to cure and so allows scope for readjustment. A little sanding around the base will be required in due course but the chimney is back where it should be and 9701 is beginning to look a little more purposeful.......
It is clear that there is still a fair amount of repair work required around the smokebox front however, and some filler will need applying to restore the shape. The middle photograph below shows the irregularities around the crown well.

Adding Detail
Work has continued on detailing the body: various handrails have been fitted and the steps [prepared earlier] now attached. The original cab roof, rear and front have been carefully removed, the cab-side casting cleaned up and a replacement made from a roof and rear taken from an old Airfix 14XX body. This required a degree of cutting down and filing before gluing in place, with the cab front filed up from a slab of white metal. The roof handrail has been bent up and fitted but is yet to be adjusted. Filler [Humbrol and Milliput] has also been applied to some of the worst gaps and pits. This will require several applications.
9701 is at last beginning to look something like the tank it purports to be. Still to be attached are the tank-side and smoke box handrail and the under running plate plumbing. I plan also to bend up some narrow brass strip to make fire-iron hooks and lamp irons. The photographs show that the front steps are a little short but, hopefully, black paint will disguise the worst of that.
Time has also been spent on the 50yr old chassis. It now runs very smoothly, having been given a replacement armature.
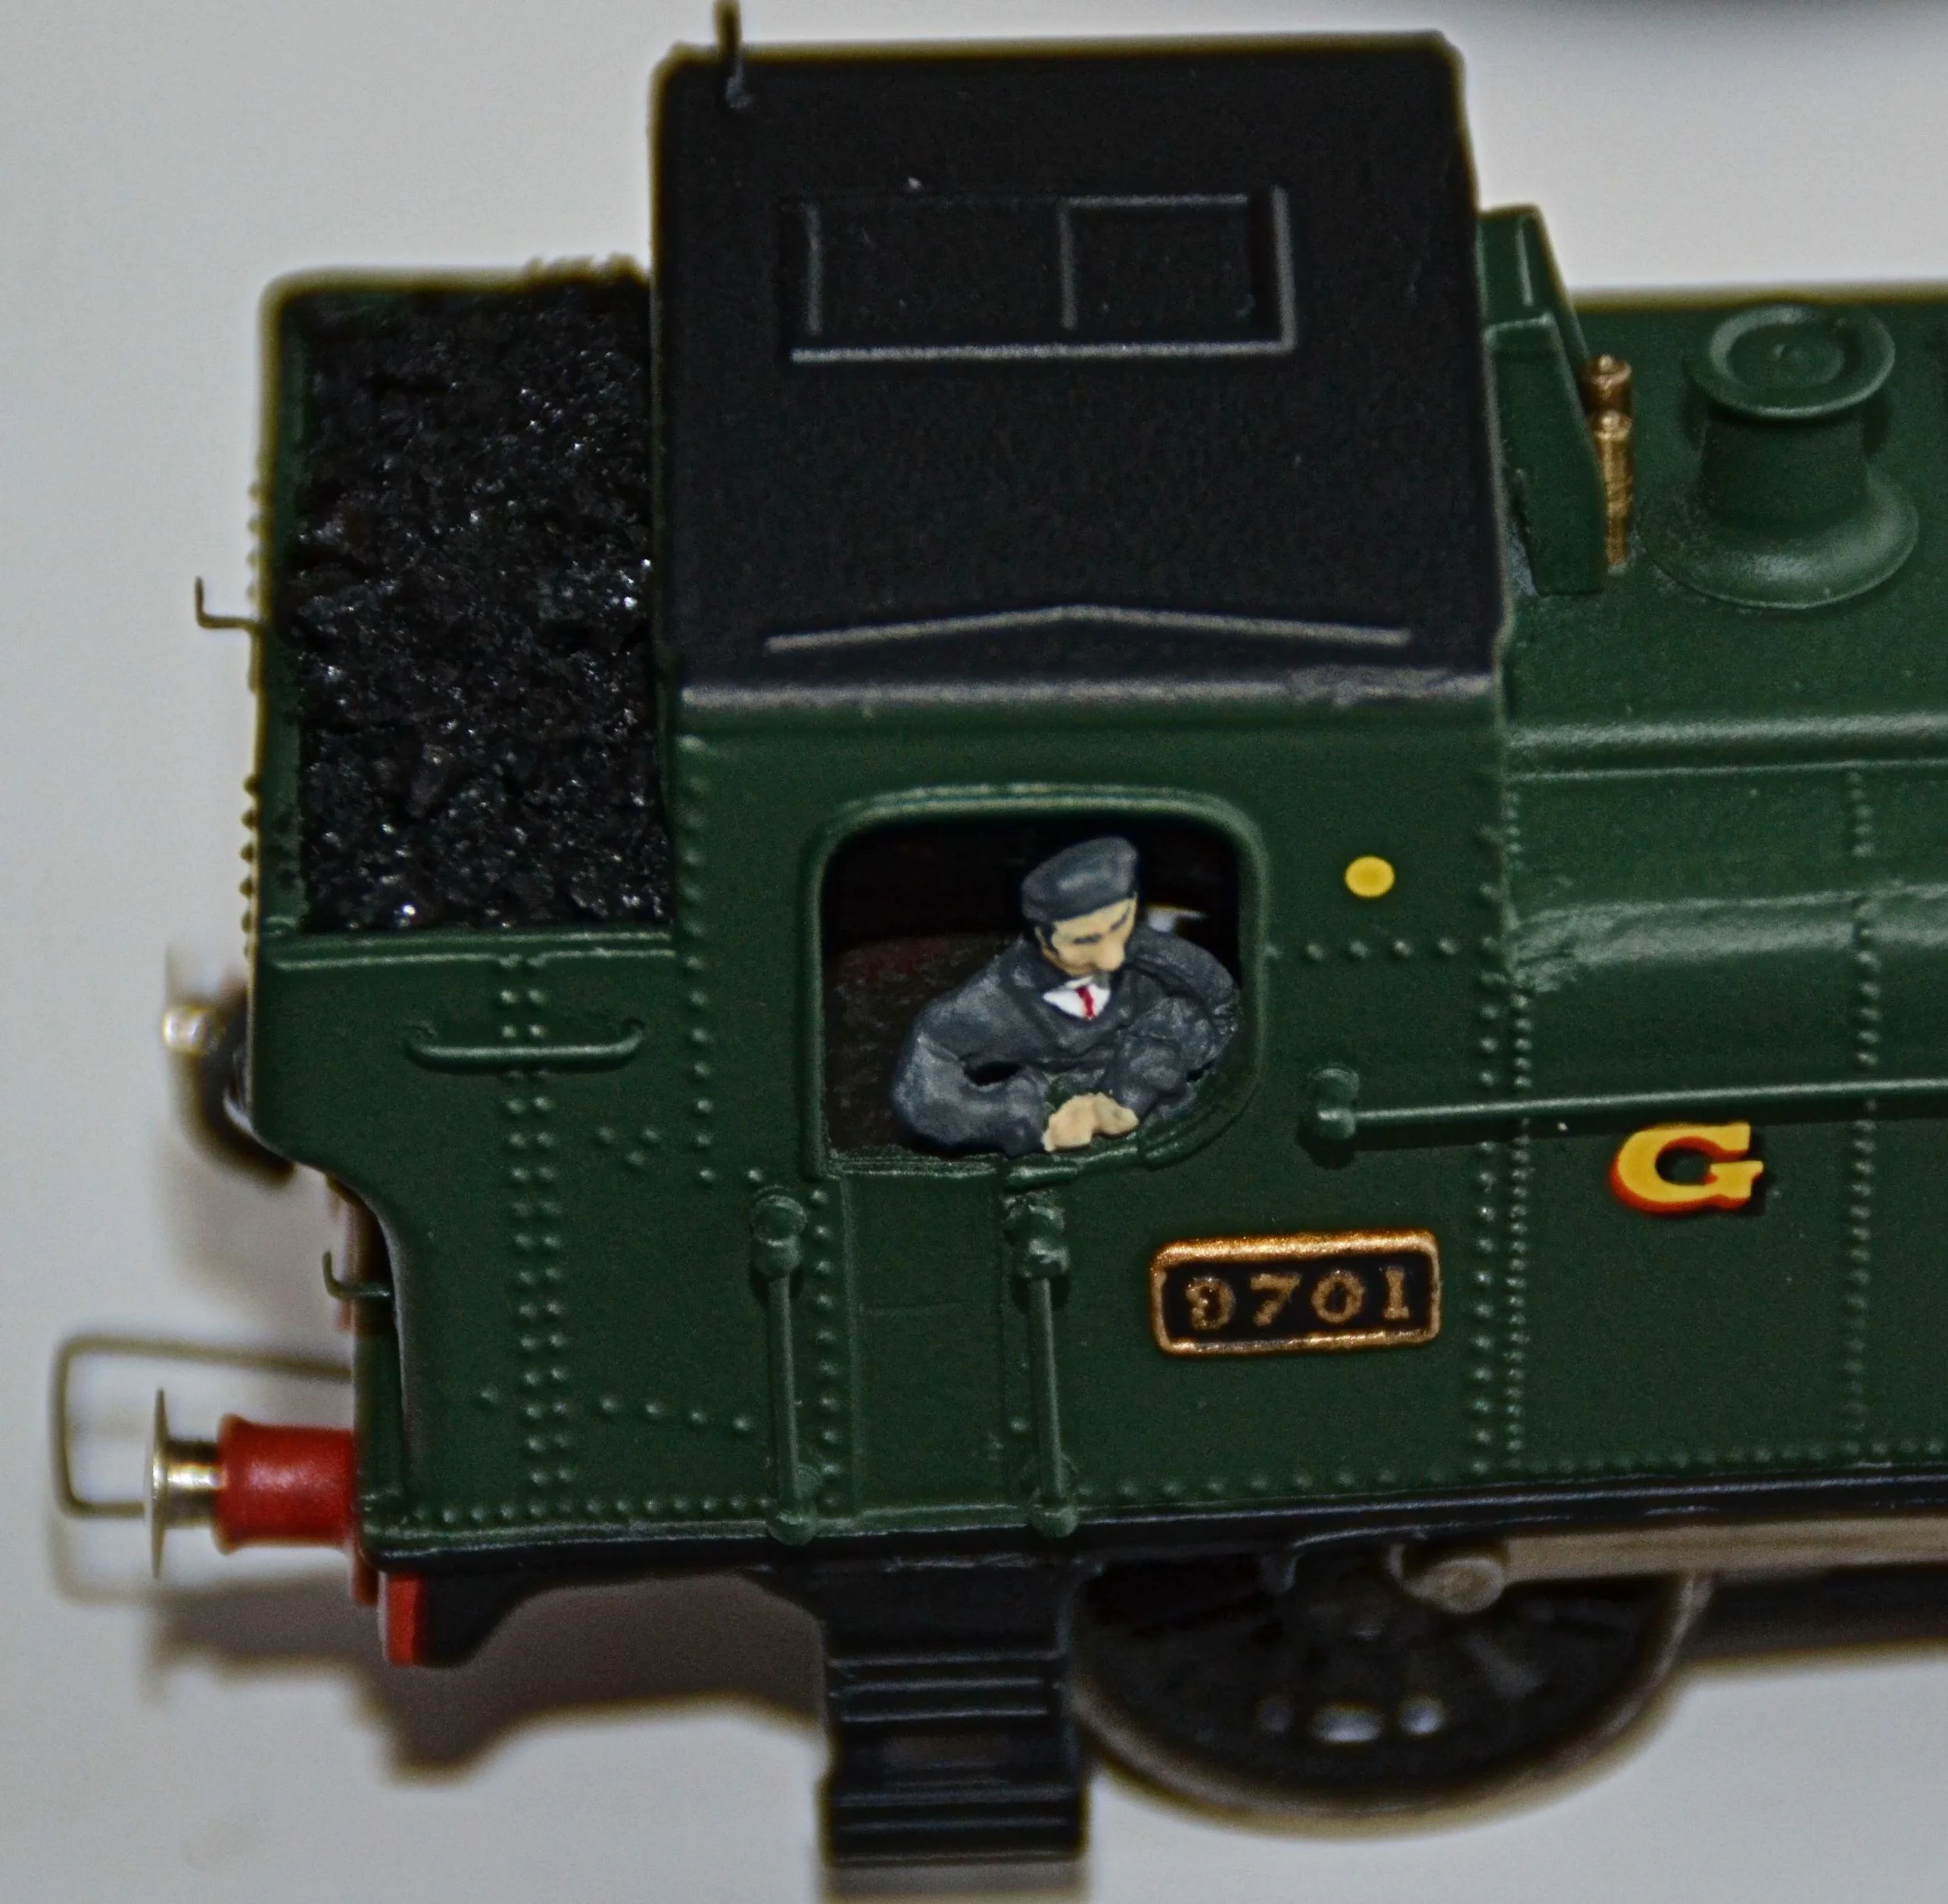
Oh, the driver's head has been re-attached !

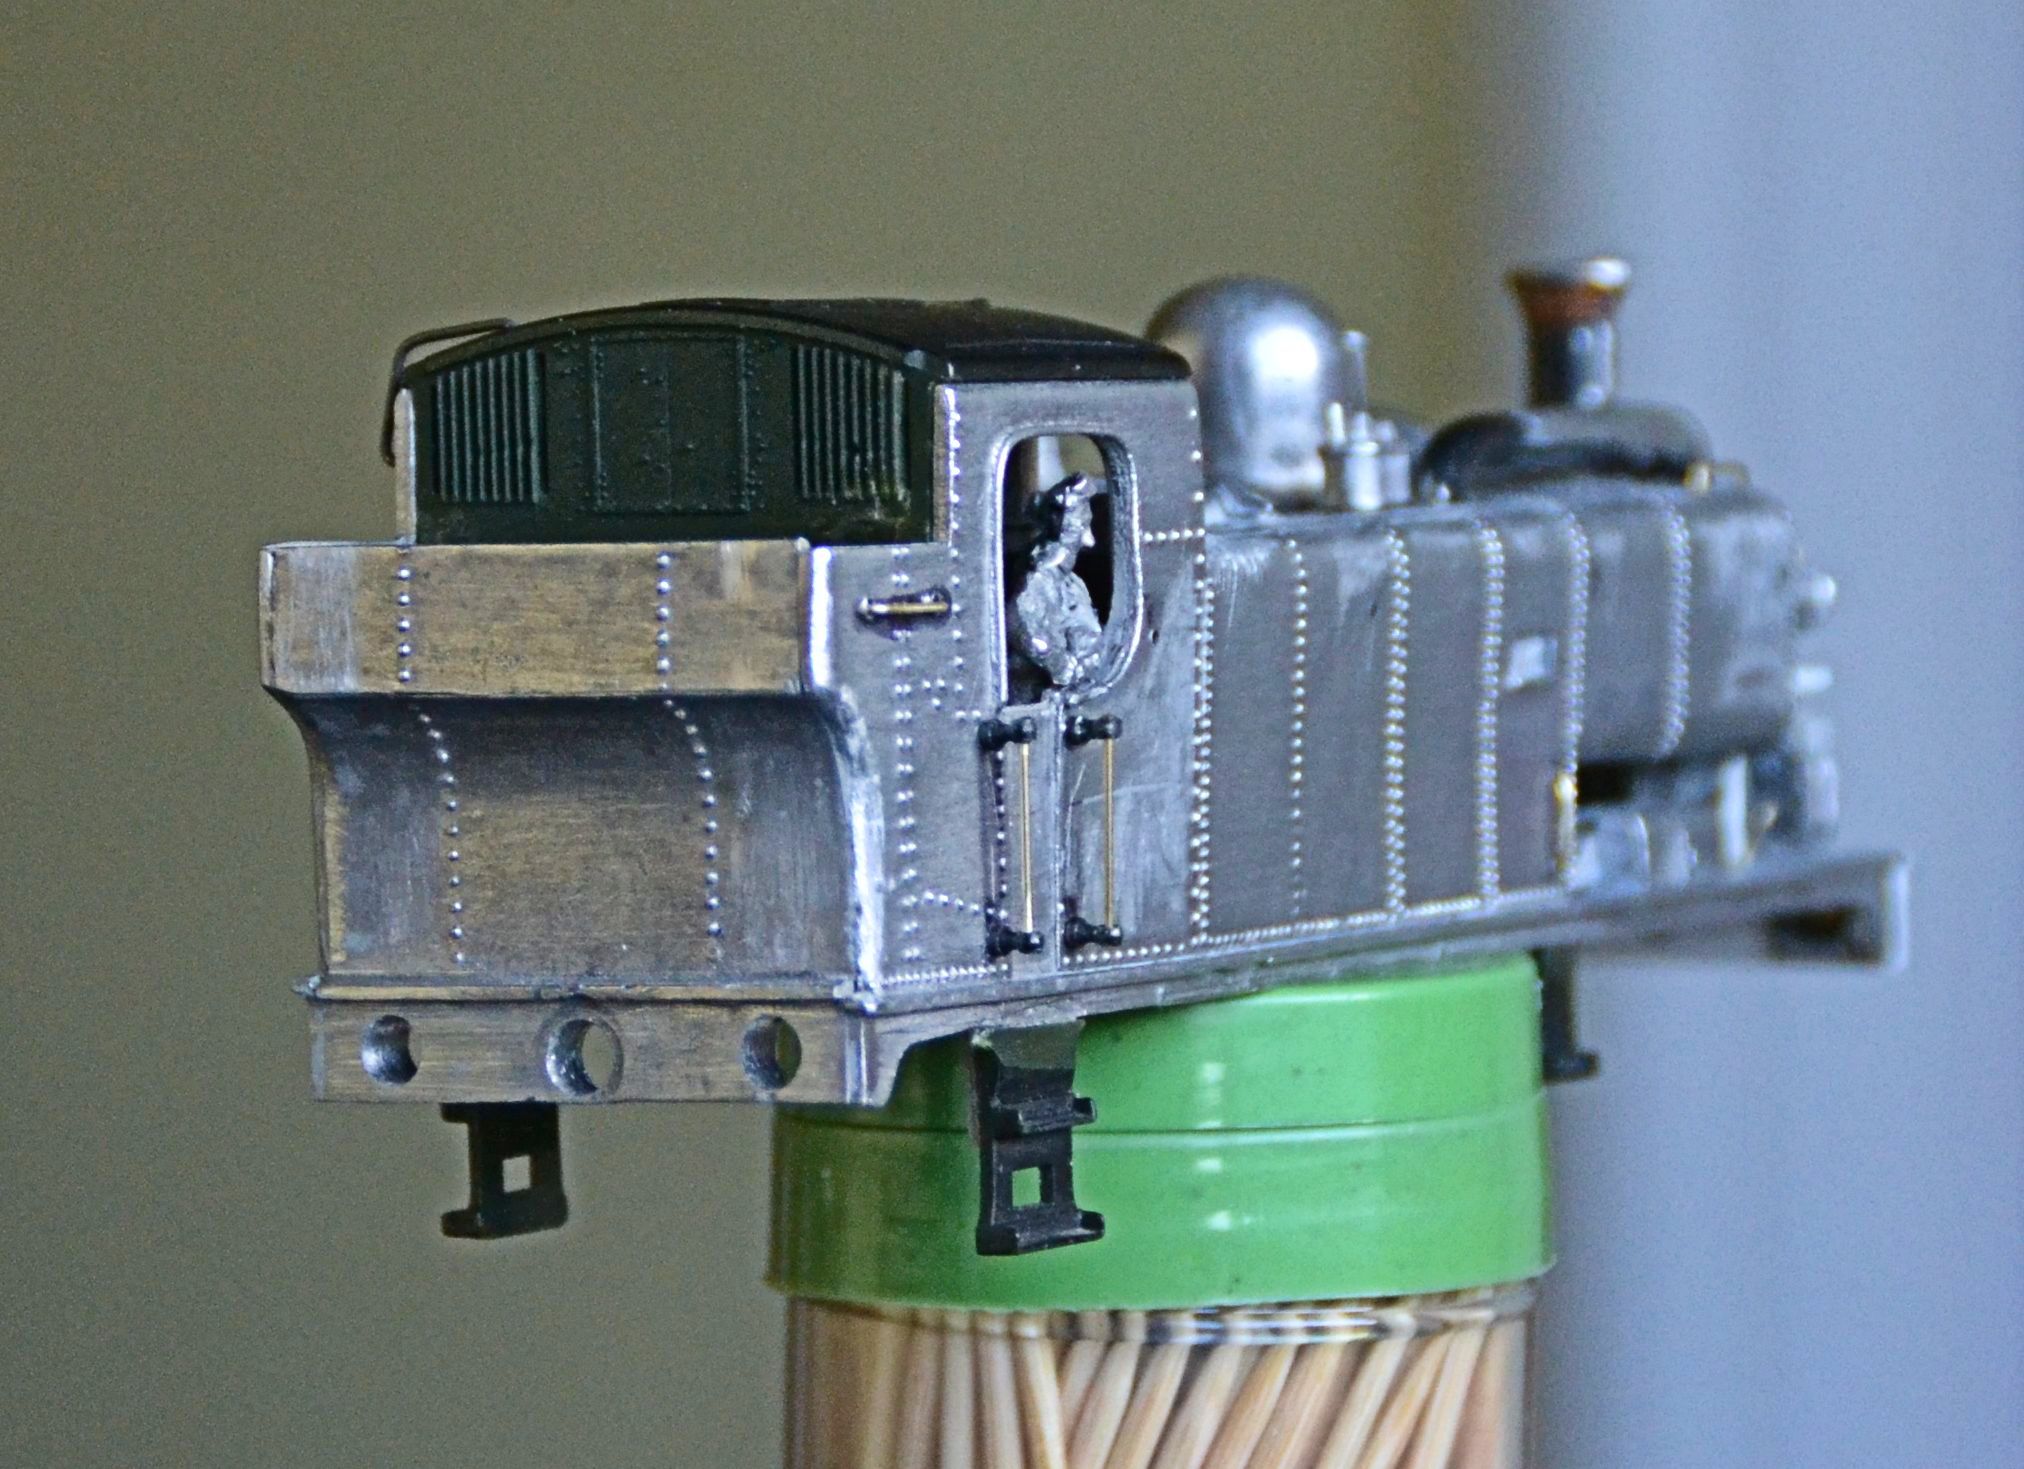
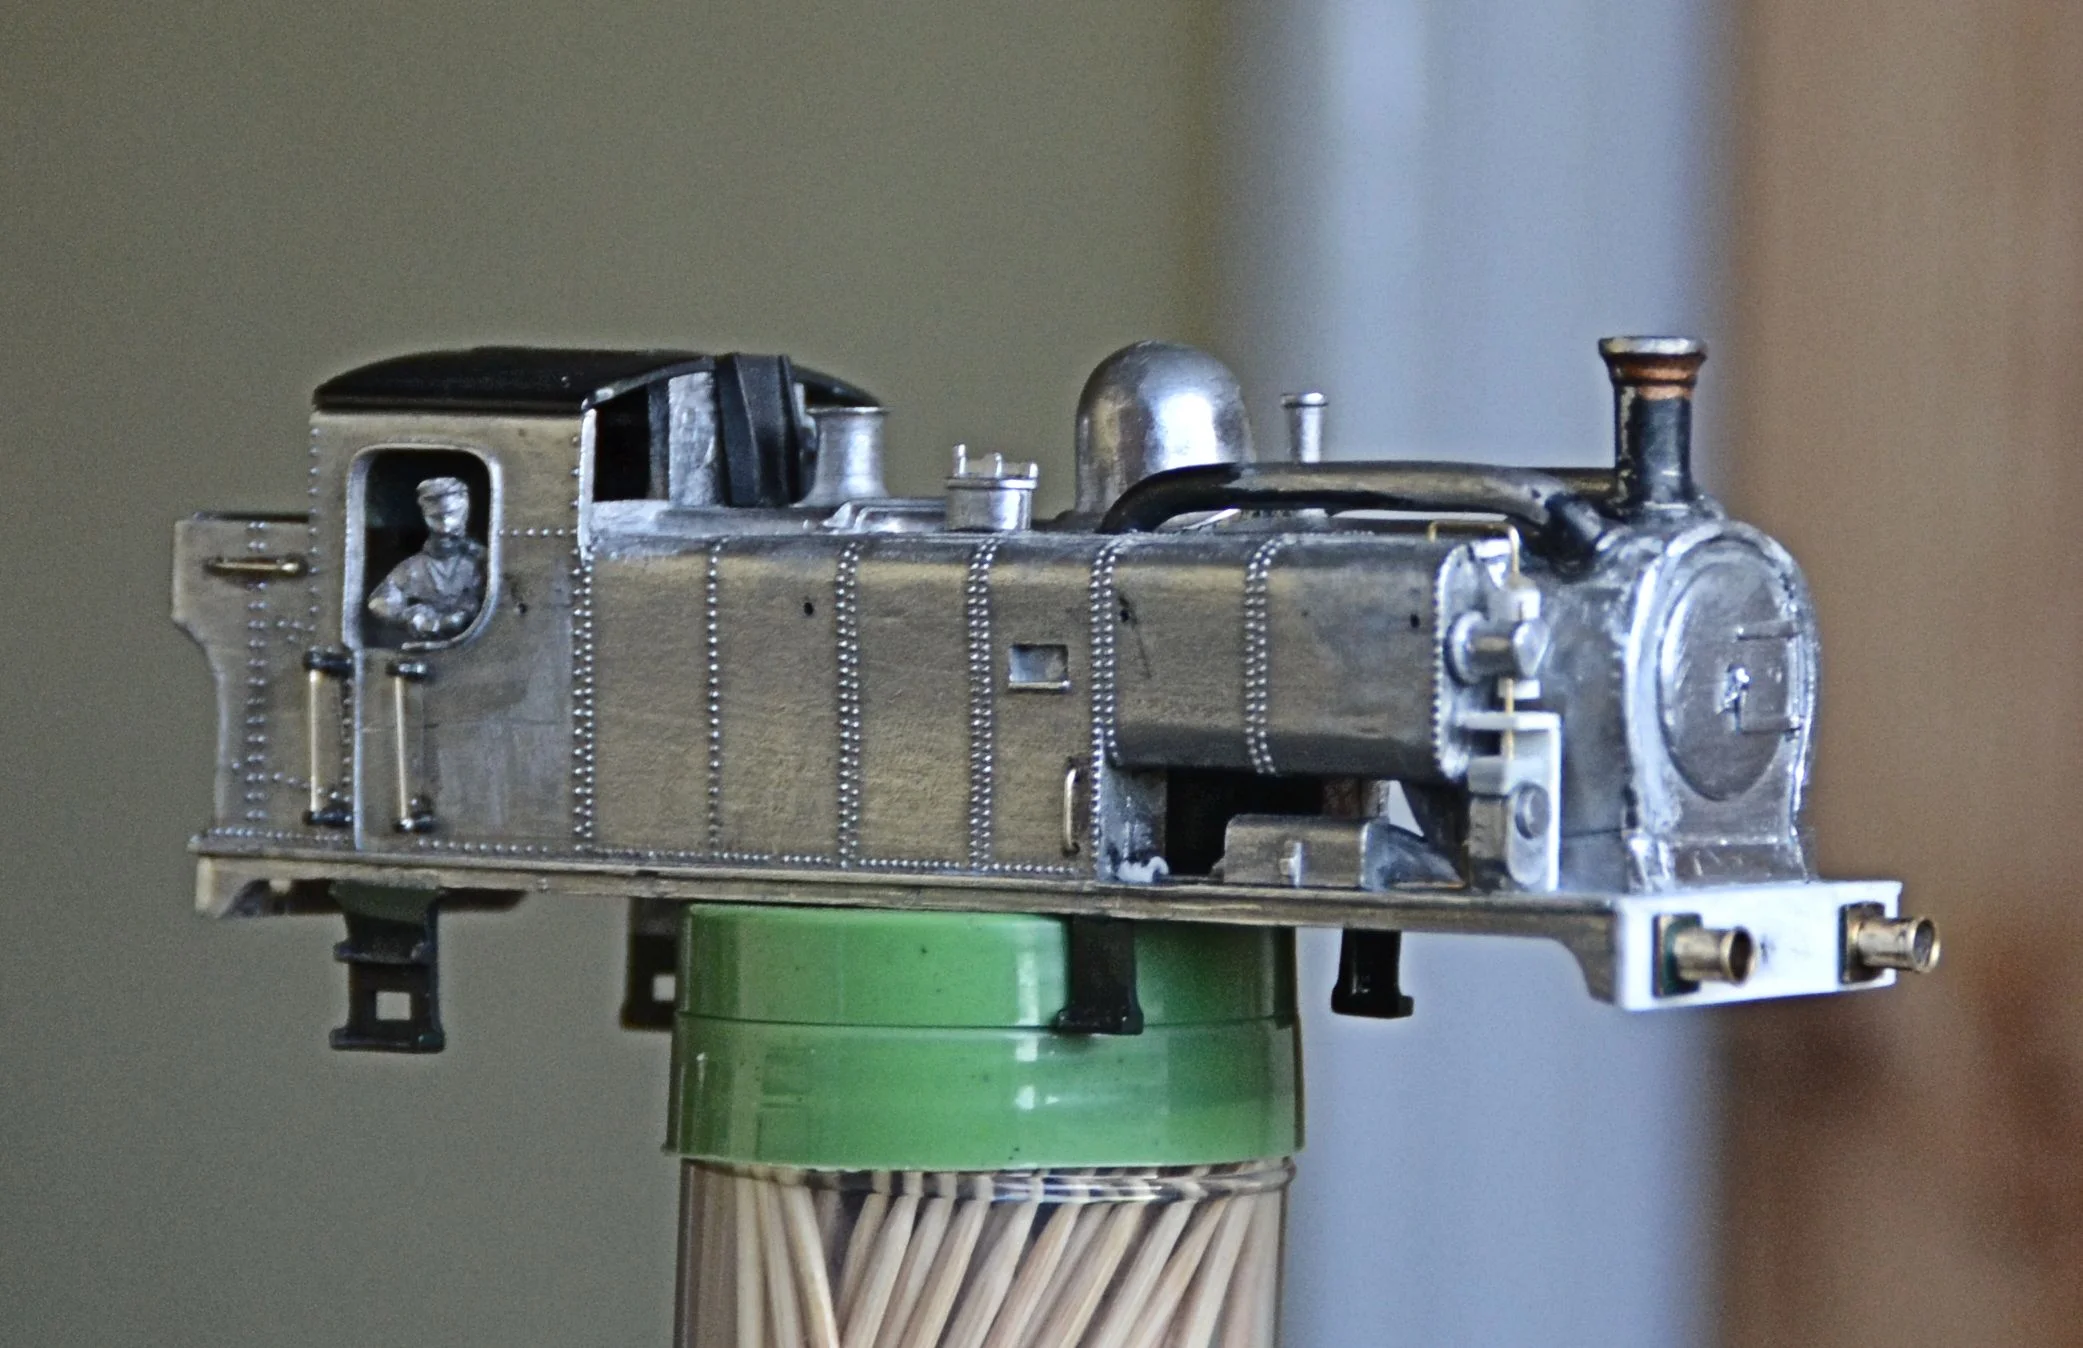
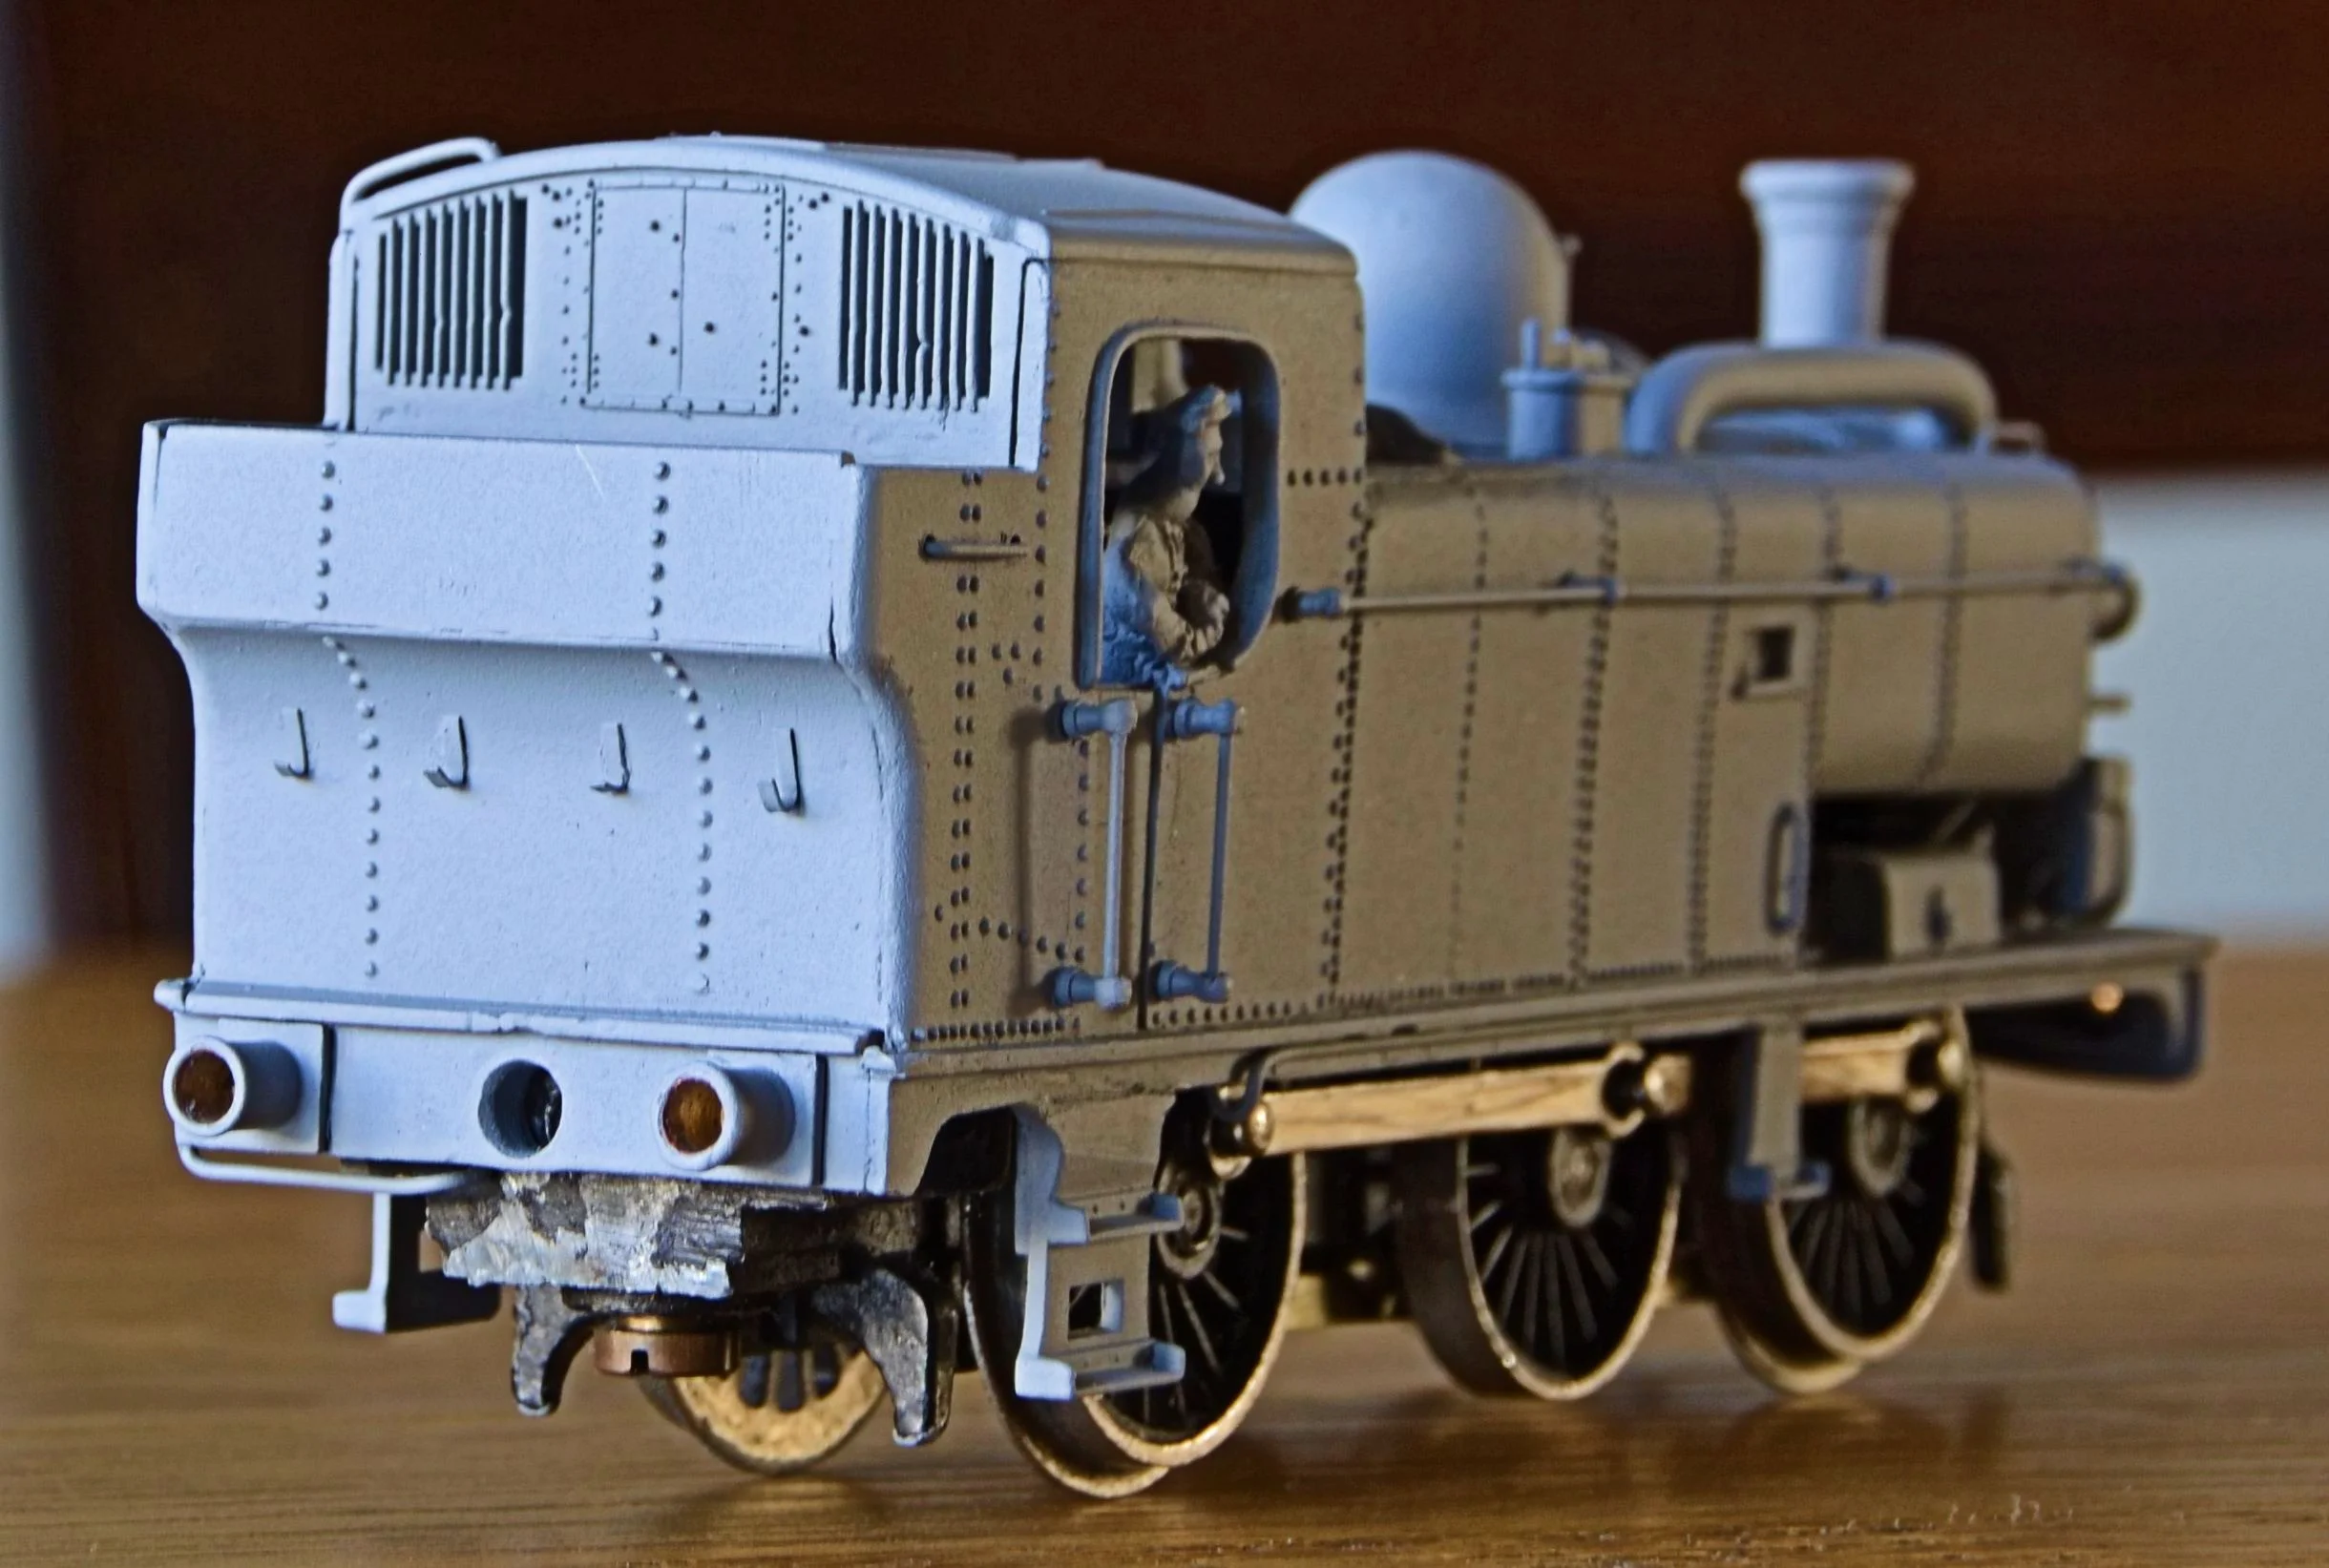
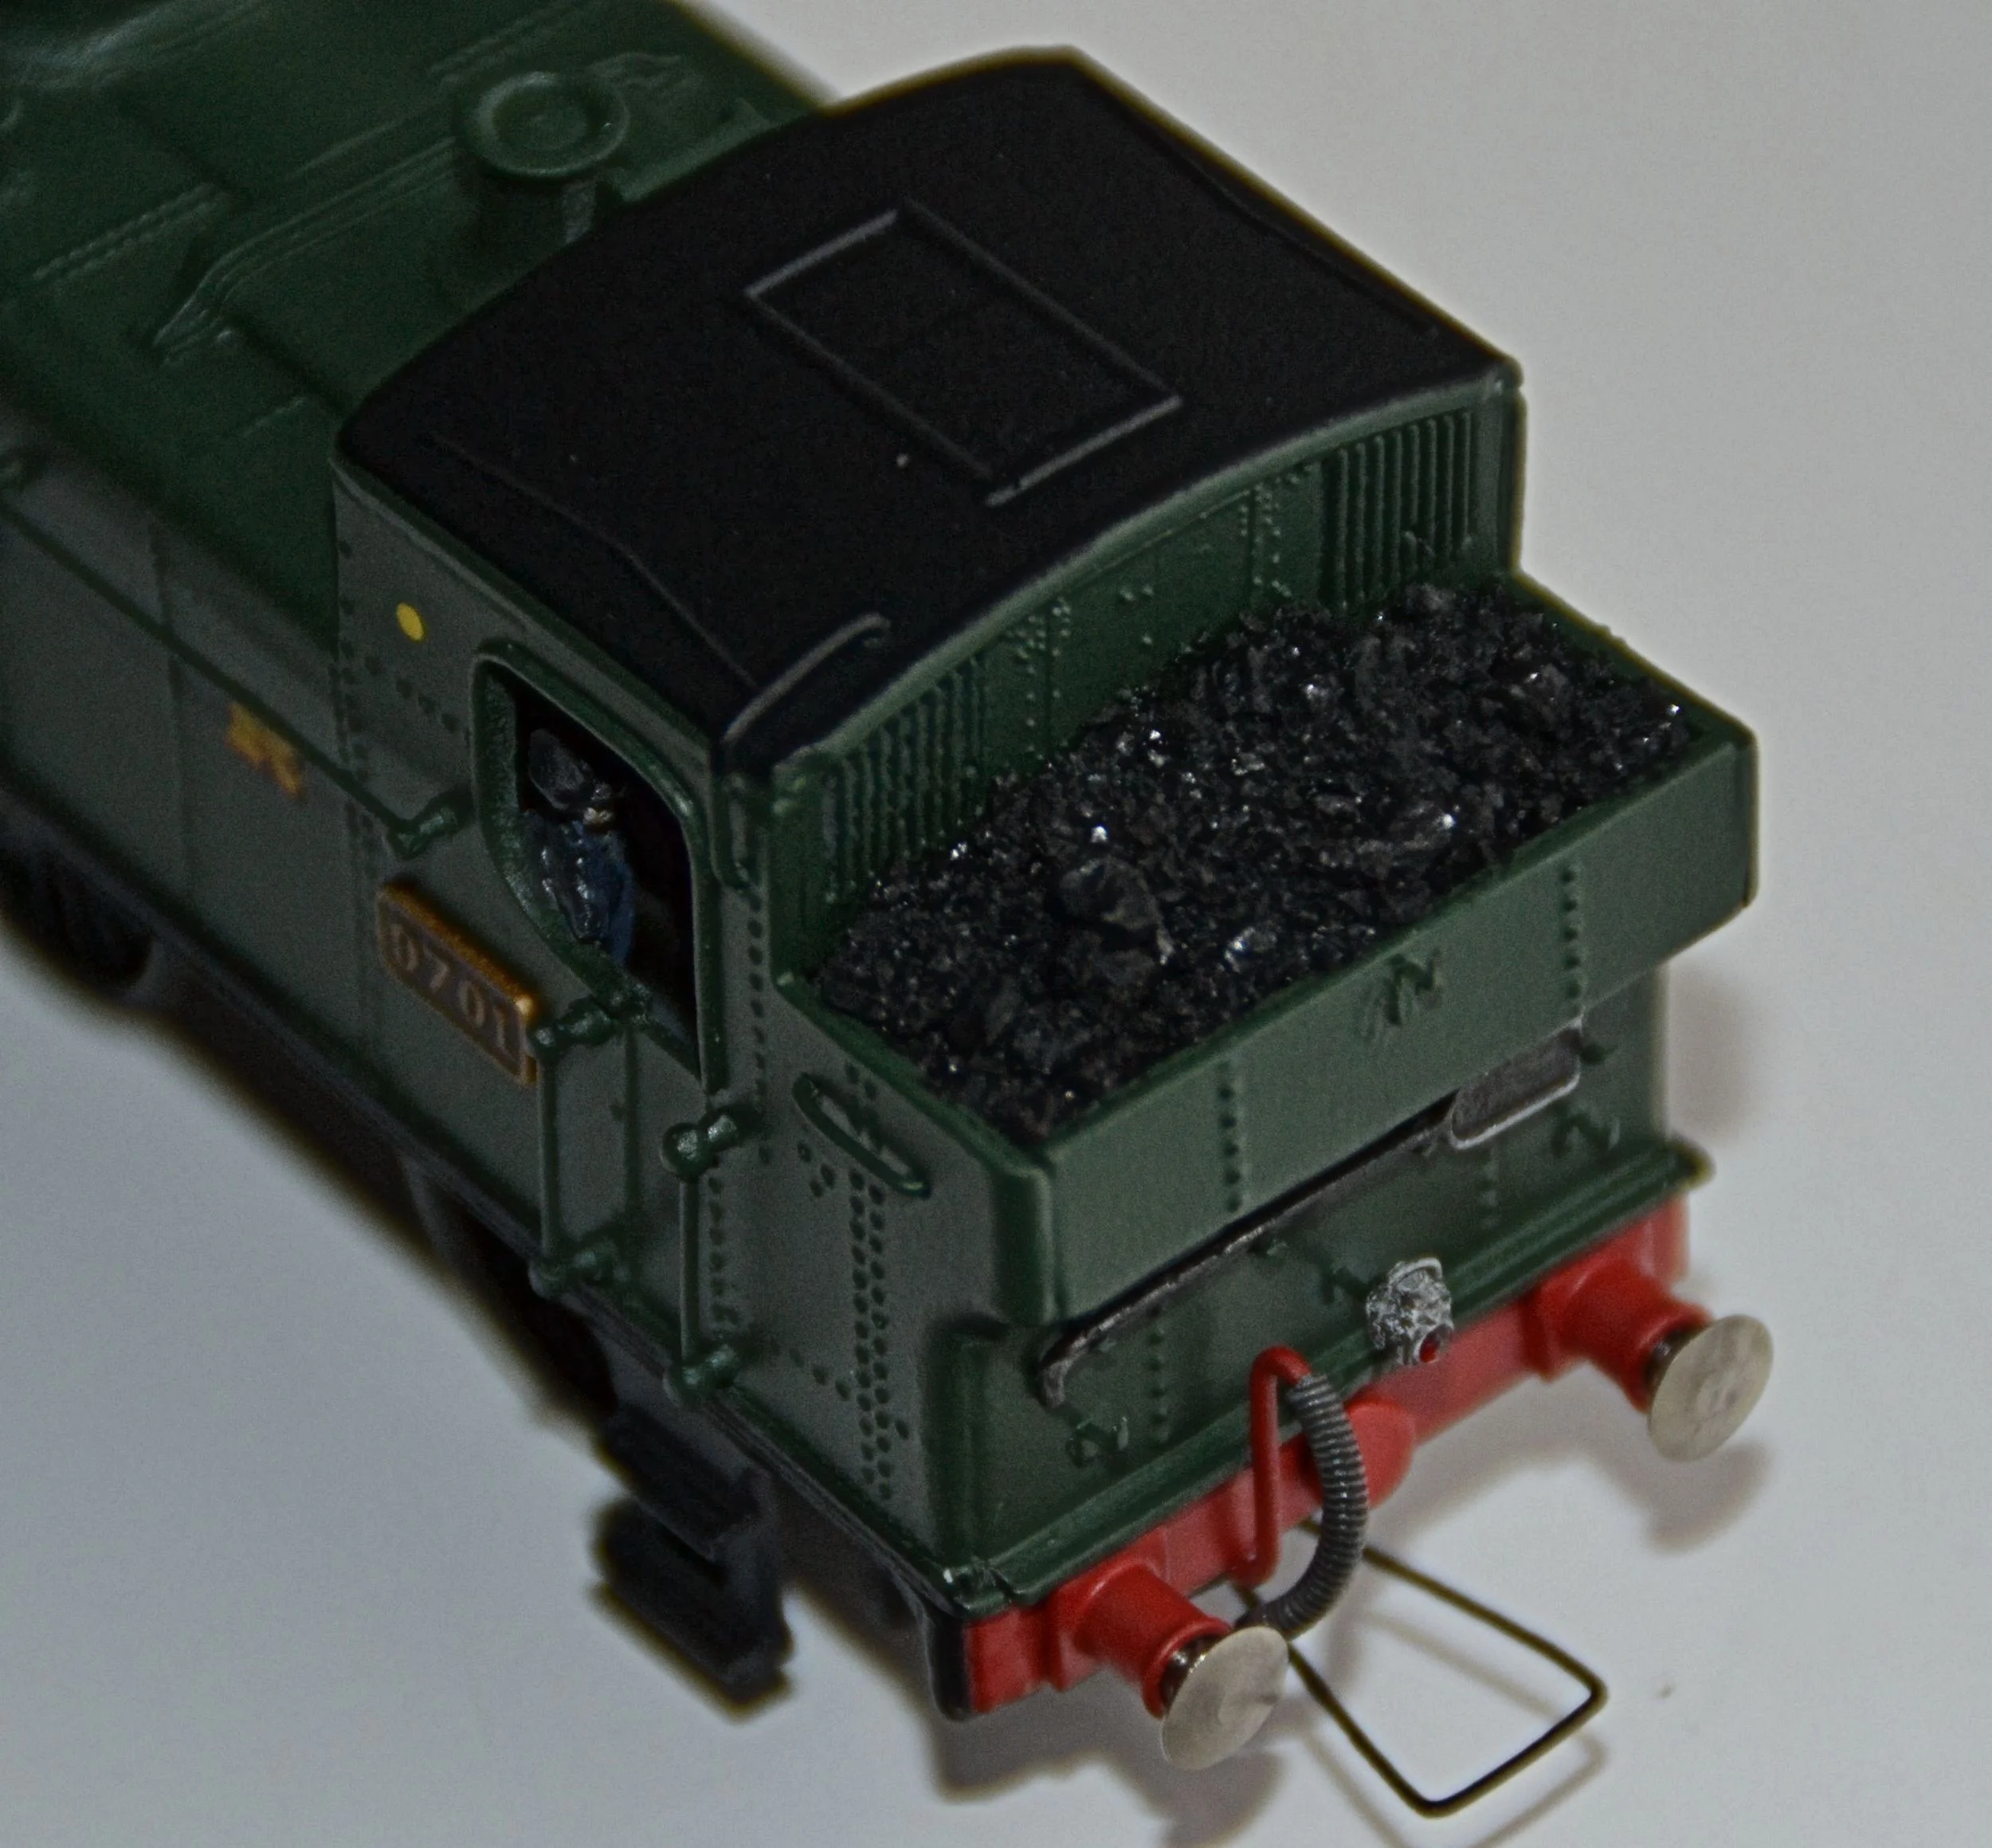
The next photos are the final pre-primer shots, the major restoration work having now been completed. They also show how well the adapted 14XX cab sections have taken. The handrail has been fitted but where it curves around the smoke box top it still needs a little adjustment. Otherwise I'm happy with the results so far. The handrail was a fiddley job, one which required forming by eye. It took about a hour or so to get it right but fitting it caused some inevitable bends which need just a little tweaking. The photos also show the below-the-footplate plumbing [green wire]. The body is sitting loosely on the chassis currently.
Number plates, coal, couplings and lamp irons will be fitted after primer has been applied, in case further filler / filing is necessary [which it probably will]. Fixing the buffer heads will be the last job.
For those who are interested in such things, the chassis motor is a Hornby Dublo 'half inch', open-frame type, which means that the chassis is an adapted R1 job: vintage stuff from the early 1960s. The R1 chassis was used as a basis for powering many white metal kits in those days and is pretty bomb-proof as long as kept clean and oiled.
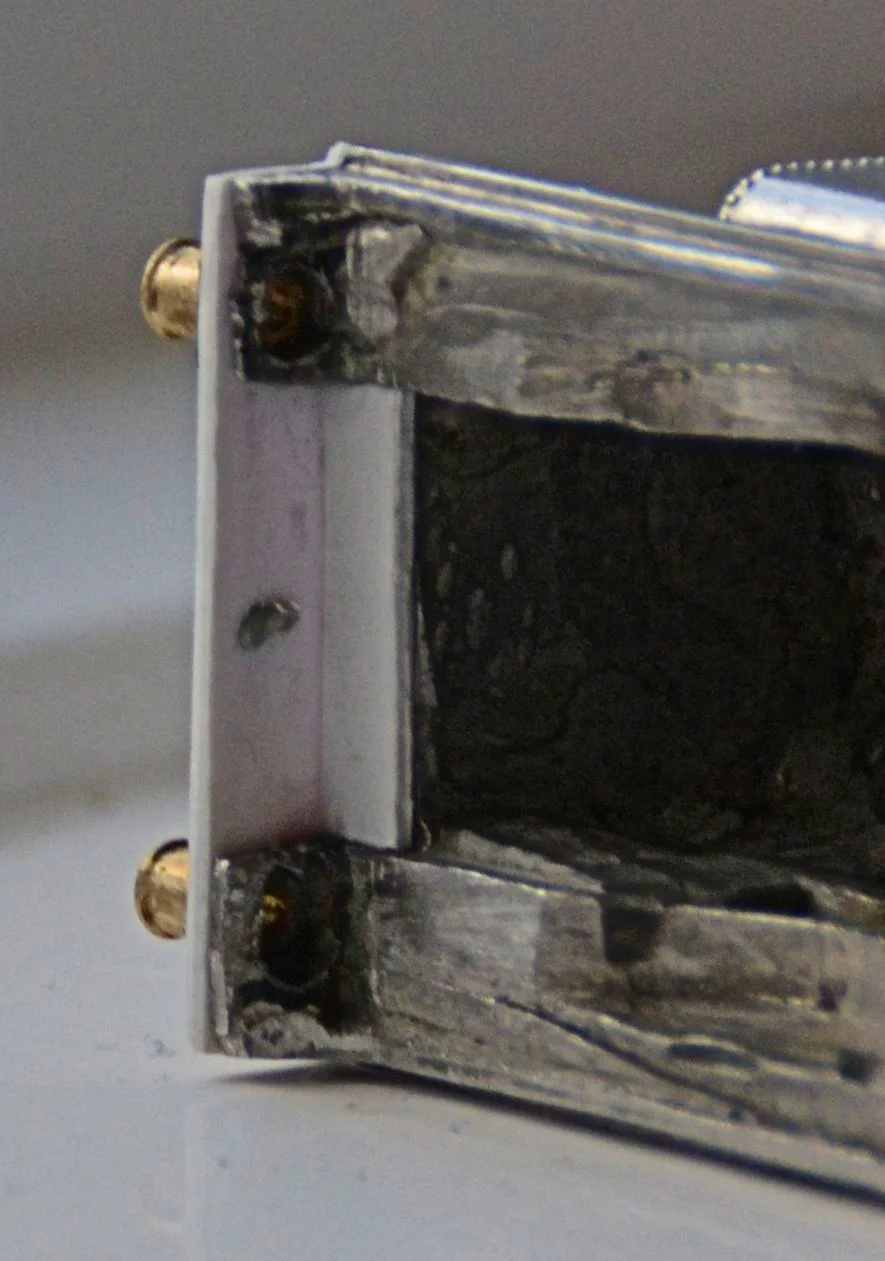
The base of the right-hand front cab window has also been reprofiled out of filler: it was originally badly damaged with a large gap in the corner. The first photos above show the extent of the damage.
The big hole in the rear buffer beam is for a fixing screw ! Nothing much I could do about that I'm afraid as it is the only way to attach this particular chassis.


Some New Underwear.........
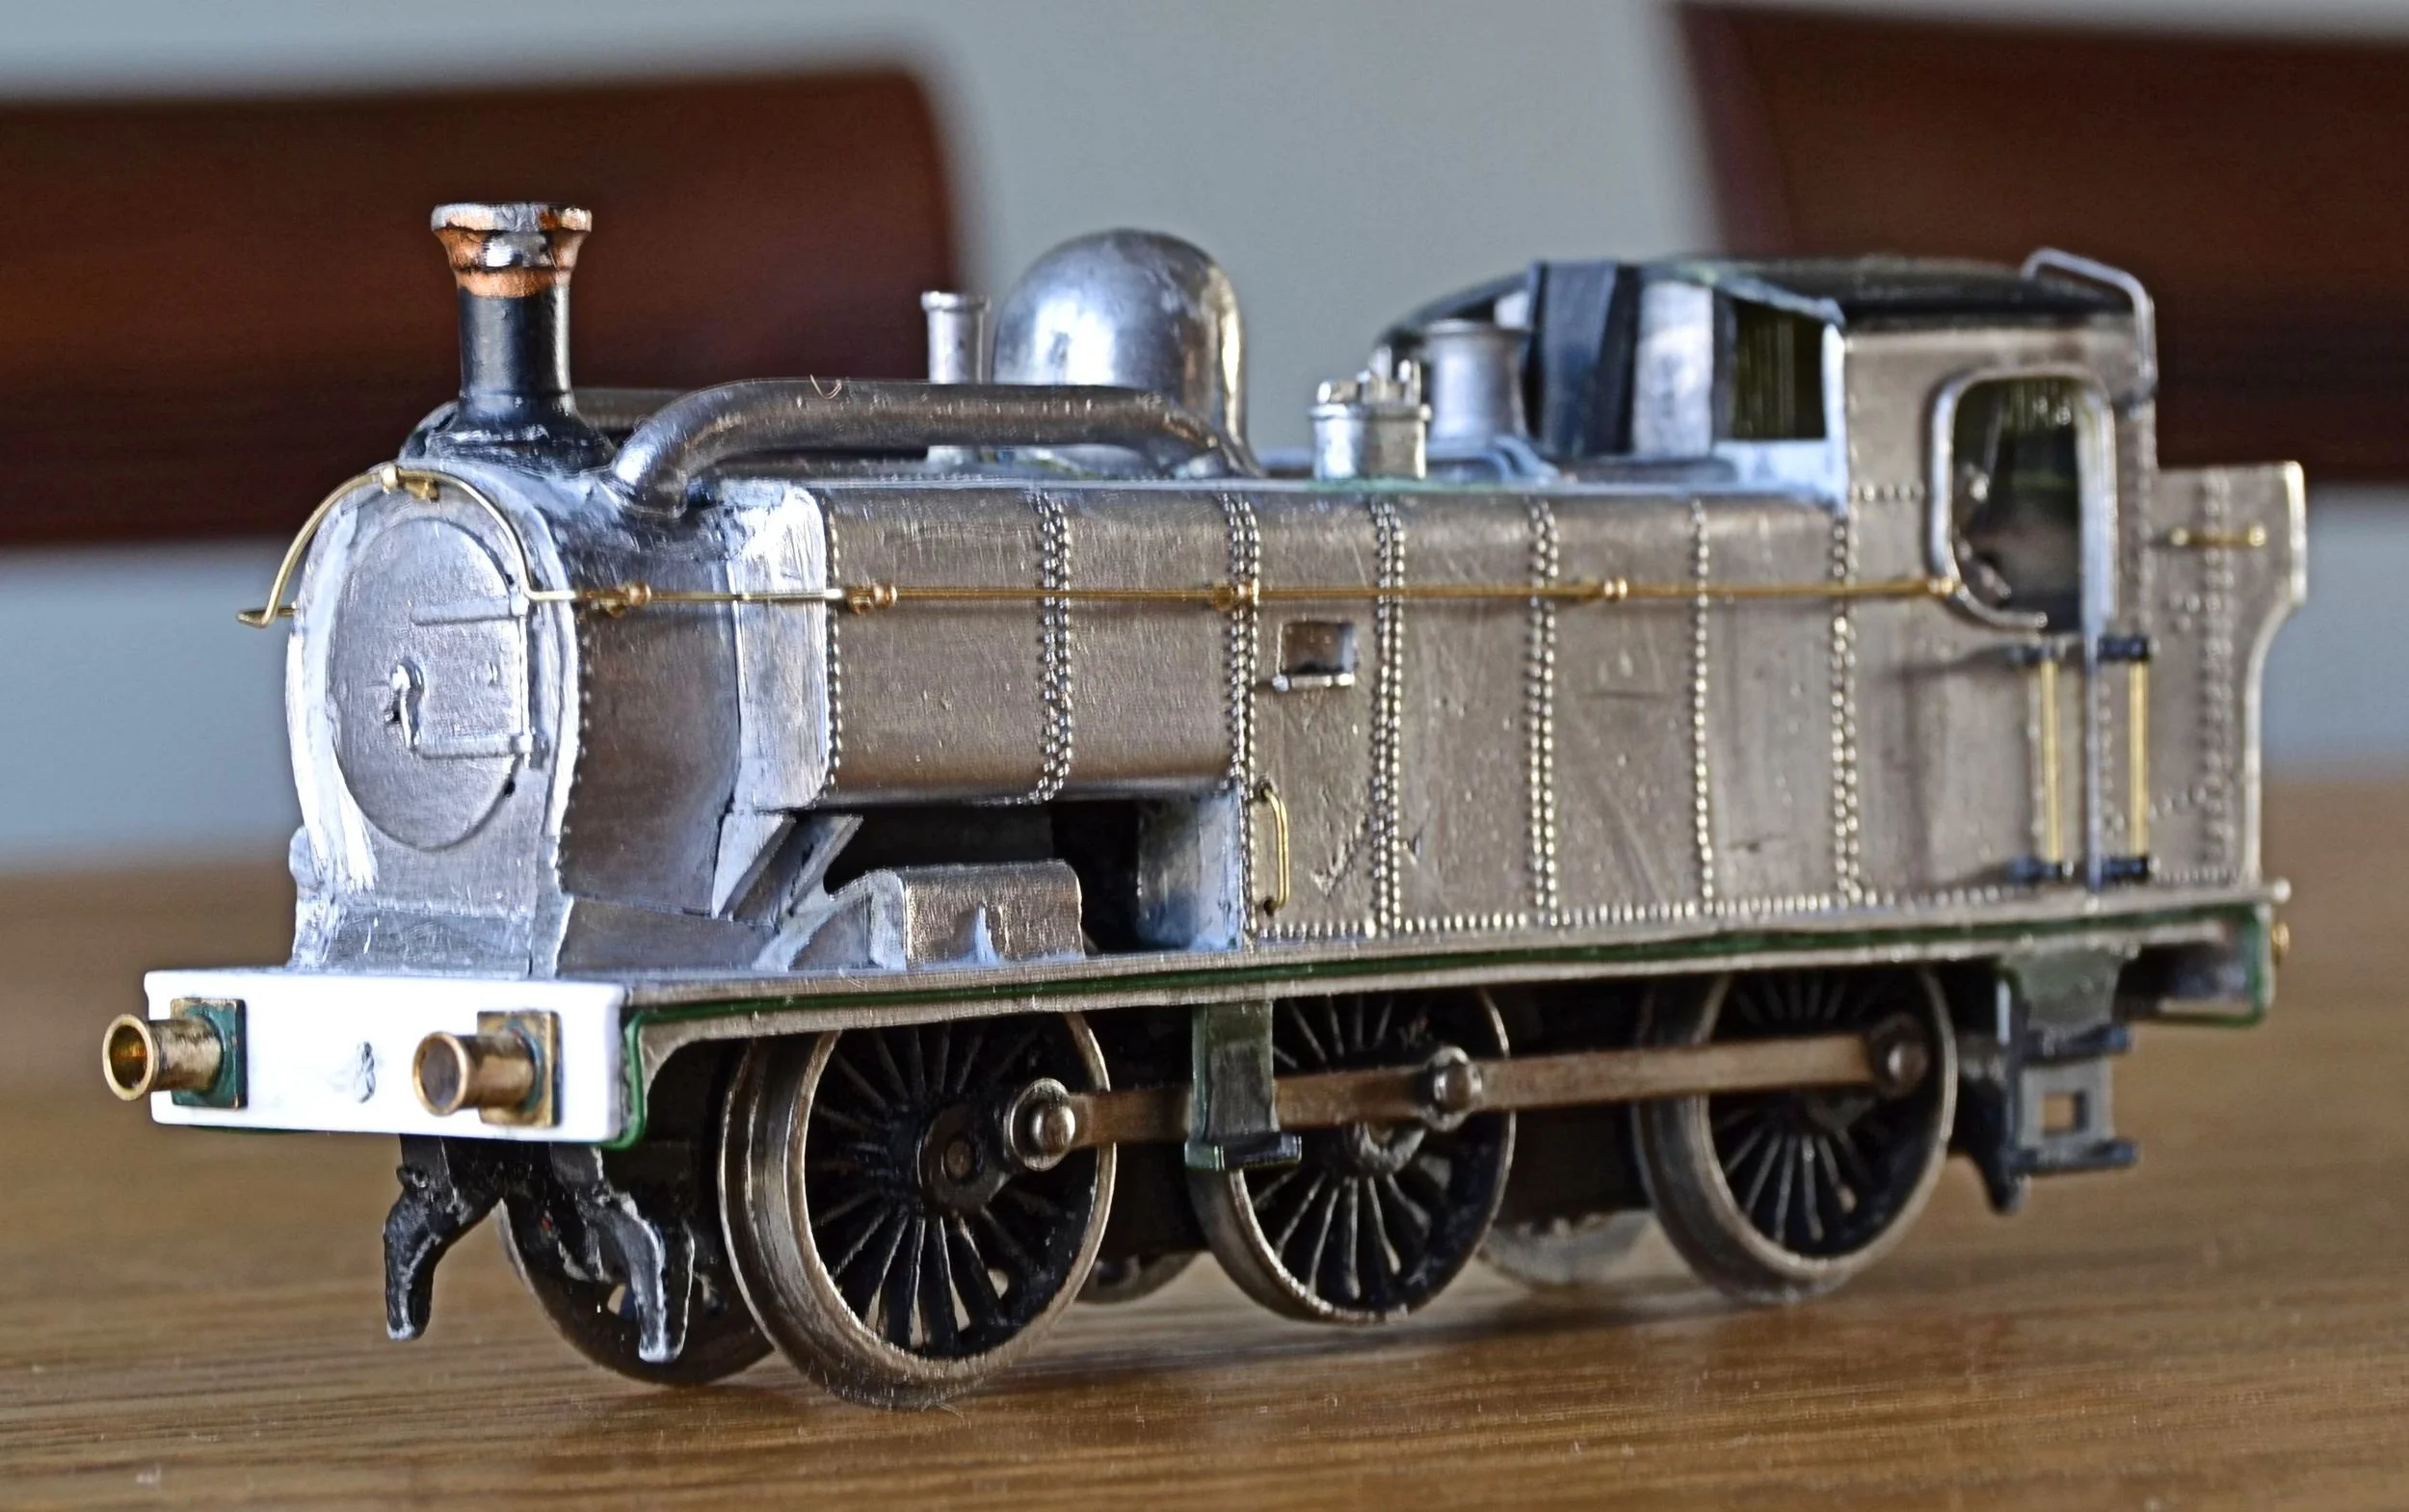
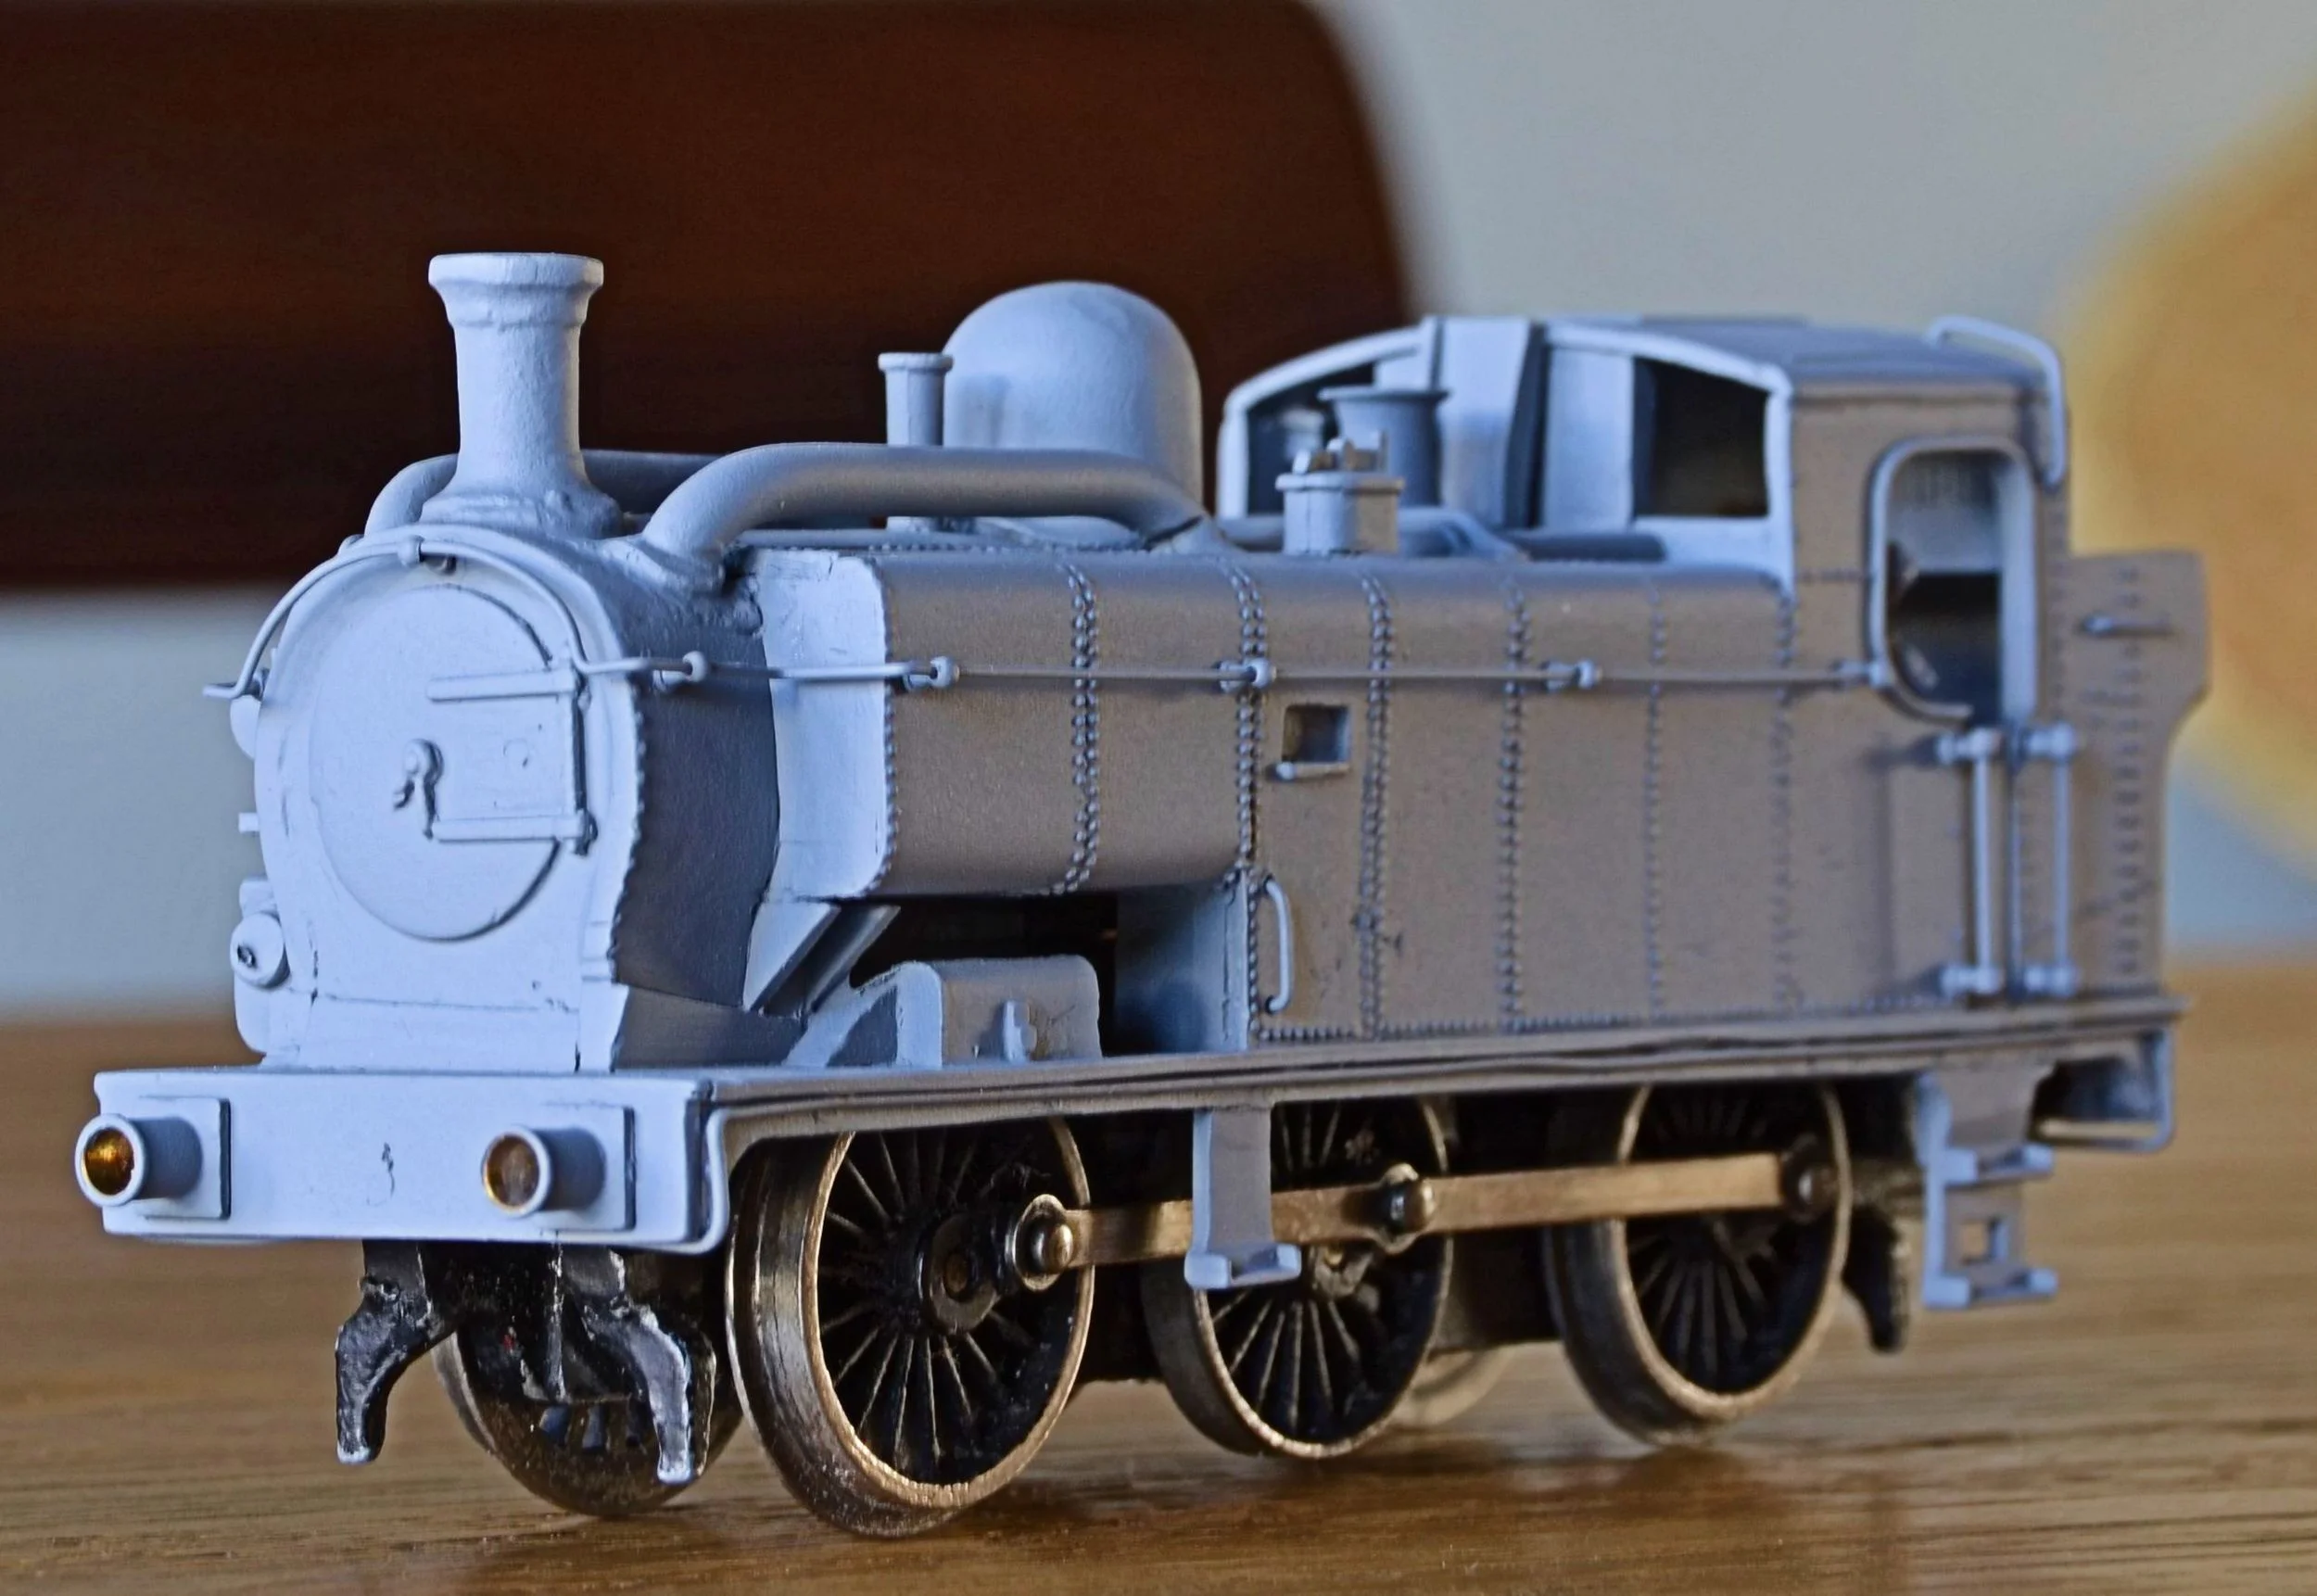
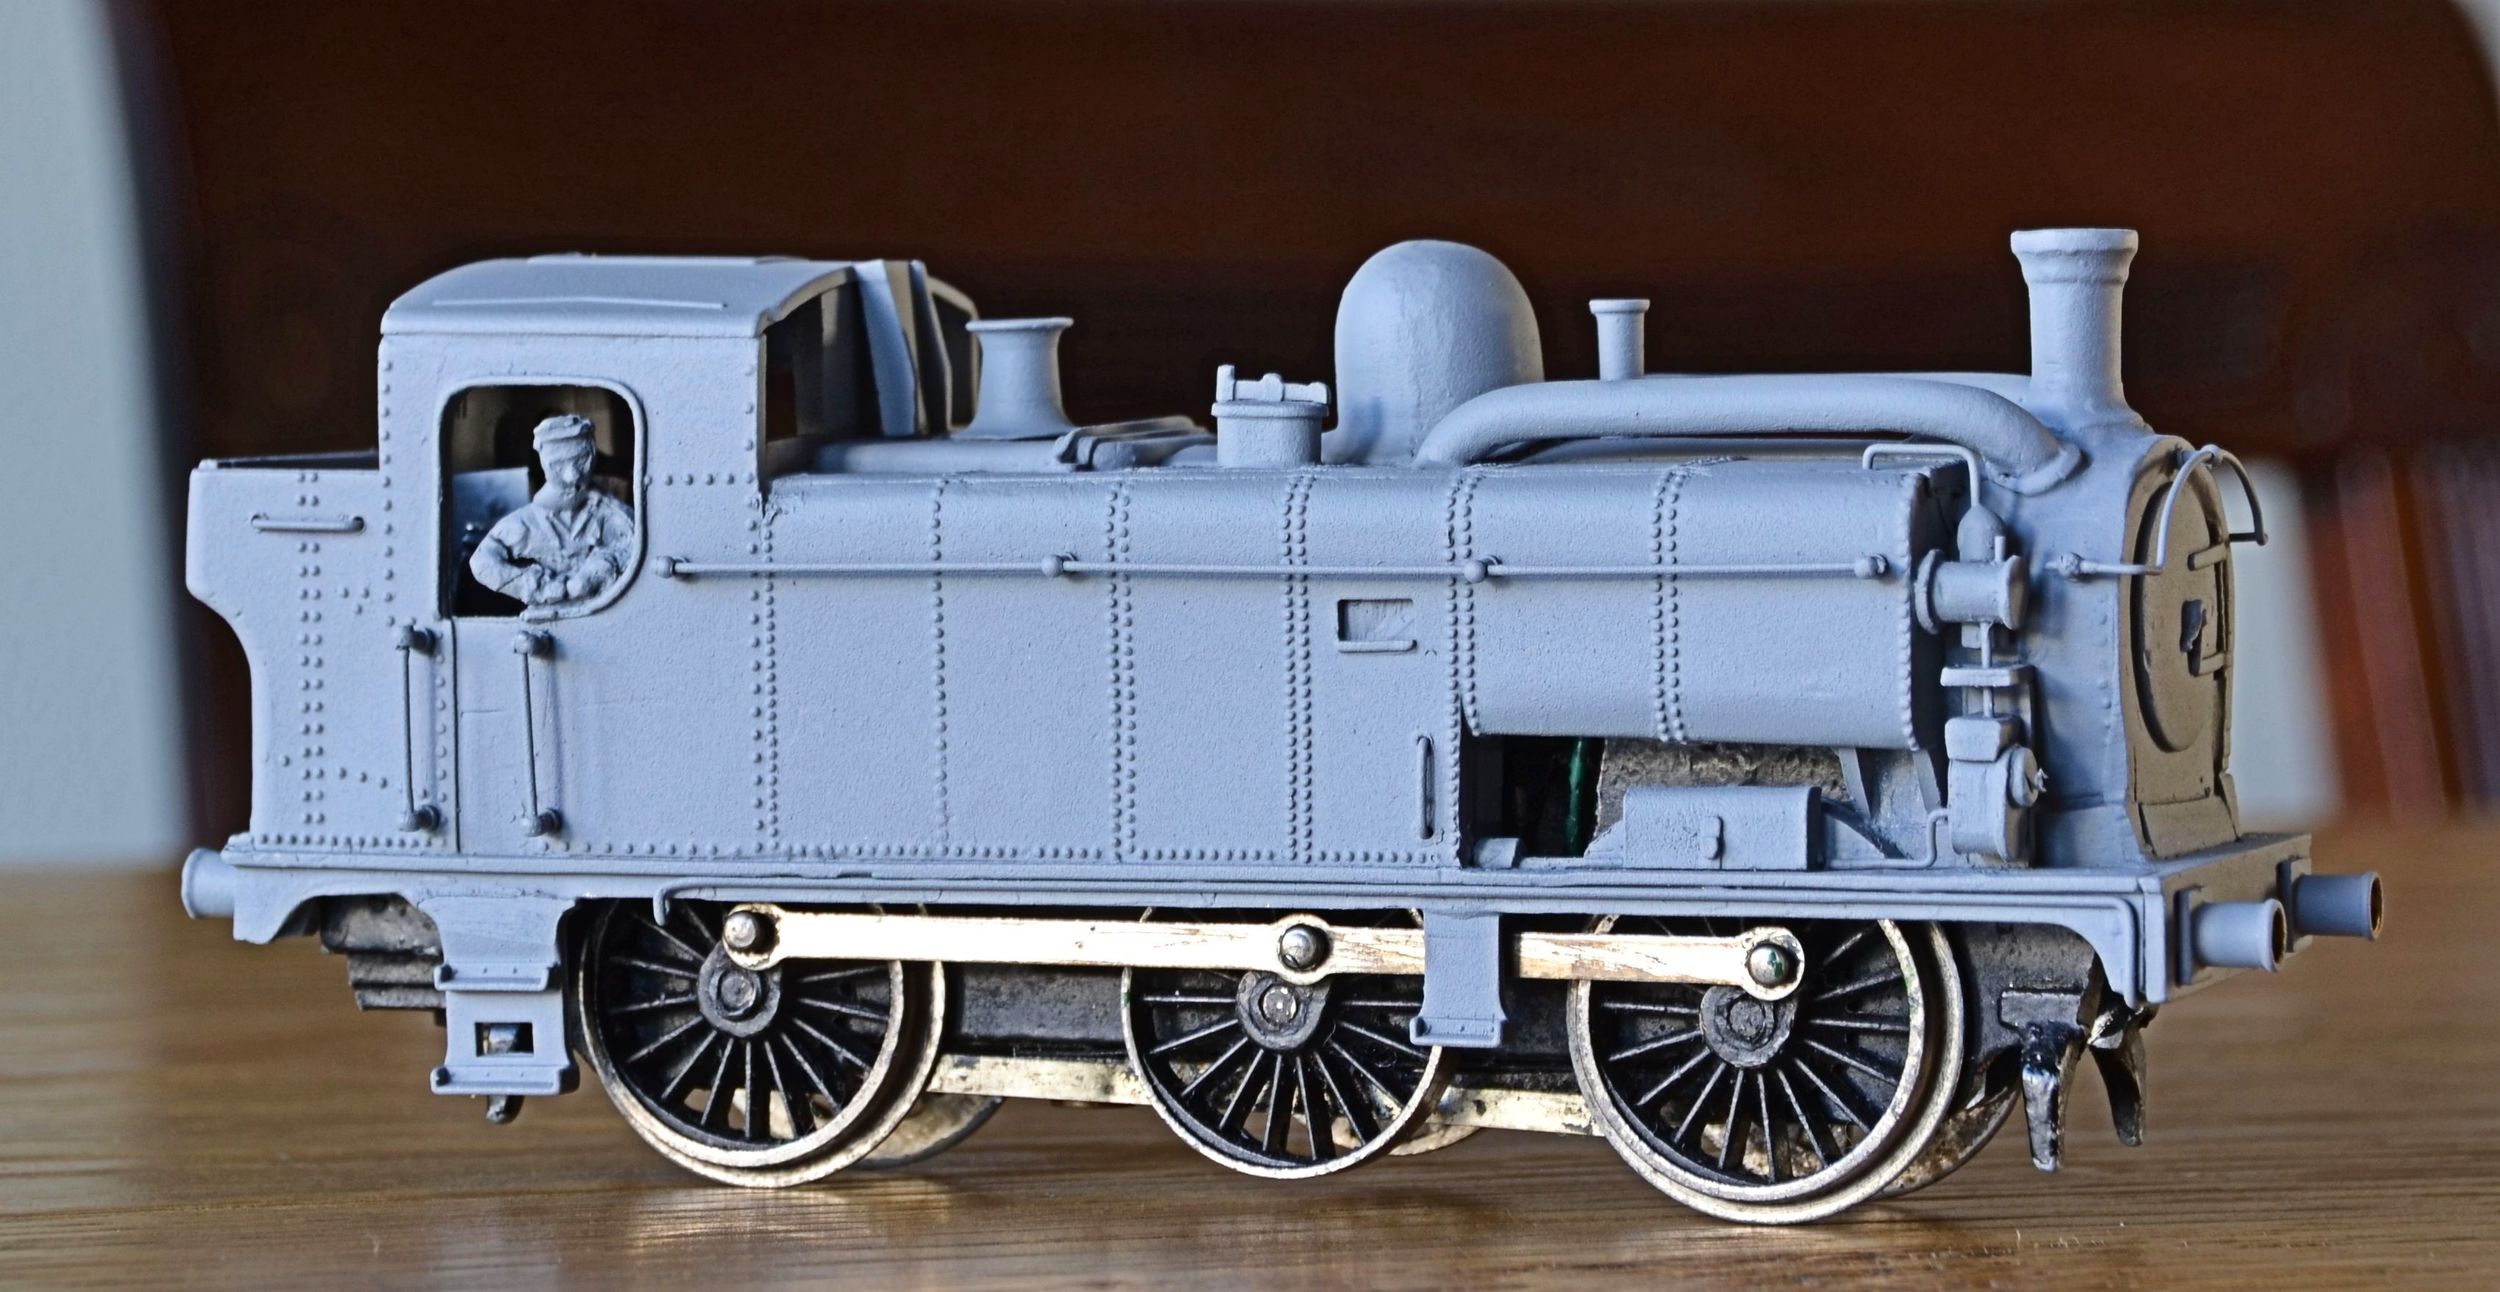
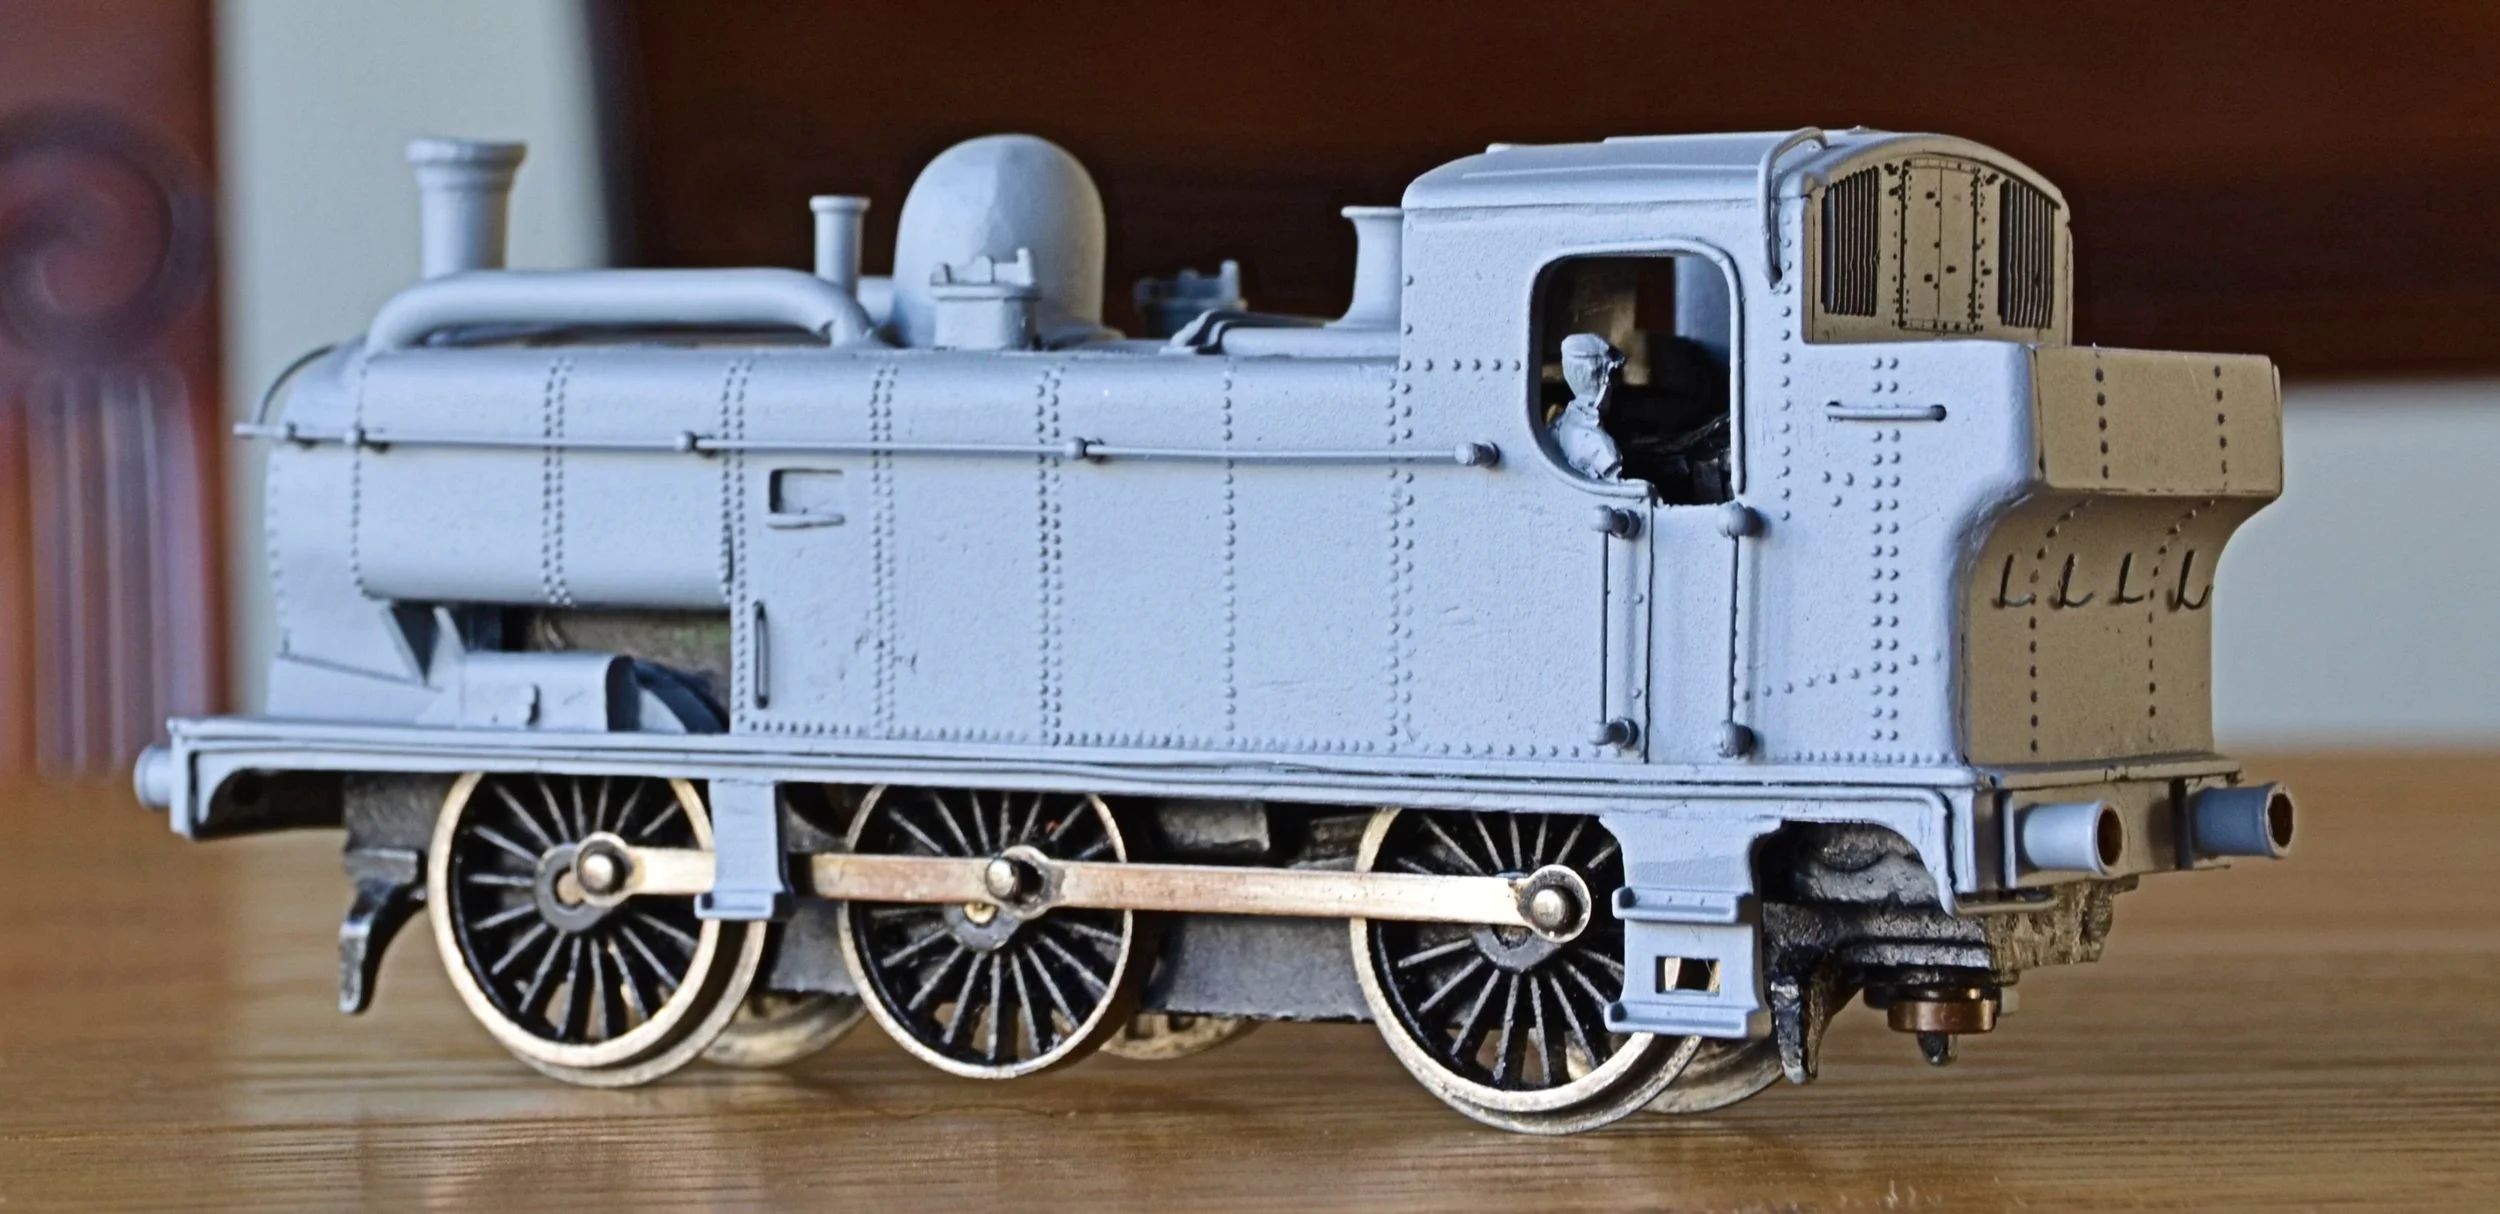
Two coats of primer have now been applied with some remedial work in between each and 9701 is now ready for Brunswick Green. The remedial work involved some further filling and reshaping of the smokebox and attention given to one or two other areas of the body. Although the photographs will not show it, the Brunswick Green will actually be Land Rover Coniston Green, a good match [especially when sprayed over with matt varnish].
A fire-iron hook was lost whilst applying the first coat of primer: this has now been replaced. All things considered, the model looks really quite good in its coat of Photographic Grey.
The body is again just placed loosely on its chassis, which will receive some matt black detailing in due course.
............and just to remind you where we started: what a complete basket-case.
Best Bib and Tucker..............
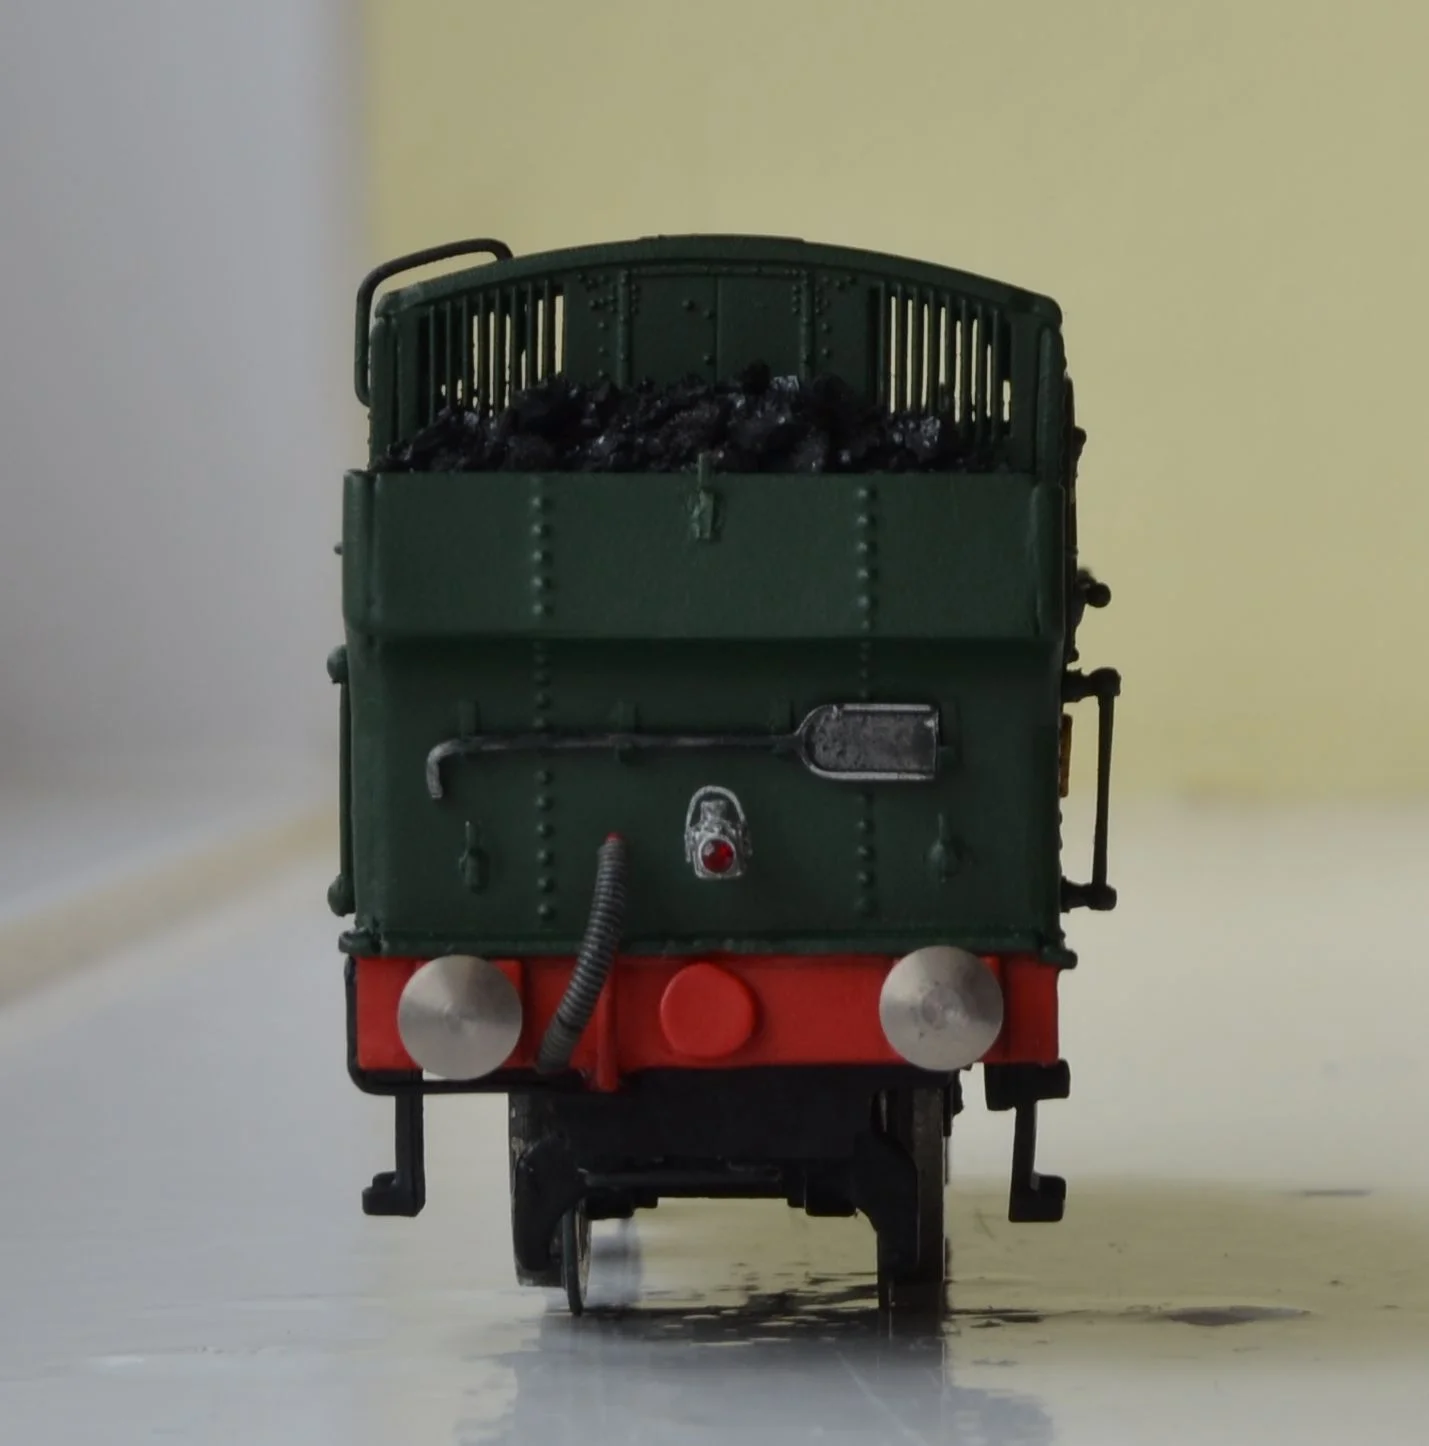
A short update: Still a little way to go before the engine can be lettered and I plan also to respray the rear of the bunker. I'm happy with the main paint job however and the home-made lamp irons have come out quite well too, even though the bunker ones are not GWR pattern. I have also reworked the rear buffer beam fixing, using a plug instead of a screw: still noticeable but far less obtrusive. It will be just a little less obvious after a flash of satin varnish [the whole model will be varnished to seal the lettering and also 'standardise' the paint finish].
A quick note on painting. I use rattle-cans for most of my paintwork and find that they give an excellent finish if the following practice is observed.......
- Shake the can for longer than is recommended on the tin - this ensures that the paint and the solvent are thoroughly mixed and helps avoid spurting
- Warm the can before use - I immerse the can in hot water for about five minutes. The water should not be so hot that you cannot hold your hand in it but hot enough to warm [and not heat !] the tin through - this will increase the pressure inside the can ensuring a stronger and finer aerosol. Never ever heat the can through exposing to a flame or other very hot source. Your aim must be to warm it only - anything more than this can be extremely dangerous.
- Only ever spray in dry conditions and - preferably - indoors. Spray applied in damp or humid conditions runs the risk of an unpleasant white bloom appearing on your model. This cannot be removed and will ruin your paintwork. This is particularly so in the case of dark colours [esp. black] and varnish.
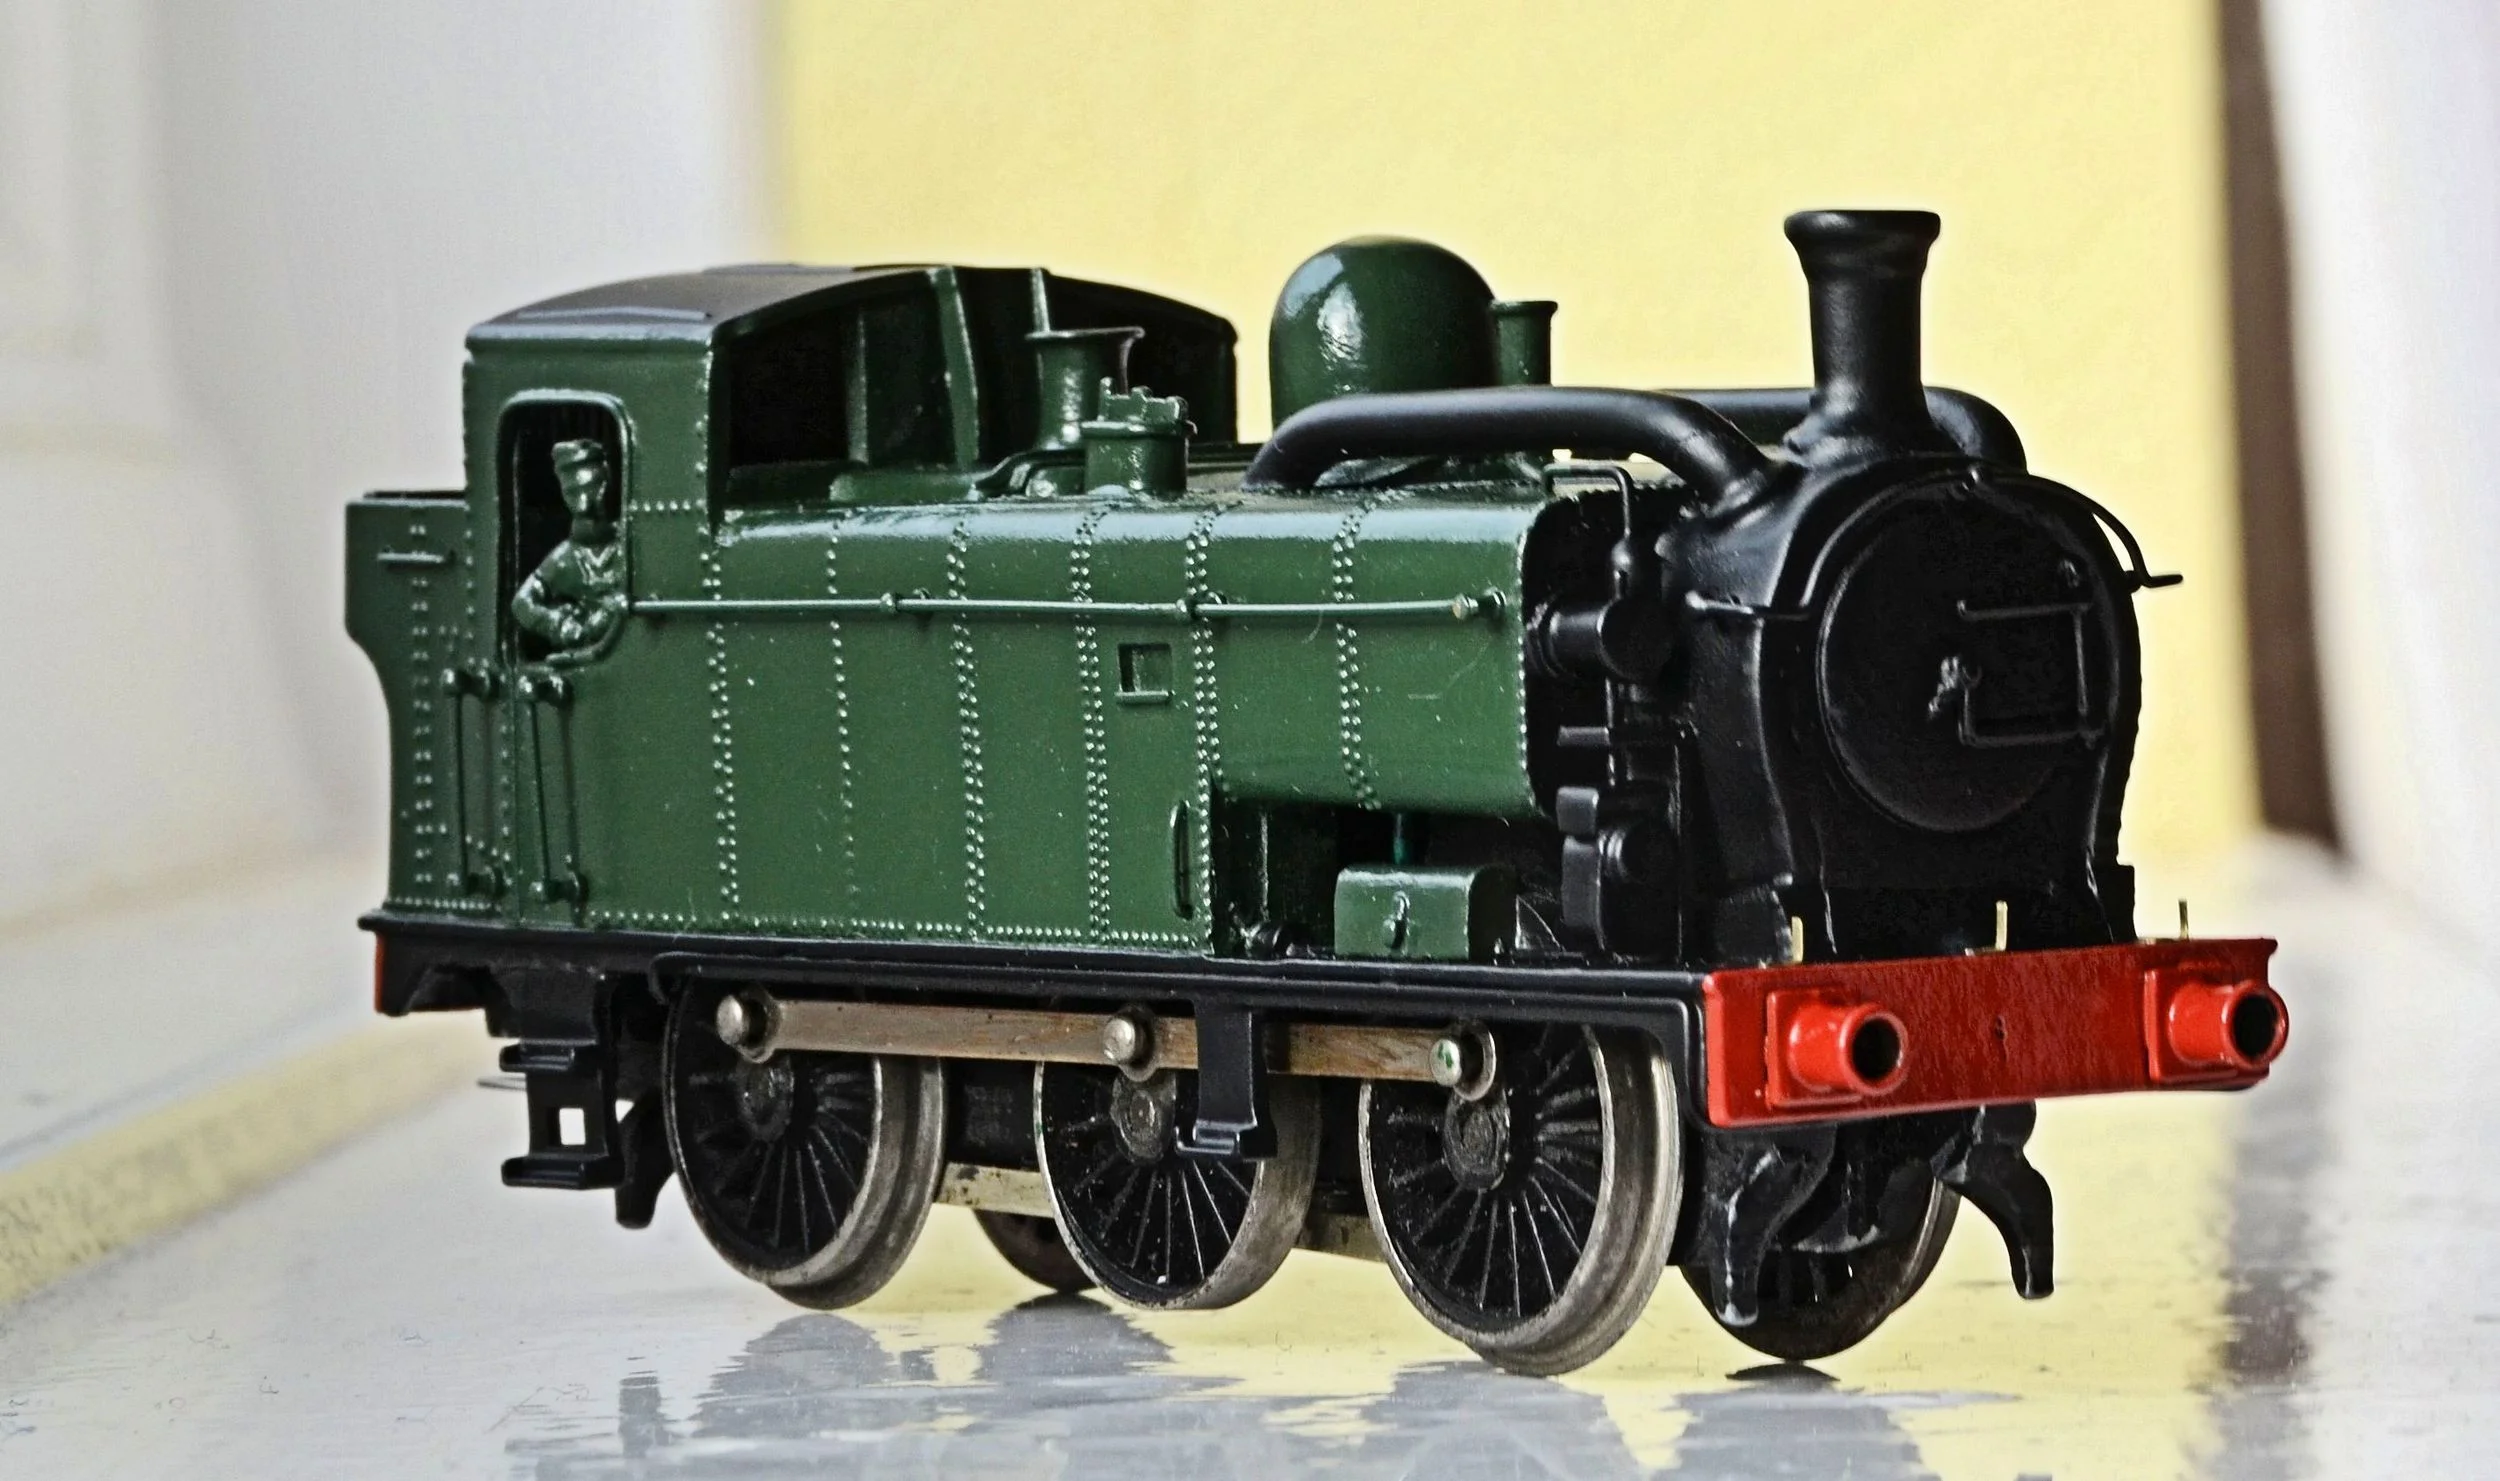

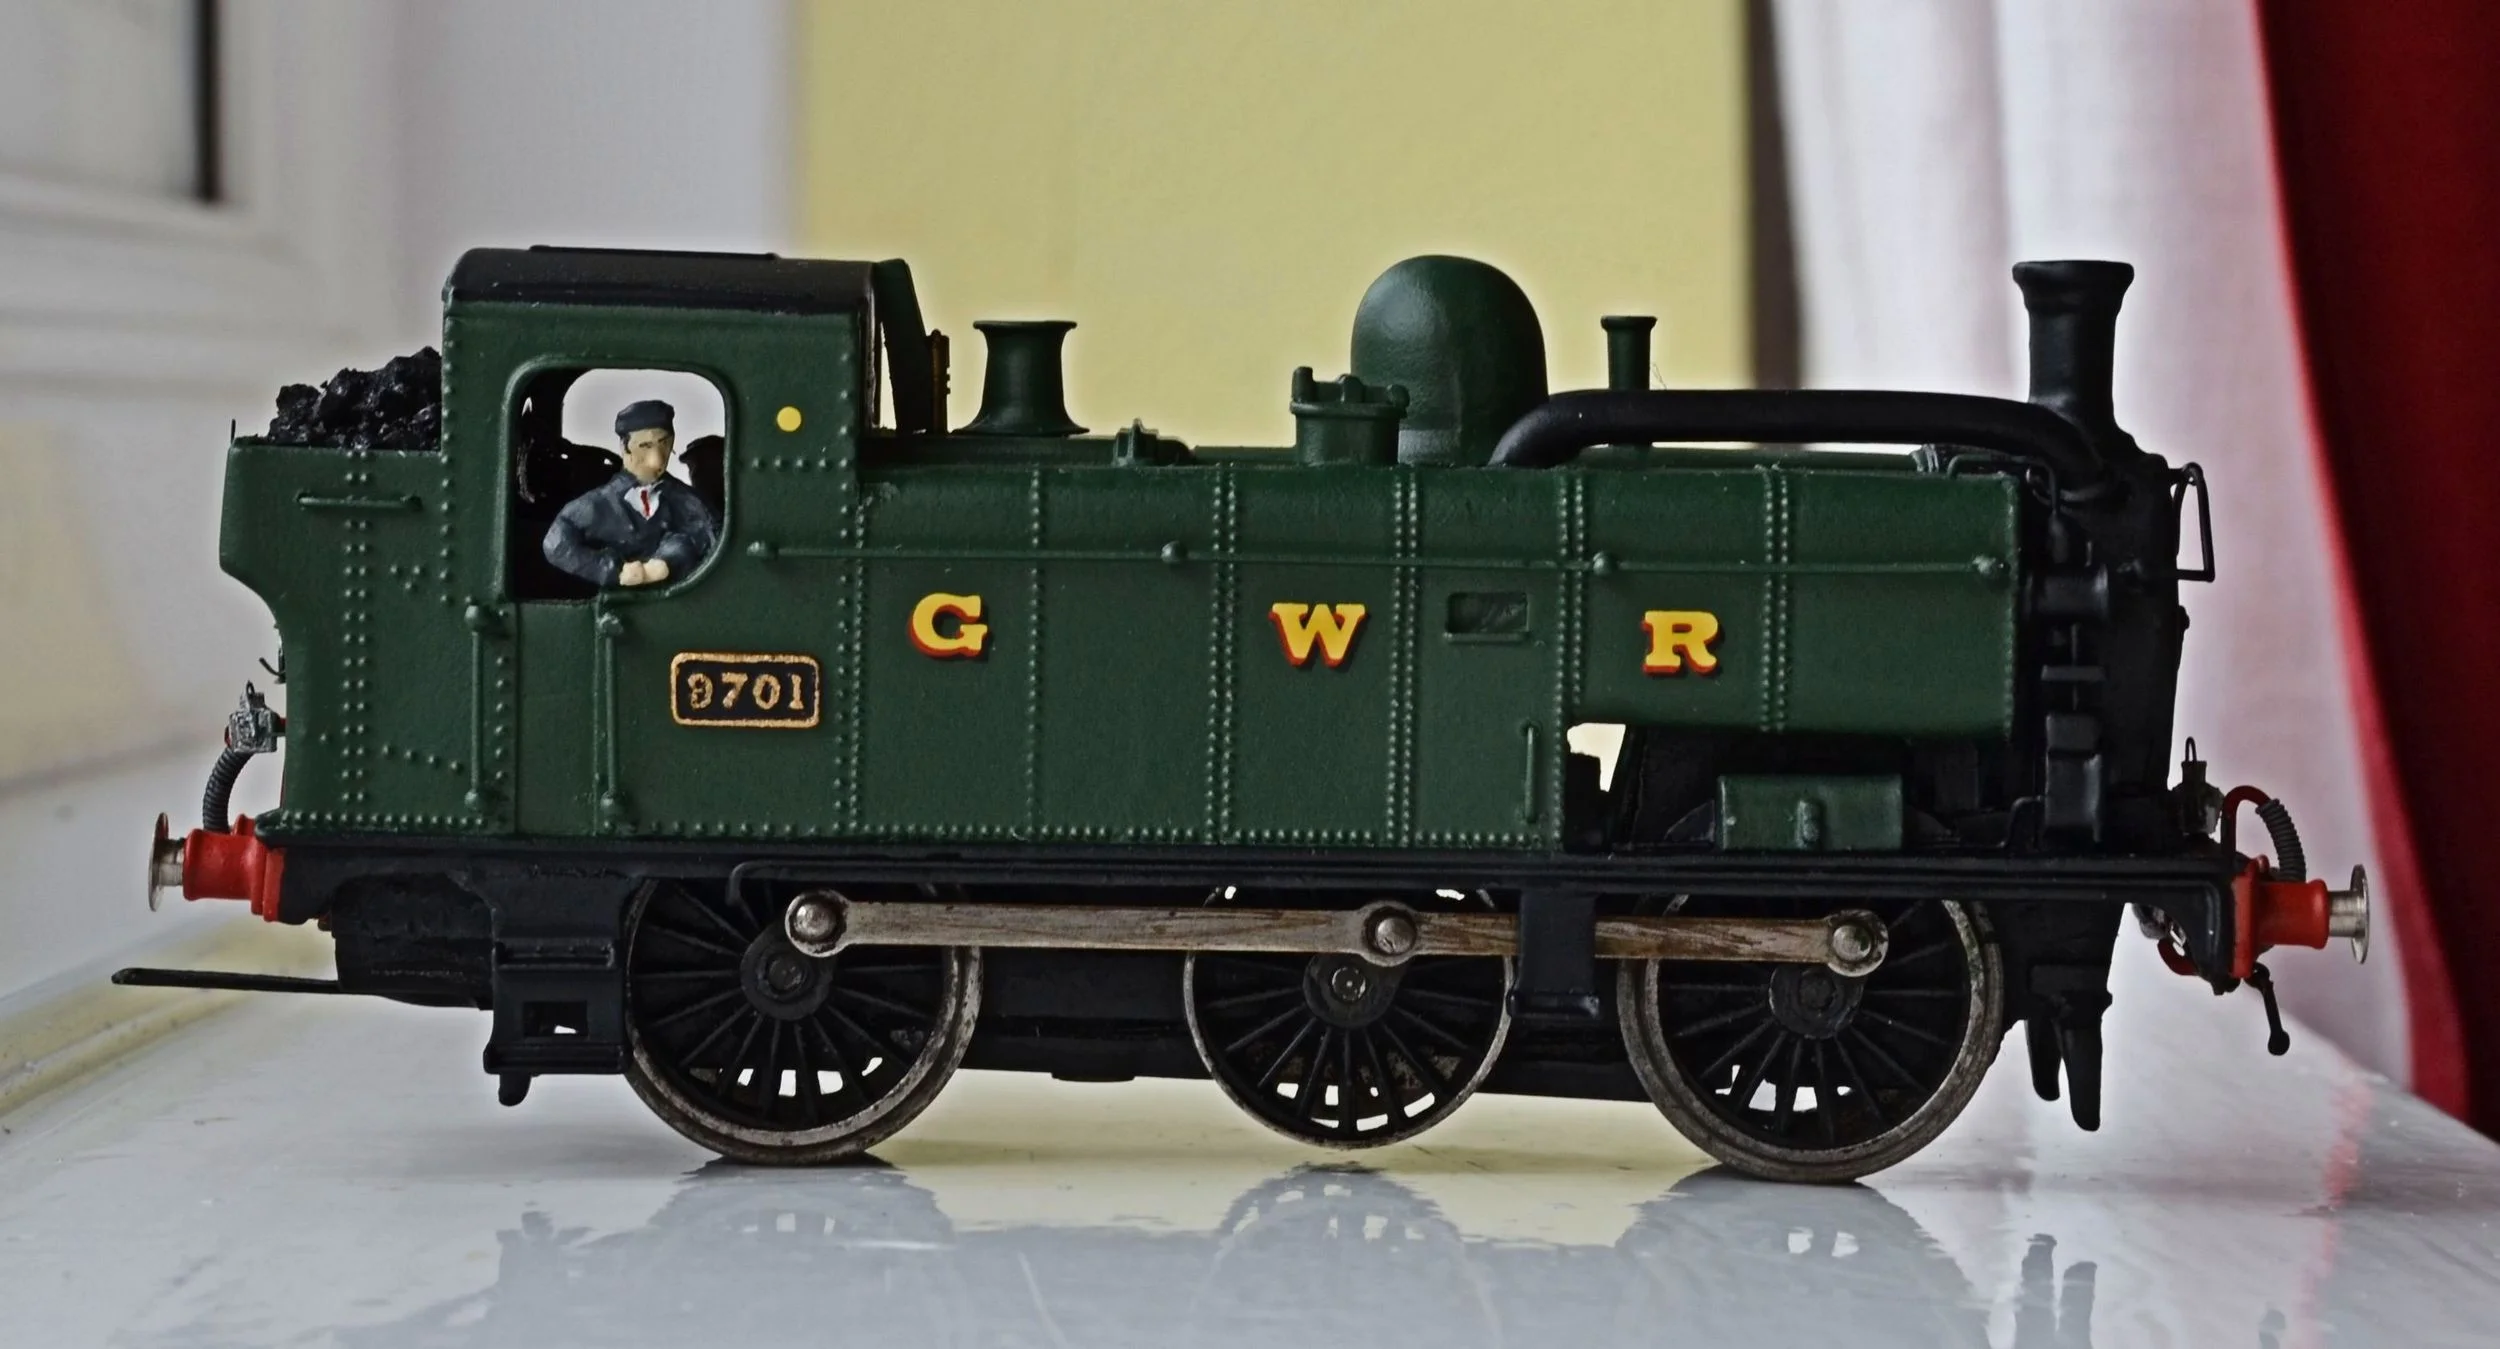
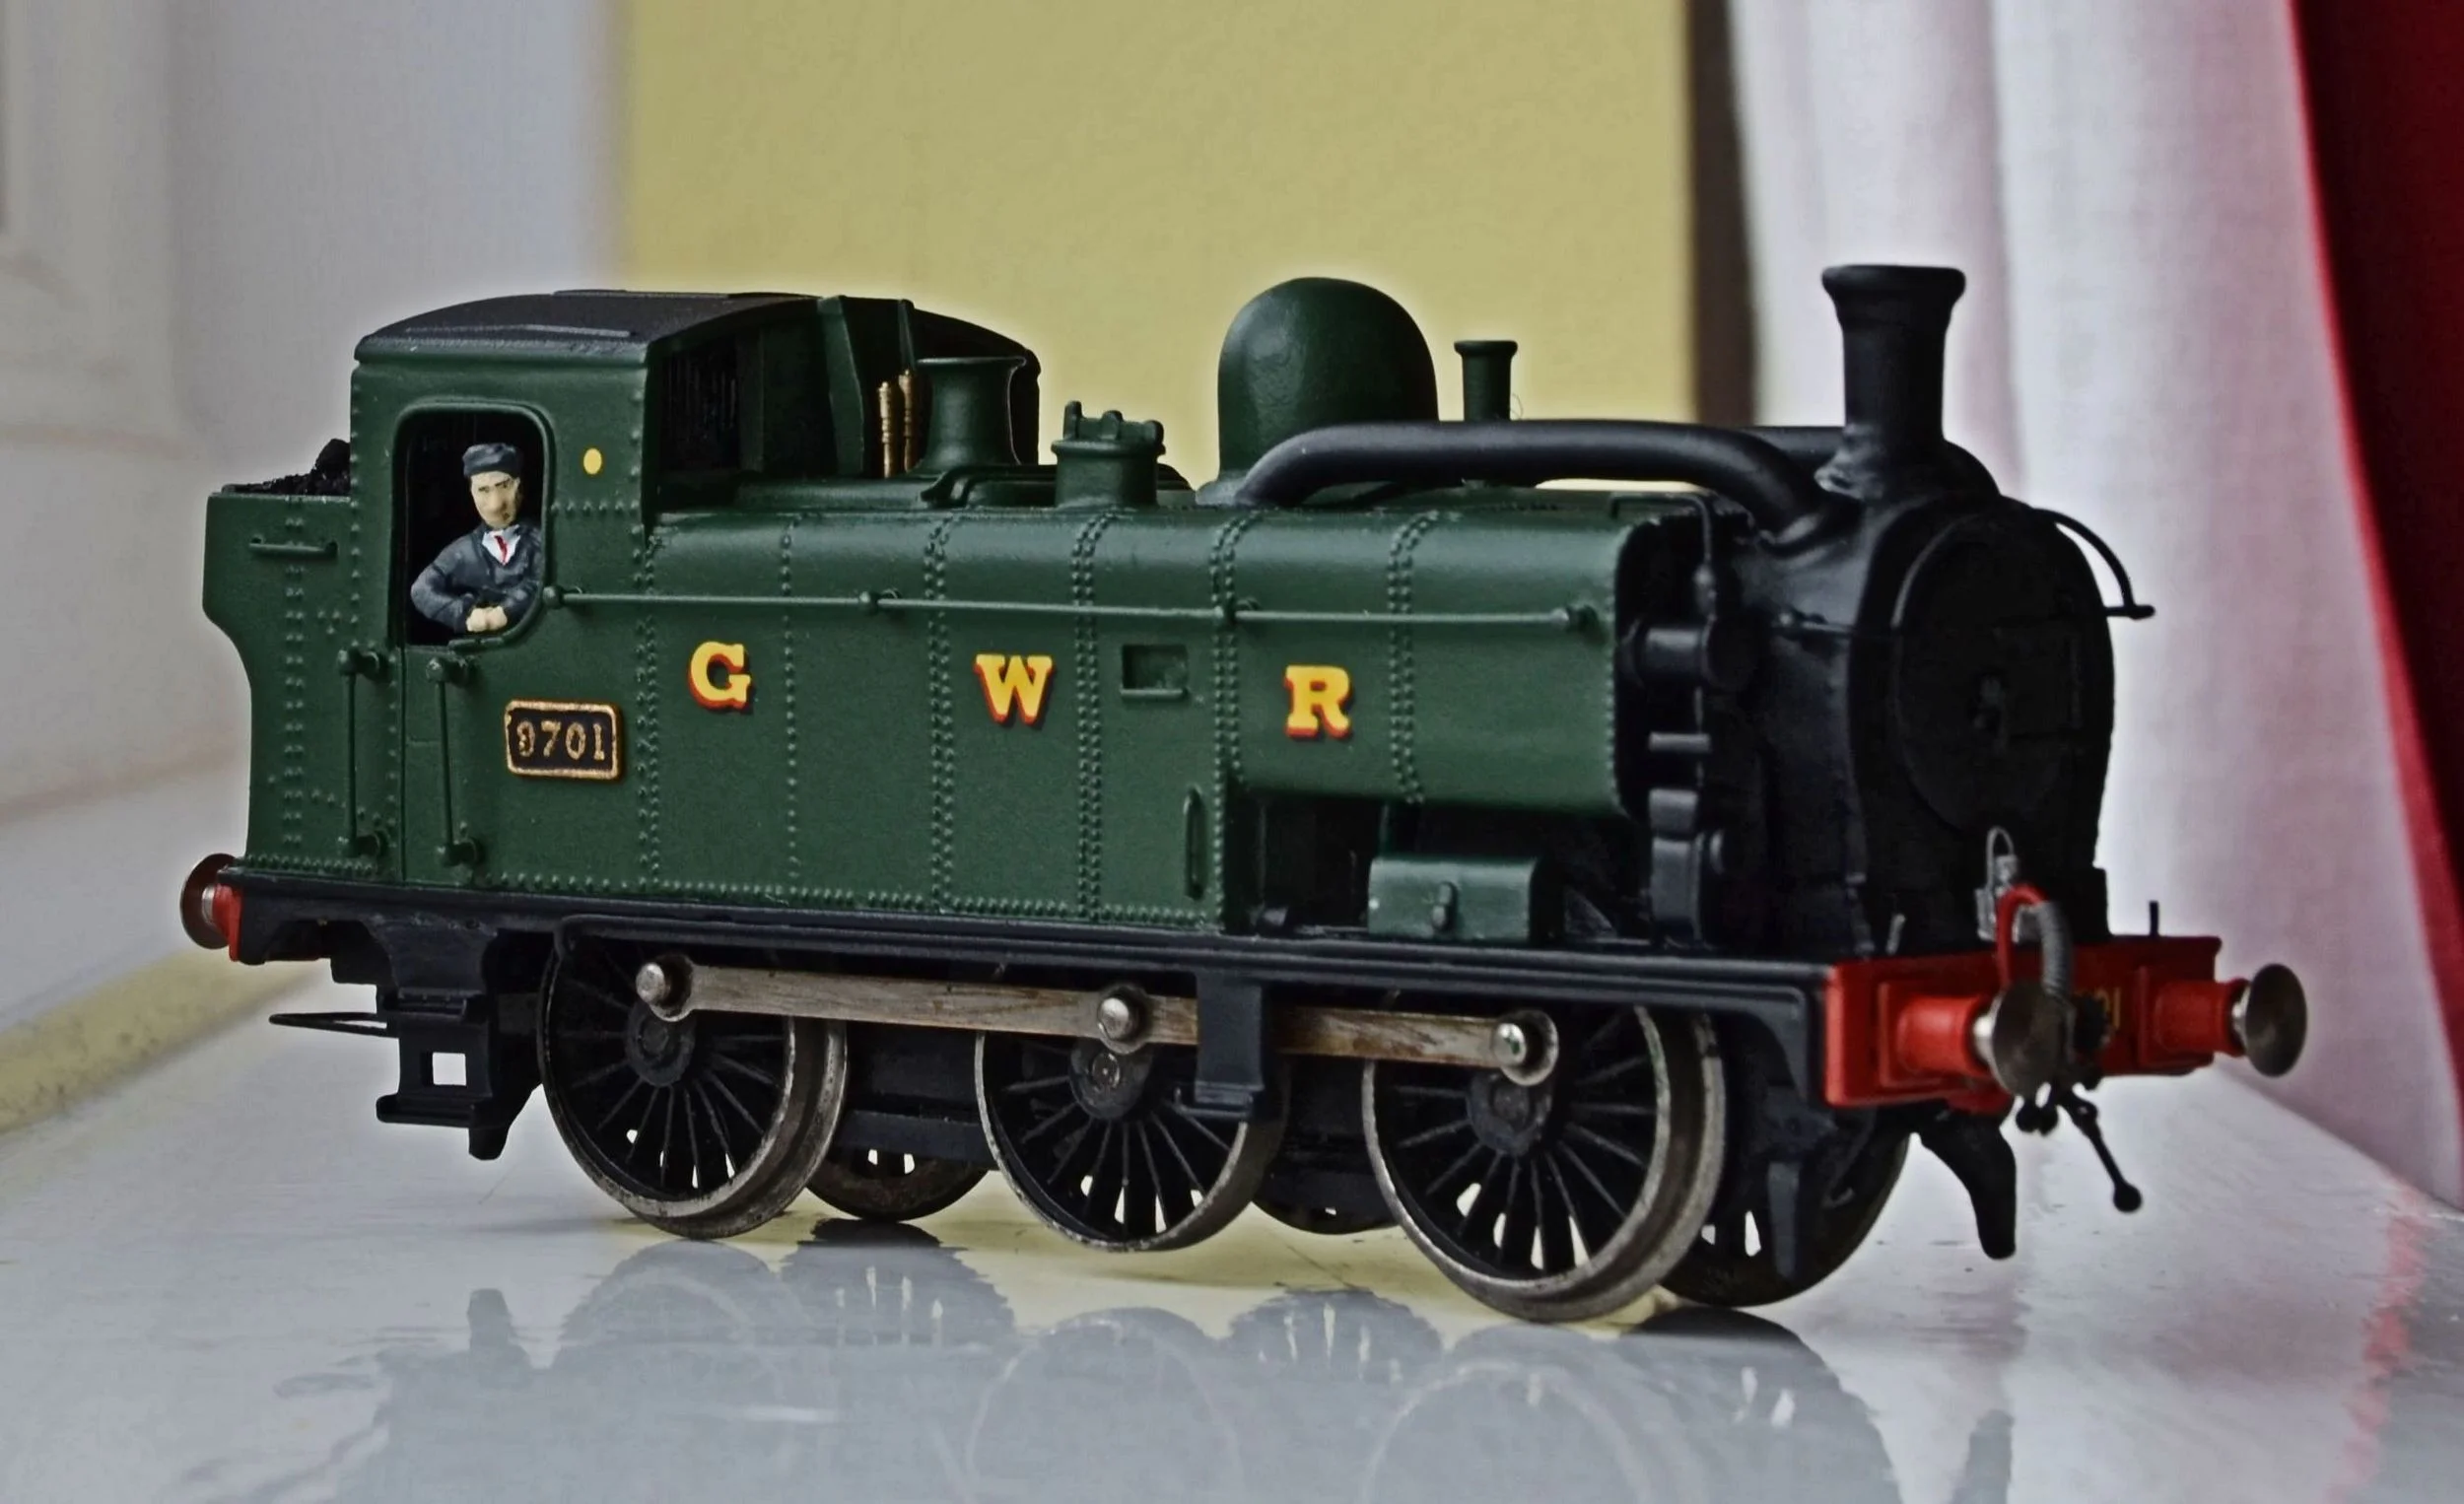
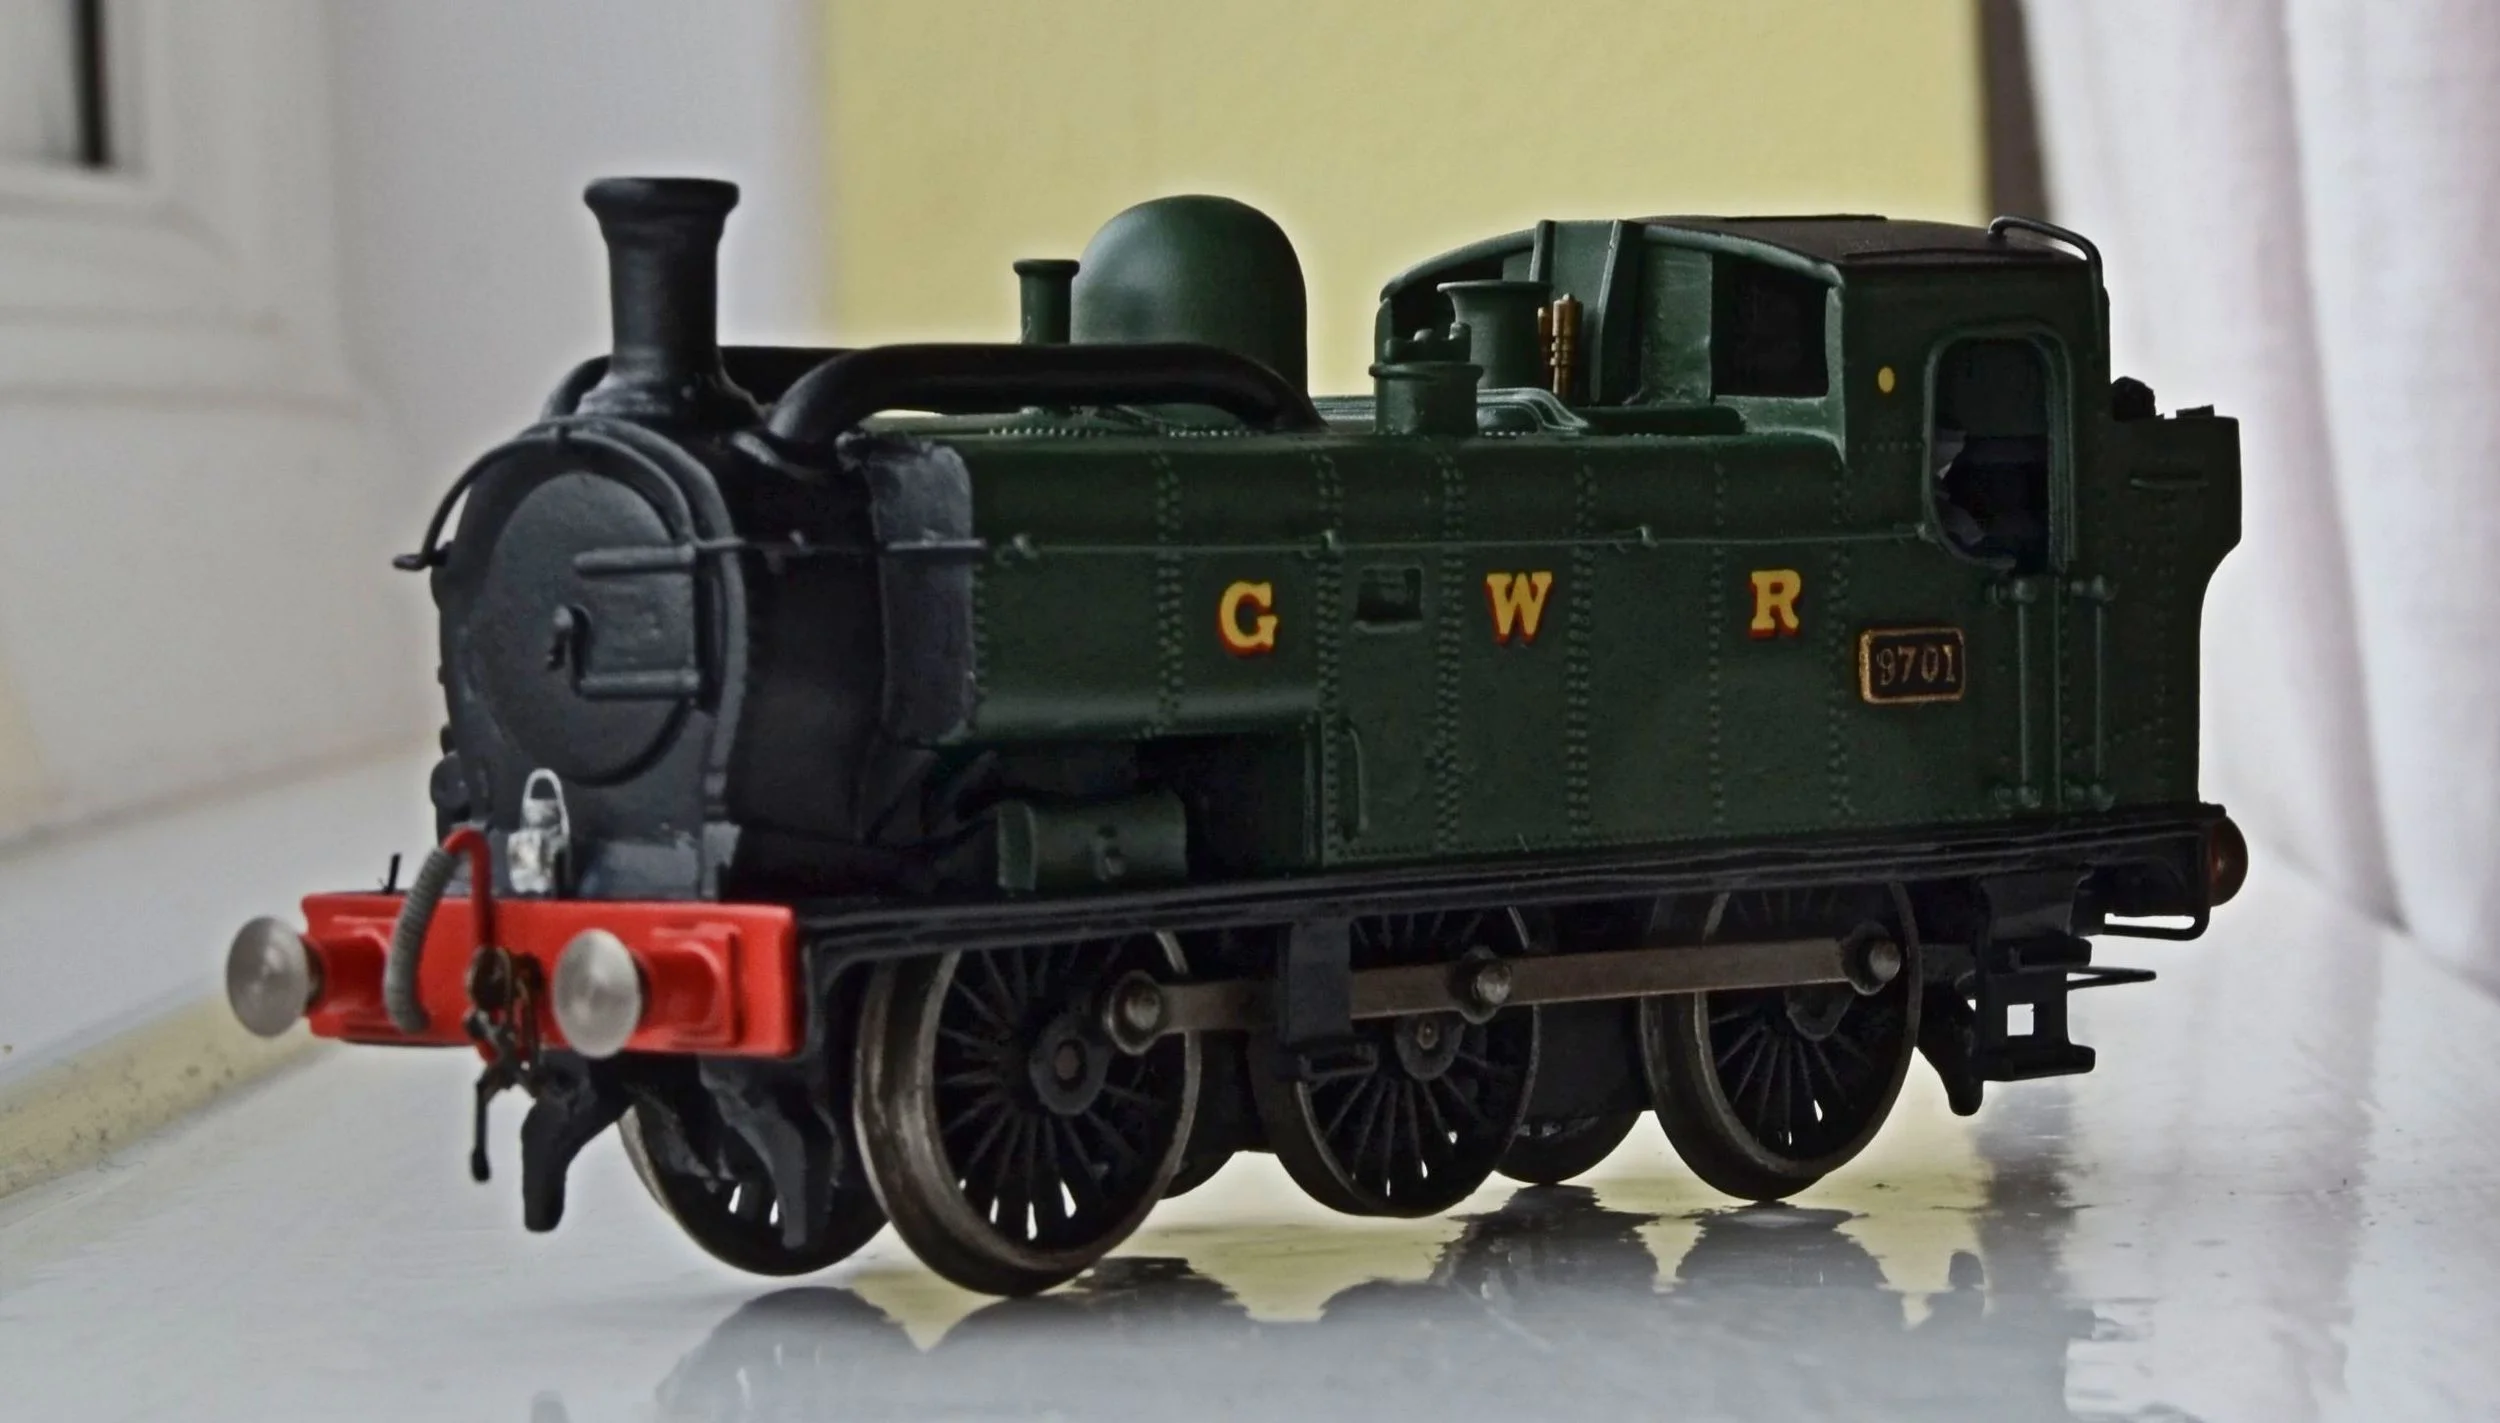
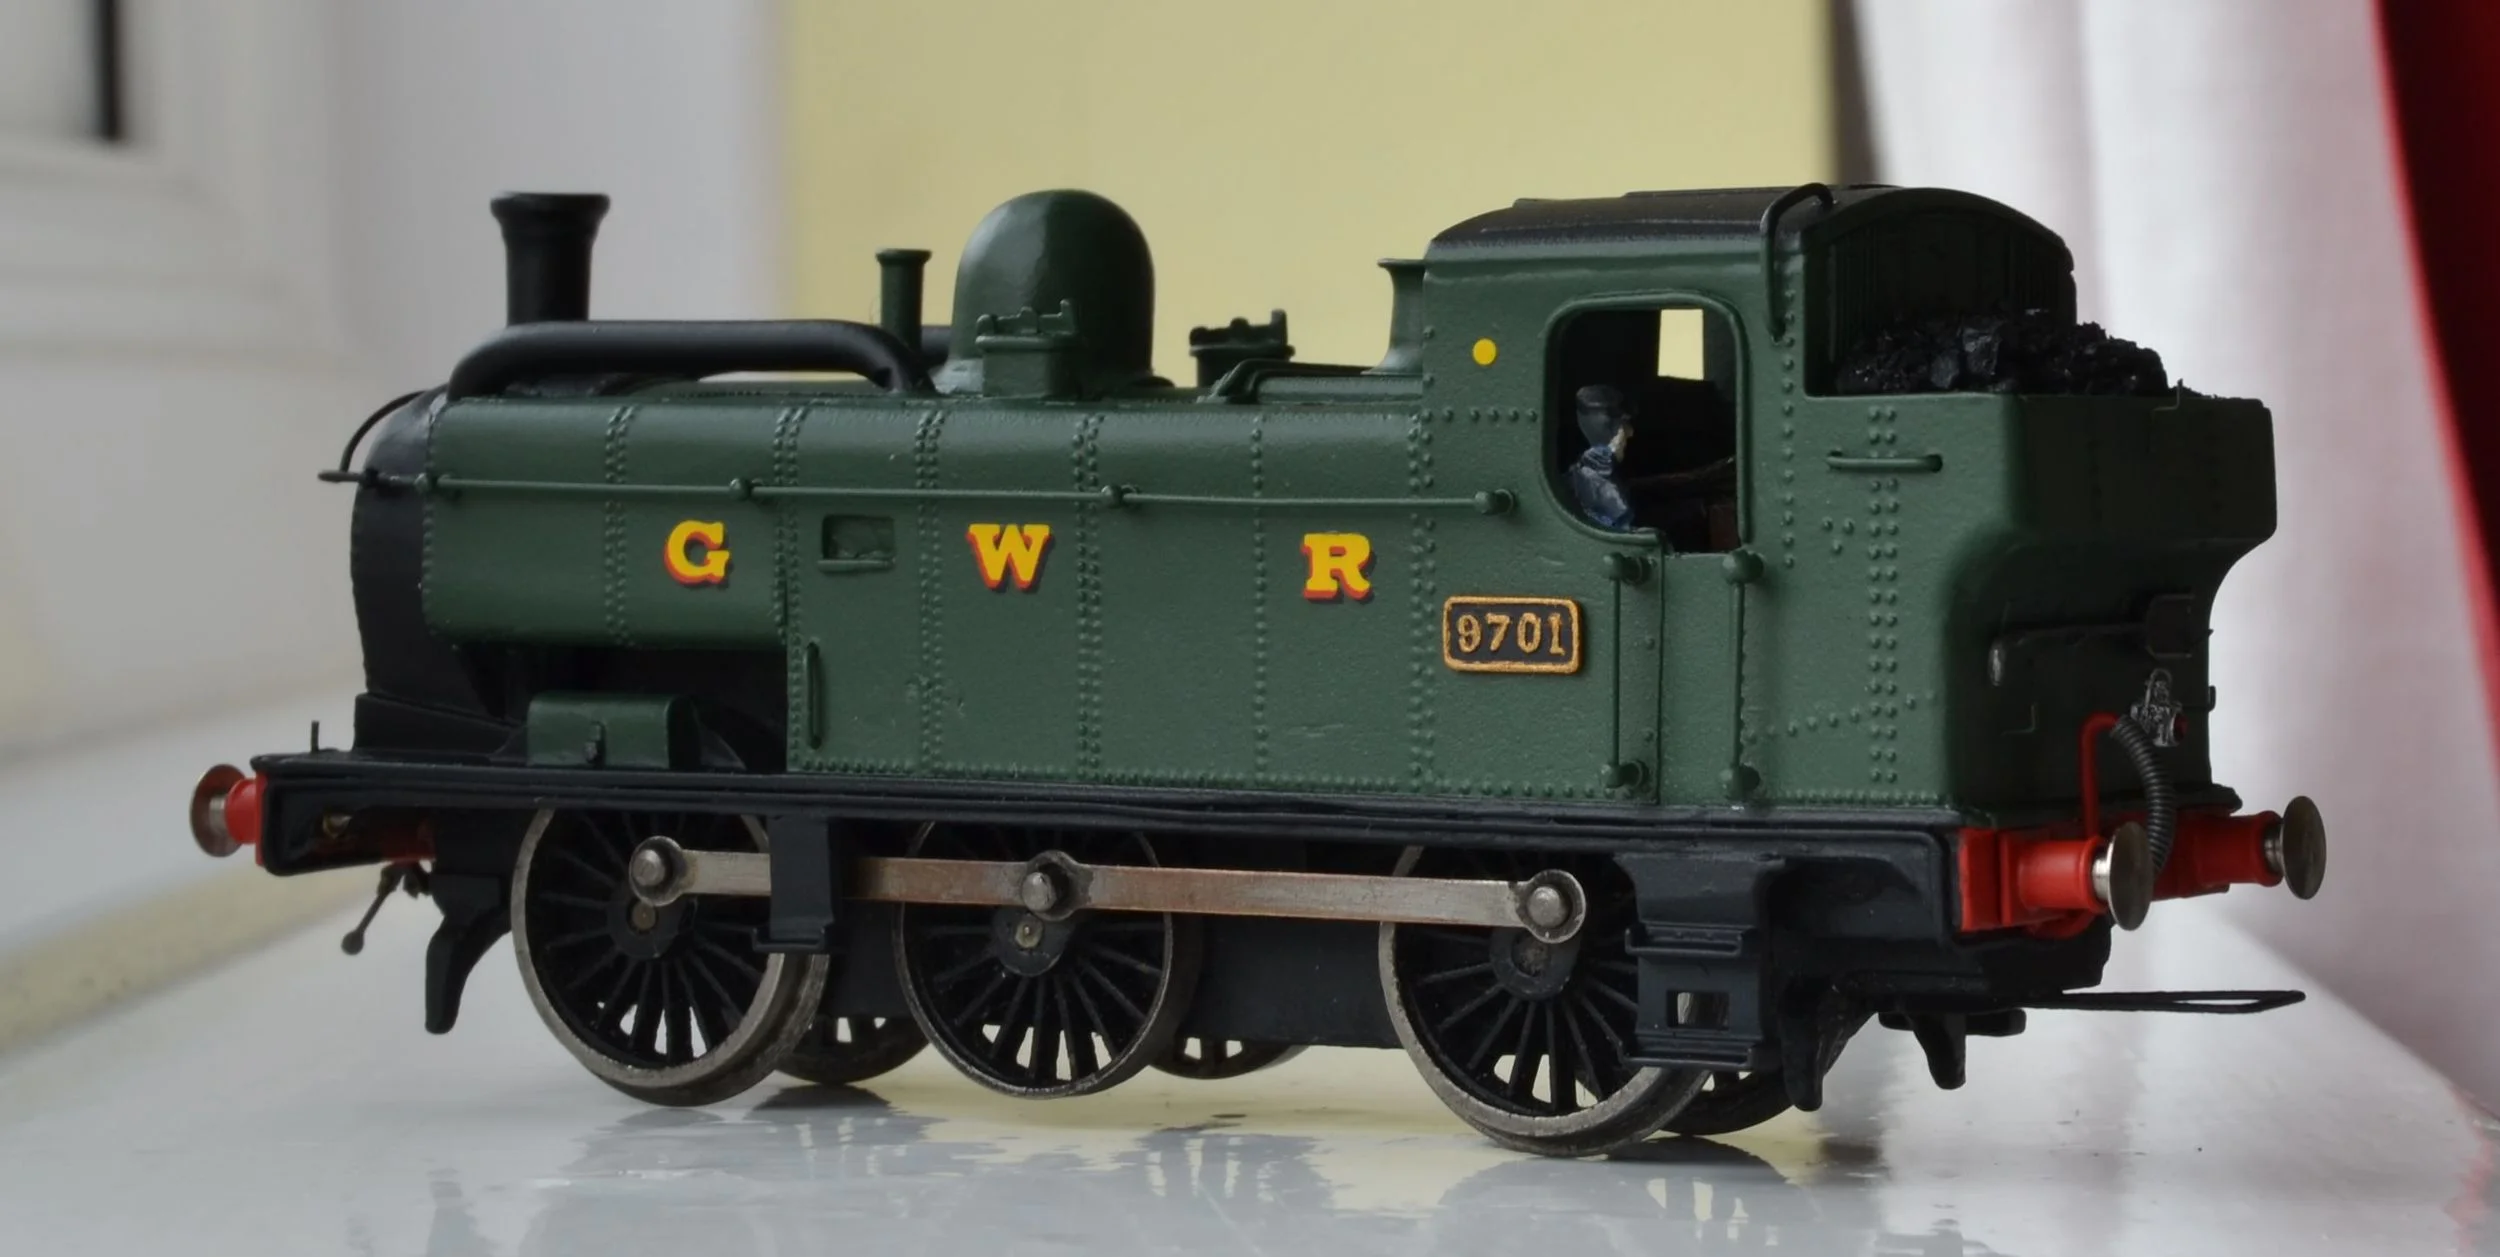
Finished !
The livery details for 9701 were a difficulty as I have neither been able to find any colour shots of this class of tank in GWR days [I doubt that any were taken] nor any note confirming whether the tank fronts and forward splashers were black. I seem to remember reading somewhere that they were, but I could not retrace the source of that information. I did however find a colour photograph of a professionally built O-gauge model and on that the tank fronts and splashers were black - so I've gone with that.
Masking up for the spray of black was really fiddley and took a good two hours - all came out pretty well however with a minimum of touching up required afterwards.
The lamp irons were fiddley also and those at the back are not of the correct pattern - I just had to give up trying to twist very fine brass strip into the correct shape after I'd used up a good six inches of it. They look OK however, and are certainly better there than not. The lamps are by Springside, although I cut off the over-scale handles and replaced them with 5 amp fusewire.
The cab-side number plates were the original rather lumpy white-metal castings. I had real doubts as to whether they could be used without spoiling the effect but following some ruthless filing and sanding, they came up reasonably well after painting. Just as well really as I've not seen 97XX class etched plates anywhere. For some reason however, the Humbrol brass paint has a somewhat coppery cast to it. I can live with it.
Being an old model sitting on an even older chassis, the loco runs a little high. Consequently, the more-to-scale and re-named Toad I have prepared for it [Old Oak Common] will need a barrier of low wagons between the engine and itself if it is to look convincing.
And as ever, digital photos take no prisoners ! I noticed too late that the route availability disks are set at slightly different heights on each side. I don't care ! You can't see both sides simultaneously in real life !
Coda.........
[those who understand musical theory will not appreciate that pun, but it's not entirely inappropriate]
Eventually 9701 will run with a more appropriate Toad. I'm trying to source a K's white metal16 ton van to run with it but, until that time, it will be followed by a slightly modified Mainline 20 ton Toad that I picked up the other day for £6. A 20 tonner is really a little too large for the requirements of its original duties and I did consider modifying a Hornby Dublo Superdetail 16 tonner. I think the K's offering would be a more complete partner however, so we'll have to be patient. When I find one, I'll update this article.
Modifying the Mainline model was a simple task and involved cutting one of the doors and placing it in an open position, painting the planking in the verandah area, re-lettering the upper panels of the van and renaming it from 'Shrewsbury' to 'Old Oak Common' [the shed for 9701], adding a guard, a running lamp and cosmetic couplings and repainting the roof [which has since been lightly weathered]. The buffers and running boards have been given a wash of black and metal wheels have been added. I usually place the Bachmann 'Old Oak Common' shunter's chariot between the two to compensate for the slight over height of the engine.
Update
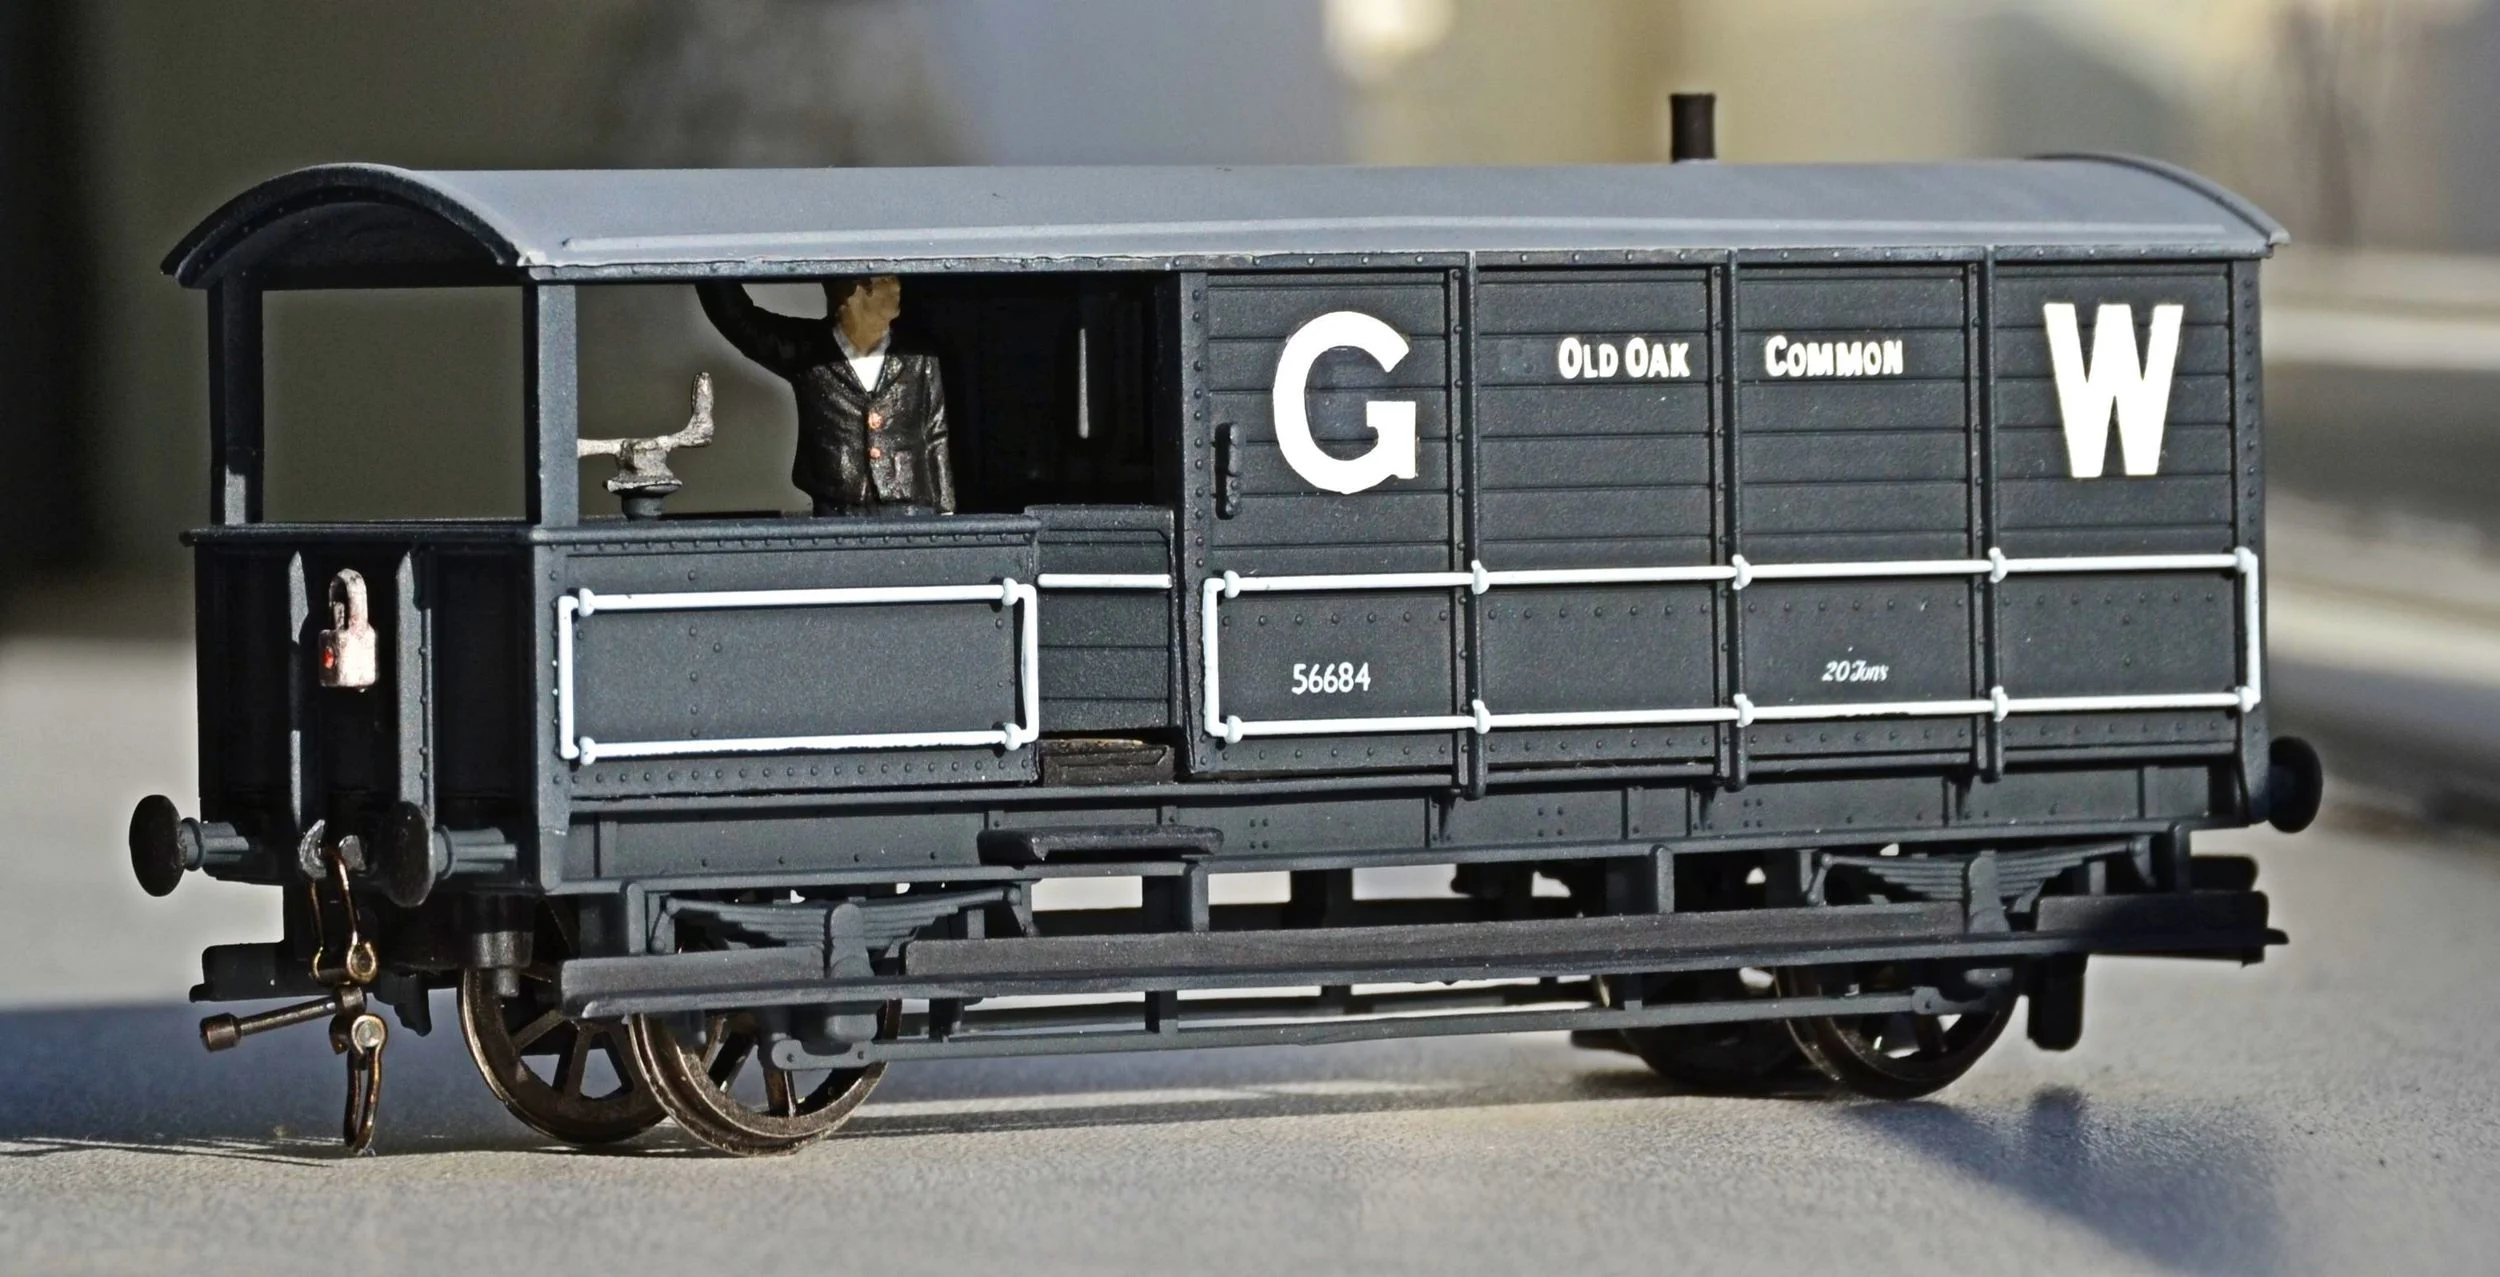
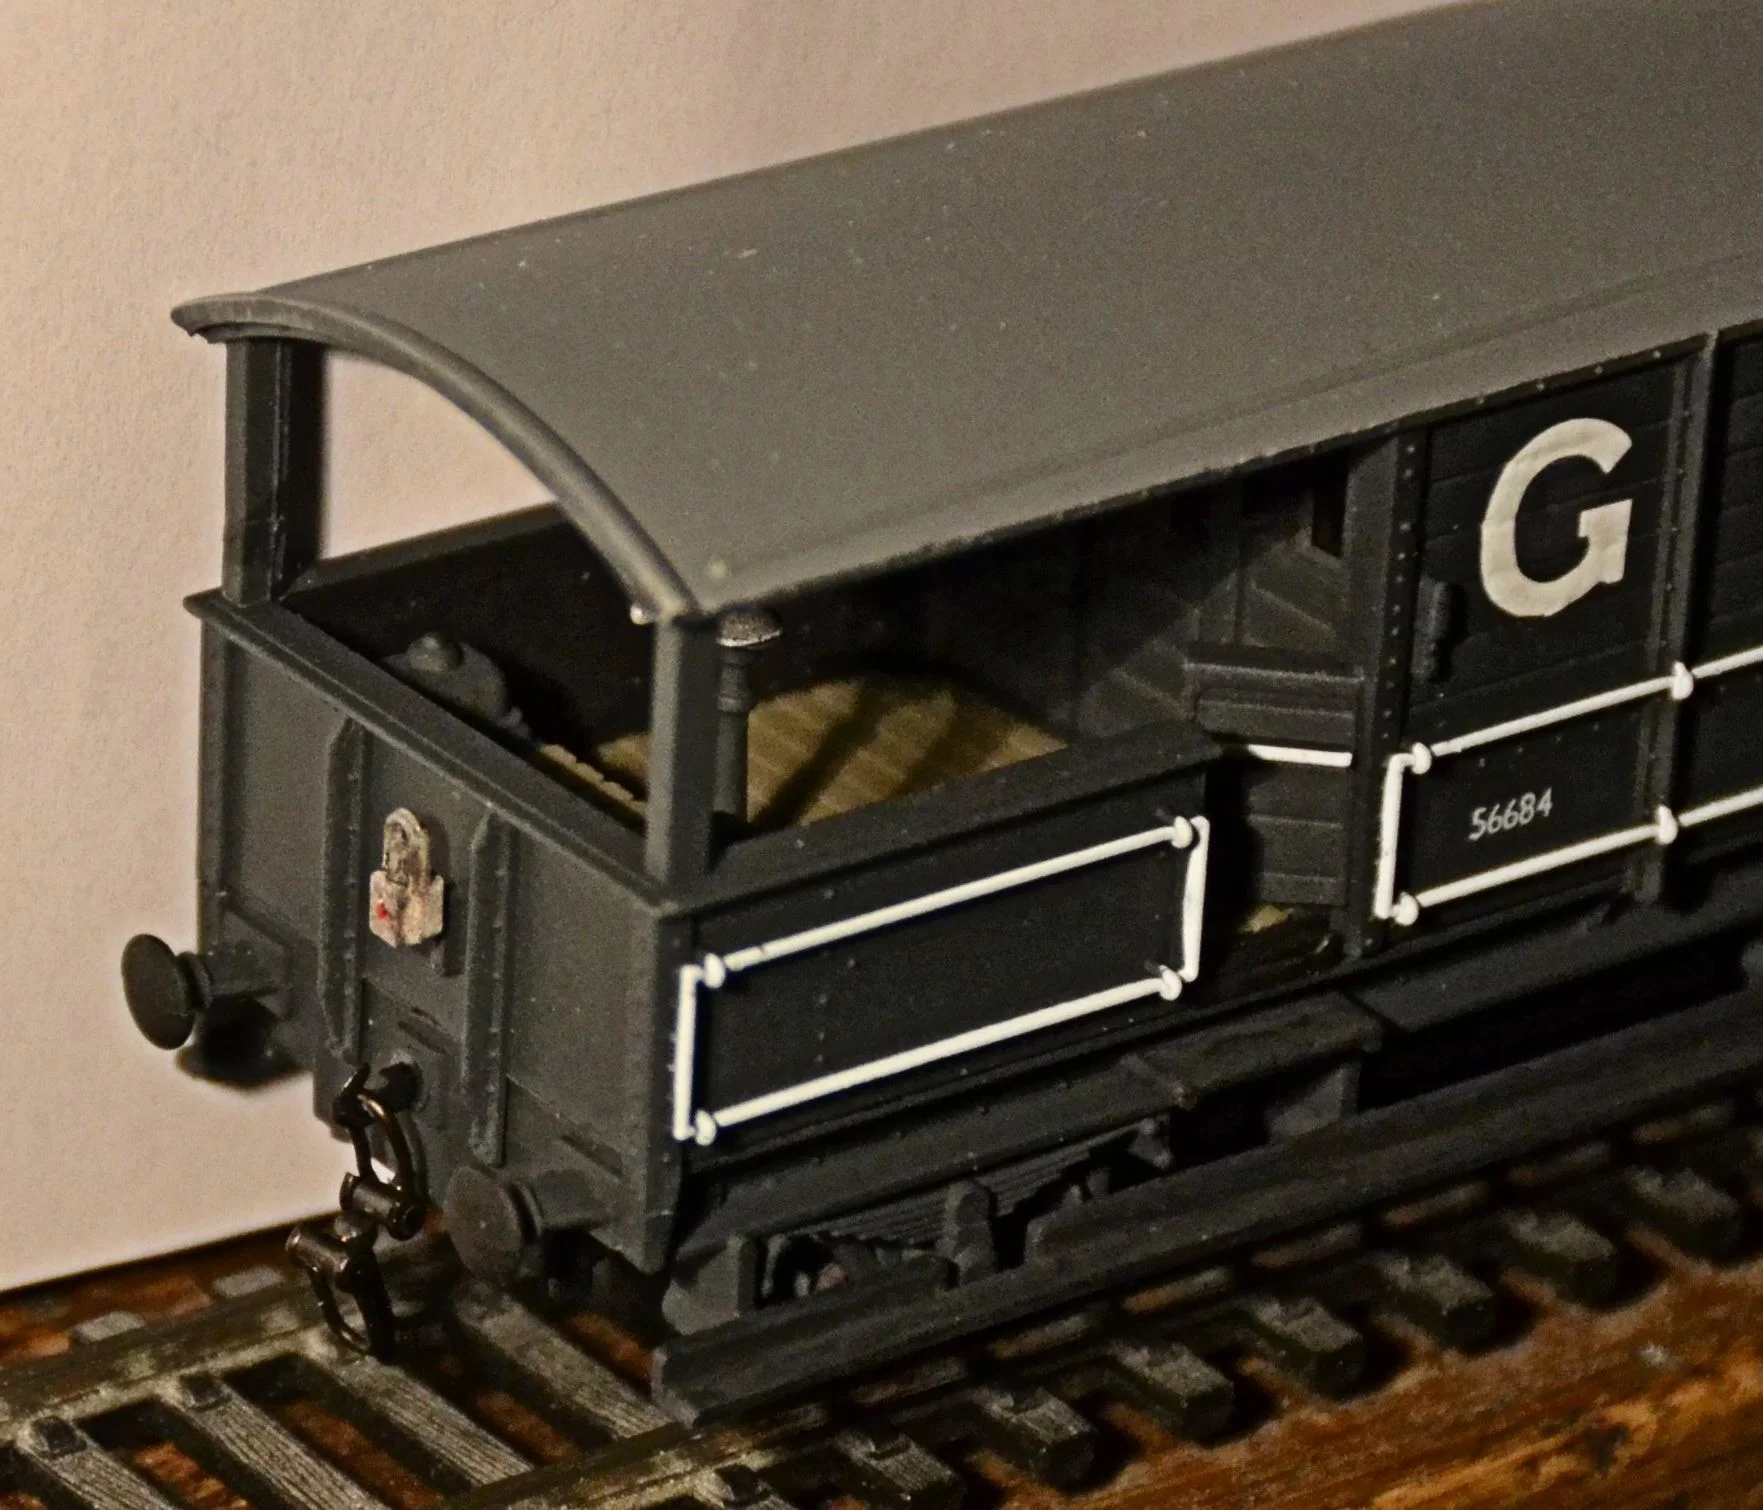
Several K's Toads have been and gone on eBay but all were either far too expensive [one a laughable £30 'buy it now'] or simply too far gone to bother with. I decided instead to kit-bash an unmade Ratio 20 ton Toad kit to provide an appropriate partner for the tank. A description of the build can be found elsewhere in the Members' Projects section of this site. A photograph of the completed model is shown below.
A 'give-or-take' AA7 Toad cut down from a Ratio 20 ton Toad kit
...........and the final completed project, with two restored and detailed Wrenn Mica B Meat Vans in tow:
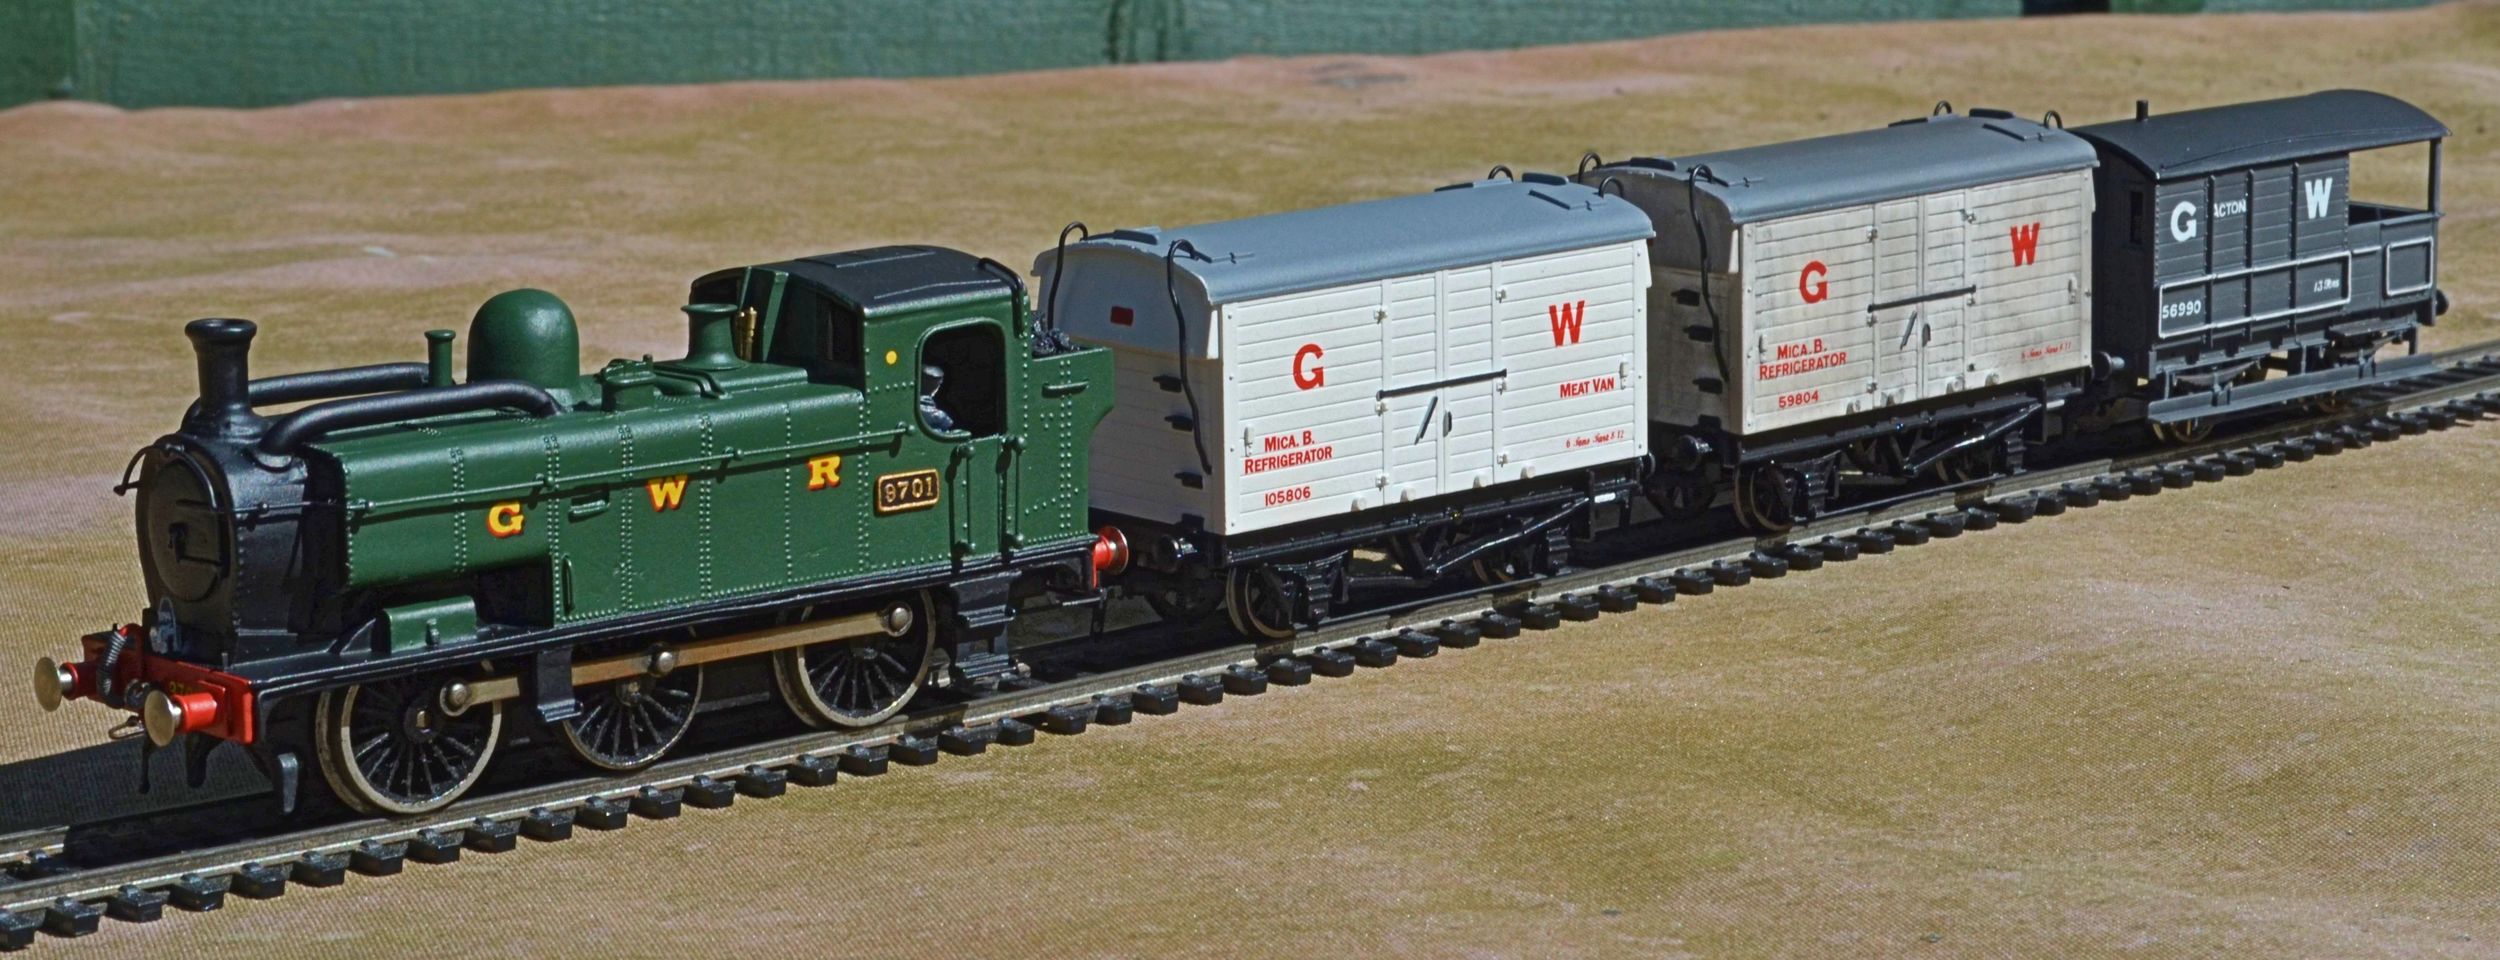
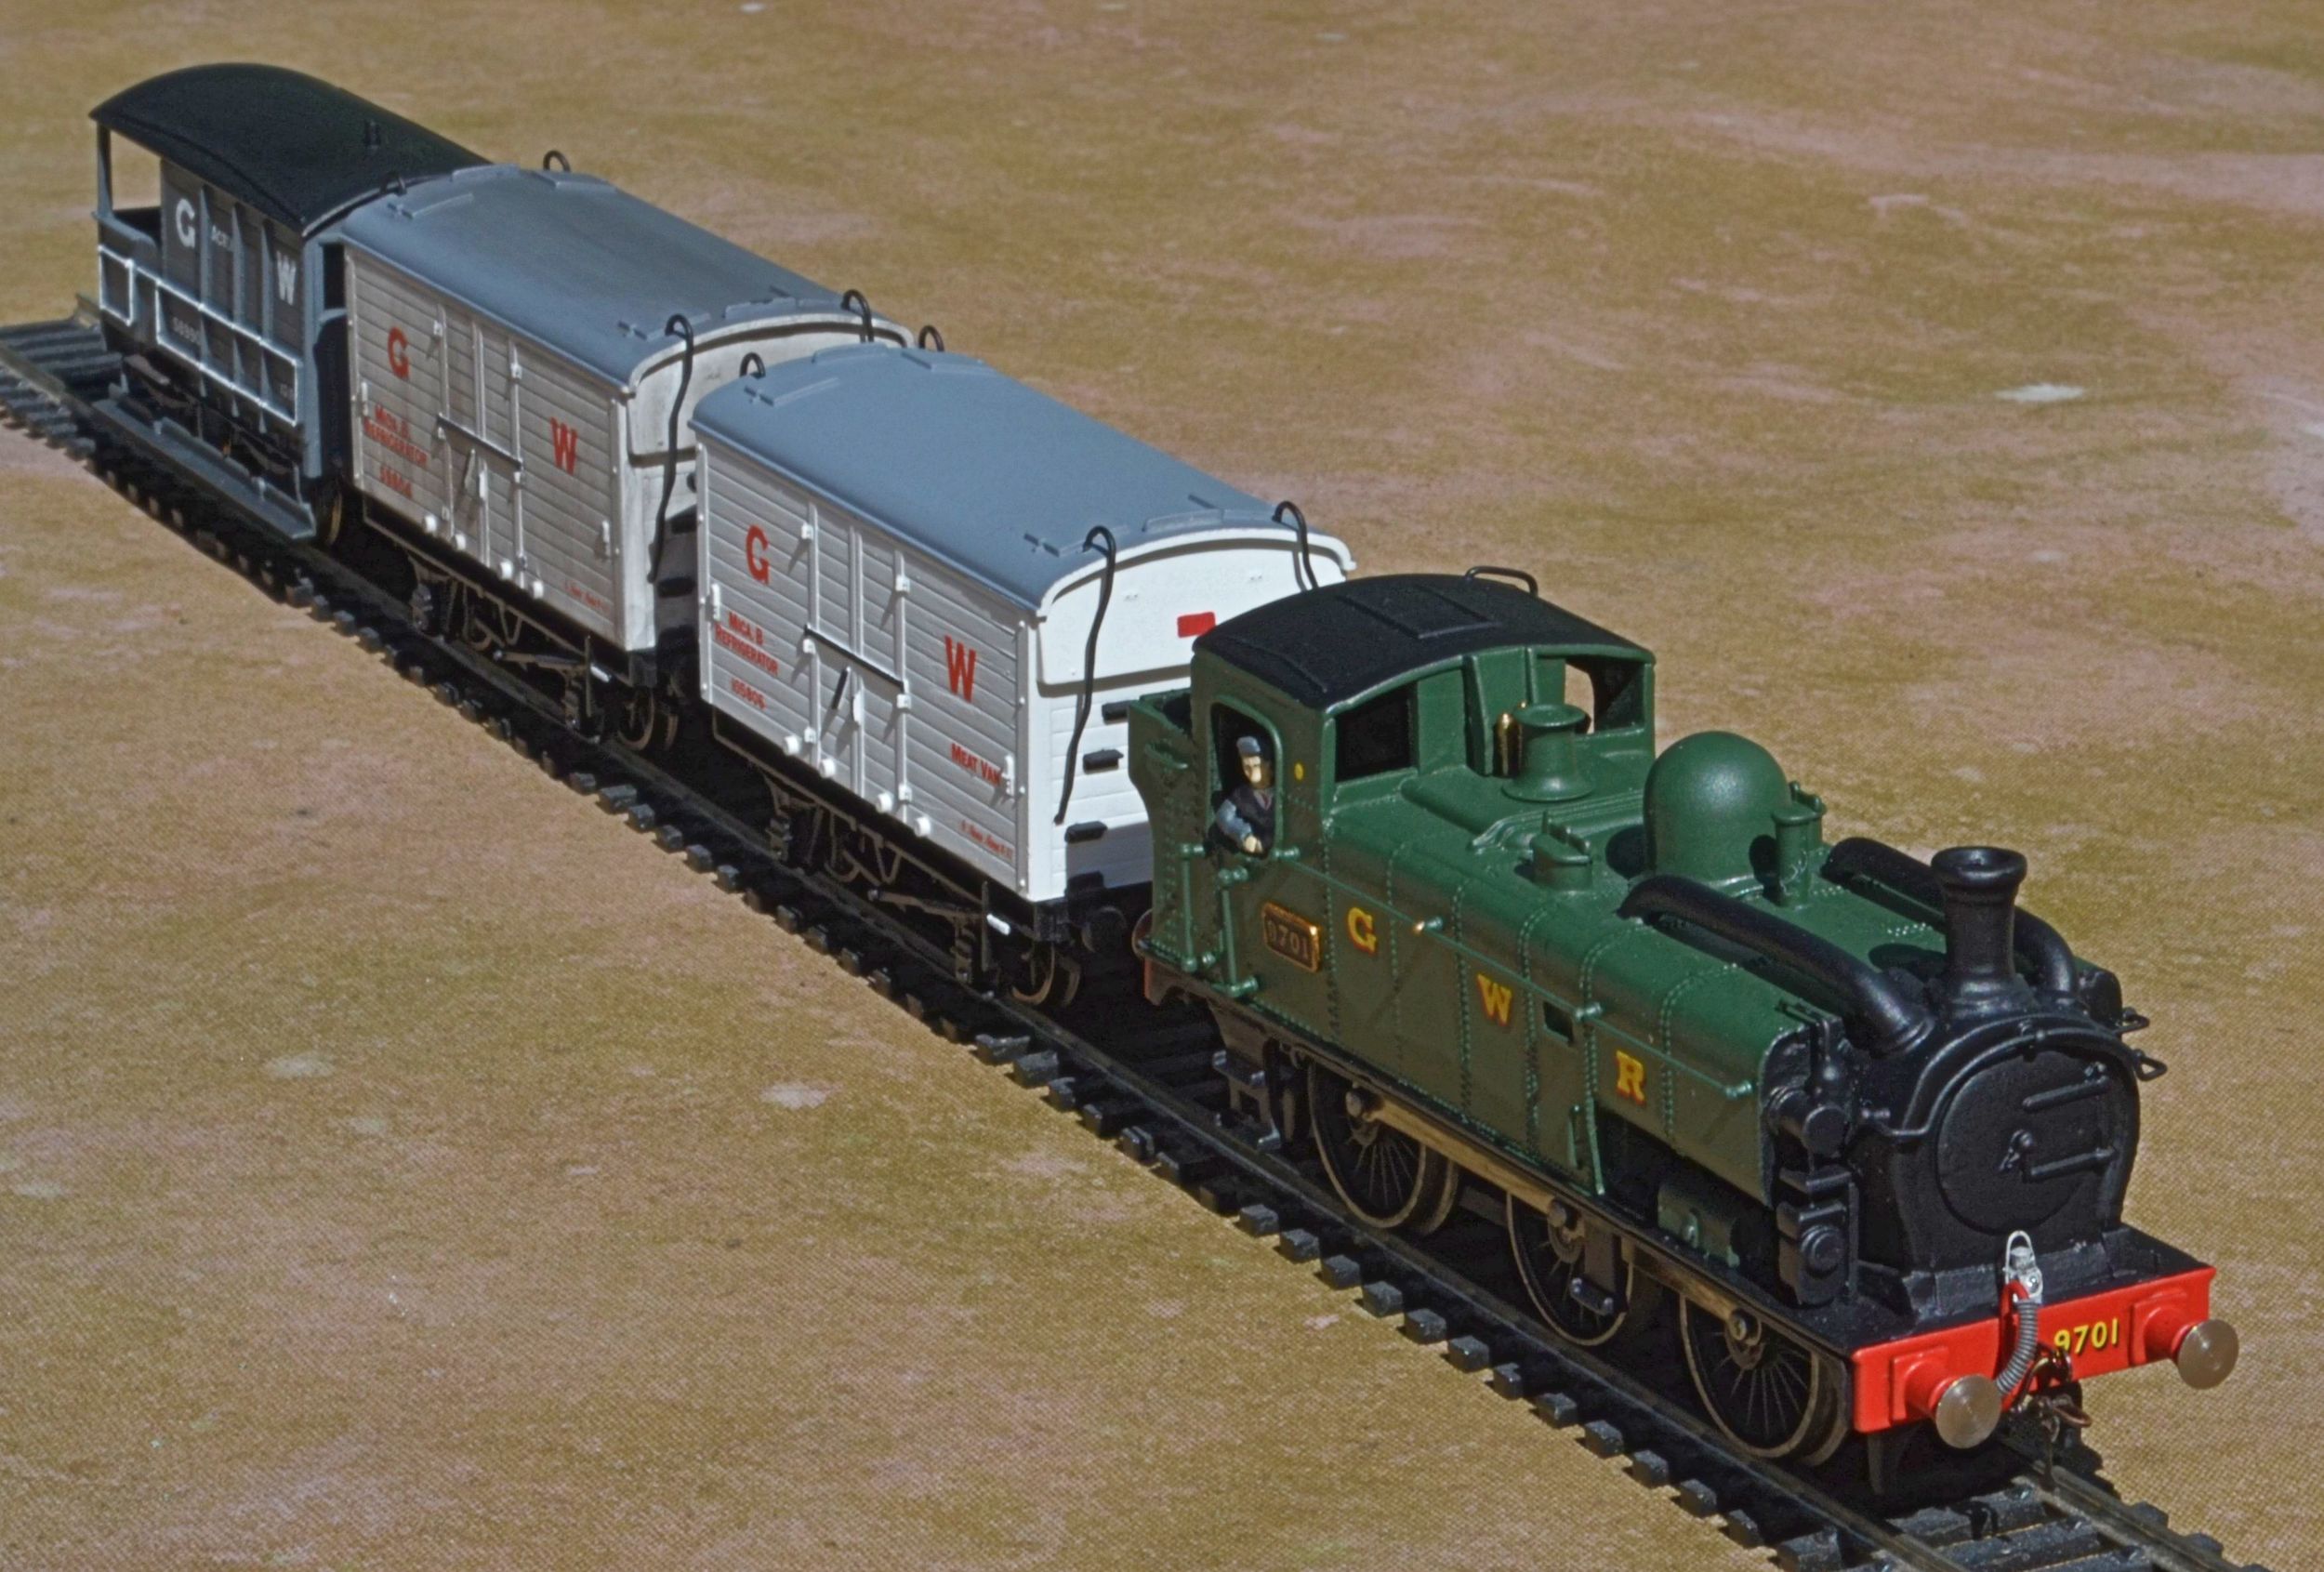

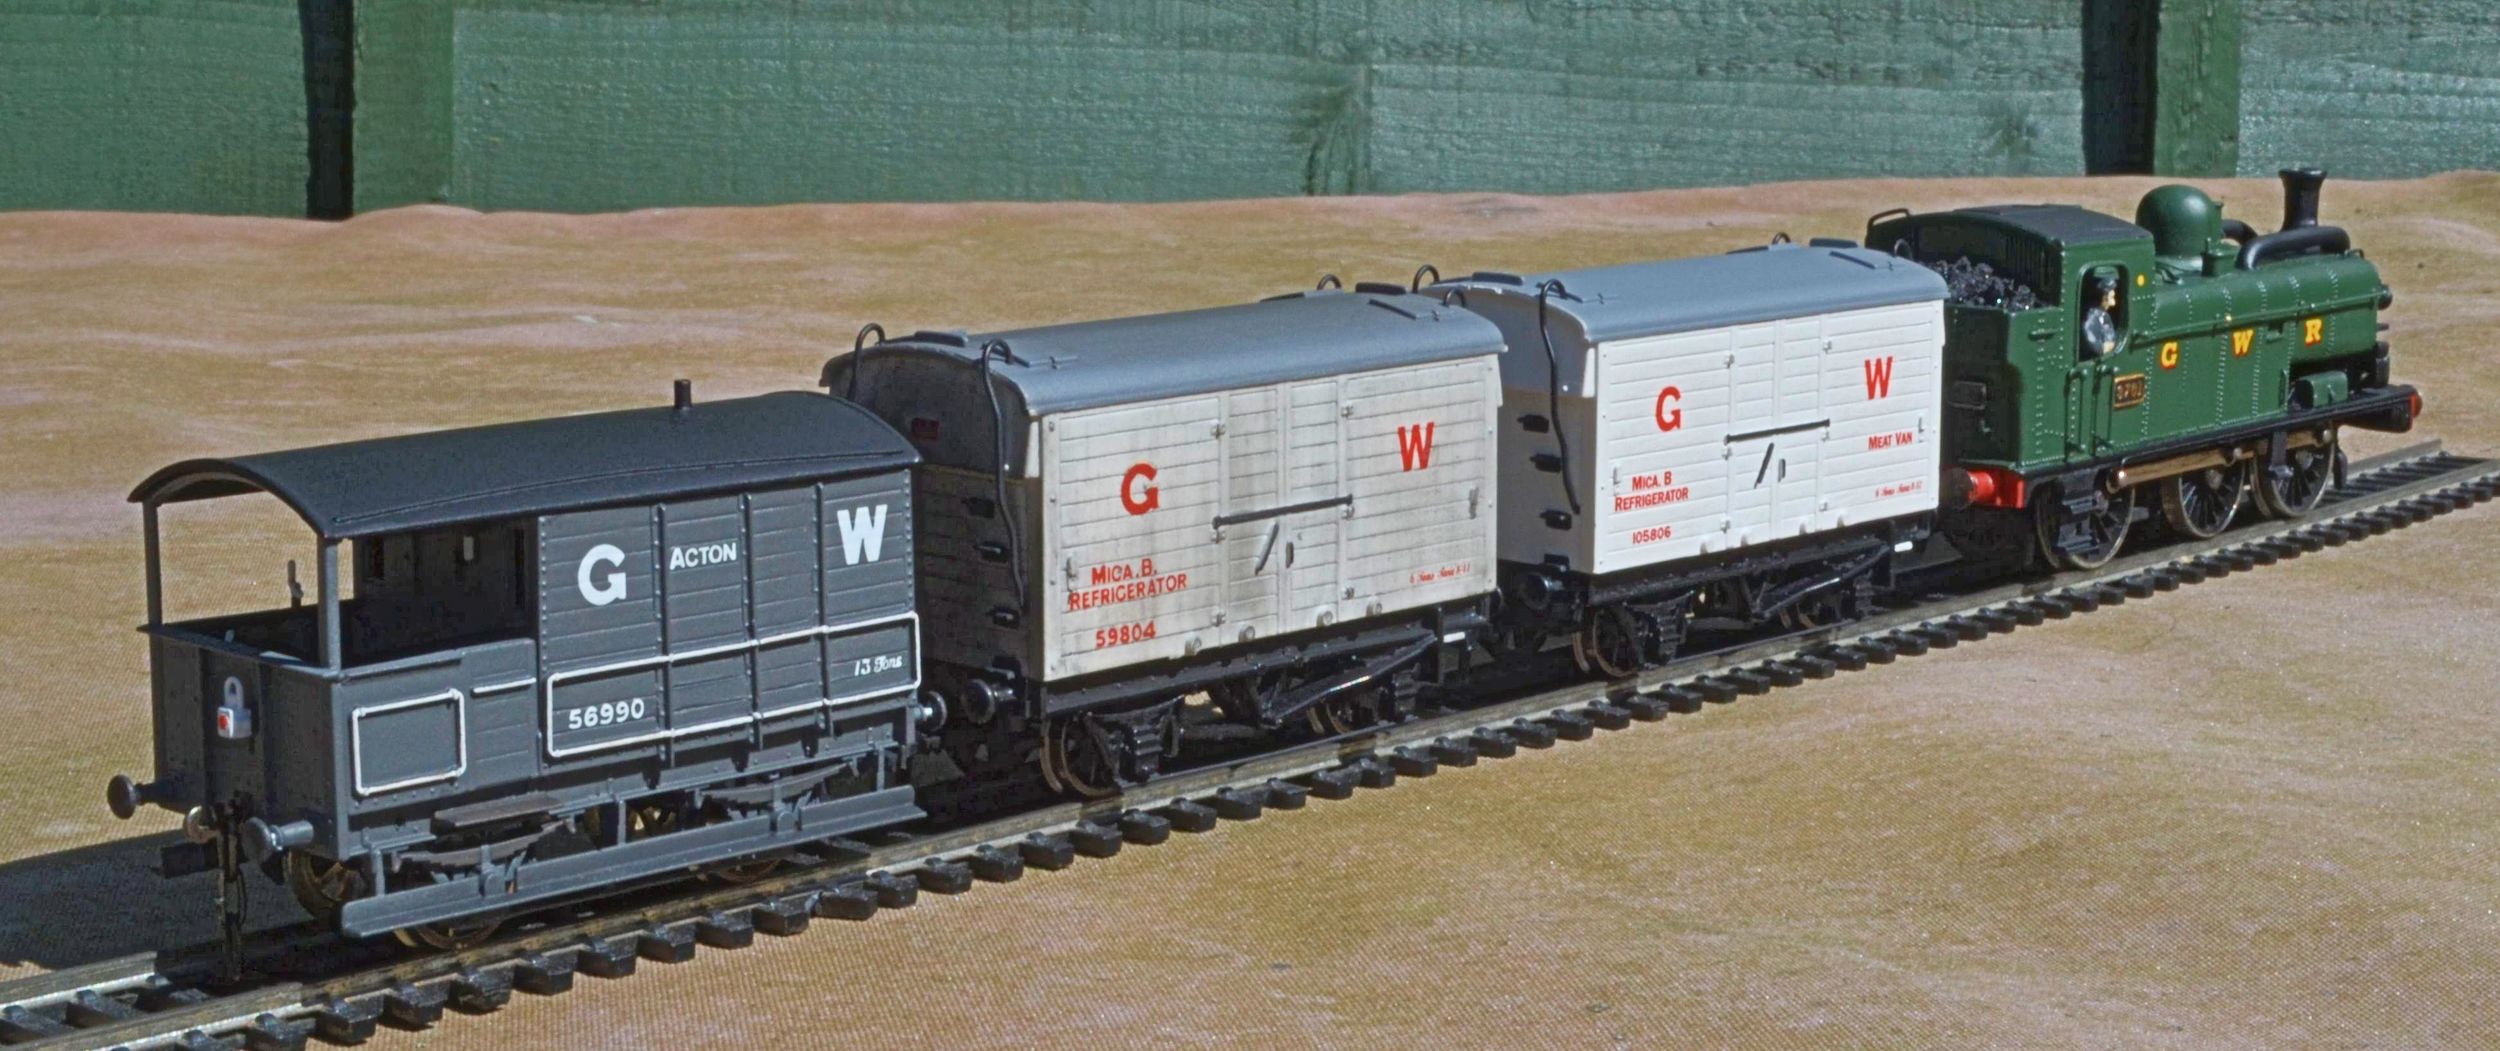
pip-pip......!