- Restoring a 40 year old Keyser Siphon F Kit -
by Tony Richards
No collection of GWR rolling stock would be complete without at least one example of that varied class of non-passenger express stock, the Siphons. These brown-painted vehicles existed in 4, 6 and bogie-wheeled variants and will forever be associated with express carriage of milk in churns.
The Siphon F was the first of the bogie-wheeled variants, dating back to 1906-07 and running in service until the mid-1950s. Only 6 were built and photographs of them in service are relatively scarce. As the progenitors of the bogie-wheeled Siphons they are historically important however and as examples rarely appear on model railways the historic Keyser kit is worth improving to represent one.
By today’s standards, the original kit is badly compromised. Designed to take an over-long roof from another Keyser kit, the model is actually longer than it should be, the centre section being stretched [see the photo above]. The underframe detail is very poor with the gas tanks being represented by their ends only and they are also underscale. Battery boxes are supplied for some unknown reason and the V-hanger detail is unrecognisable. The bogies [plastic in this case] are broadly correct in style [GWR American-pattern] but they are flimsy and two-dimensional, comprising sides and a single central stretcher. The wheels, of course, are plastic and the roof rarely fits correctly. The vacuum cylinder sits in splendid isolation. The photo below shows the model as bought, and apologies for the poor quality of the photo, too...
So, there’s a lot to do to bring this model even closely up to standard but as the only readily-available easy-build I consider it worth it. There will be other views of course…
I acquired the donor model quite cheaply via eBay. I wasn’t prepared to spend more than £15 for a complete one but bought three Siphons for £20. If you want one, wait until the price is right as they can be unrealistically expensive.
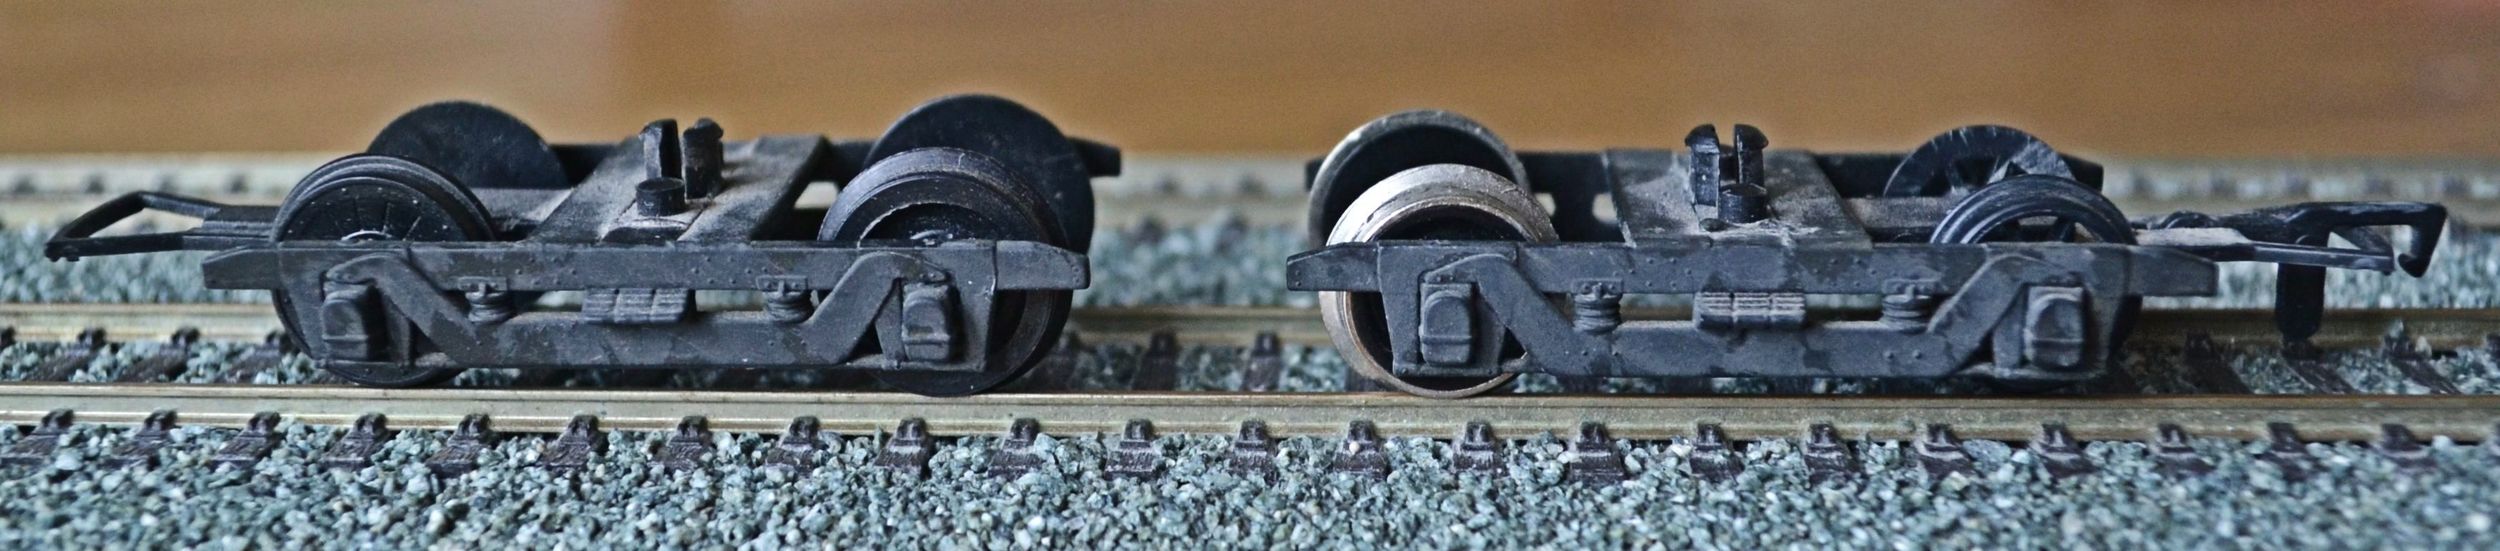
I decided to bin the plastic bogies immediately and substitute white-metal ones from an even earlier Keyser kit of the same model. This would add necessary weight to a very light model and also provide more robust running gear. Photos below show the restored replacement white-metal units [left] and the discarded plastic units [right]. After cleaning up, the white-metal bogies were fitted with brass top-hat bearings into which Bachmann coach disks were fitted. The bogies run very smoothly and have since had stretchers fitted to their ends

On examination, it was immediately clear that the entire kit would need dismantling and the mouldings cleaned up or repaired. I also decided to detail the underframe as far as possible, using parts from the bits box. The photo below shows the component parts [and particularly the original poorly-detailed underframe] from a similar kit used in a different project: if you exclude the buffers and bogies, etc., there are just six main parts.
Dismantling, cleaning up and reassembling the body parts was straightforward. Although the original polystyrene cement had been applied thickly, it came away easily enough and had not adhered at all in some places. The roof required trimming and sanding to achieve a good fit at the ends and glueing three reinforcing partitions inside the body braced it well, straightened the sides and assisted with the roof fit. None of this was difficult.
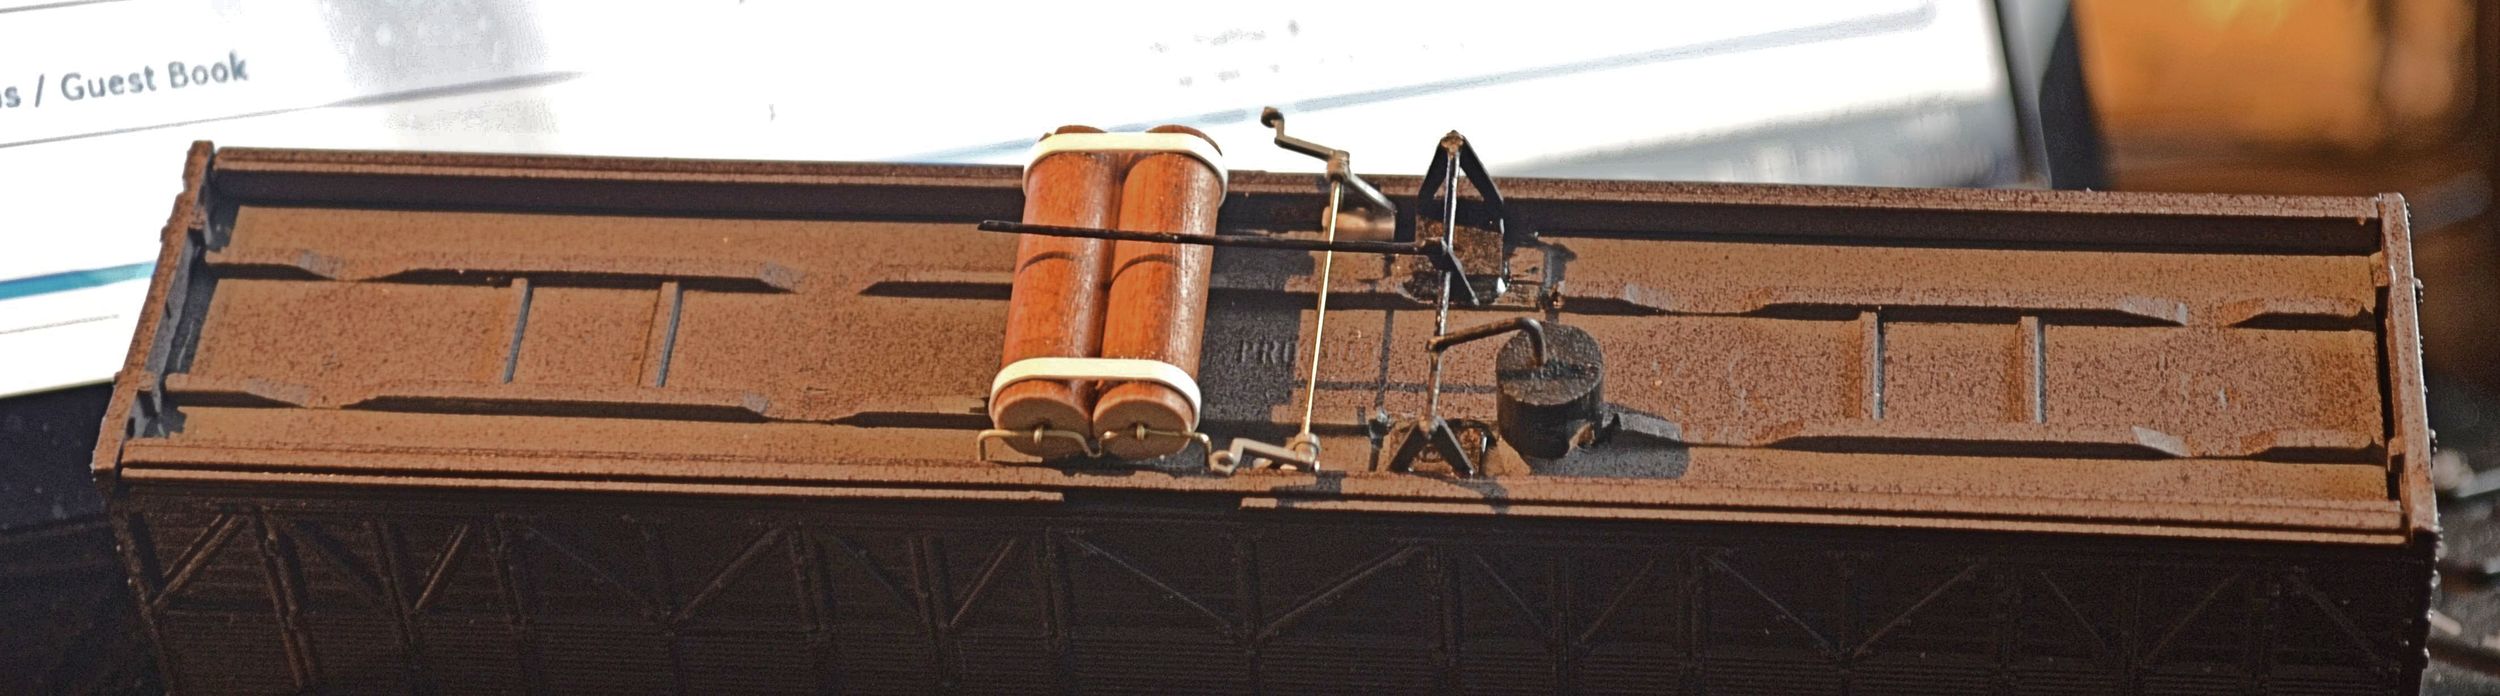
Detailing the underframe was a very different matter however because of a general lack of photographs showing clearly what went where. Whilst the floor of the model had not been designed to be detailed and, consequently, compromises were needed with regard to the spacing and positioning of parts, it was possible to provide representations of the major components and so achieve a more realistic finish. The gas tanks are made from wooden dowel with plastic strapping and thin brass wire piping. The hand brakes were scavenged from another GWR wagon kit and are joined with brass wire. The brake cylinder was fashioned from wooden dowel with the V-hangers and associated rodding made from brass strip and brass and steel wire. Everything was attached to the underframe with two-part epoxy glue. Photos below show the detail before and after priming. The stanchions for the white-metal bogies have been fitted in the right-hand photo. The body has also been given a first coat of brown.

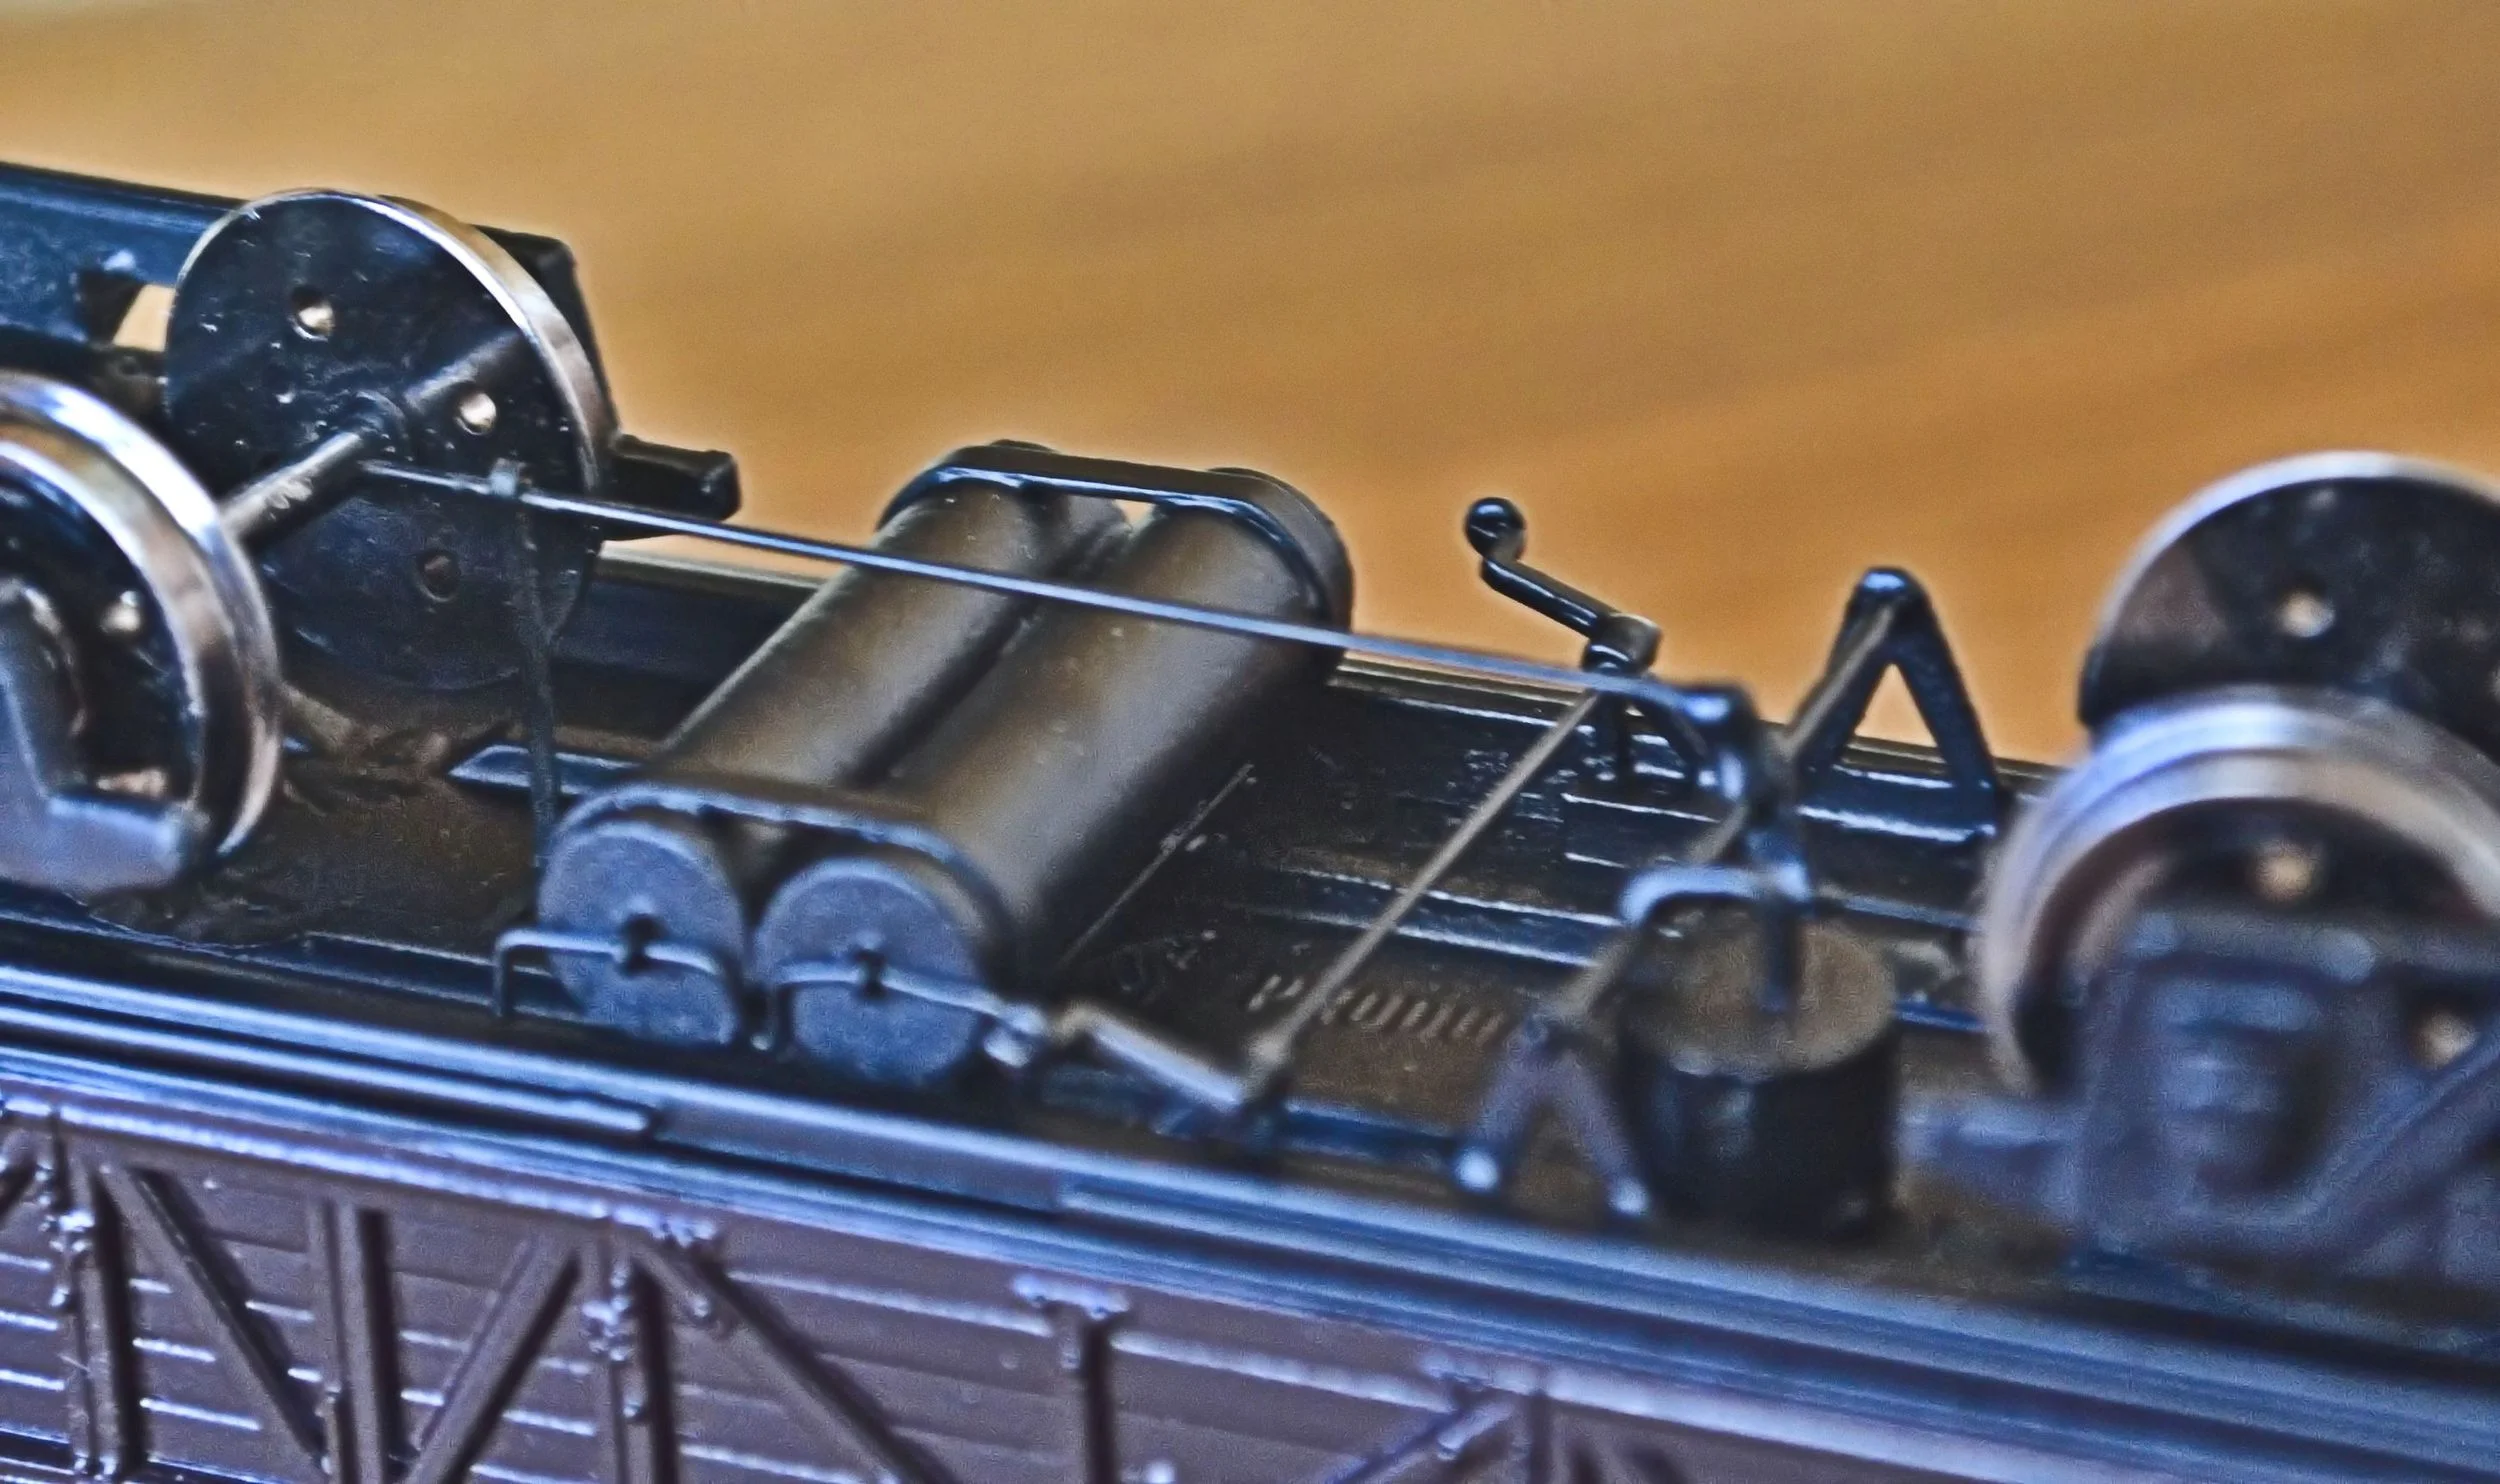
The body has now been given a further light coat of brown and the buffers fitted. After some further detail to the chassis [brake-pulls and hangers, etc], the body was masked up and the underframe sprayed matt black. This part of the kit is now more-or-less complete although some light weathering will follow and the brake levers will need to be repositioned and painted. The photos below show the underframe in greater detail and also the roof, a dry fit at this stage, partially painted.
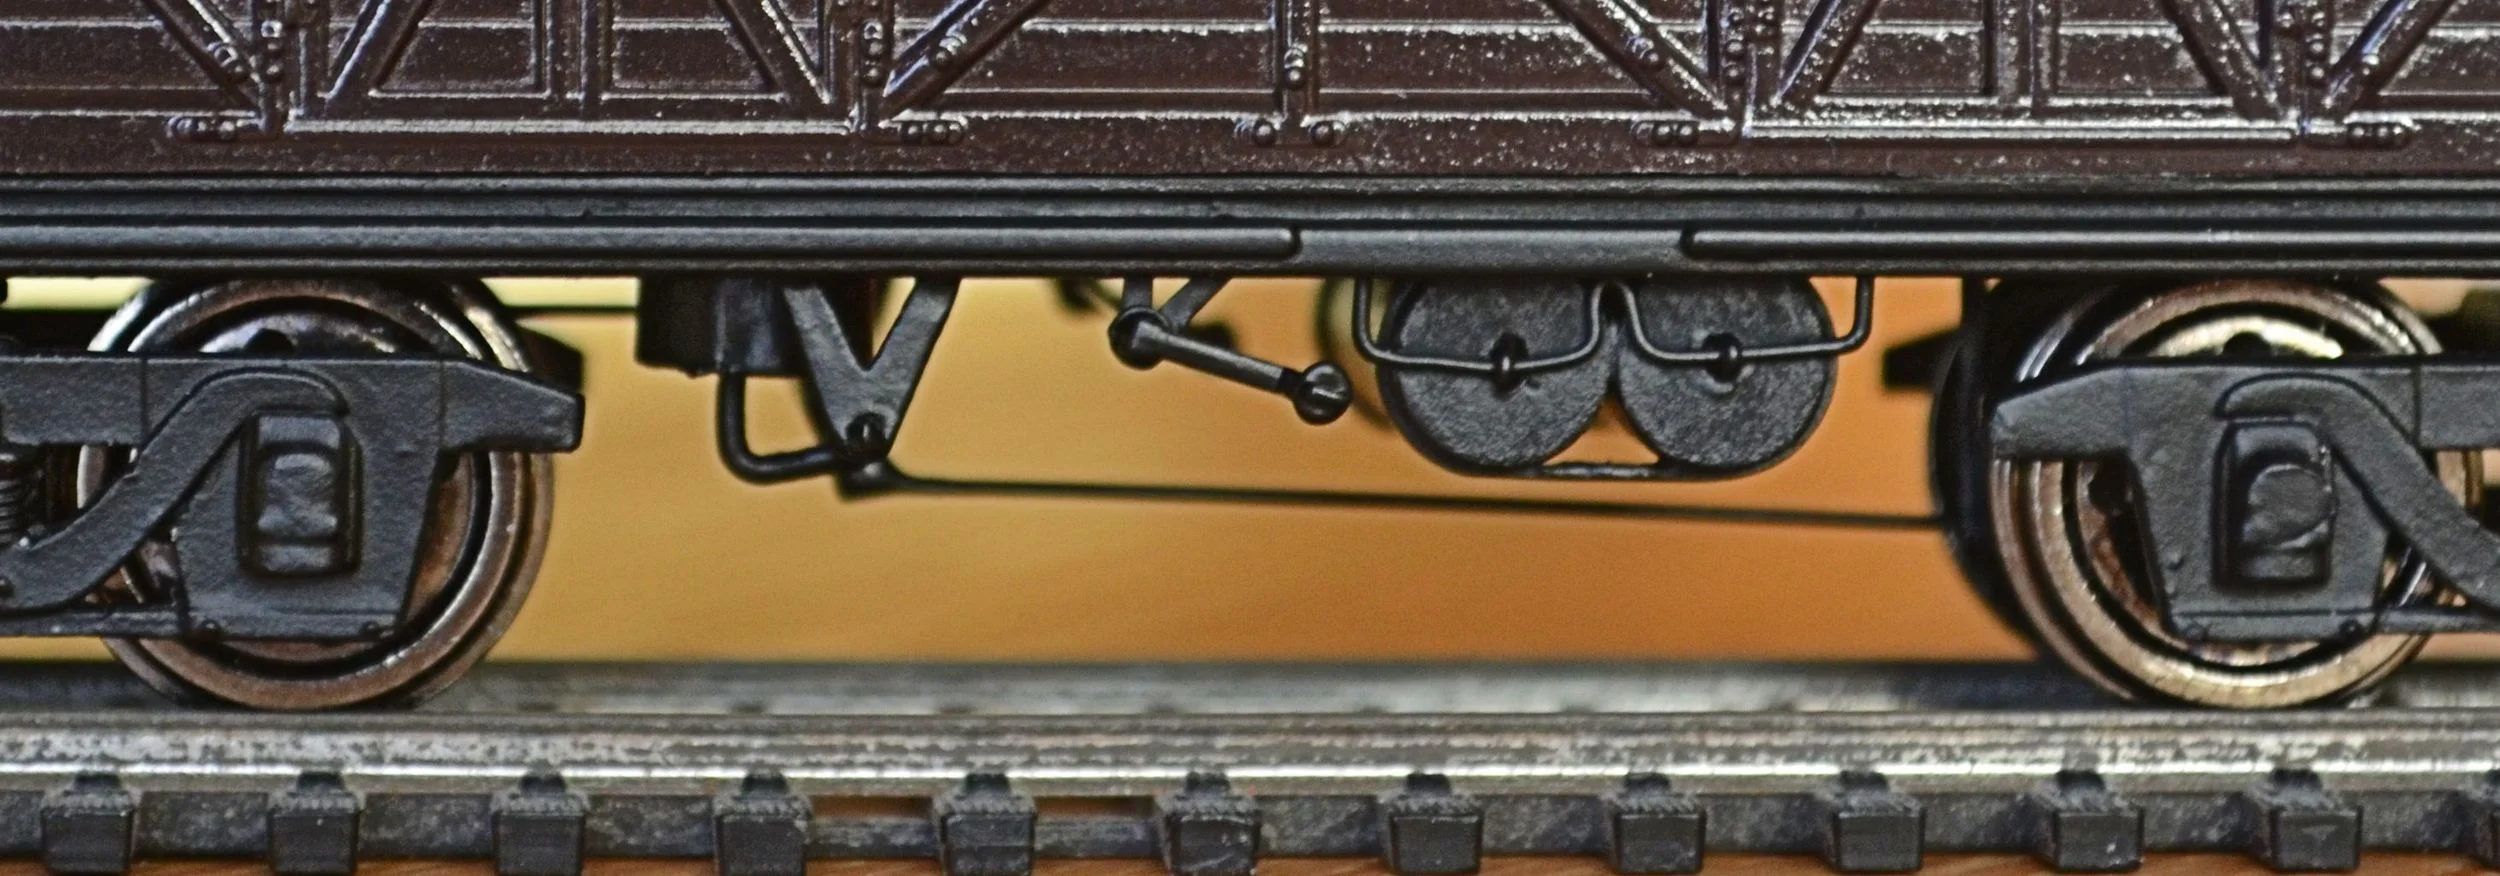
Whilst not 100% accurate, the improvement in underframe detail is substantial when compared with the photo of the original at the beginning of this article. A coat of satin varnish will be sprayed on once the body has been lettered: that will reduce the high gloss finish that it currently wears.
Fitting the bogies so that the body did not rock or appear lop-sided was difficult. Thin brass and plastic-card shims glued between the bogie tops and the fixing points eliminated wobble however and the whole now runs quite satisfactorily. The body was sprayed again with Halfords’ Vauxhall Brazil Brown and the bogies and underframe re-sprayed matt black. The roof was painted grey and now awaits weathering. Lettering is from Pressfix and Modelmaster transfers [difficult because they were to scale and so did not fit easily] and the body was finally sprayed with satin varnish to seal it.
The photos below show the finished model although the roof has yet to be lightly weathered.


And a final shot of the van after general weathering...
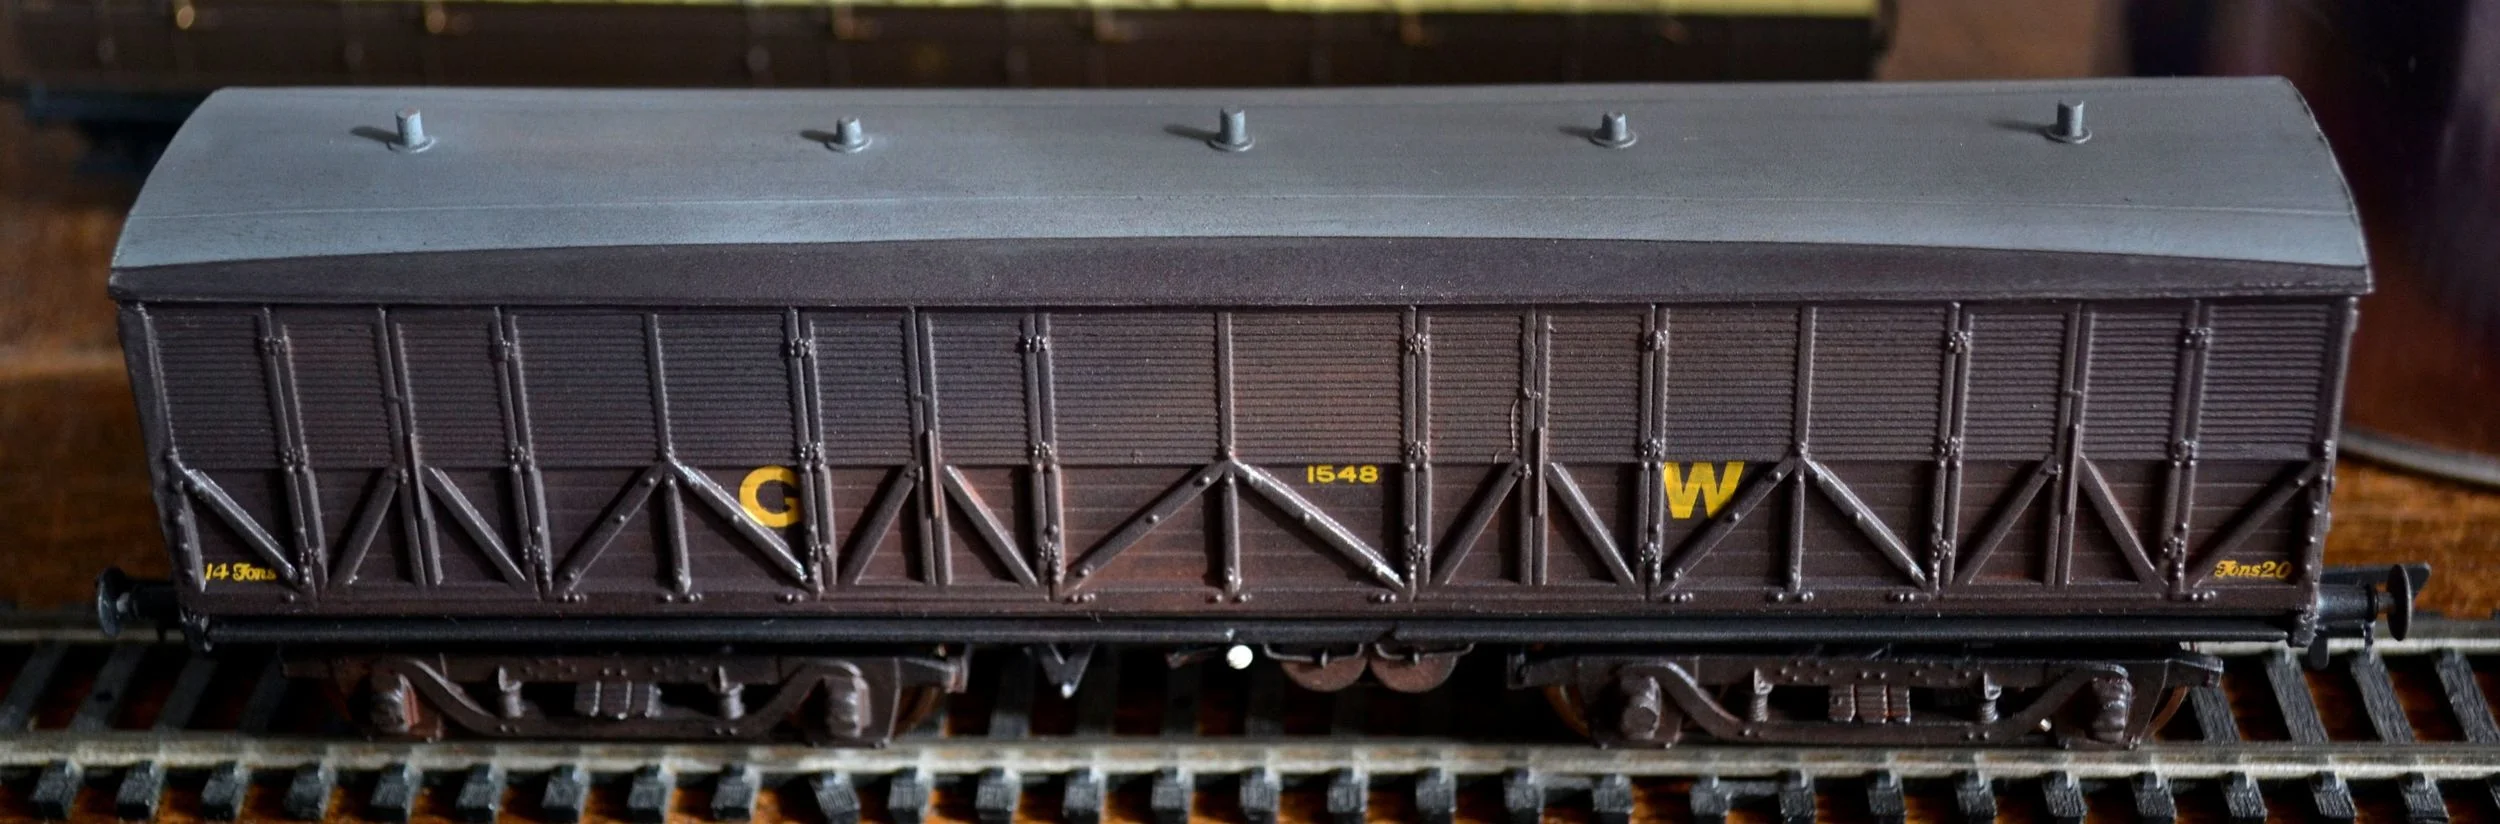
Job more or less done ! Any critique of the finished product needs to take into account the fact that its genesis lies in a primitive kit that is now 40+ years old. The gas cylinders and v-hanger / brake cylinder assembly should each be closer to their respective ends and the body should sit about 2mm lower on its bogies also. The limitations imposed by bogie swing and bogie height force these compromises however, and only a complete scratchbuild of the chassis would avoid this. A bridge too far right now…