- Simple improvements for the Infamous Mk1 "Magazine Coach" -
by Gwion Rhys Davies
Ah the infamous Mk1 "magazine coach" by Hatchette Artworks Ltd. These coaches caused quite the stir back in 2013 when the first of "Your Model Railway Village" issues was brought to the shelves of everyone's local news agents. For £3.99 you received a Mk1 coach in 'maroon', a straight piece of fixed track and the magazine itself. Now, the track was steel and of an odd length so it wasn't going to be used in any layout anytime soon, but the coach itself was quite the head turner.
The coach features metal wheels, NEM sockets with tension lock couplings and extending coupling mounts for the corners: brilliant features for such a low price, but how was it so cheap? Well, a simple answer, it's the plastic it's made from. The plastic is so cheep and nasty it makes the coaches look hideous, and they completely lack any decals other than the yellow srtipe along each side. Something had to be done !


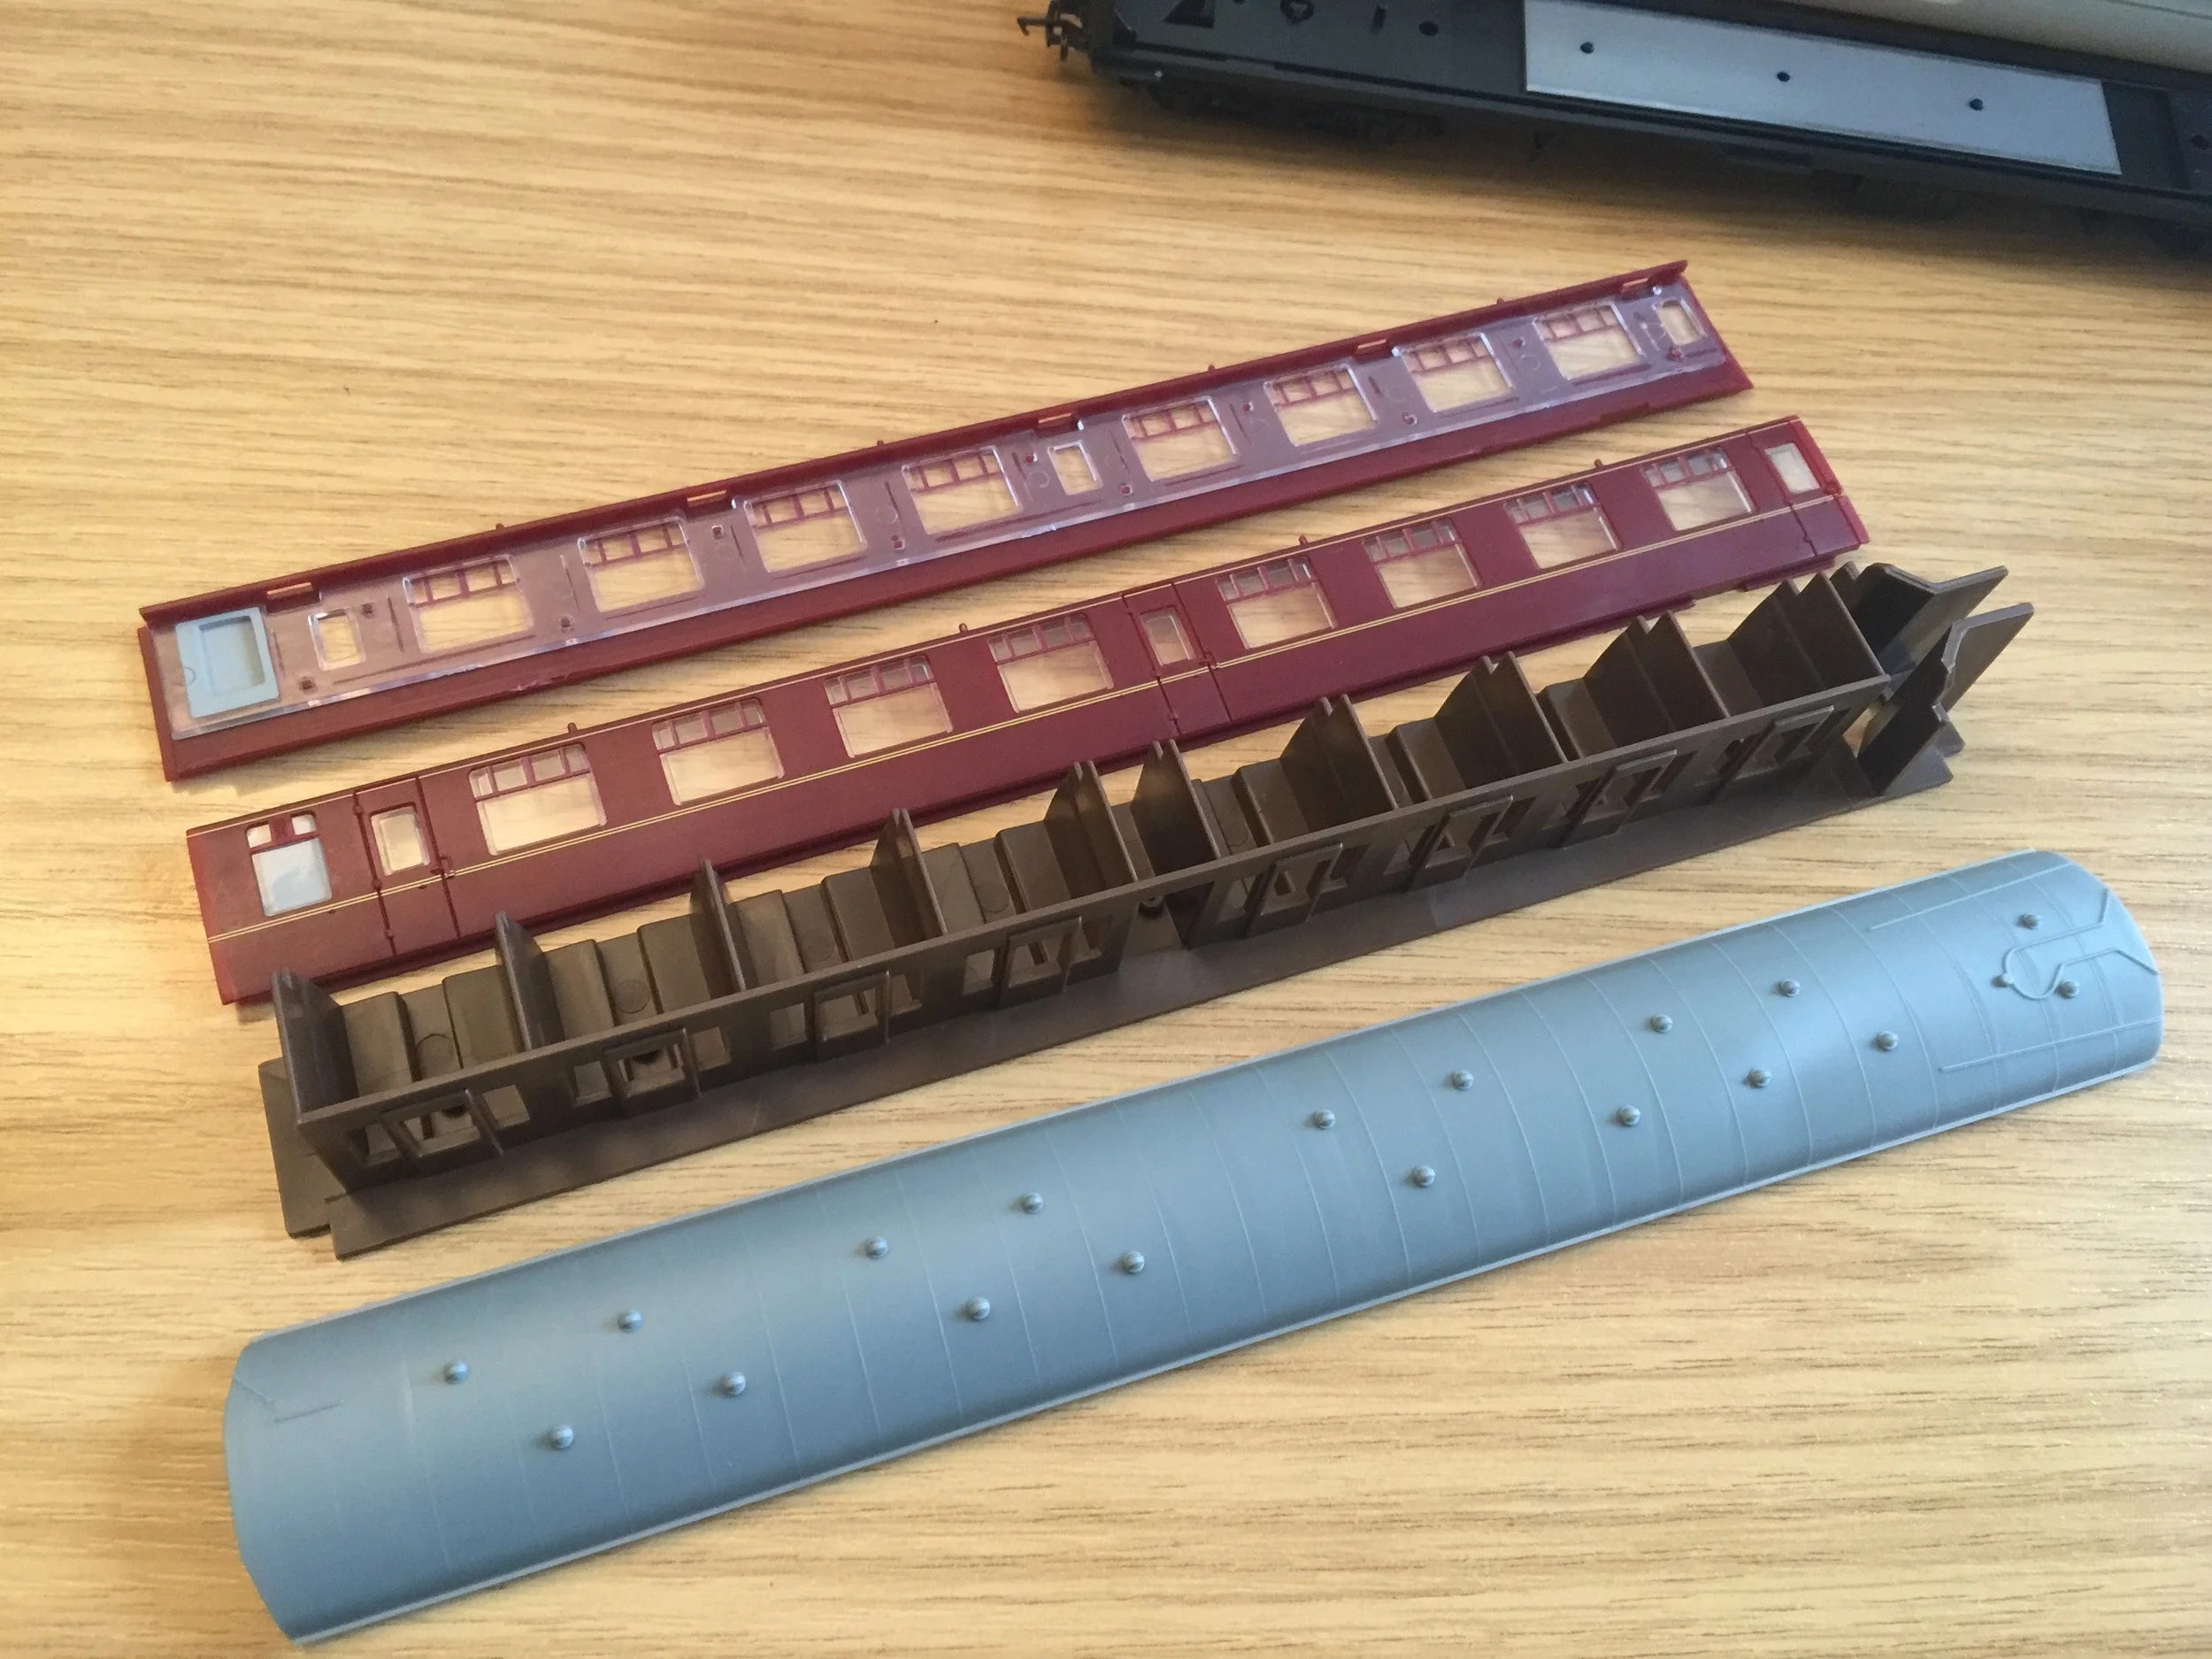
As seen in the photos above, you start by removing 3 screws from the base of the model, 2 of which are found under the coupling arms under the bogie [which simply pops off with little force]. You can then remove the coach body from the base. Next you will need to slide the brown seating out from between the coach body sides and finally separate the sides from the roof.
With the roof now separated from the body, you can apply a coat of grey car primer to it. This covers the cheap plastic feel while also giving it a matt textured finish that will help with weathering it with powders in future. We can now reassemble the coach by reversing the earlier instructions. (Below: original coach left, improved coach right).


This simple modification alone has already improved the coach's appearance. Next I will look into placing decals on the sides and toning down the cheap glossiness of the coach body and bogies.
Before doing anything else however, the flush glazed windows need to be removed from the side panels. I found a guitar plectrum to be quite useful for prying the windows away from the body but they are glued in so this can be quite tricky and it is best to avoid bending the windows too much as they are prone to cracking.

Now the windows have been removed I can proceed to add decals and respray the side panels in a matt varnish. I purchased water based transfers of the BR Coach Roundels from Replica Railways, one sheet will suffice for the 8+ coaches I've acquired over the years with plenty left spare for future projects. Note, I bought these at a £1 compared to the usual £3 as they were slightly defective. Applying transfers is quite trivial, cut them into individual pieces and soak them in water for a couple of minuets, thens offer the soaked transfer still on its paper to the model and slide it over to the model. You can add water to the applied decal before it sets if you need to adjust it.

With the parts separated, I hit each one with a coat of Humbrol Matt Varnish. The intention is to hide some of the reflective impurities of the plastic while also giving a good base for applying weathering powders to further cover any imperfections. I tend to apply the varnish in a sweeping motion across the part from about 30cm away. This gives a very clean even coating, any closer and you will find it botches where small droplets have fallen.

Now resembled, the difference is night and day. Further improvements could be made by lightly weathering the model just to hide any imperfections.